

Why I Shoot Film in 2018
An explanation for why I continue to shoot film in 2018
When I started this blog back in 2015 I published several articles to explain why I recommend photographers to…
An explanation for why I continue to shoot film in 2018
When I started this blog back in 2015 I published several articles to explain why I recommend photographers to continue shooting film.
Film photography is making a great comeback, with increasing numbers of photographers going back or starting with film and new and existing film manufacturers producing new types or restarting the production of a previously discontinued film. The latest example being Kodak, who announced to bring back T-Max P3200.
While I have several 35mm and medium format film cameras, I still am using my X-Pro1 more than my film cameras and I love the versatility of digital. For me, these are two different worlds, and I am lucky I can live in and with both
So what are my reasons to continue shooting film?

You need to be disciplined and follow a set process
Most of the older film cameras do not have any auto mode settings. You all have to do it yourself: transporting the film to the next frame and cocking the shutter, setting the shutter time, choosing the aperture, focusing, and of course taking the picture. In some cases you even have to do all these in a specific order to prevent damage to the camera. As a consequence, shooting film will slow you down quite a bit, helping you to really think through why you are making specific adjustments to your settings.
Furthermore, you only will see the results of your actions hours, days, or even weeks after taking the pictures. No chimping... You better spend some time on making sure that the composition is right, that your lens is clean, and that you exactly have in your frame what you want to be in it.
You need to know your photography theory
As I mentioned in the first post on this topic, most of the older film cameras do not have any auto mode settings. You all have to do it yourself: transporting the film to the next frame and cocking the shutter, setting the shutter time, choosing the aperture, focusing, and of course taking the picture.
Since you have to change settings manually, you really need to know what you are doing: why for example are you choosing a specific aperture, or specific shutter time. You also can not switch film sensitivity between shots (some medium format cameras, however, have changeable film backs, which do allow you to actually use films with different ISO values). Yes, even before you go out to take pictures you need to think about what kind of images you want to capture. Is it very light outside, or dark? Do you need to freeze motion, or do you want to blur motion? To answer these questions and make the right decisions for the pictures you want to achieve, you need to know a bit more about photography and light theory than when working with a full automatic digital camera that can adjust ISO settings 'on the go'.
For some shots, film is just better
In my opinion film still has more detail retention in highlights and shadows than electronic sensors can capture. There is no need for HDR photography, because film is HDR. Film has a huge dynamic range, with even gradation from dark to light tones.
Of course, it is up to you to choose the right shutter speed and aperture to achieve this. Keep in mind, however, that there is no such thing as the 'right exposure': you decide what feeling, mood, and effect you want to create with your shutter speed and aperture selection.
And then there is that specific film look: blogs are filled with discussion about whether film images actually look different from digital images. And what to think about the numerous "film" presets available for digital post-processing software. Probably a lot of personal taste is involved, but to me for some pictures film just works better.

You spend less time in post processing
First of all, since you only have a limited number of exposures per roll you probably will be more selective about taking a picture. As a result you will have less pictures to go through per session, which of course will save time when reviewing and selecting your best images.
But even more important, it is my personal experience that a well taken picture (i.e. correct shutter time, aperture and sharpness for the result you want to achieve) on film needs less post processing than a well taken digital picture.
Here I have to admit that at this moment I am only shooting film, not developing. I send my rolls to a professional lab for developing, scanning and printing. I upload the scans into Lightroom for minimal post processing and publishing on my portfolio pages.
You actually will have pictures in your hand
Although I love to share my pictures via Zenfolio, I sometimes also want to have the tangible product. When shooting film it is just easier for me to get actual prints: I usually order them when I have the film developed and scanned. No need to go through the process of preparing the image in Lightroom for printing and taking or sending the digital file to a lab or printer, or printing it at home. And to be honest: as a result of these additional steps needed, most of my digital pictures only live in the digital world.
This was the last post in this series about five great reasons for shooting film. There is actually one bonus reason: it is just fun to fiddle with the mechanics of a film camera, going through all the actions to make sure all settings are correct. It is just more fun than working with the digital stuff, even if you are shooting your dSLR or mirror-less camera in 'full manual' mode.
So do I like to shoot digital? Yes! Do I like to shoot film? Yes! Depending on the situation I choose for a specific medium and way of creating images. I strongly believe both digital and film have their merits, and I will continue to use film as long as there are film cameras and as long as there is film.
-------
I hope you enjoyed this background story about my reasons to continue to shoot film. Don't forget to subscribe, to ensure you will receive new information like this delivered to your email inbox the moment they are published.

Image of the Month: St Michael's Mount
St Michael's Mount: Island of Monks, Barons, and Fairy Tales
When we lived in the Netherlands, my wife and I developed a special fondness for the landscapes and history of…
St Michael's Mount: Island of Monks, Barons, and Fairy Tales
When we lived in the Netherlands, my wife and I developed a special fondness for the landscapes and history of Great Britain and we regularly - that is, basically every year - spend our summer holidays there. First only the two of us, and later with our daughters. We have some great memories from these trips, although most of these memories involve rain; summer in England can be challenging for campers.
One of the parts of Great Britain we kept going back to is Cornwall: for a long time one of the areas where the Celtic culture and language have been kept alive. Unlike Wales and Scotland, Cornwall is now a part of England, but it still has preserved that magical feeling of Arthurian legends and fairy tales.

St Michael's Mount is an island off the Cornish south coast, and it shares a name, history, and a unique feature with its sister island Mont Saint-Michel off the coast of Normandy, France. This unique feature both islands share is related to their accessibility: at low tide, you can walk over a causeway to the island. At high tide, however, this pathway is covered by the sea.
St Michael's Mount has a long history, going back to prehistoric times. The first recorded inhabitants were monks; the same that owned and built up Mont Saint-Michel. From the later Middle Ages into the 17th century, the island and its castle have been the site of numerous fights between warring parties. It eventually became the property of the St Aubyn family, who still own it today.
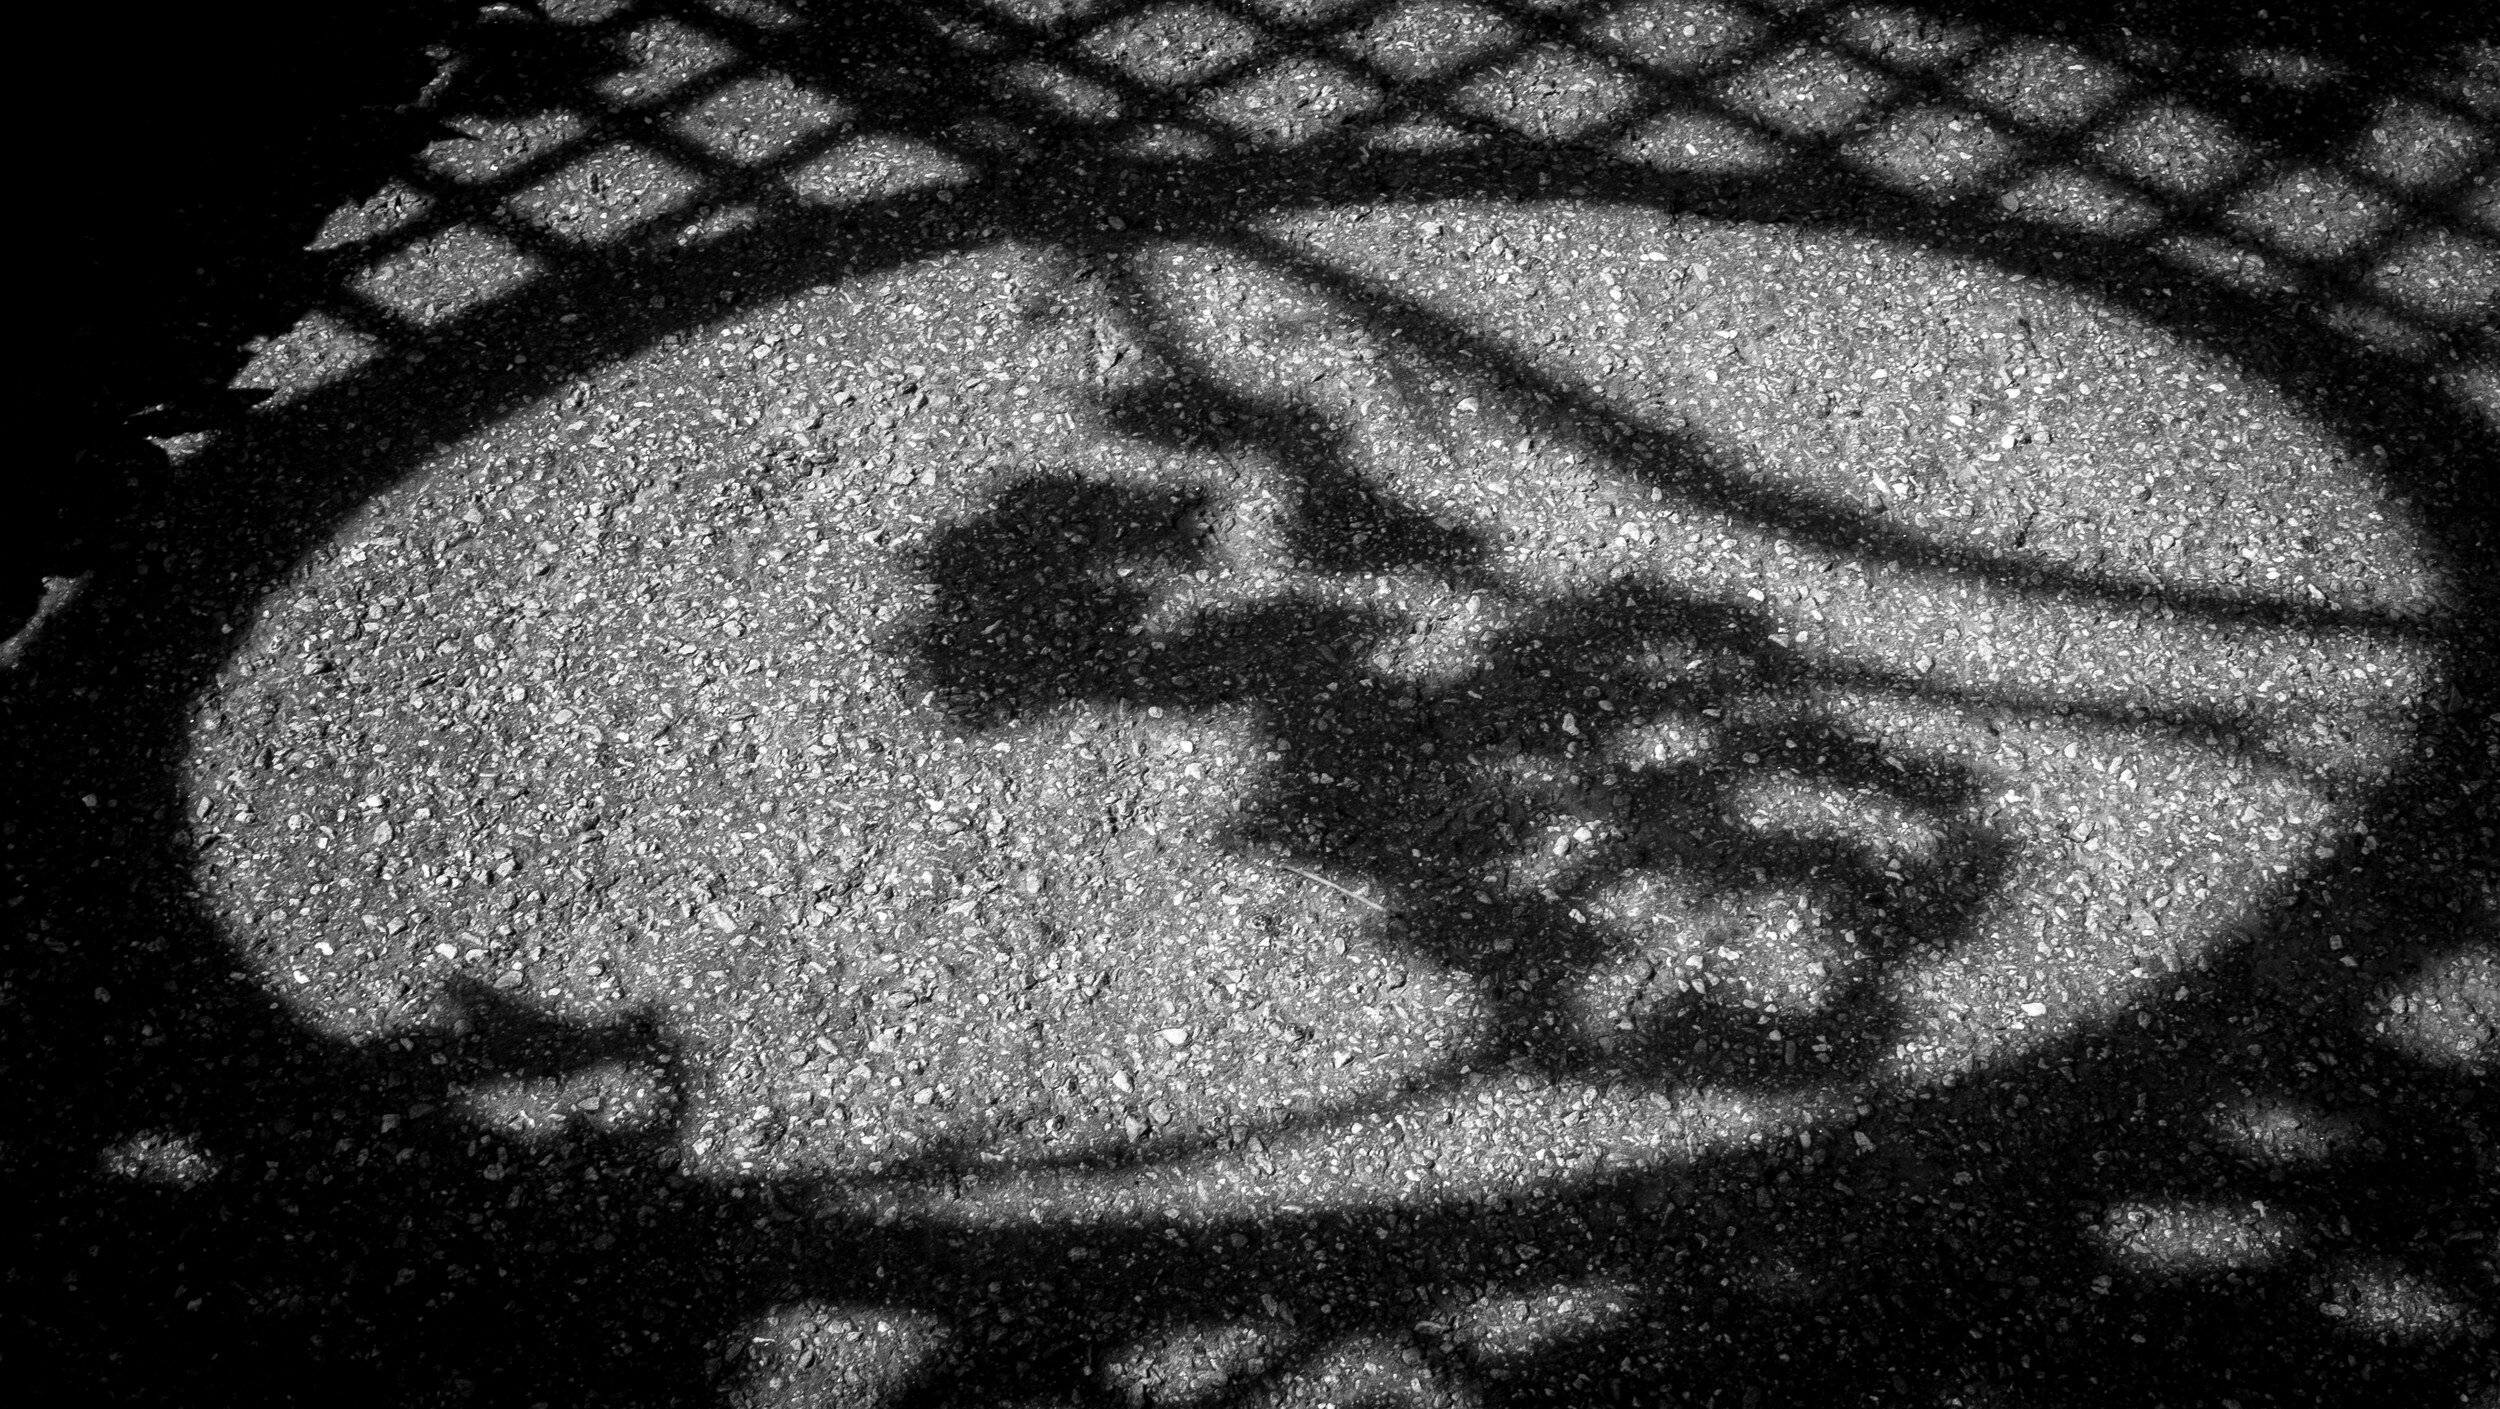
St Michael's Mount's history includes many legends and fairy tales. Probably best known is the tale of Jack the Giant Killer. The story goes that after slaying the giant Cormoran, Jack buried his heart in the pathway that leads up from the island's harbor to the castle. During our visit my, then eight-year-old, oldest daughter was keen to find it and point it out to me. And indeed, embedded between the cobblestones is a clearly distinguishable heart-shaped stone.
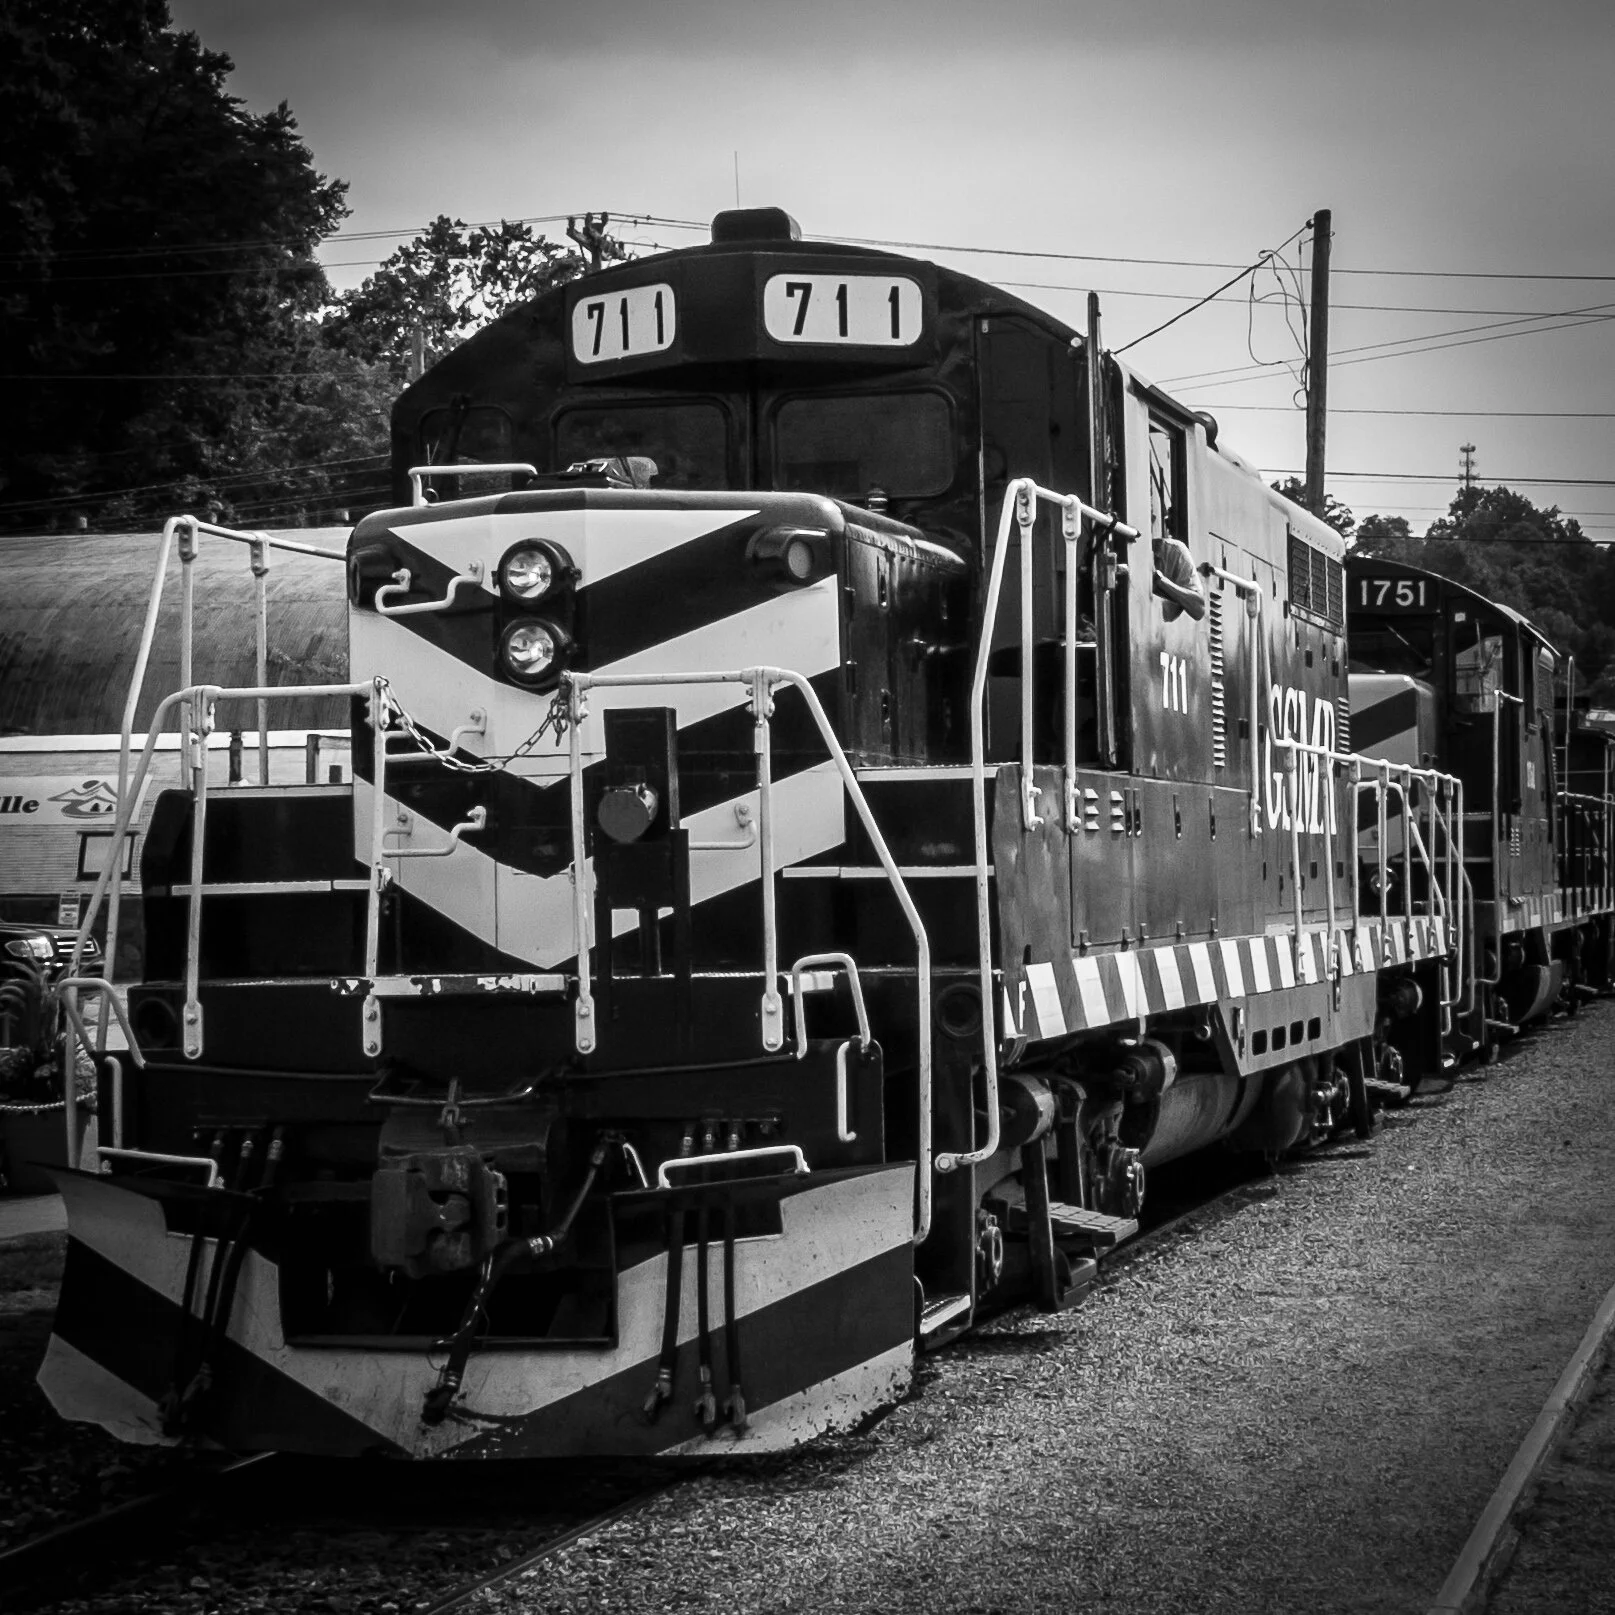
I wanted to create an image that shows the uniqueness of the island while at the same time conveying the brooding atmosphere of the fairy tale.
To achieve this I converted the original image into black-and-white and increased contrast. Although the island is rendered quite dark, it stands out very well against the lighter backdrop of the distant sky and sandwiched between the natural vignette formed by the dark-gray sea and clouds.


I like how the start of the causeway is just visible. Disappearing into the sea, telling the story of the unreachable and calling world of fairy tales. By cropping the image from its original 2:3 aspect ratio to the 4:5 aspect ratio I created more focus on the impact of the line of the causeway pointing towards the island.
The final result, with the brooding sky and the dark lump of the island: scary and at the same time calling.
- - - - - - -
I hope you enjoyed this background story about the creation of St Michael's Mount. Don't forget to subscribe, to ensure you will receive new information like this.

Olympic Dream
Olympic Dream
As a young boy, he had a dream…
Olympic Dream
As a young boy, he had a dream.
Television was his inspiration and biggest source of knowledge.
He started practicing.
Other kids played soccer, football, or rugby.
He practiced his game.
Other kids had multiple hobbies.
He practiced his game.
He went to college.
Other students joined Greek life and started partying.
He practiced his game.
He got a job.
His colleagues watched football and went to tailgate parties.
He practiced his game.
Finally, he was ready.
Then he realized that jousting is not an Olympic sport.


Photo Book Review: On Ground
Photo Book "On Ground" by Simon Gabriel
A couple of weeks ago I purchased and received On Ground by Simon Gabriel, a self-published photo book…
Photo Book "On Ground" by Simon Gabriel


Introduction
A couple of weeks ago I purchased and received On Ground by Simon Gabriel, a self-published photo book featuring 100 selected 35mm images created between 2014 and 2016.
I really enjoyed this book and although the first-run edition of 50 has already sold out, I recommend watching Simon's website to check if a new run will be published.
Review
To start with: I really love the images!
They are a collection of color film (35mm) images taken in the USA and Great Britain, and - as far as I can see - one from somewhere in China, and one from the inside of an airplane.
The colors are great and show the photographed subjects at their best. Simon's selection of subjects resounds very well with my artistic vision of "wanting to share not the obvious but what we usually are unable to see." To me, the images in this photo book show how day-to-day stuff, sometimes banalities can have beauty.
The book provides no explanations or background regarding the images or the photographer. The website only states: "Featuring 100 chosen archive 35mm images from 2014-2016, On Ground is a self-published photobook".
Although the images for this book have been "chosen", I do not really see specific grouped or themed subjects. It actually seems as if the images have been arranged as casual encounters, i.e. not arranged at all but sequenced as you might stumble onto the locations in real life.
In fact, these images almost remind me of Robert Frank's "The Americans". But without (almost) any Americans in the frame. And in color. They are a collection of real, everyday places in the USA and the UK. The images in the book share the stories about where people live, and ask the question "what do these environments tell us about the people who live, love, and work there?" Can we from these images tell anything true about the inhabitants, or do the images expose the environment as a stage that only reaffirms stereotyping?
The cover, binding, and paper quality of the book are very good. It has a very nice matte, laminated soft cover, and the 200 gsm silk paper renders the images really well. As mentioned above, it contains 100 color images, and the book size is 21.0 x 21.0 centimeters (about 8.3 x 8.3 inches).
Is there anything I do not like about this publication?
Hmmm....let's see...not really...but...
Who is Simon Gabriel?
The book does not provide any clues at all.
Or maybe one: One of the images actually contains a Vivian-Mayeresque self-portrait.
His Instagram profile only says "Film Photographer and Pedestrian, from Merseyside" (England, UK). Yes, it is the area The Beatles are from, but other than that...
To start with, I would really love to read some background about the photographer. And why did he select these specific images? I'm always interested learning what vision other photographers have for their work.
With regard to the images, I would like to have seen the US and UK ones separated. And I do not really see why Simon has included the odd China one and the one in the airplane (which is definitely not "on ground"...). The image of the airplane seat actually could have been used as a "divider image" between the US and UK images. Another reason why I would like to have some more background information about the photographer's vision for these images and the book.
Conclusion and Recommendation
"On Ground" is a well-executed book, with beautiful and thought-provoking images of places in the USA and Great Britain. Although the first run edition, unfortunately, is sold out already, the content and quality of this book definitely justify another edition. Whenever available, I highly recommend purchasing a copy. Check the book's website for more info and some insight into the book. Simon also has great images on Instagram and Flickr.
Simon Gabriel is definitely someone to watch and follow!!

Helping Hands
Helping Hands
sometimes life proves that…
Helping Hands
sometimes life proves that
the greatest needs will provide
many helping hands

Image Of The Month: Grass With Water Drops
Grass With Water Drops' Behind The Scenes
The image I am going to discuss today was taken in July 2010, and final changes for publication were made in 2017.
'Grass With Water Drops' Behind The Scenes
Taking the Picture
The image I am going to discuss today was taken July 2010, and final changes for publication were made in 2017.
In 2010 my family and I lived in South-Africa, and my wife's sister with her husband and two kids visited us from the Netherlands for their summer vacation. Although our initial plan was to rent an eight-person Landrover (but that is a story for another time), we rented the ubiquitous Toyota Hiace van and made a round trip from the Johannesburg area where we lived to Durban, stopping at a couple of safari parks and staying at camp sites and lodges.
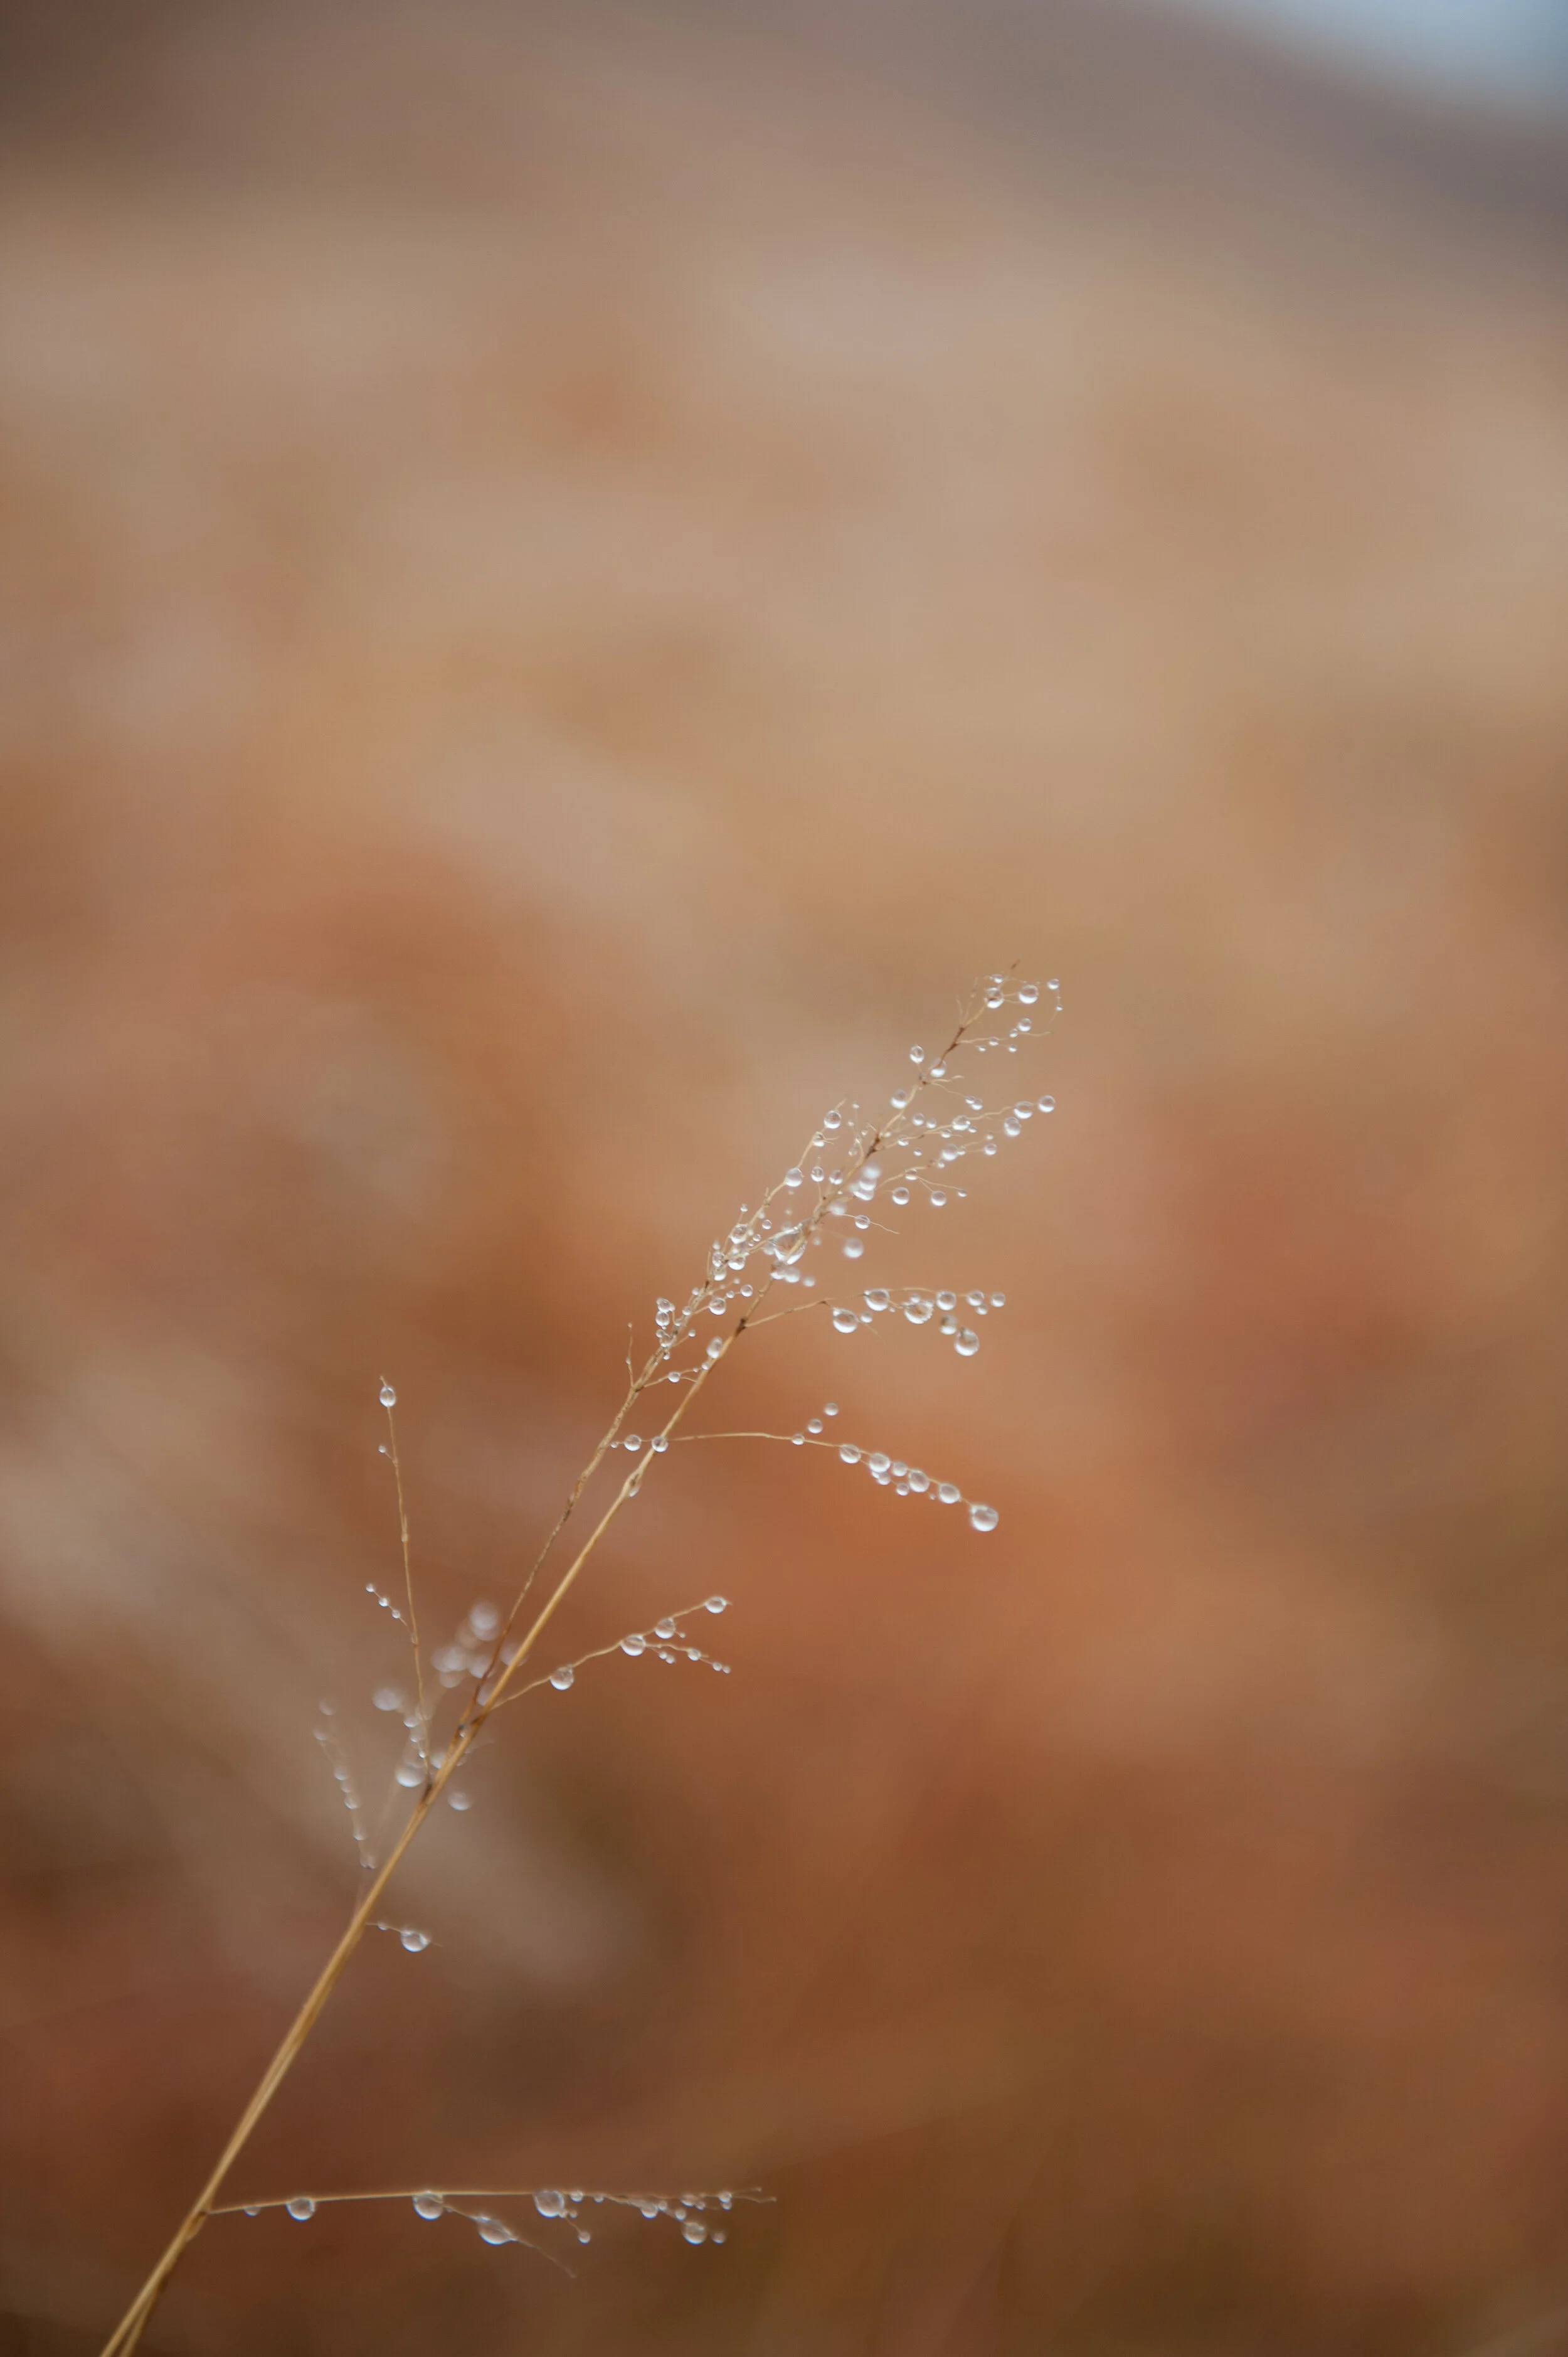
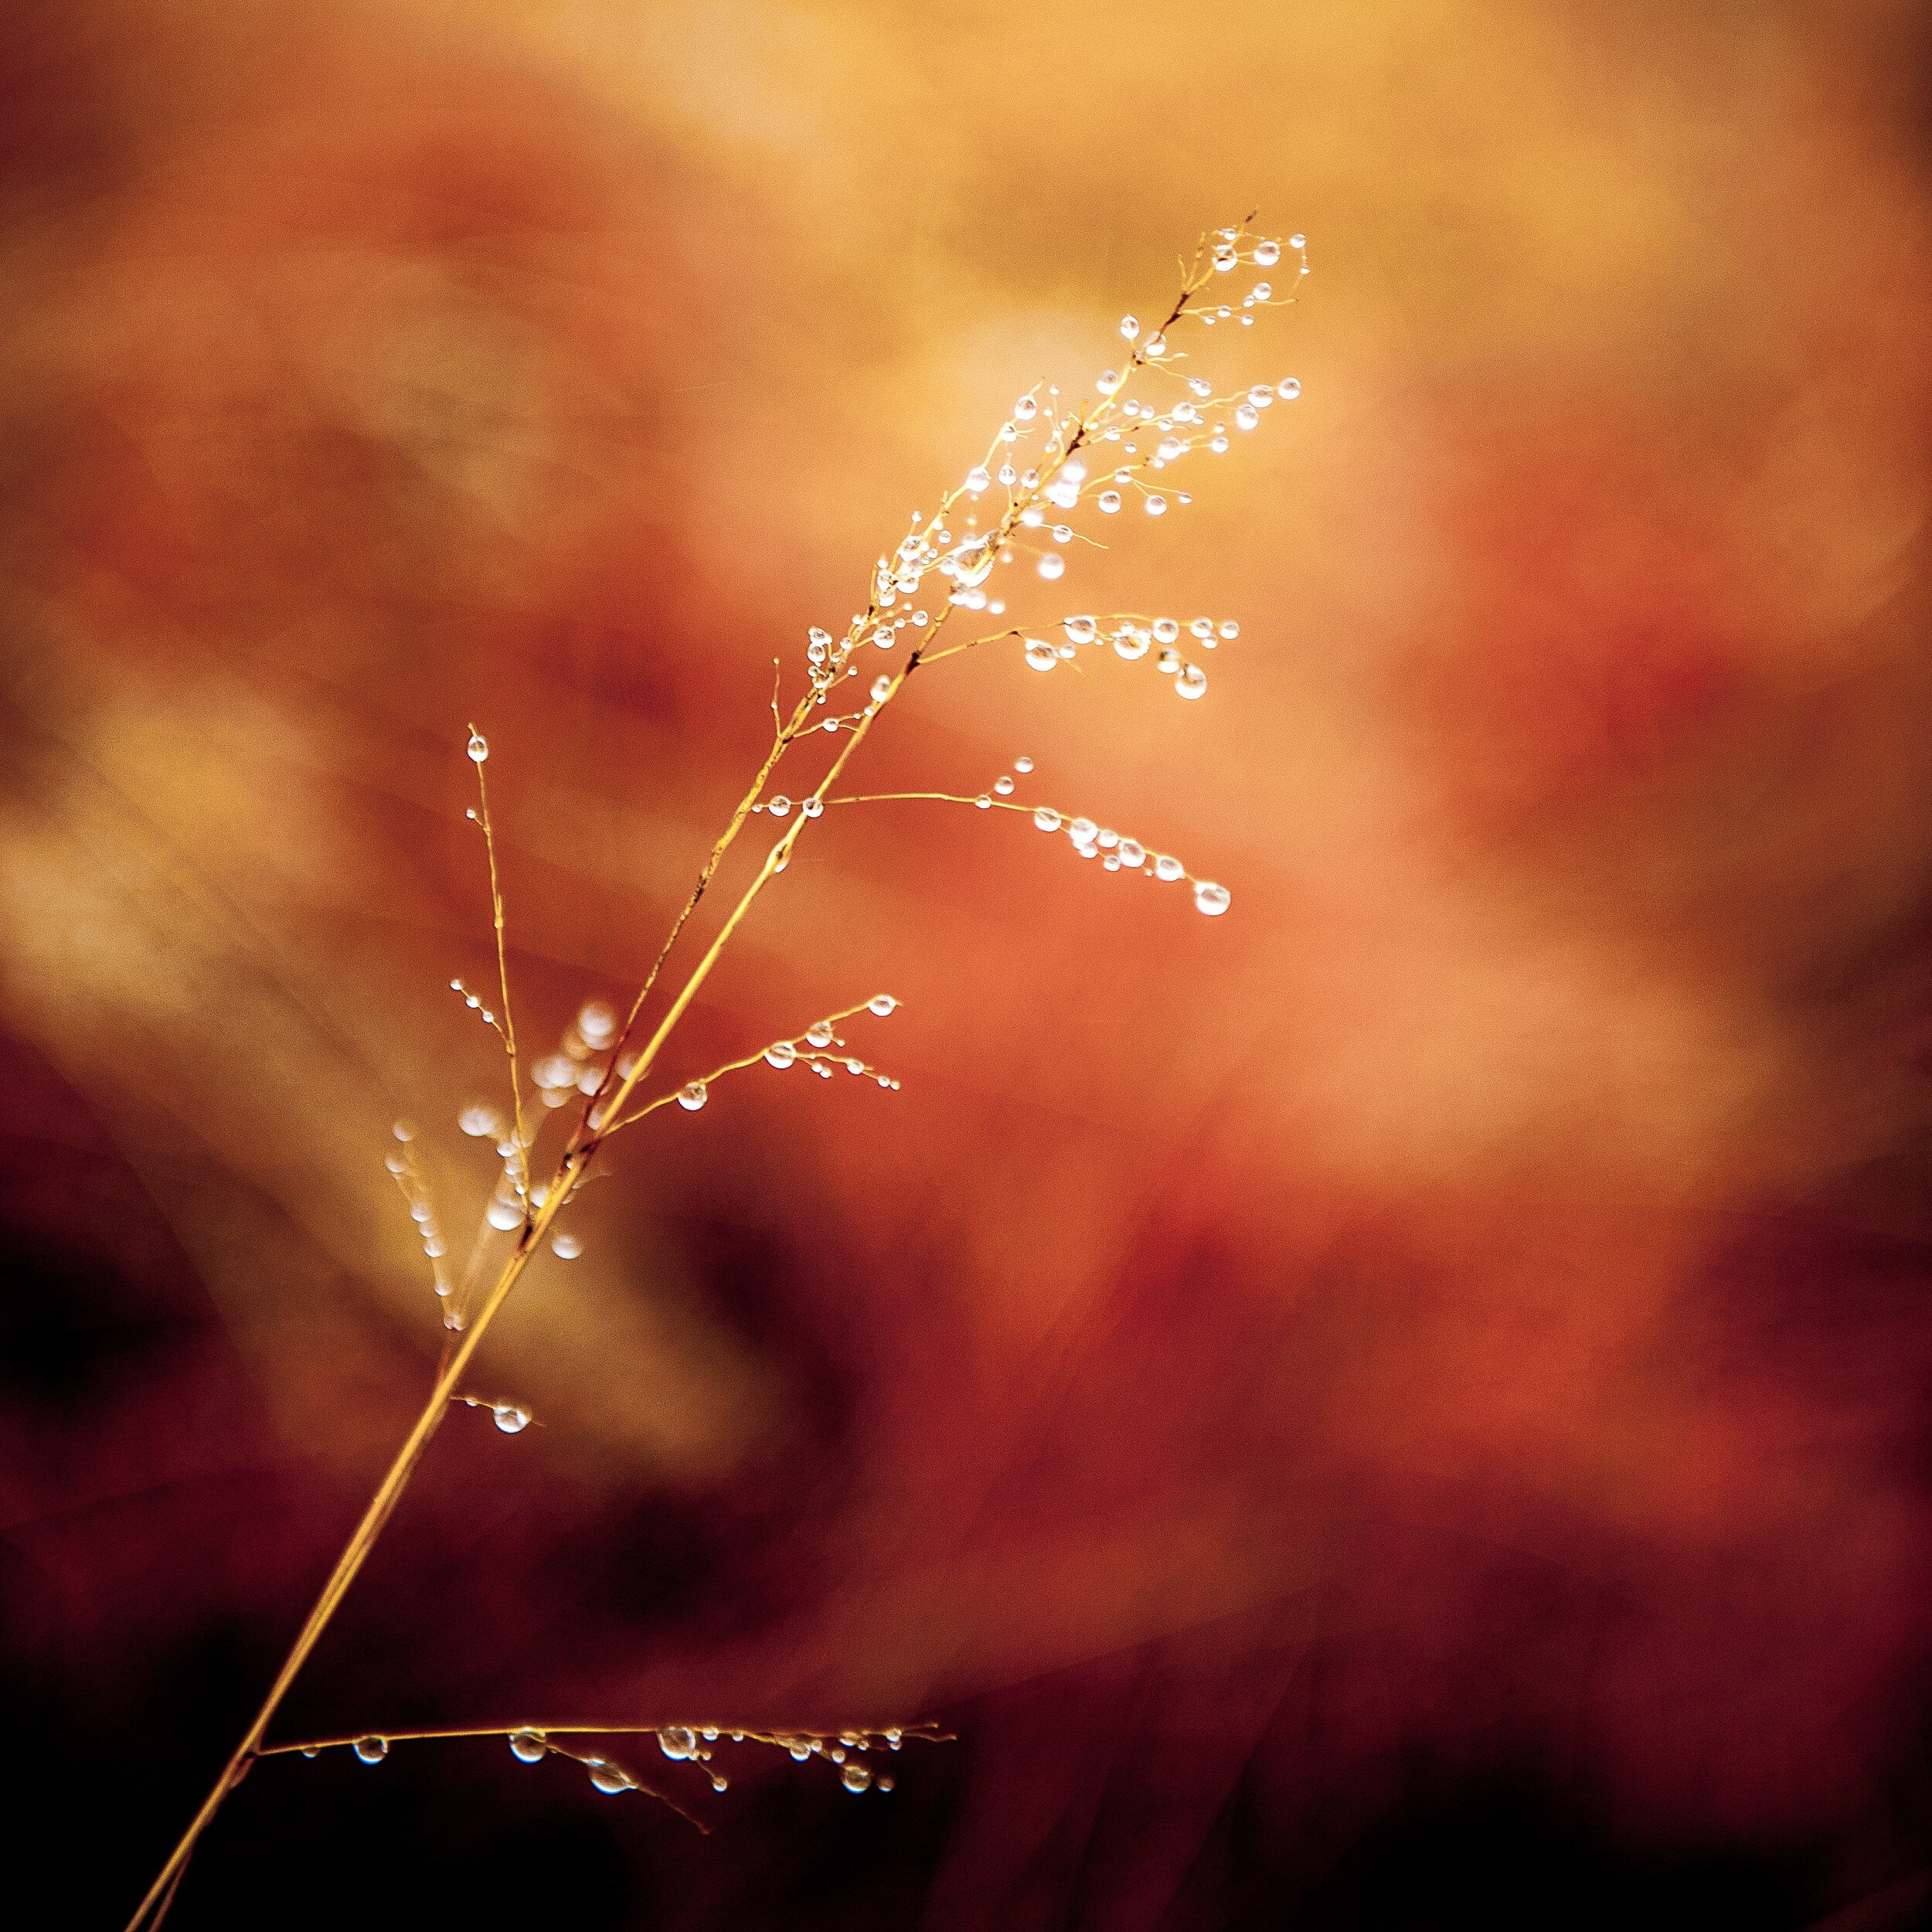
One of our overnight stops was at Didima resort, located in the Cathedral Peak valley of the u Khahlamba Drakensberg park, approximately halfway between Johannesburg and Durban. The resort has several cottages with great facilities, and we rented two cottages for my and our sister in law's families. The area surrounding the resort is great for hiking, and it was during one of our hikes when I noticed some nice high grass with early morning dew drops clinging to it.
At that time I still had my Nikon D700 camera (read a previous post to learn why I sold this gem), and I used the 24.0-70.0 mm/f2.8 lens to capture it. The D700 is a full frame sensor camera, and for this image I shot it at 70mm focal length. Since I wanted the grass and water drops stand out against the background, I created a very shallow depth of field by selecting the f2.8 ("wide open") aperture. This led to a shutter speed of 1/320 second.
Creating the Image
Since I only started this website in 2013 with real activity only starting in 2017, this image like too many others had been living on my computer's hard drive without seeing any action.
The Nikon D700 has a sensor that produces images with an 2:3 aspect ratio, my preference however is for images with 4:5 and 1:1 aspect ratios. I therefore had to crop the original image to create versions with these aspect ratios for publication and printing. In addition, I wanted a 1:2 aspect ratio version because that was the format more easily accepted by Twitter.
Furthermore, although the original image as created in-camera was not unsatisfactory (see below), I wanted a more dramatic and abstract view. In other words: there was work to do.
The image as created in-camera / 2:3 aspect ratio
Adobe's Lightroom provides me with all the tools I need for what I want to do and accomplish with my images, and I try to use as less of its tools as possible to achieve the final results I have in mind applying all tools from top to bottom as they appear in the Develop menu: Basic, Tone Curve, HSL/Color/B & W, Split Toning, Detail, Lens Corrections, Transform Effects, and Camera Calibration.
Color Versions
For the color version I adjusted the Basic, HSL, and Detail sliders as shown below.
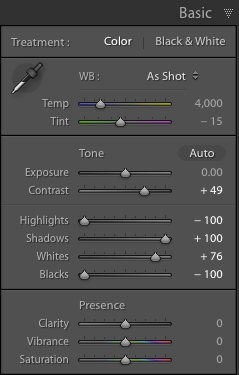
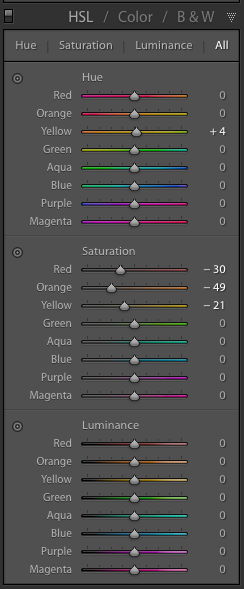

Although the saturation changes for the Red, Orange, and Yellow colors are very important to create the effect I desired in the color versions, the most important changes I made were in the Basic section by reducing the Highlights and Blacks to the maximum, increasing Shadows to the maximum, and increasing the Whites to 76% of maximum.
This means that any Highlights in the image have been reduced to almost zero, and the Black areas in the image have been made as black as possible. The shadows have been made as light as possible and any white areas have been made almost extremely white. I also added some sharpening and noise reduction.

Since I wanted to have an additional color copy in 1:2 aspect ratio to use on Twitter, I had to crop again. This horizontal 1:2 crop was quite a challenge since the main object in the image has a vertical structure. In the end I decided to keep the top of the grass in the image, creating the result below.

Black and White Versions
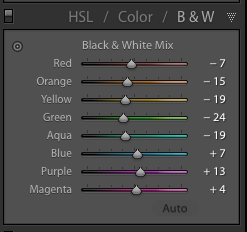
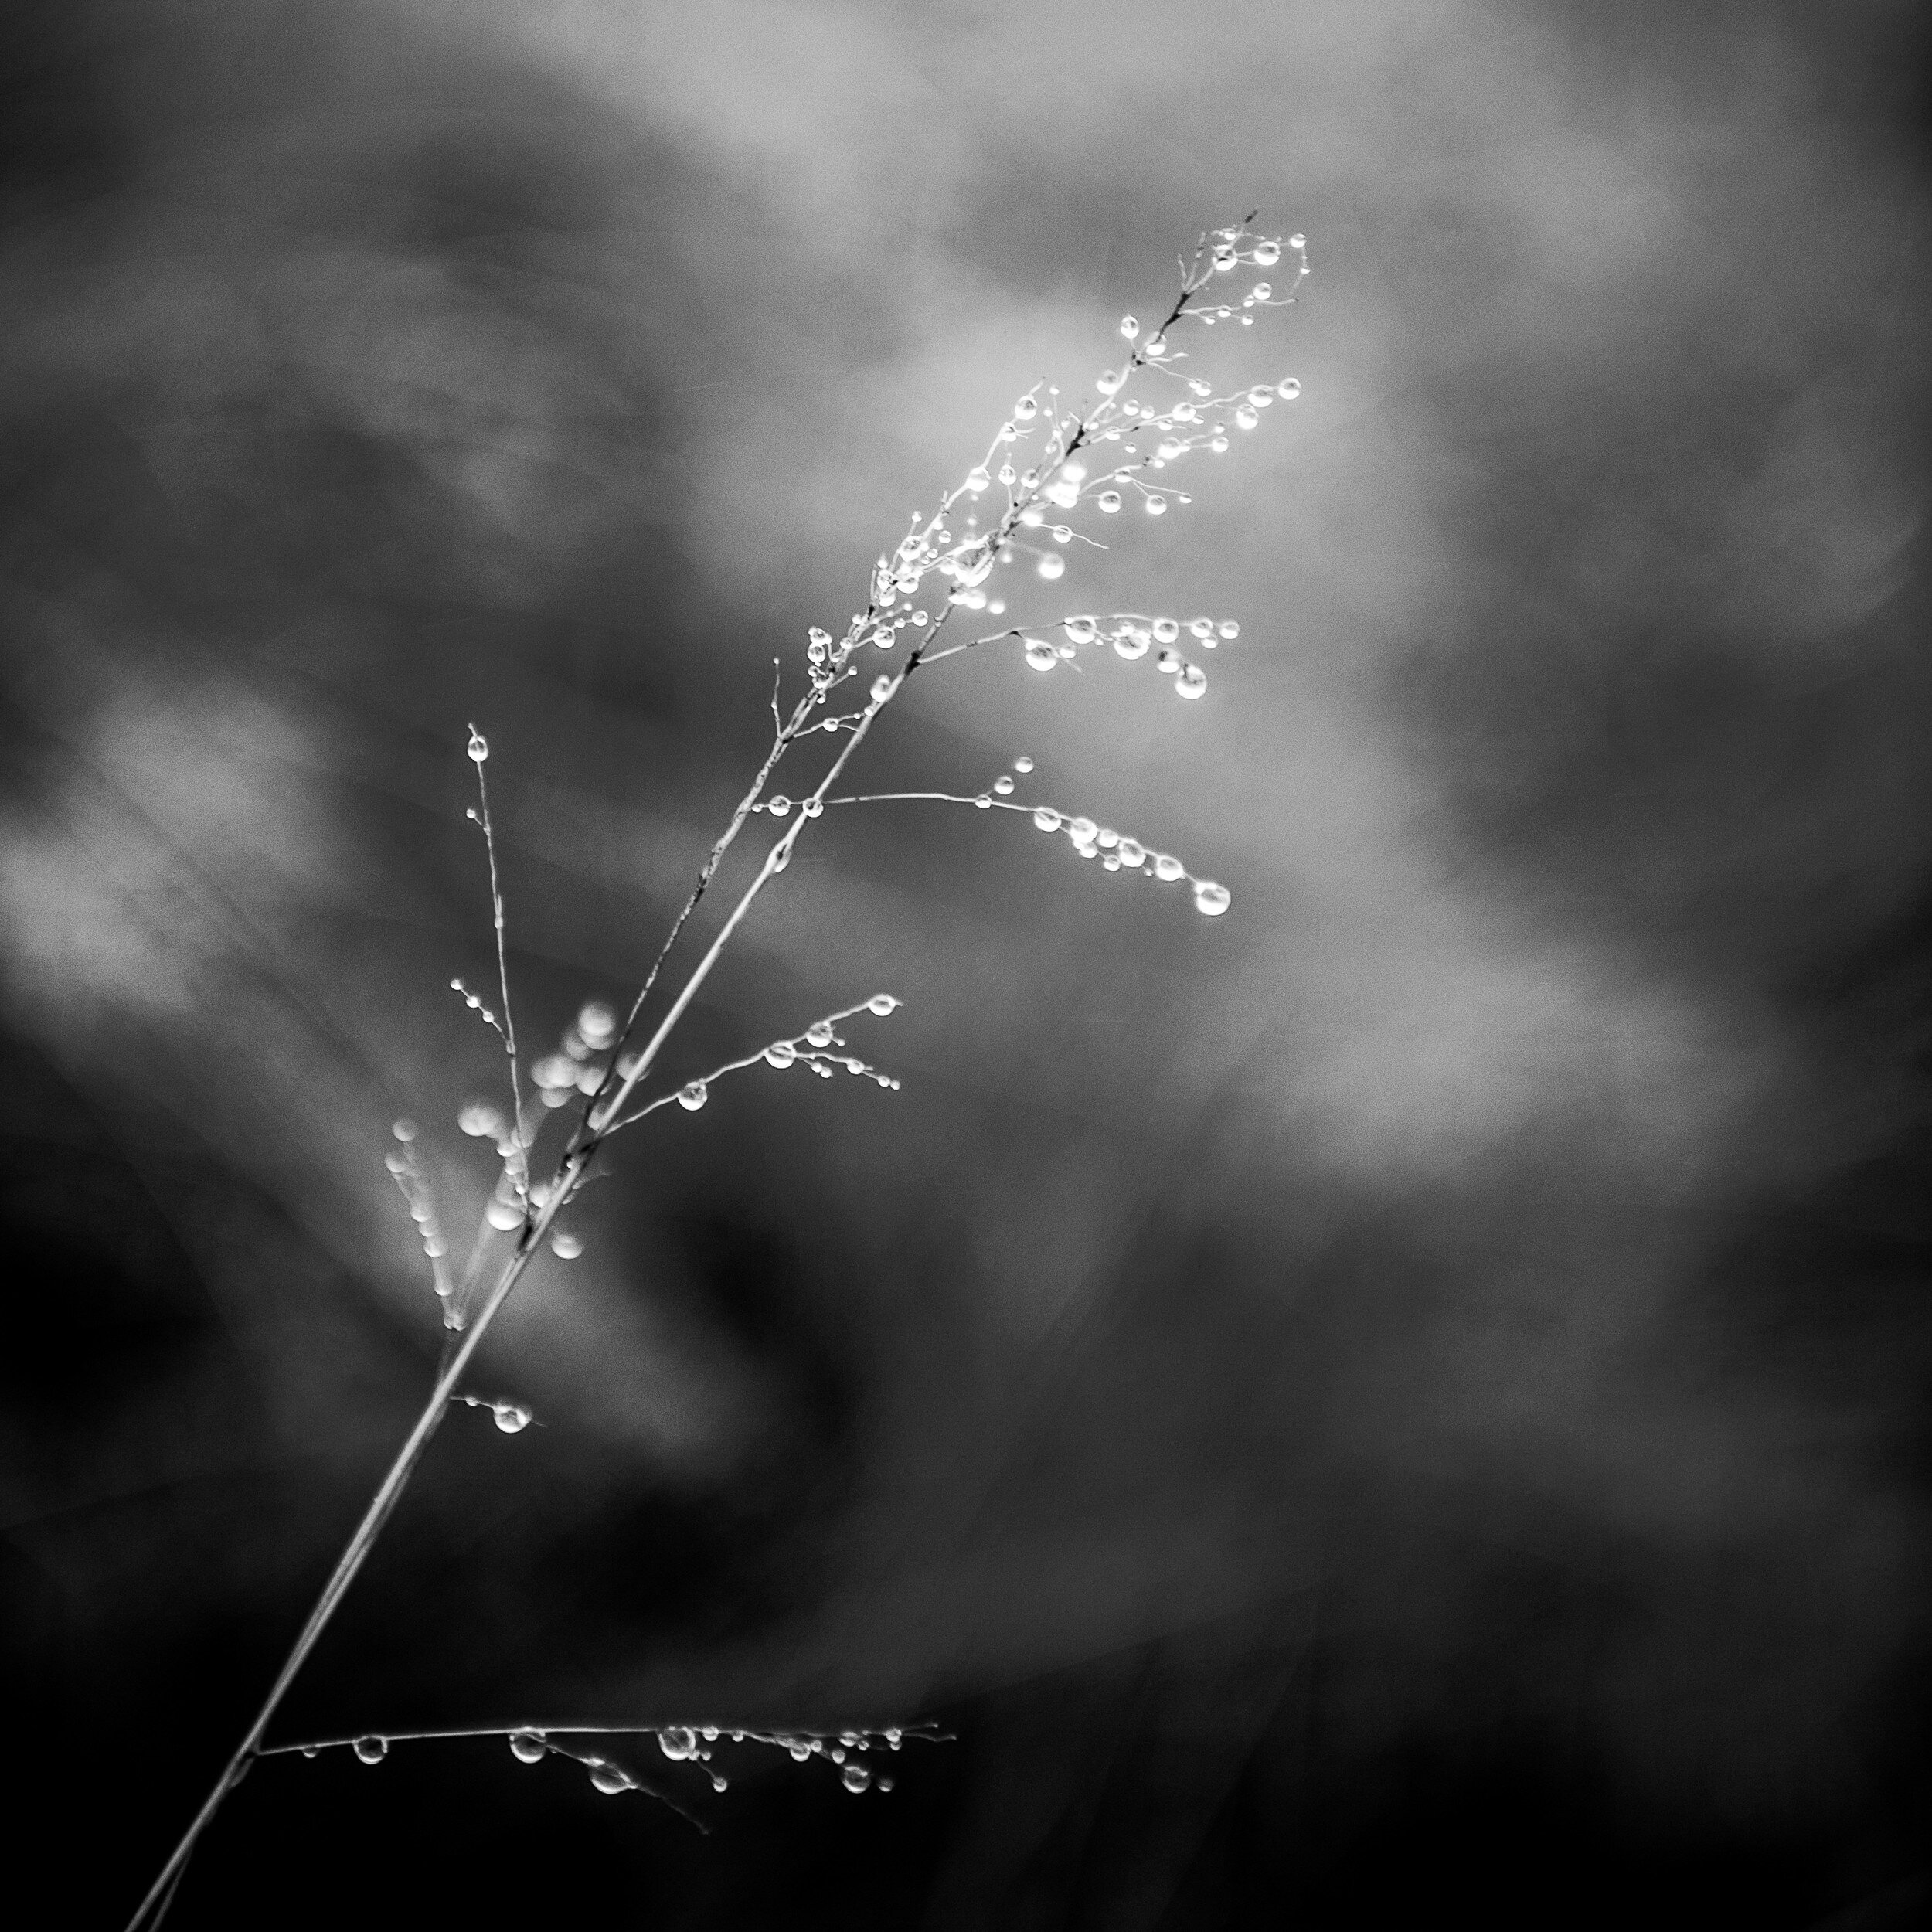
For the black and white copies I kept most Lightroom settings the same as for the color ones. However, to accomplish the best effect in black and white, I needed to play around a bit more with the color settings in the HSL/Color/B&W panel.
Resulting in the following result (after cropping to 4:5 and 1:1 aspect ratios respectively.

Final Thoughts
I am quite pleased with the final results.
In both the color and black and white versions the shallow depth of field separates the main subject very well from the background. This effect has been enhanced by the adjustments I made in Lightroom, with quite a dramatic effect in the color versions.
The original composition works very well after cropping to the 4:5 and the 1:1 aspect ratios. In the 4:5 version, the direction of the grass follows almost exactly the diagonal of the image rectangle. Although the 1:2 version was predominantly created to comply with Twitter image requirements, it actually produced a very balanced composition with more focus on the detail at the top of the grass.
- - - - - - -
I hope you enjoyed this background story about the creation of the Grass With Water Drops images. Don't forget to subscribe to ensure you will receive new information like this, and Haiku, PicTales, and other stories delivered to your email inbox the moment they are published.

How To Buy A Print From A Zenfolio Site
I decided to buy a print from my own Zenfolio site to check the process and quality
All images in my portfolio are now available for purchase as open edition prints, directly from this site. However,…
I decided to buy a print from my own Zenfolio site to check the process and quality
[update: since my website has been changed since I first published this article - and I am no longer using Zenfolio - several links in the article have been removed. The buying process might also have been changed by Zenfolio]
All images in my portfolio are now available for purchase as open edition prints, directly from this site. However, prior to adding this option as a menu item to the Manten|Photography site I wanted to make sure that prospective buyers will get what is being promised. I wanted to test the buying process, shipping and packaging, and the finished product.
This is quite a lengthy post, with images for each process step. If you want to fast-forward to one of the sections, you can do by clicking one of the links below:
The Buying Process
Packaging and Shipping
The Finished Product
Conclusion
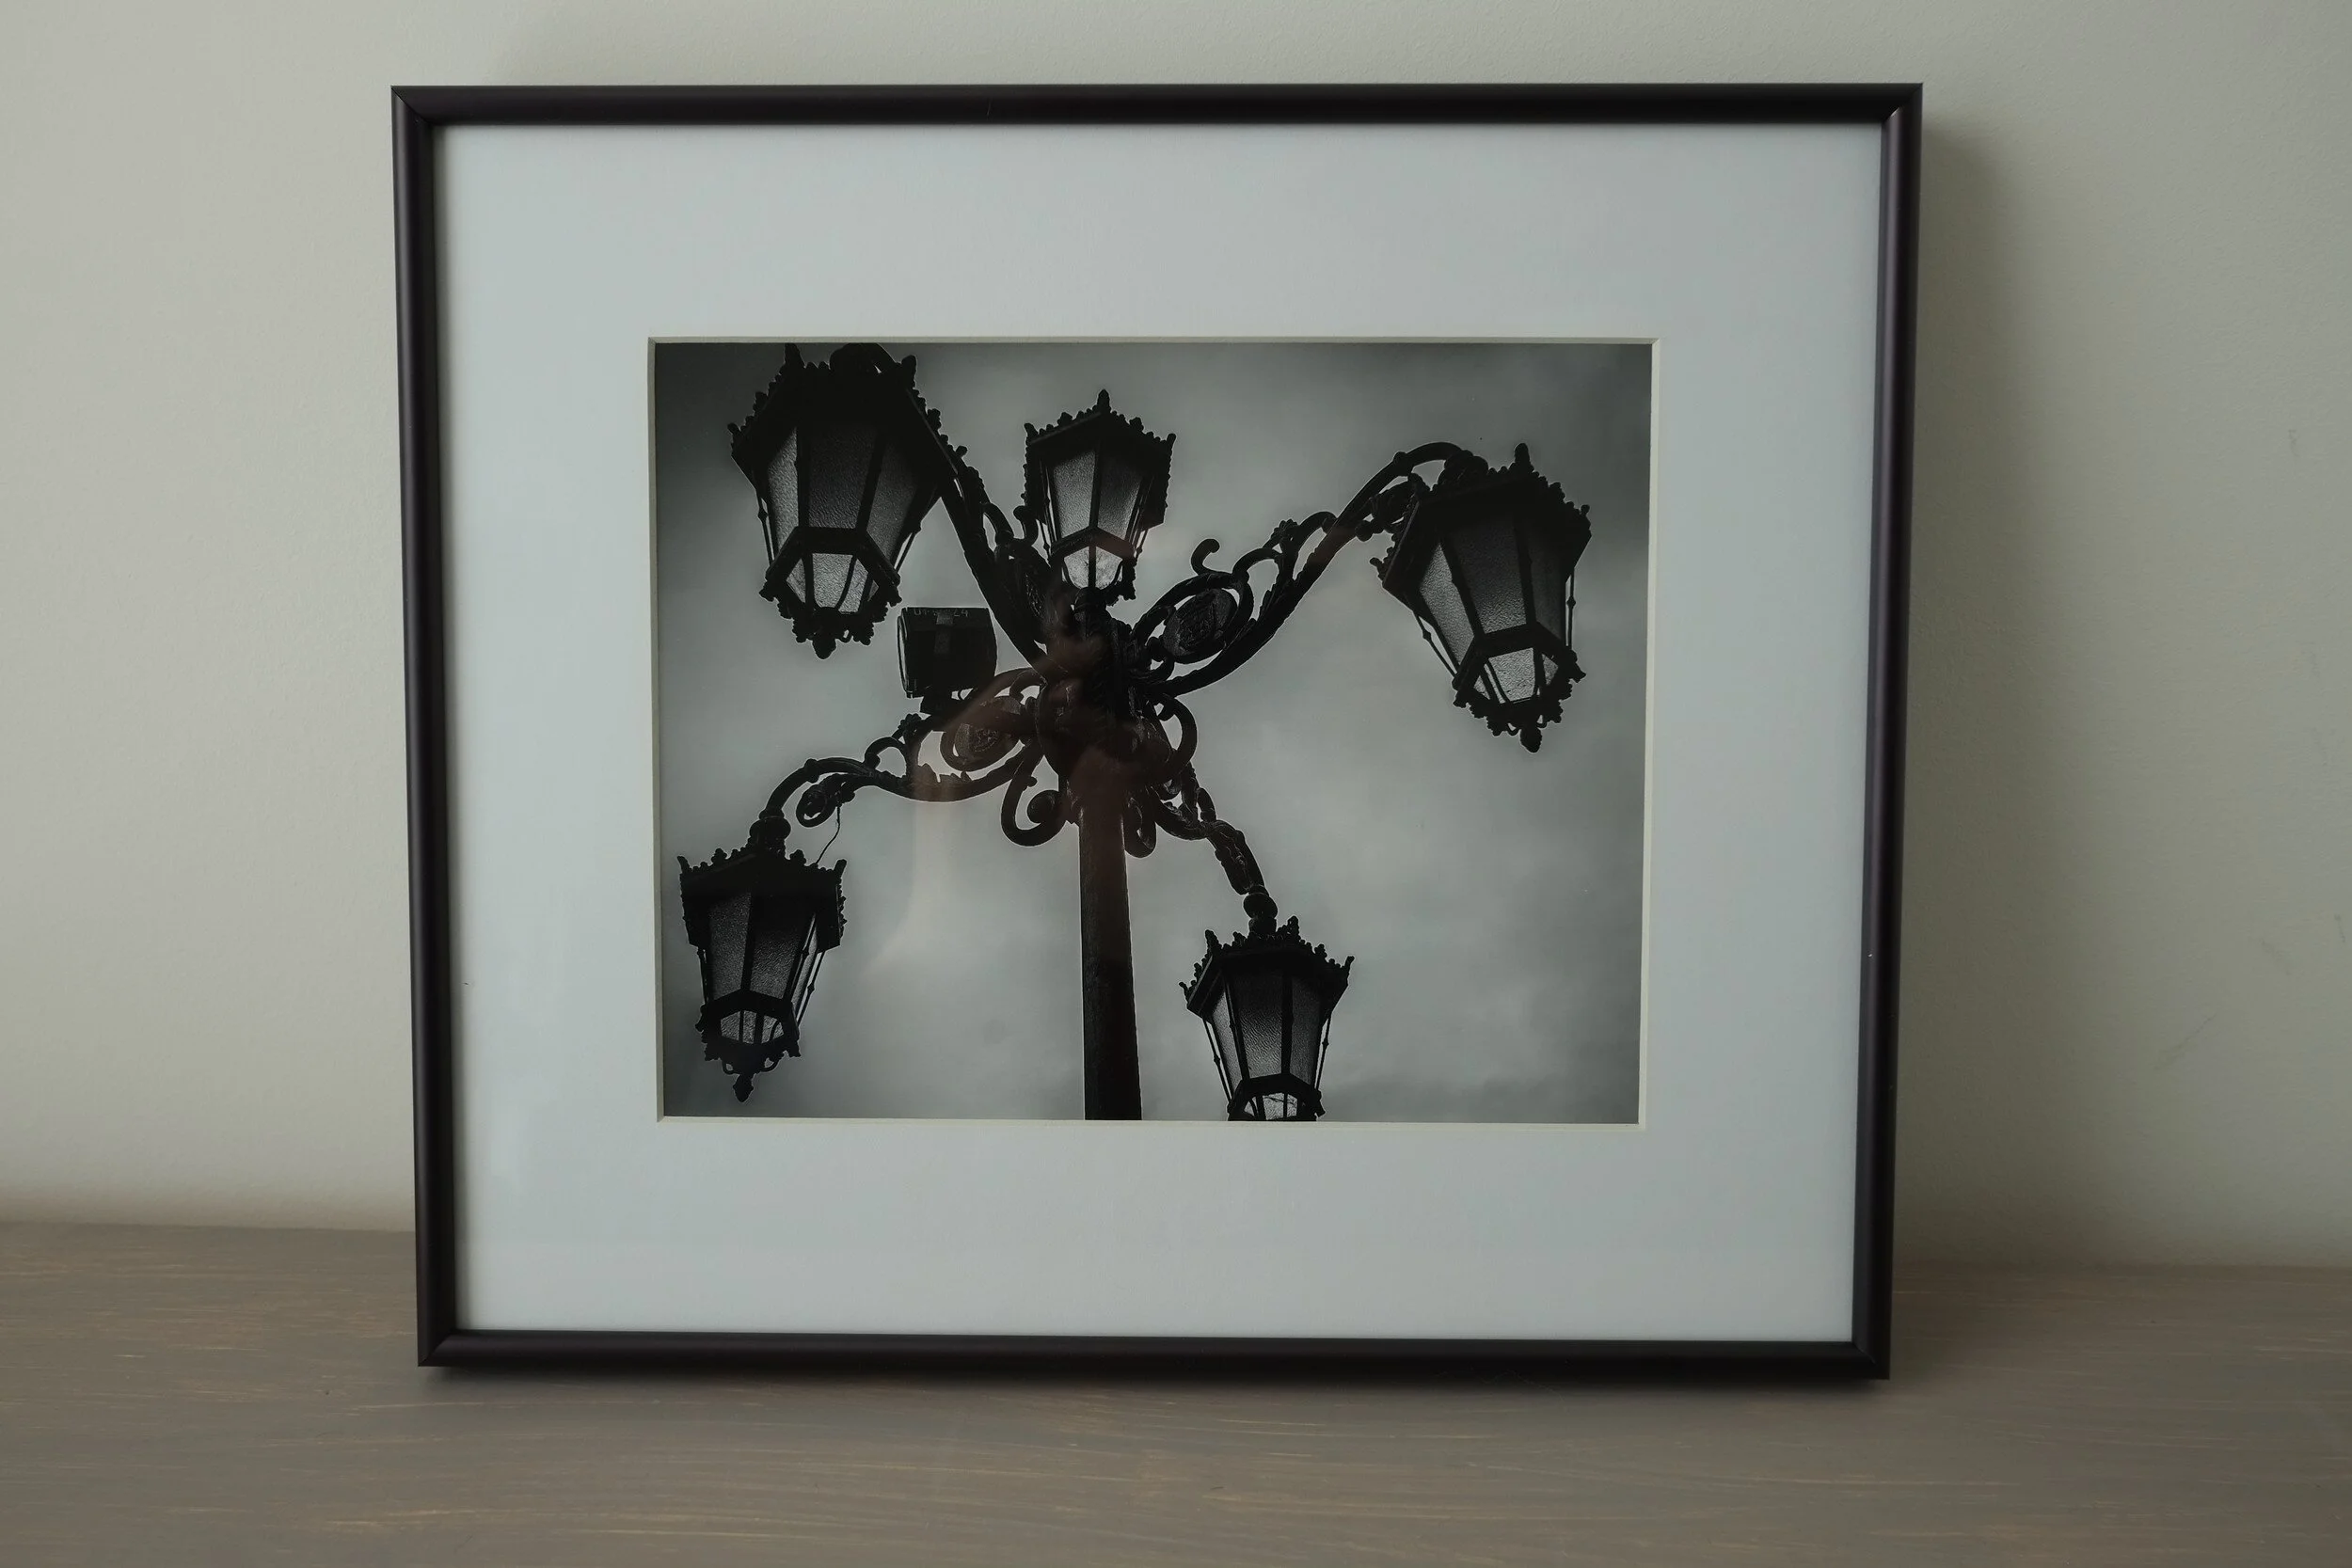
The image I used for this test is Antique Street Light, 2007: a black and white image of a vintage lamp post in Madrid, Spain, just around the corner from the Royal Palace. It is quite a moody image with lots of blacks and greys, which would help me to review the quality of the final print.
Now let's deep dive into the process of how to buy a print from a Zenfolio site.
The Buying Process
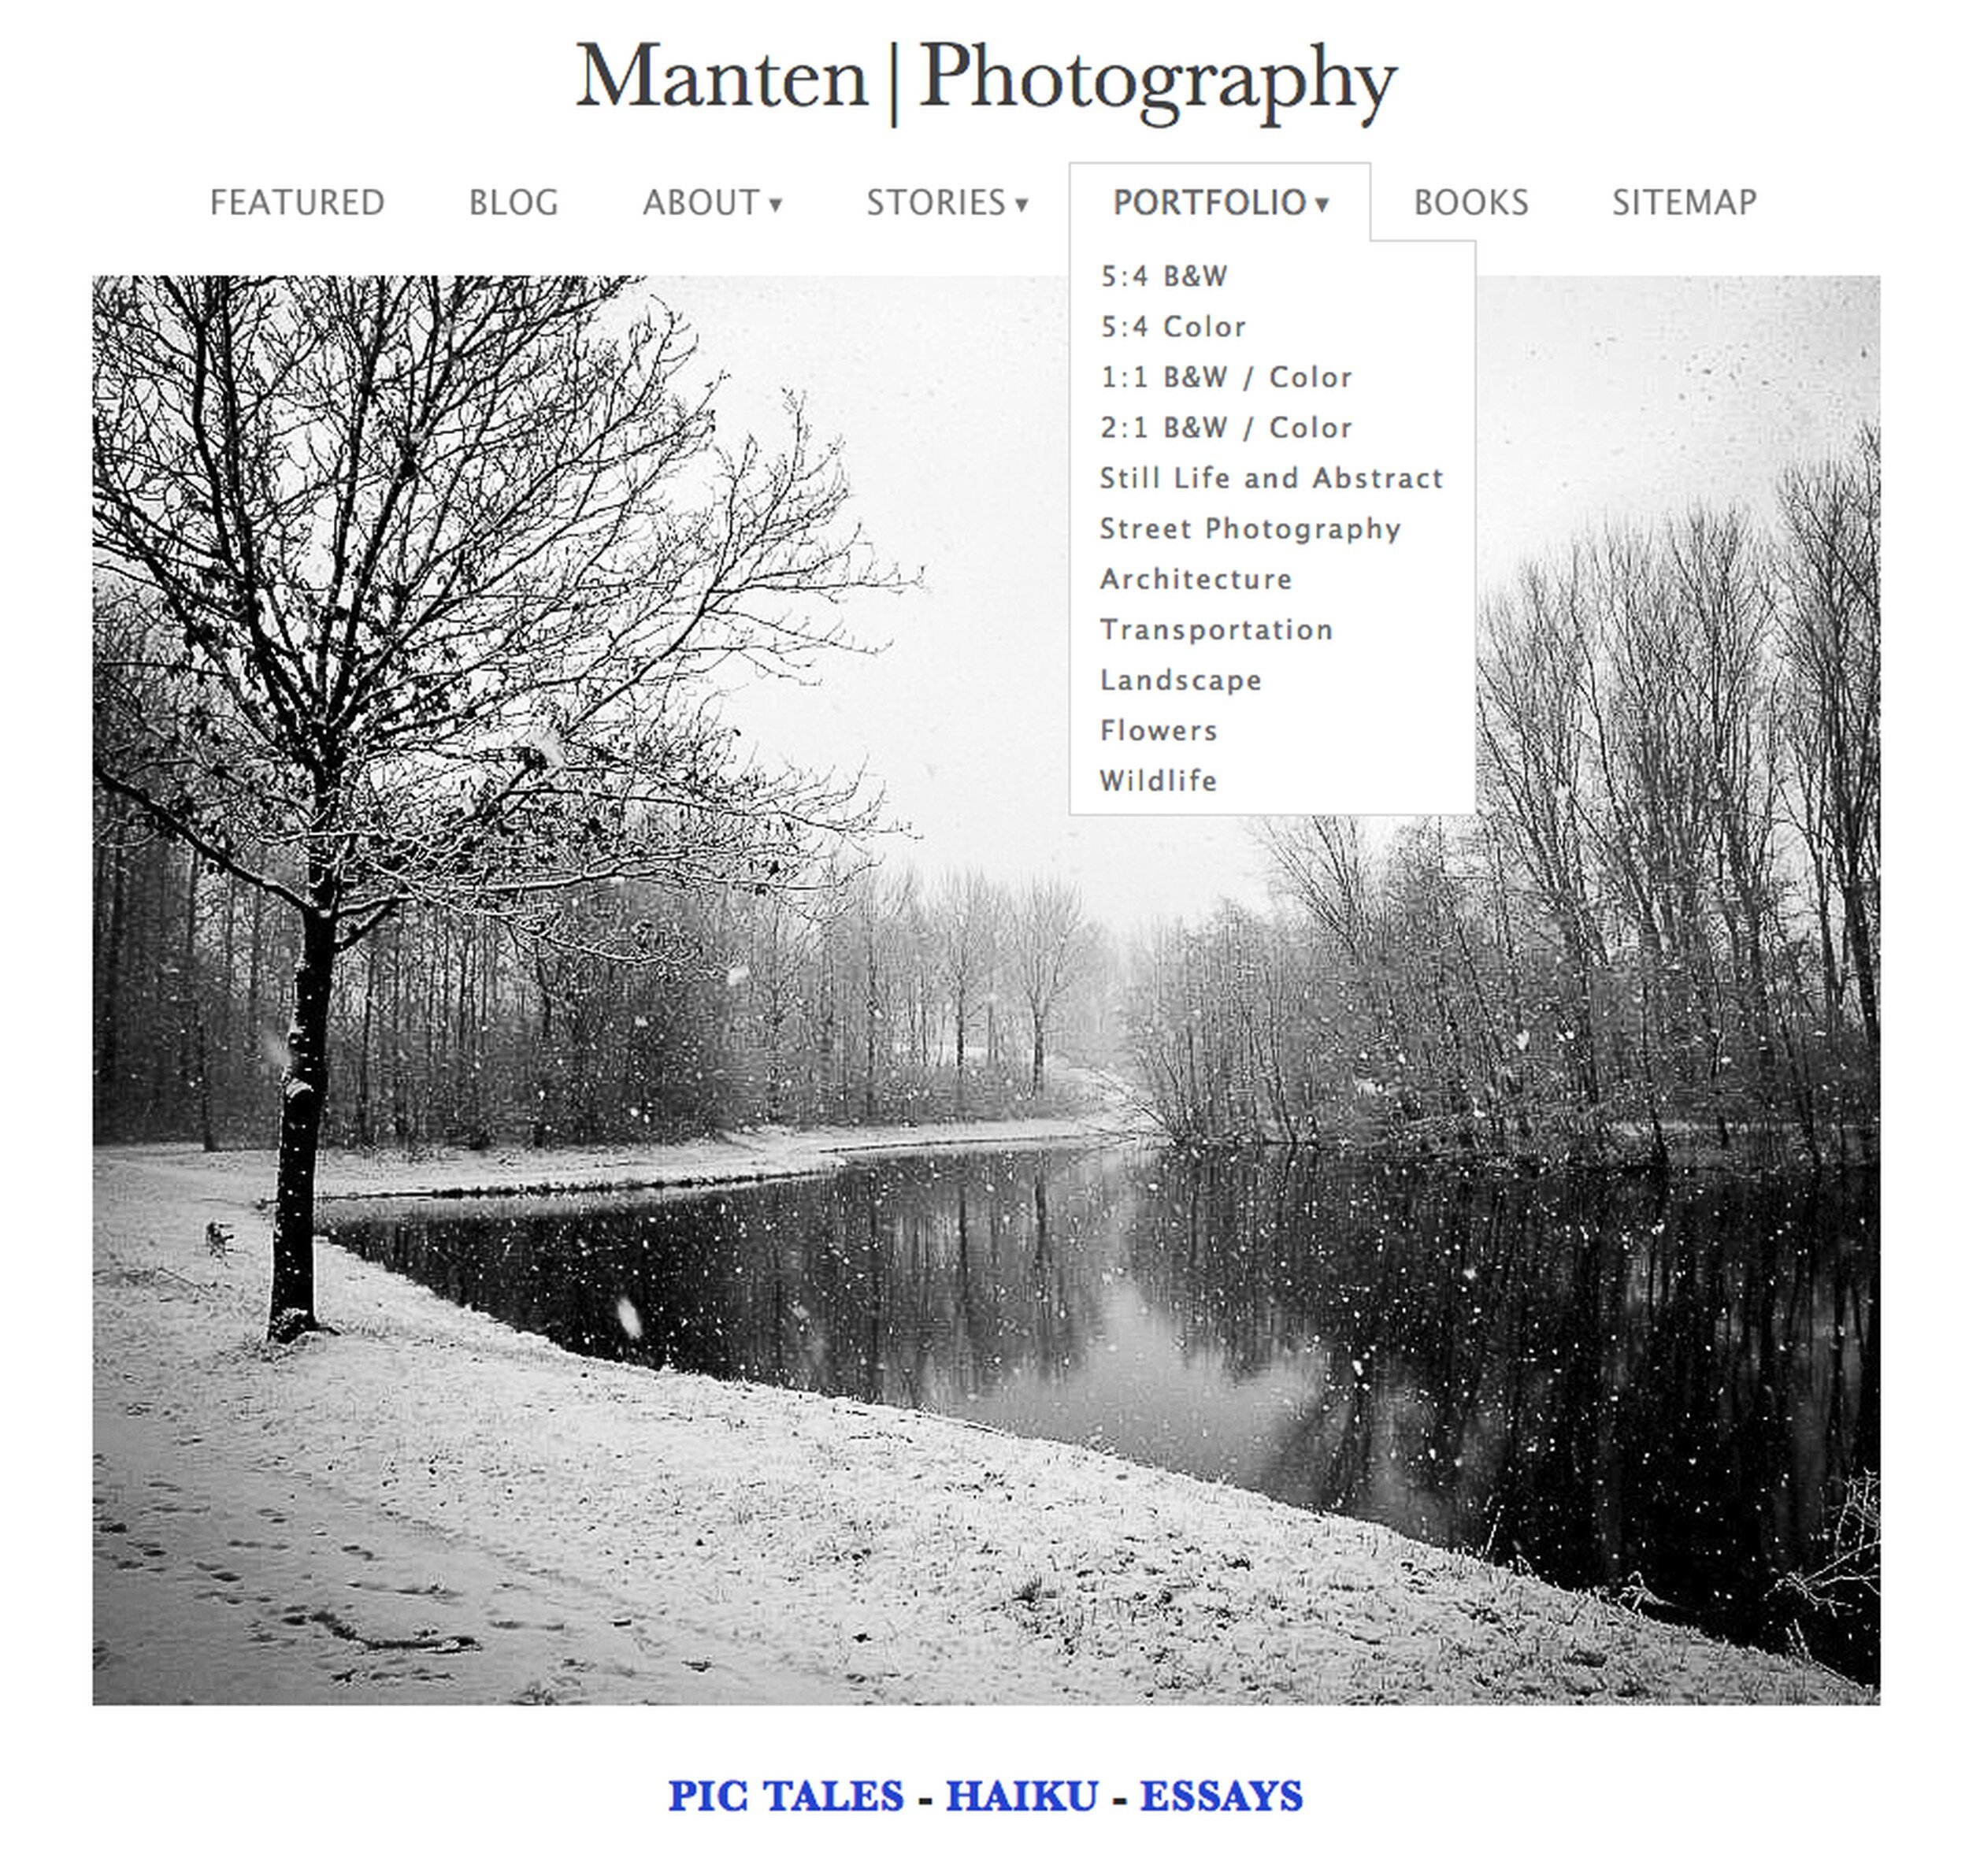
The easiest way to start the buying process is to go to one of the Portfolio pages, which can be accessed from the home page. I have made selecting an image easy by grouping photos by aspect ratio (e.g. 4:5) and by subject matter (e.g. Architecture). In this case I decided I wanted to buy a black and white image with a 4:5 aspect ratio.
On the selected Portfolio page contains all images that match the selection criteria, sorted by image title. For this test I selected the image Antique Street Light, 2007. Since I only wanted to buy one print, I just double-clicked the image on the Portfolio page. In case I wanted to select multiple images, I could have clicked the Select Photos button, which provides the opportunity to selecting more than one photo by clicking a check box on each image you would like to include in your selection.

Double-clicking the image I wanted to buy, brought me to a screen that shows a larger image of the selected photo, with a scroll bar with the other images of that Portfolio page at the bottom. You always can select another image from that bar. You will also see a broad white margin to the right that shows the products available for the selected image (in this case only an 8" x 10" print), and the base price for each product.
By clicking the circle with the 'plus', the image is added to your cart. From here you can select additional images or, as I did, you can go to your shopping cart.

The screen shot below shows what hovering your mouse over the cart icon (in the upper right corner of your screen) will show. You can view your cart, or you can Register on the site (if you have not done that yet) to save your cart. Now is the time to register if you have not done before. Clicking the Register button will take you to the registration page.

Here you can create a new account (first time buyers), or you will be asked to sign in to complete the buying process.

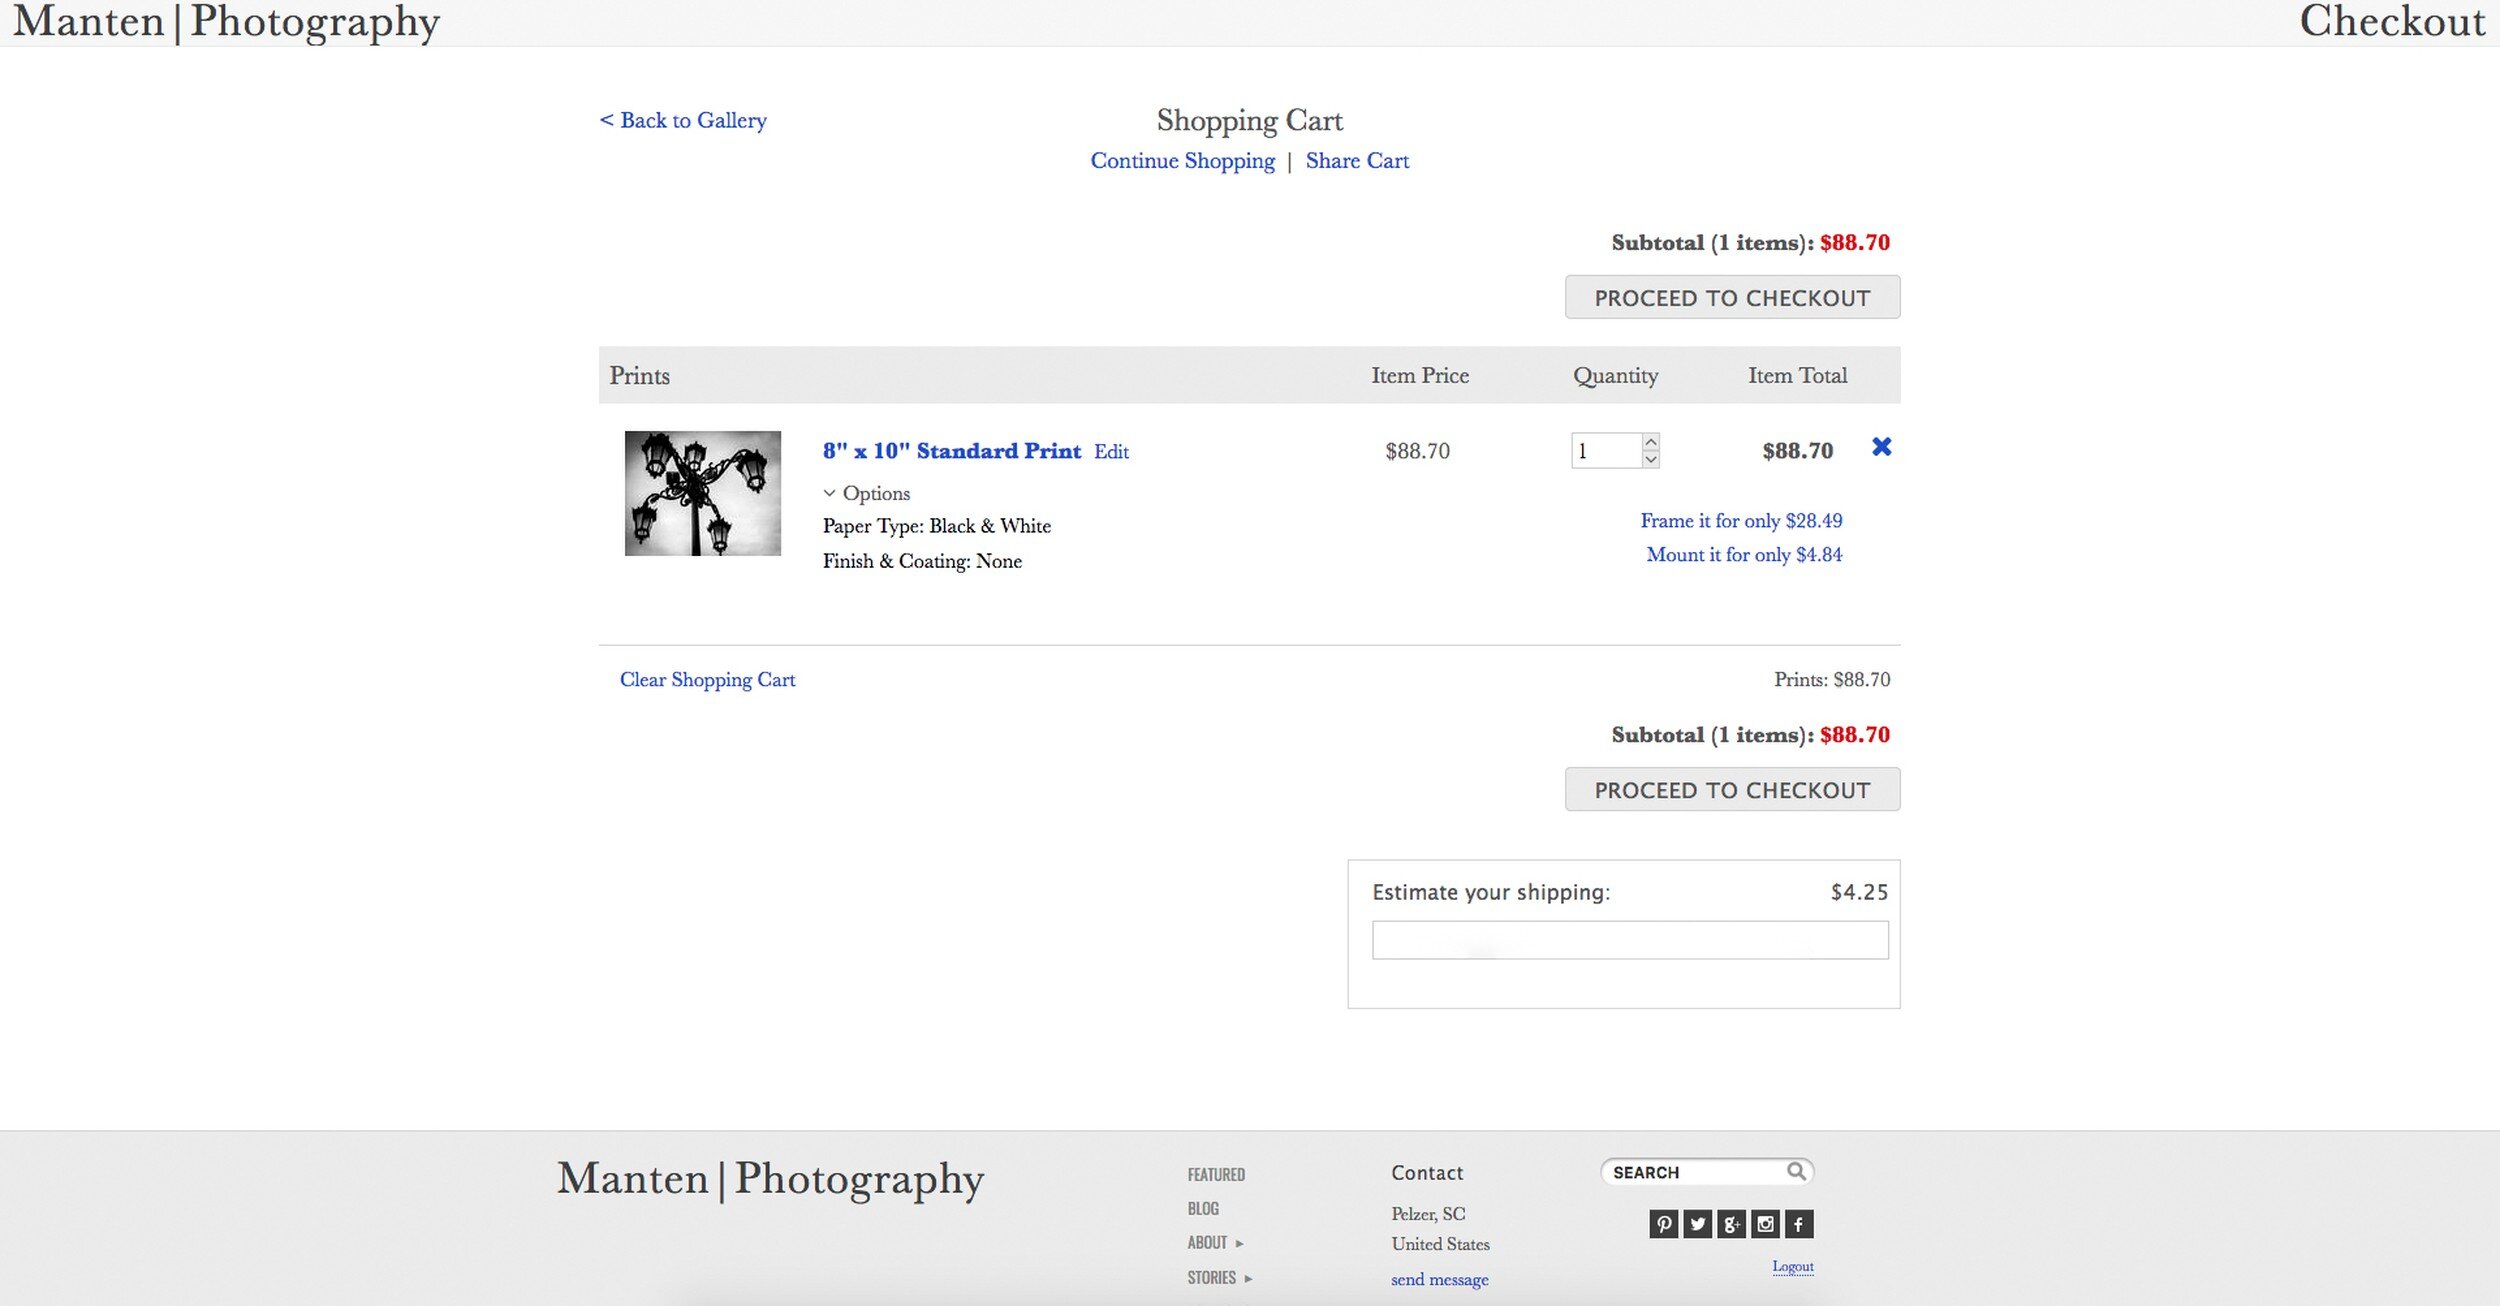
After creating a new account or signing in, you will be taken to your Shopping Cart. It shows the image(s) you selected to buy, the type of product (in this case 8"x10" Standard Print) with paper type and information on finishing and coating, the item prices, the quantity, and the total price. If you only want to buy a print, you can Proceed To Checkout.
But wait...there is more!
Clicking the blue 8"x10" Standard Print text on the screen above will take you an additional screen, providing options to add coating, a mat, and a frame and glass to your print. The additional cost for each item will be clearly displayed when selected.

Clicking the Preview butting at any time during this selection process provides a preview of the selected configuration, as shown below.

When you are happy with your selections, you press Escape to go back to the image in the configuration screen and then click Save to go back to your shopping cart. If you have selected multiple images, you can go through this process for each image.

Back to your shopping cart, you will see that the product information and item price for each image has been updated. Before you proceed to checkout, you will have the opportunity to estimate your shipping cost by entering your address in the appropriate area.

Clicking Proceed To Checkout will bring you to the following screen, where you can input your shipping details. Having completed those, you can click the Continue Checkout button.
Note that I expanded the view of my computer screen for the screen shot below to include the address bar:

This takes you to a screen where you can check the shipping address, and make a final selection for Overnight or Expedited shipping. Then click Continue Checkout.

We are almost there: on the next screen you will be asked to select a payment method: you can use a credit card you saved during a previous session, save a new credit card, or pay with PayPal. Note that this screen also shows the total amount (sales tax will need to be added for purchases in South Carolina), and the shipping address.
Clicking Continue Checkout on this page will take you to the last checkout page.

This page provides a total overview of the purchase, shipping address, and payment method. When you now click Place Order there is no going back, and your purchase is complete.

The last page you will be taken to is a Receipt of your purchase, which can be printed for your records. Now you can Continue Shopping, or go back to any other page on the site. You might be interested in reading the Blog or have a look at the Haiku, PicTales, or Essays pages. <back to top>

Packaging and Shipping
Now the waiting started...
I ordered my print on Monday 1 January, and received the package on Friday 5 January. Which I think is rather quick taking into consideration that 1 January is a public holiday, the image had to be printed, matted, and framed, and there were quite some snow storms and blizzards across the US interfering with shipping and deliveries in general.
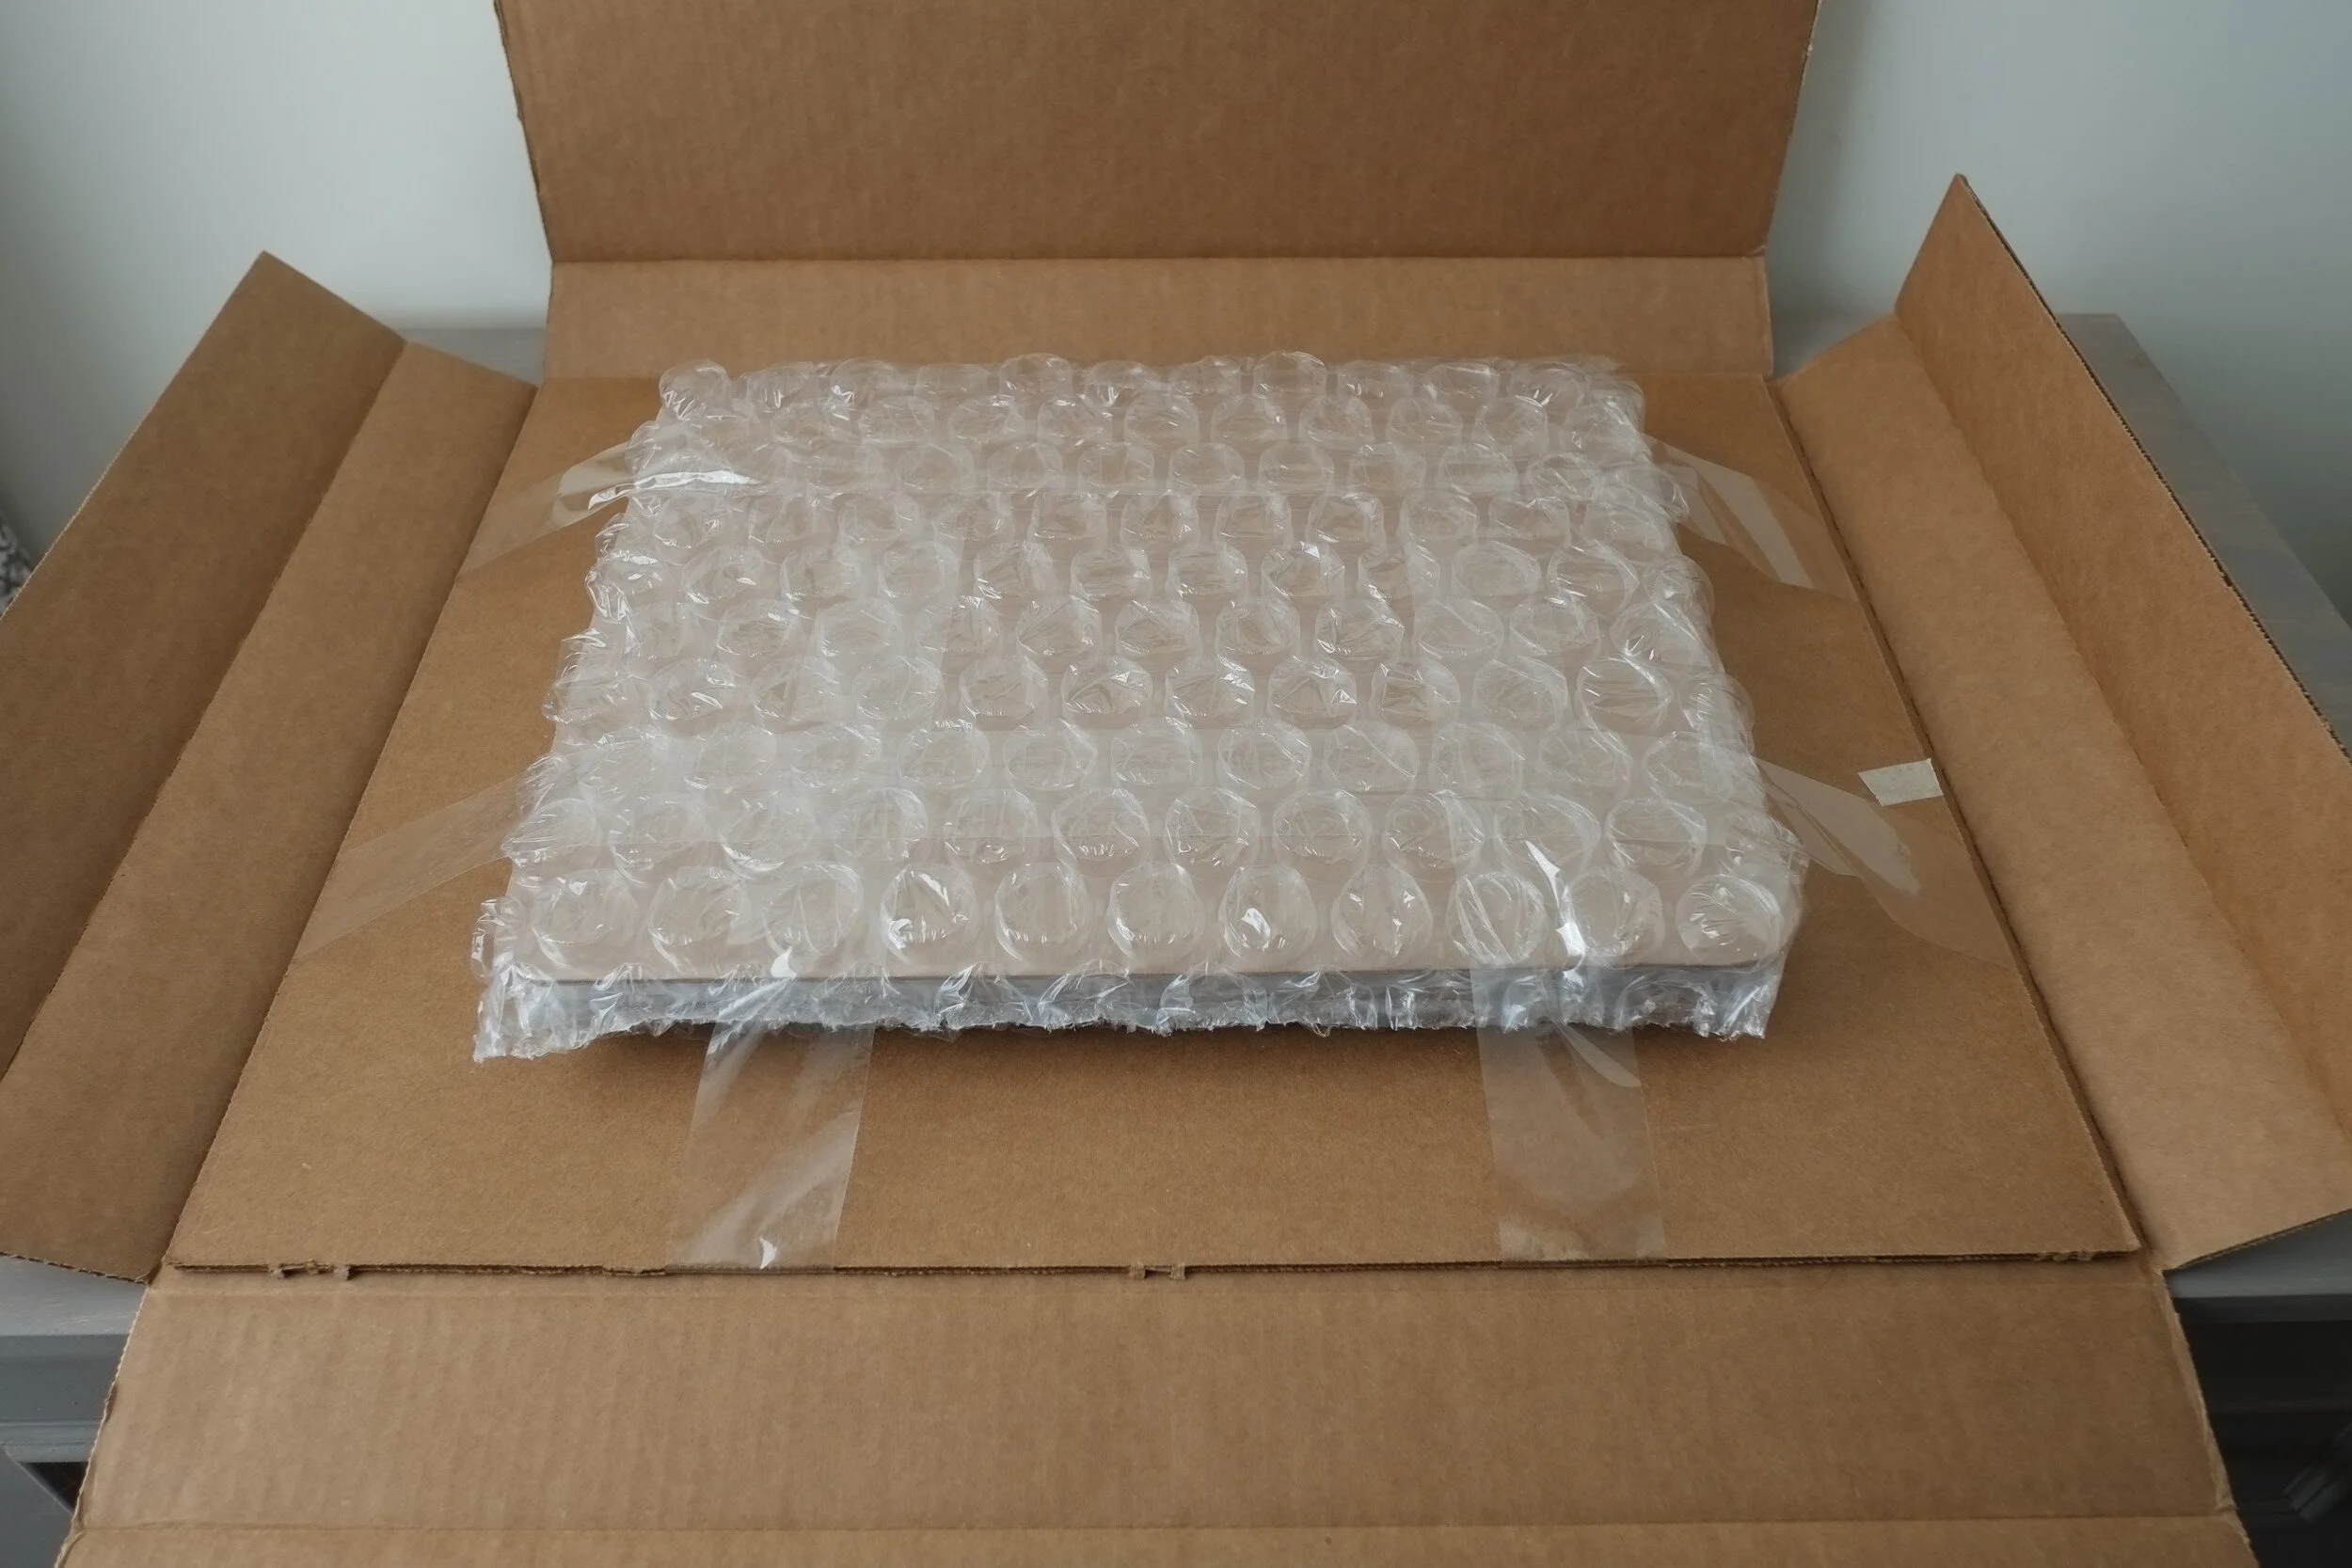
What I received was a sturdy cardboard box (see below), well taped, with sufficient indication that the contents are fragile.

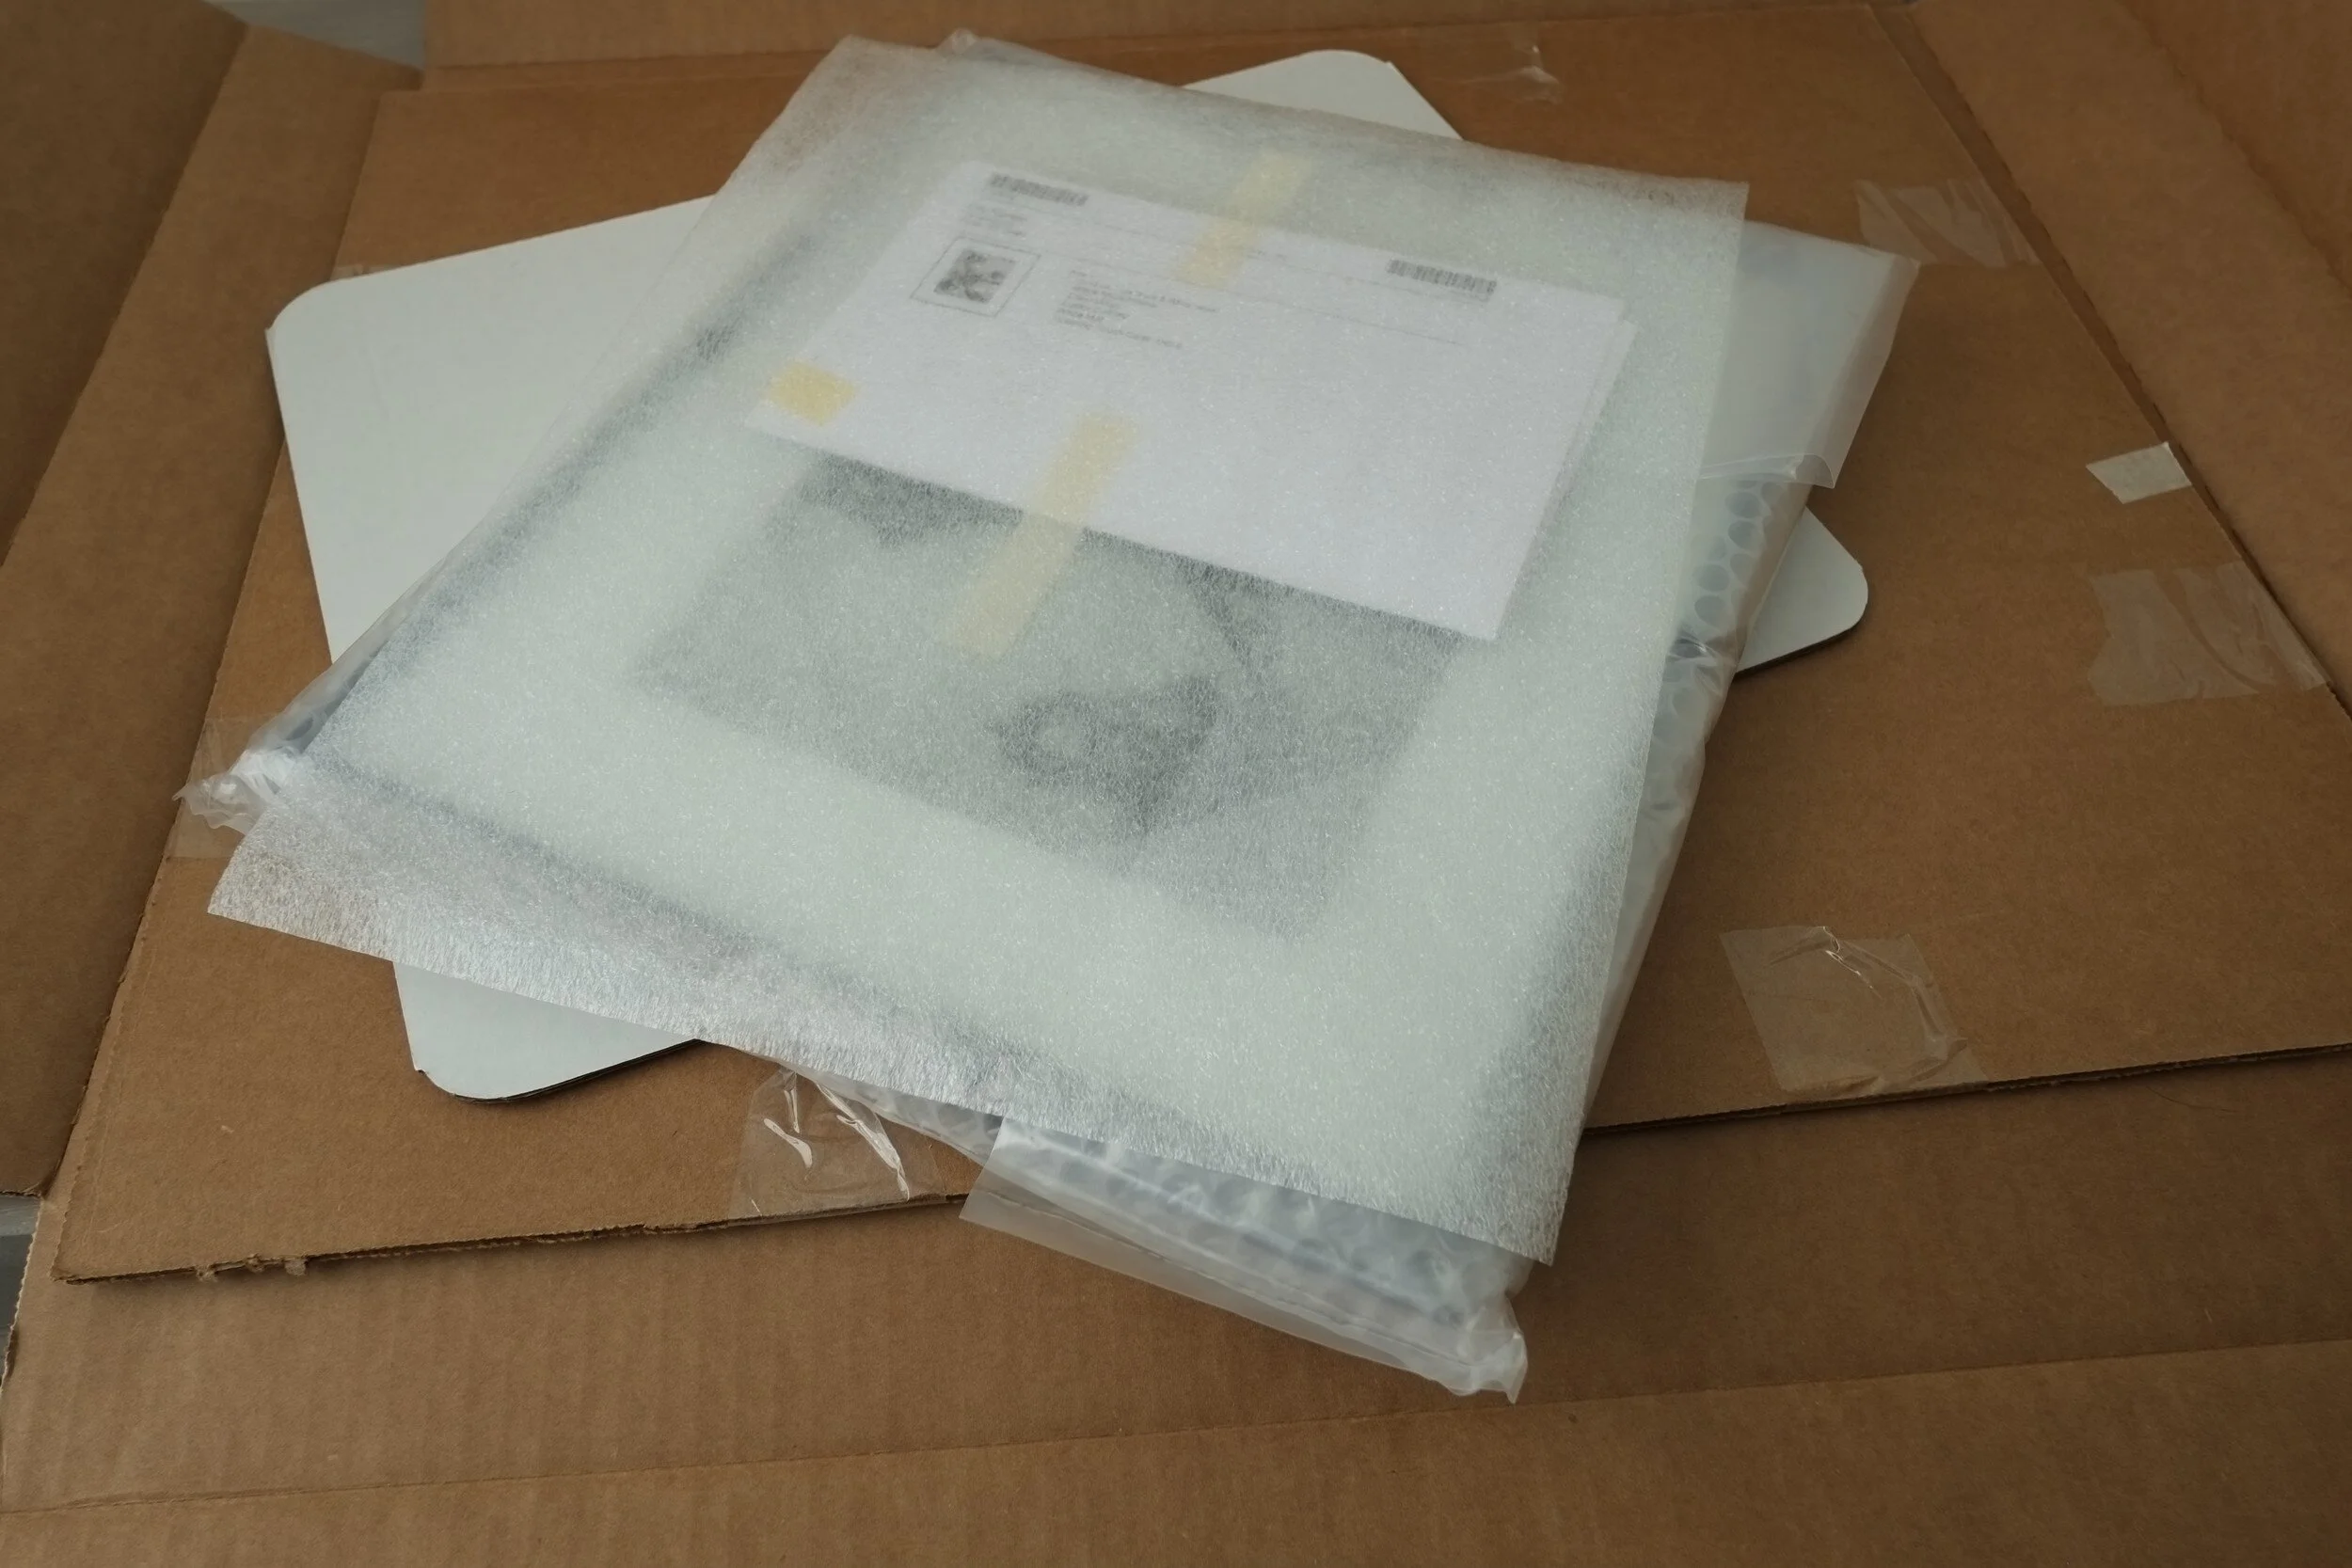
Inside the box, the package containing the actual framed print was sandwiched between and taped to two additional pieces of cardboard.

This is how it looked after removing one of the cardboard pieces.
Excitement started to grow, because I now could see the frame within the package. The whole bubble-wrapped content had been put inside a clear plastic bag. Removing the plastic bag revealed...more bubble-wrap, another cardboard sandwich, and a protective sheet of foam (the next couple image shows the unwrapping and cutting through several layers of packing materials).
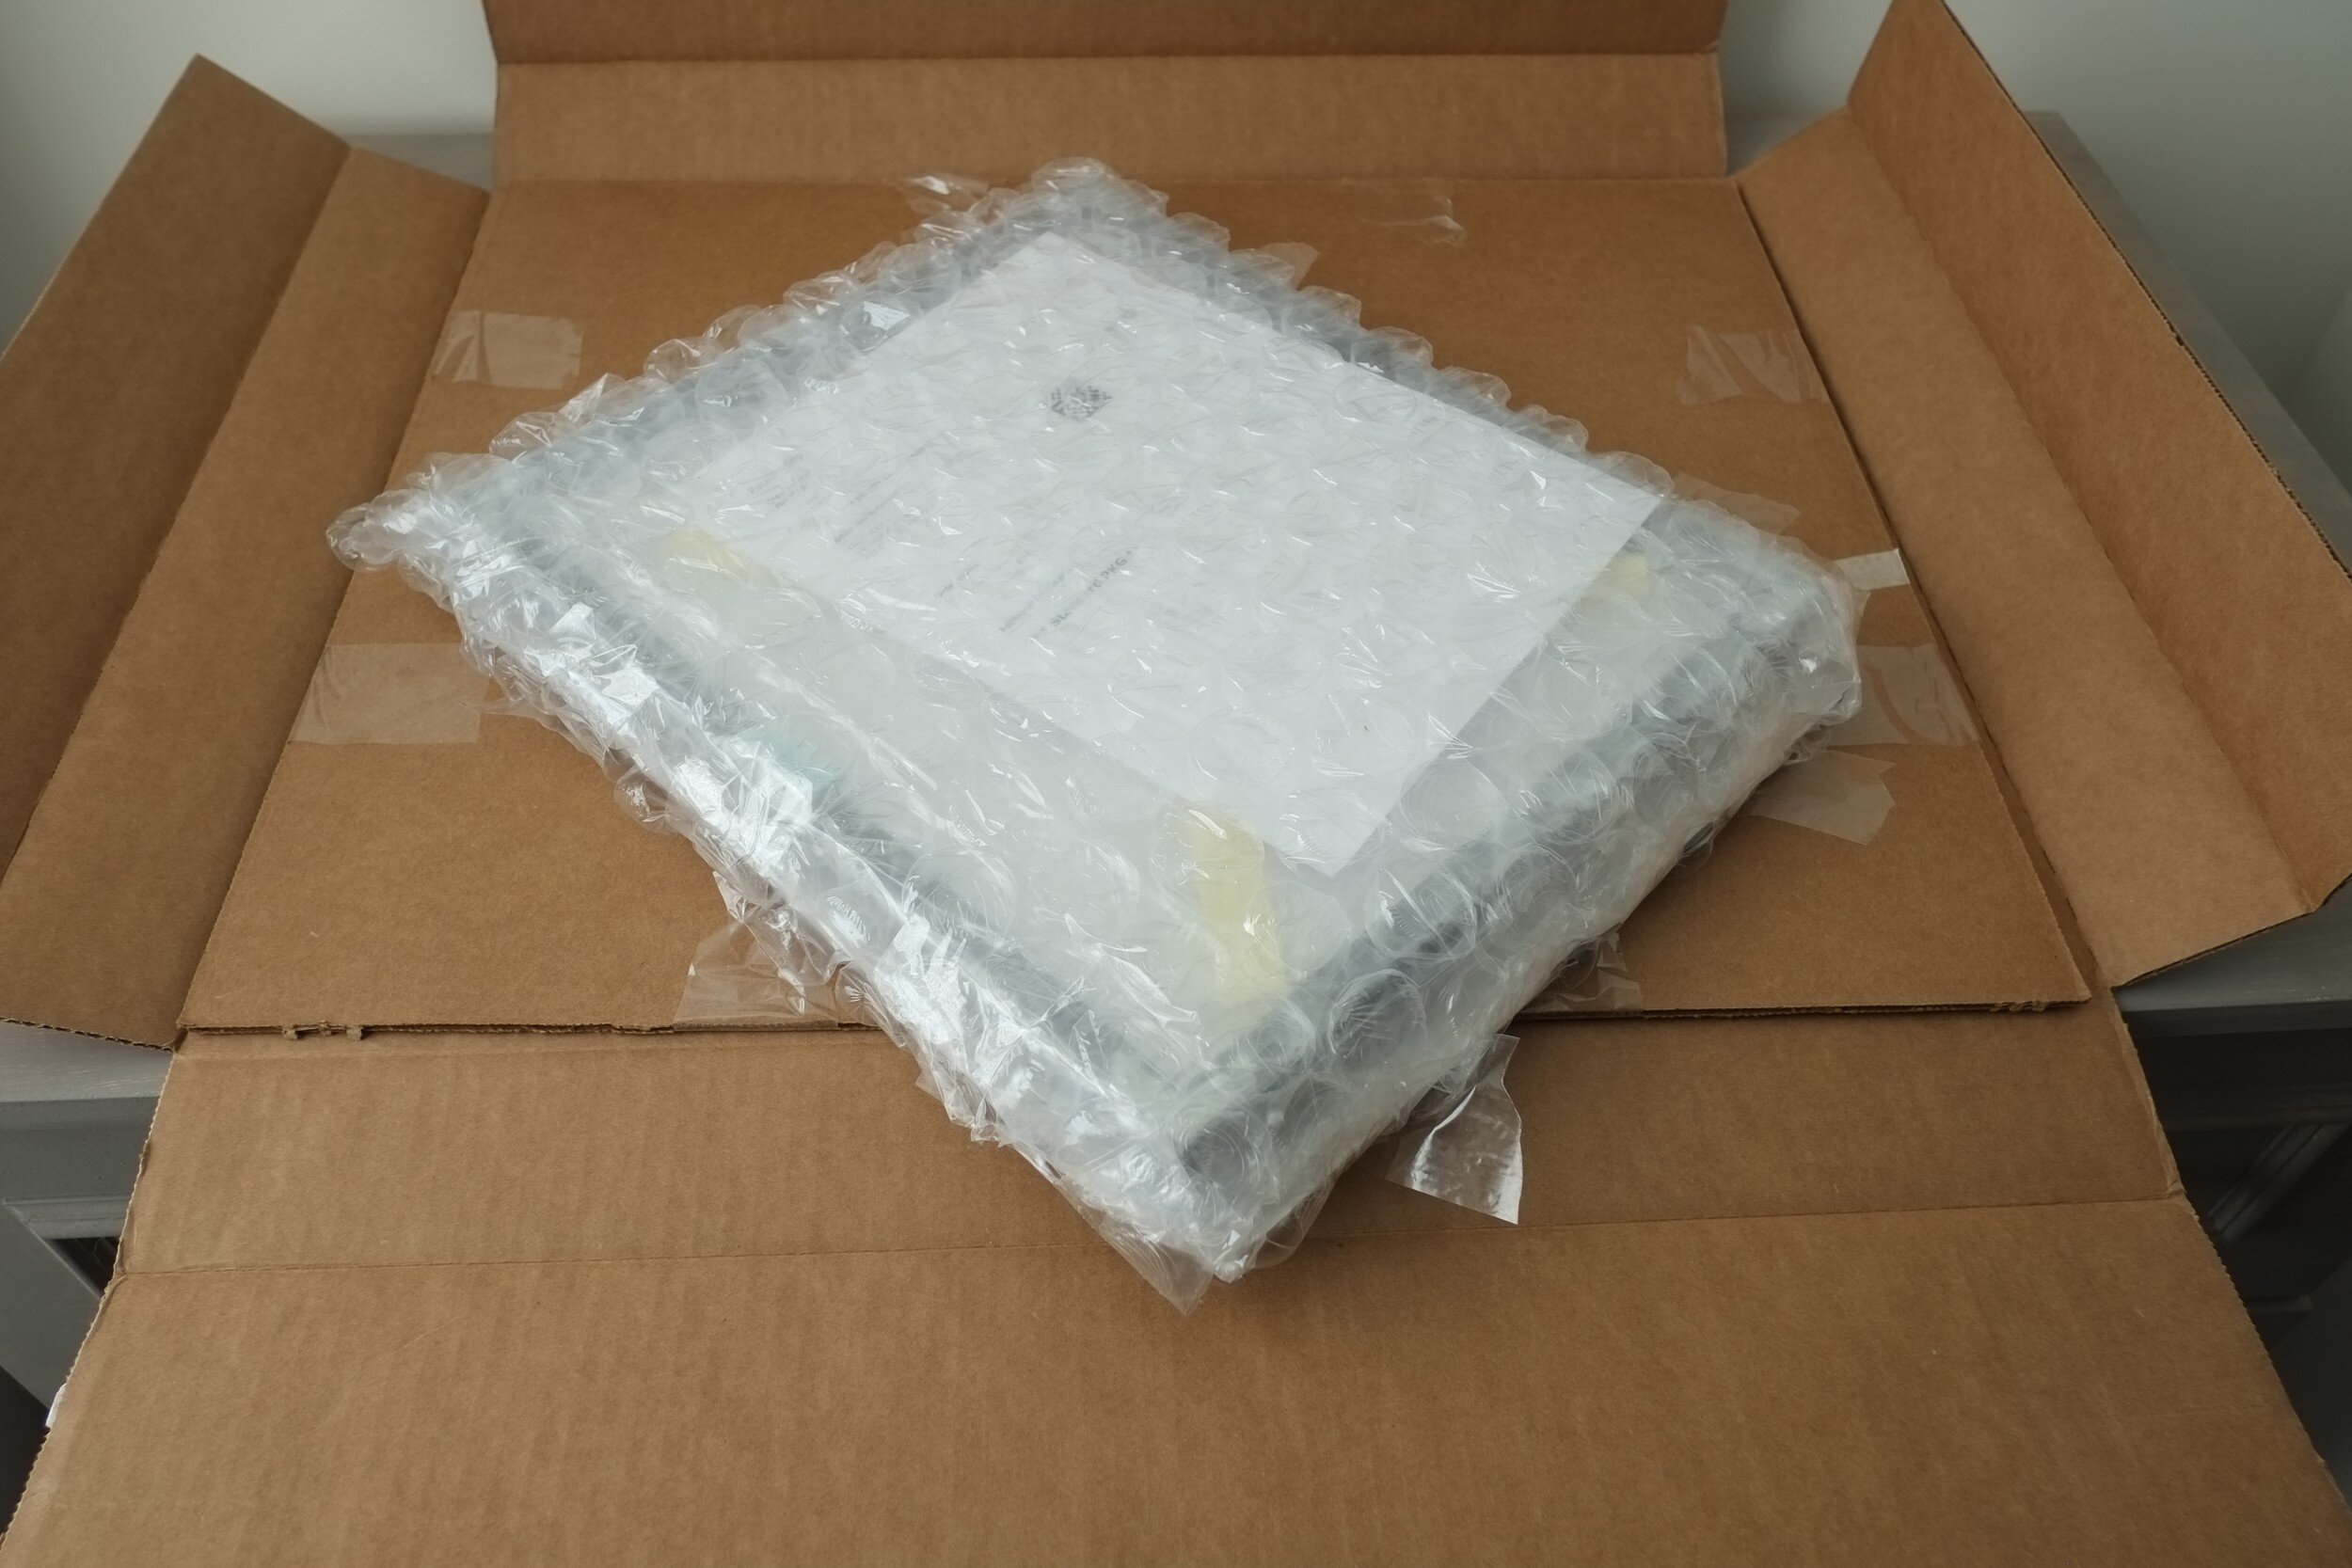
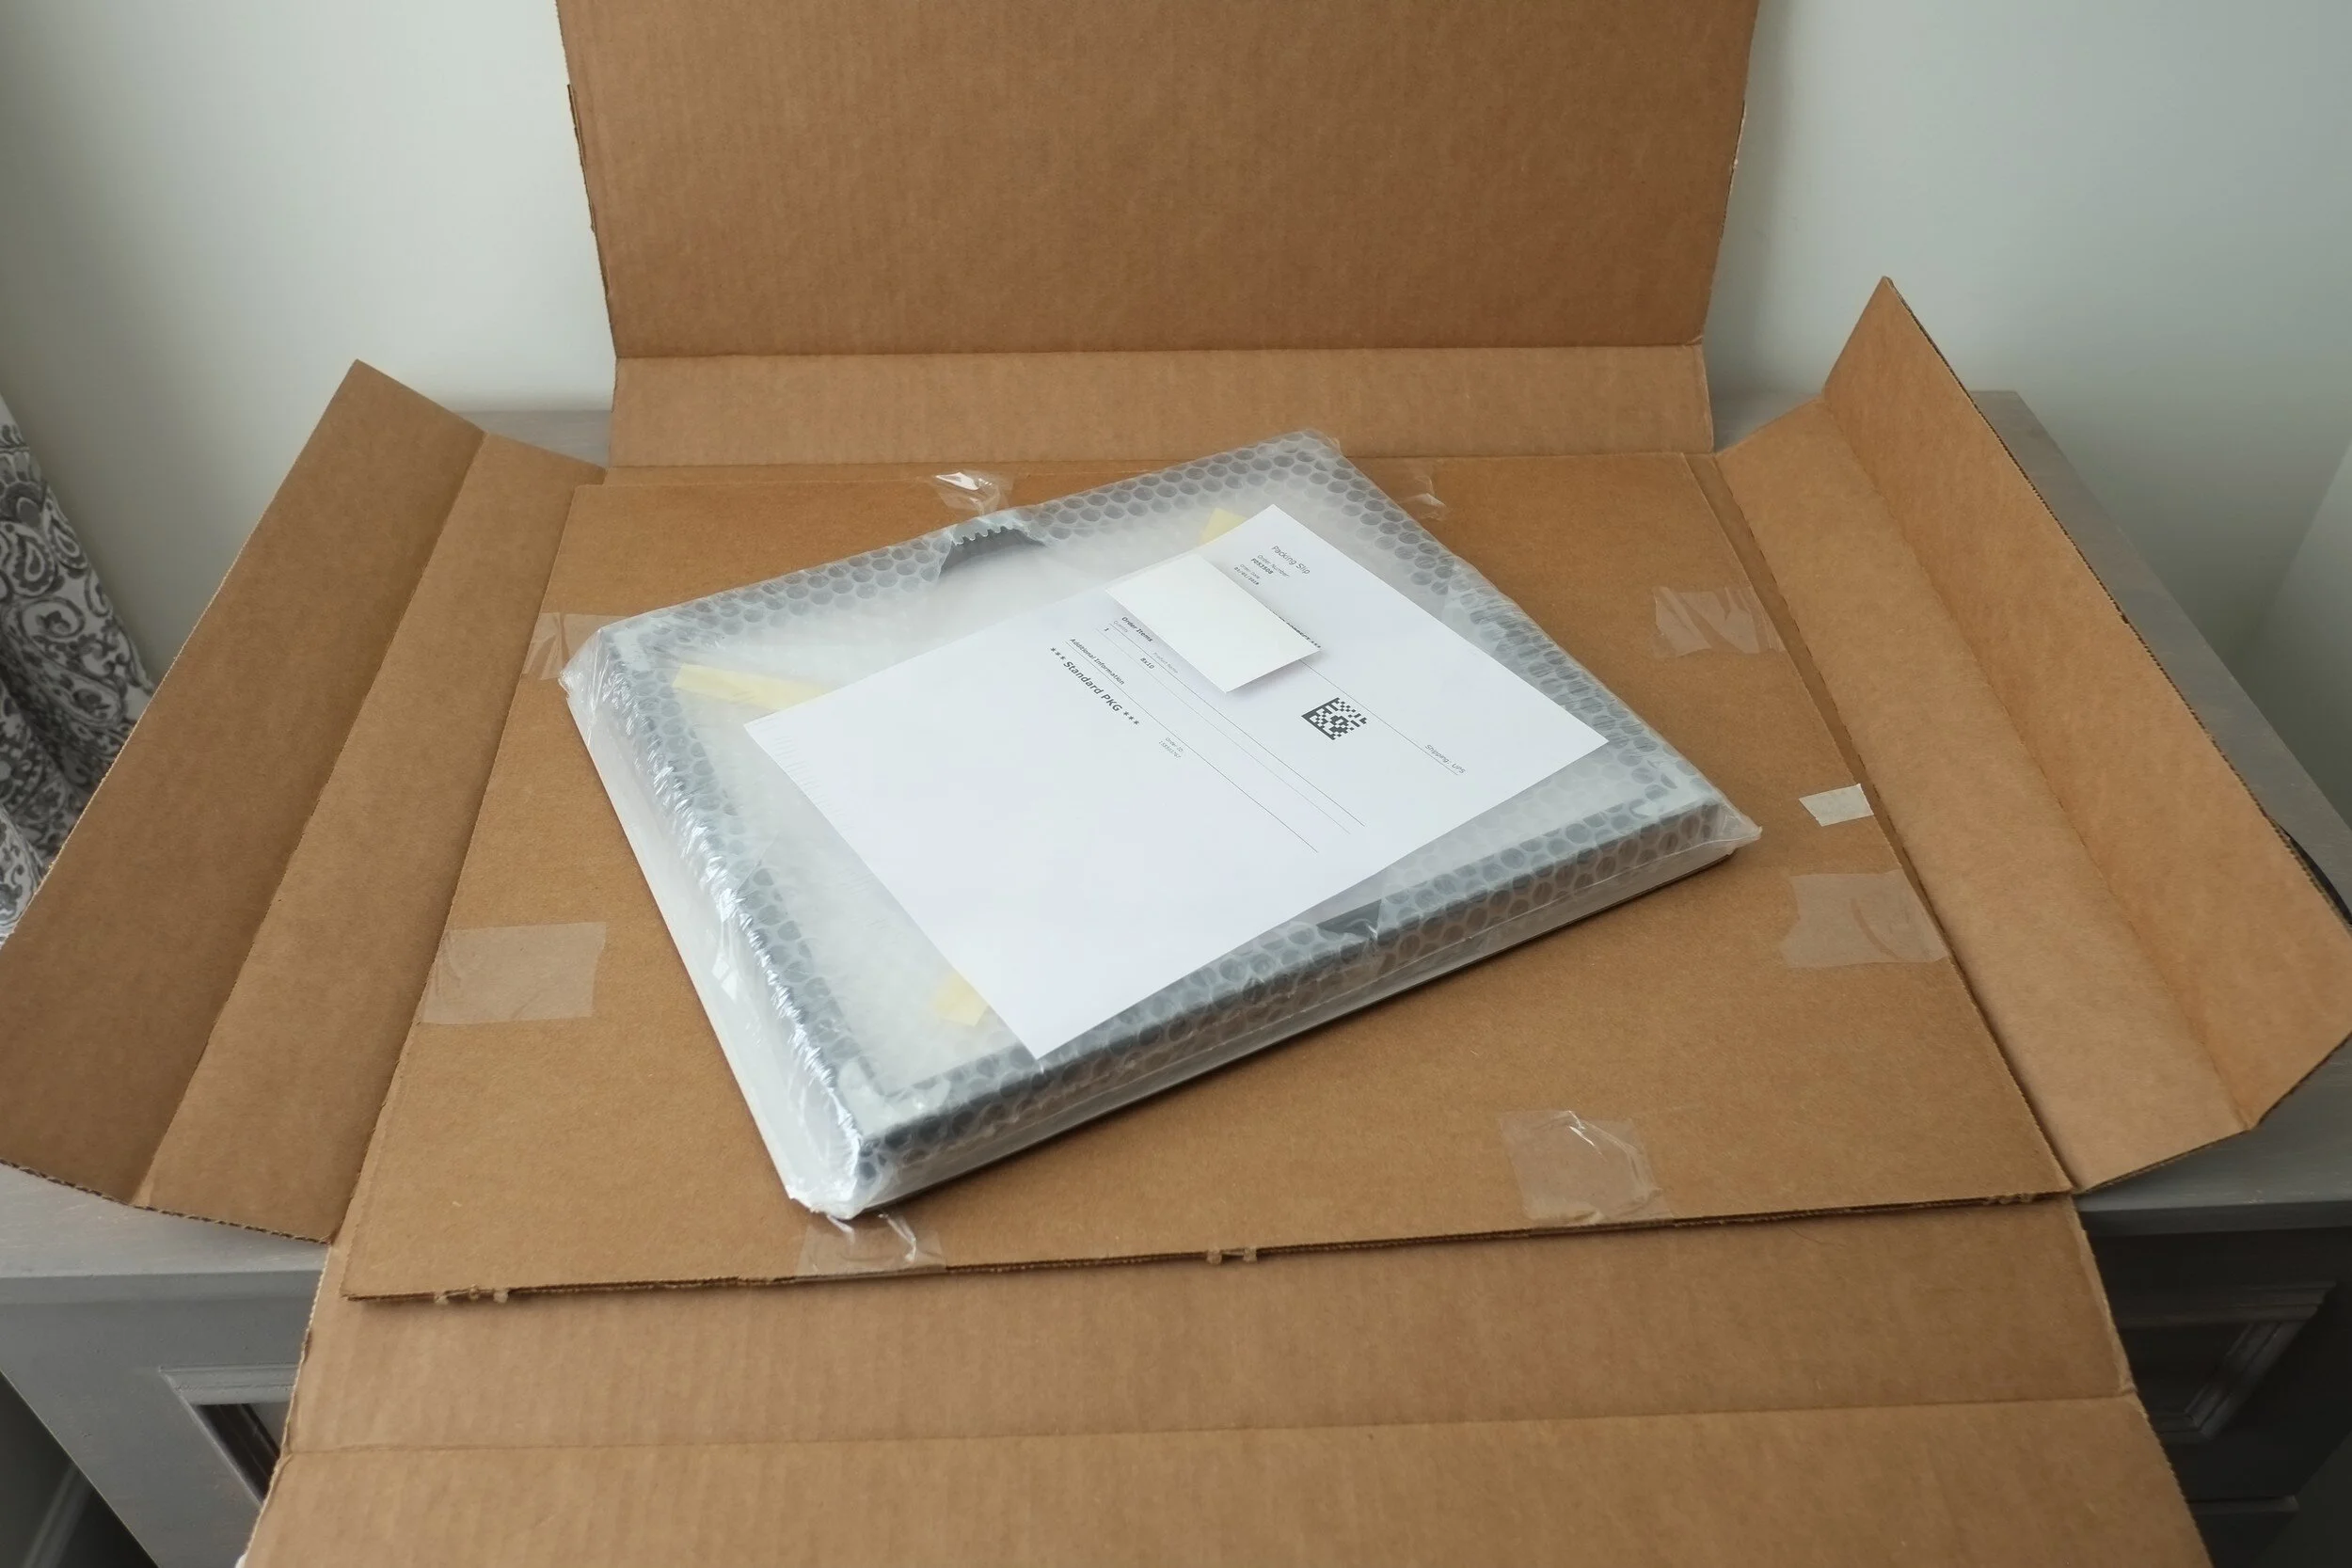
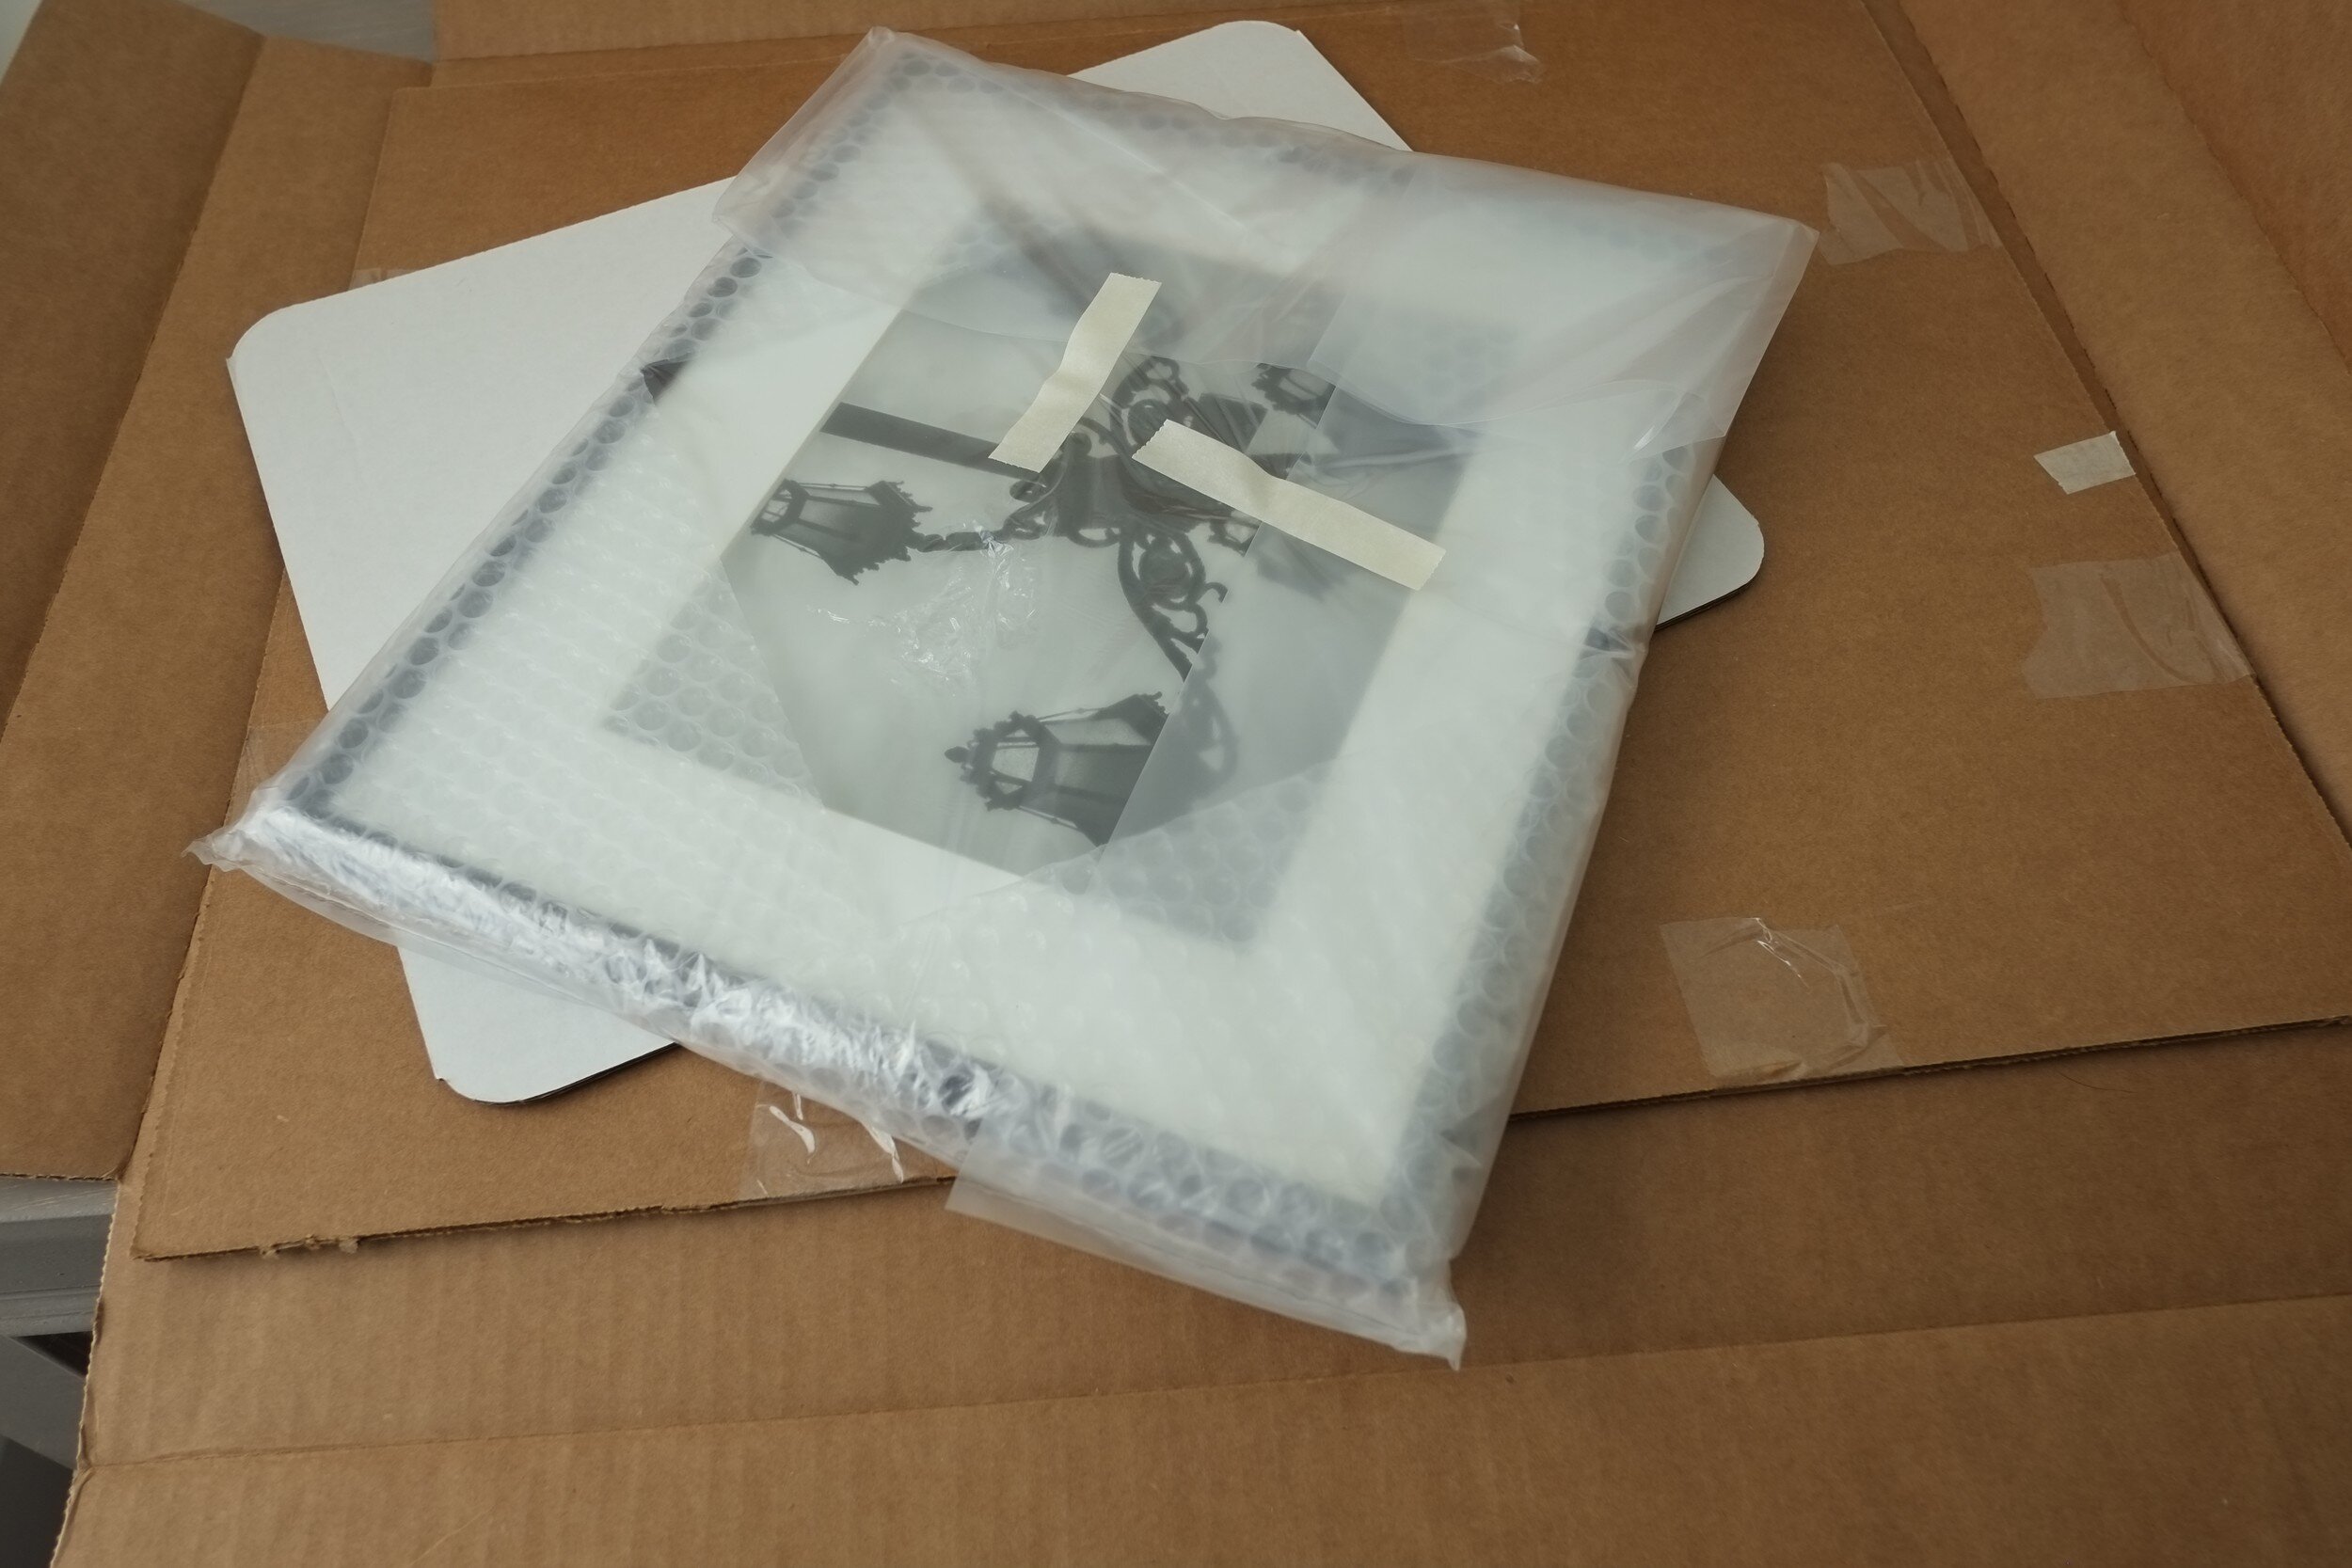
Almost done, notice the bubble-wrap corner protectors!


And finally...the framed print, ordered only four days ago! <back to top>

The Finished Product
I specifically selected a quite dark and moody image for this test, and I am very happy with the print quality. There is good tonality and contrast, and blacks and whites are well defined without loosing too much detail in the shadow areas.
The white photo mat is clean, with sharp beveled cuts. I noticed however that, although the print is 8"x10", the mat cut-out is slightly smaller at 7 3/8" x 9 3/8", leading to some cropping of the visible part of the print.
The glass is clean and without blemishes.
I selected the black metal frame, which to my opinion is always the best option to display fine art photography. It is of a good quality and to my surprise I noticed that the sides have some structure. This is almost not visible, but provides the frame a nicer feel and look. I like it very much.
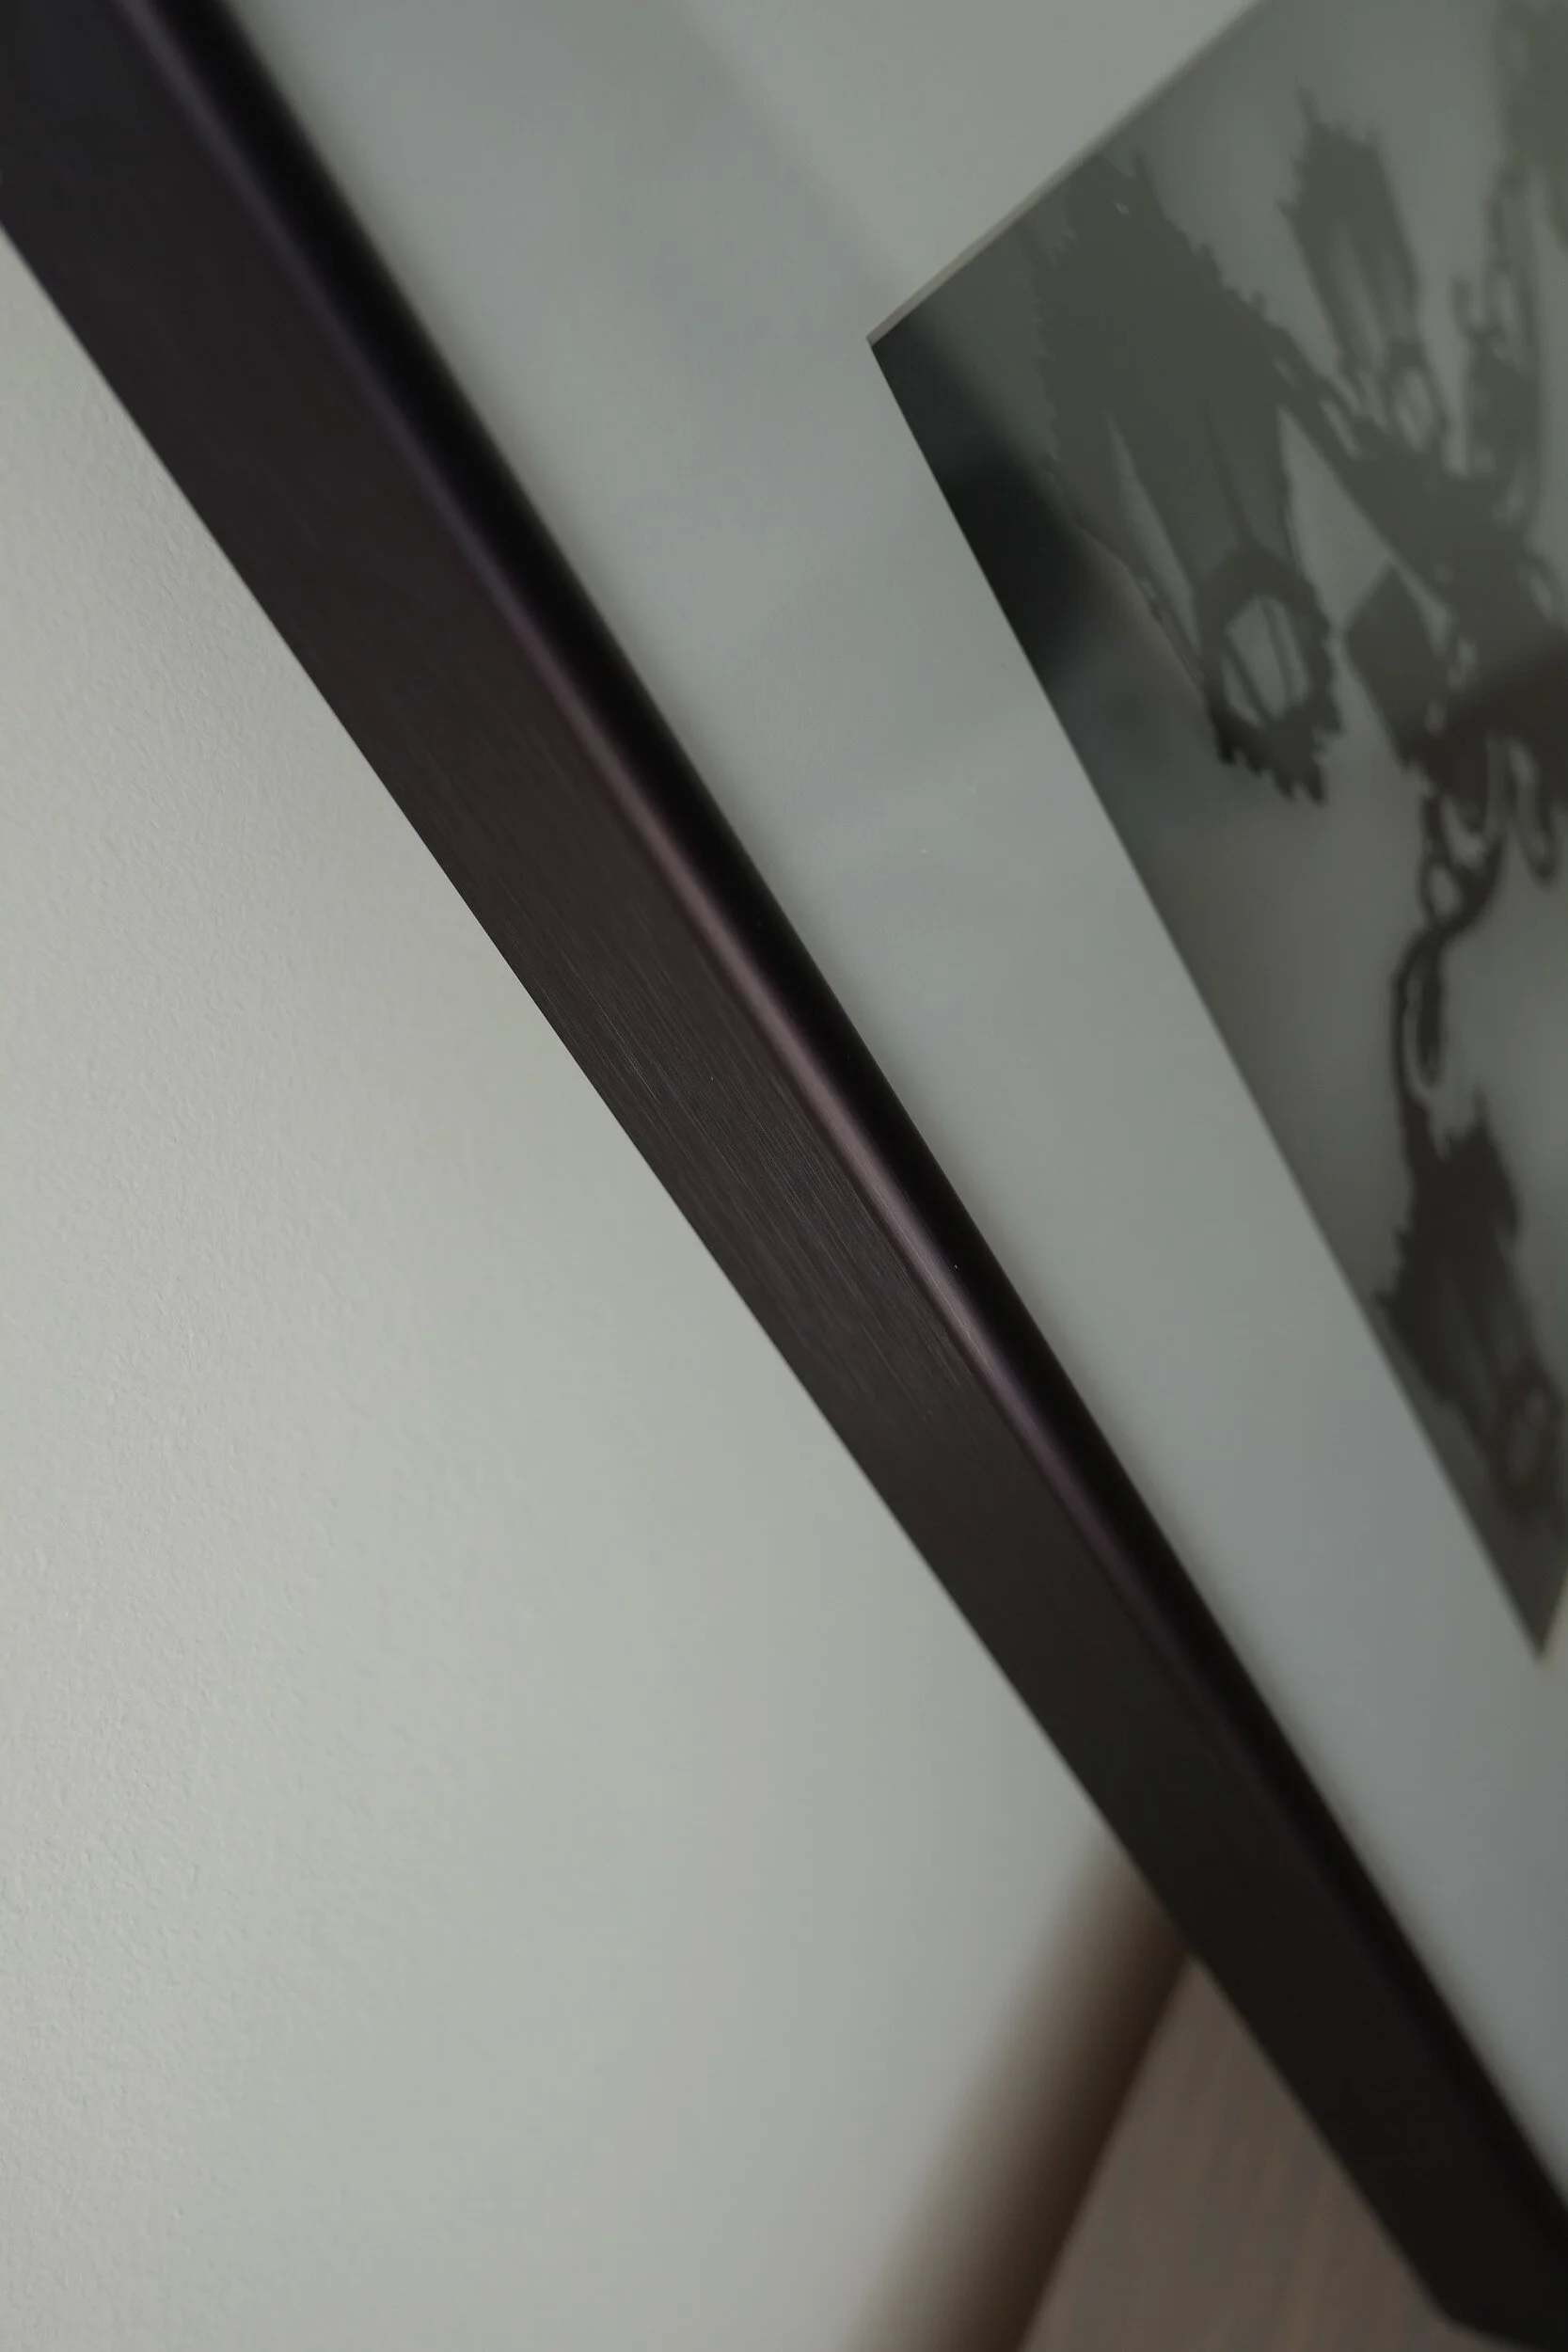
The back side of the frame has corner reinforcements, and hardware to easily mount it on a wall. I also noticed that it will be easy to add hardware for mounting the frame with a cable (as galleries might require). <back to top>

Conclusion
Bottom line: I am very pleased with the buying process and the finished product.
The buying process is easy, the Zenfolio program guides you through each step, you can always go back and make changes until you click the Place Order button.
I like how the program shows how changes you make (e.g. selecting a different kind of frame) impact the finished product.
Production and delivery times are quite fast, and actually exceeded my expectations.
Packaging is superb. The framed image is very well protected inside a sturdy cardboard box, with a sufficient amount of bubble wrap and foam to protect against any unforeseen rough handling by the shipping company.
The quality of the print is great, and the mat, frame and glass are of high quality materials and finish. As mentioned, when ordering the print the buyer should allow for some more cropping of the displayed image because of the mat cut-out size. <back to top>
I hope this test and review has been helpful for you. However, please do not hesitate to contact me if you have any questions regarding the buying process or any of the products.


2017 Year End Review And Looking Forward To 2018
What Has Been Accomplished in 2017 and What To Expect For 2018
2017 has been an exciting year for this site and blog, and I want to share with you what has been accomplished, and…
What Has Been Accomplished in 2017 and What To Expect For 2018
2017 has been an exciting year for this site and blog, and I want to share with you what has been accomplished, and what I will be focusing on in 2018.
First, however, I want to thank all subscribers to my blog, and followers on Instagram, Facebook, and Twitter. It is great to connect with you all, having an audience, and getting feedback on my images and blog posts. You are the reason I continue pushing myself, and to publish, even when it is challenging to come up with new ideas and images.

2017 Review and Accomplishments
I started with this Zenfolio site in August 2013, not really knowing what to expect, how this would develop, and if I would like it. Looking back, especially to 2017, I realize that keeping this website and blog up helps me to focus on the quality of my images and finding my artistic voice and style.
2017 actually was the first year that I really committed to the site and the blog, and I learned a lot in the process. Publishing a blog every week is a challenge, and in the process, I have built a huge respect for people who are able to publish multiple posts every week. I however also learned that it is a lot of fun and that it provides a great feeling of accomplishment.
Working with Zenfolio has its challenges, but there is a lot to discover and learn, and once it was set up to my liking, the site is quite easy to maintain and expand. Although a Zenfolio site cannot be customized to the same extent as for example a WordPress based site, there are still a lot of opportunities to change pages and layouts. Some of these changes can be accomplished with Zenfolio's built-in tools, and I am also learning quite a lot about coding in the process.
My blogging goal for 2017 was to publish a post every week, and looking back I am happy (and proud!) to see that I accomplished this for 50 of the 52 weeks; I missed only 2 weeks!
2017 also was the year I started publishing my PicTales, Haiku, and Essays on the blog.
The blog posts published in 2017 include:
>19 PicTales;
>12 Haiku;
>5 Essays.
The 14 remaining posts are about topics I hope you, my audience, appreciate because they provide information about my photographic approach, interior design, and other photography related topics like book reviews.
The above means that 74% of my current total of 68 blog posts has been published in 2017; only 18 posts being published from 2013 through 2016.
Working on this site and blogging was not only fun to do, and rewarding because it connected me with you, my audience; it also has helped me to grow artistically and move ahead in my photographic journey. I really got hooked on telling stories and on medium format film photography. I also have become more critical of my own work, which led to a major review and culling of images on my site when I had to re-publish all images in October.

What To Expect In 2018
Looking back to what I accomplished and learned in 2017 provided me with some good thoughts and goals for 2018:
Digital photography definitely will continue to be part of my work: I am a mixed medium photographer and I appreciate the benefits of both digital and film photography. One of the challenges I have set for 2018 is to work in 4:5, 1:1, and 1:2 aspect ratios for digital work. Creating images with 1:1 and 1:2 aspect ratios will be relatively easy because I can select these aspect ratios in the Electronic and Optical Viewfinders (EVF and OVF) of my Fujifilm X-Pro 1. The 4:5 aspect ratio, which is actually my favorite one, will, however, be more challenging to achieve since this is not an EVF/OVF option on the X-Pro 1. I probably will need to work with the grid overlays in the finders to make the right compositions for cropping.
I want to expand my film photography and start my own developing. Although I will continue to work with a photo lab (I can recommend Richard's Photo Lab and The Find Lab) I want to experience the fun and learn from developing my own negatives. Traditional silver halide printing of images then will be something for the future.
Looking back to 2017 I realized that quite a lot of the stories I published were based on existing, older work. For 2018 I definitely need to produce more new work for my blog posts and portfolio.
I very much enjoyed creating and publishing the PicTales and Haiku, and these will continue to be part of my work. I, however, want to find a better balance between Essays and Editorial work, which probably will lead to creating more documentary type images. This actually makes me wonder if there actually is a thing like "fine art documentary". Maybe a topic for a blog post!
To get more feedback on the quality of my images, and also just for the fun of it, I am going to submit on a regular basis to Calls for Entries and Contests. This also will provide me feedback regarding the marketing of my images.
Talking about marketing and sales; starting 2018 I will provide several diversified opportunities to purchase prints of my images: I will offer open editions via Zenfolio for all images, limited editions of selected images via one of the major artists sites, and "on request" limited editions for all images when potential buyers would like to purchase prints in specific sizes and/or mediums. I am in the process of arranging this all, so stay tuned (subscribe to the blog!) for announcements on how to purchase prints.
My final goal for 2018 is to start at least two major, long-term, photography projects. I have compiled a long list of possible projects I would like to work on, and I am going to select at least two for 2018. In addition to the final results, I will regularly share progress and images on the blog. Another reason to subscribe!
So a lot to start and accomplish next year. I am looking forward to working on all these projects and sharing new stories and projects with you.
I wish you all a great, exciting, and successful 2018, and thank you again for subscribing (and if you haven't, you still can do below) and following. 2018 will be another exciting year with new developments for my photography, website, and blog.
Eric
Winter Arrived
Winter Arrived
All is still…
Winter Arrived
All is still.
Waiting, confident;
Preparing for rebirth.

Lakes turned into mirrors
Black glass reflecting the old.
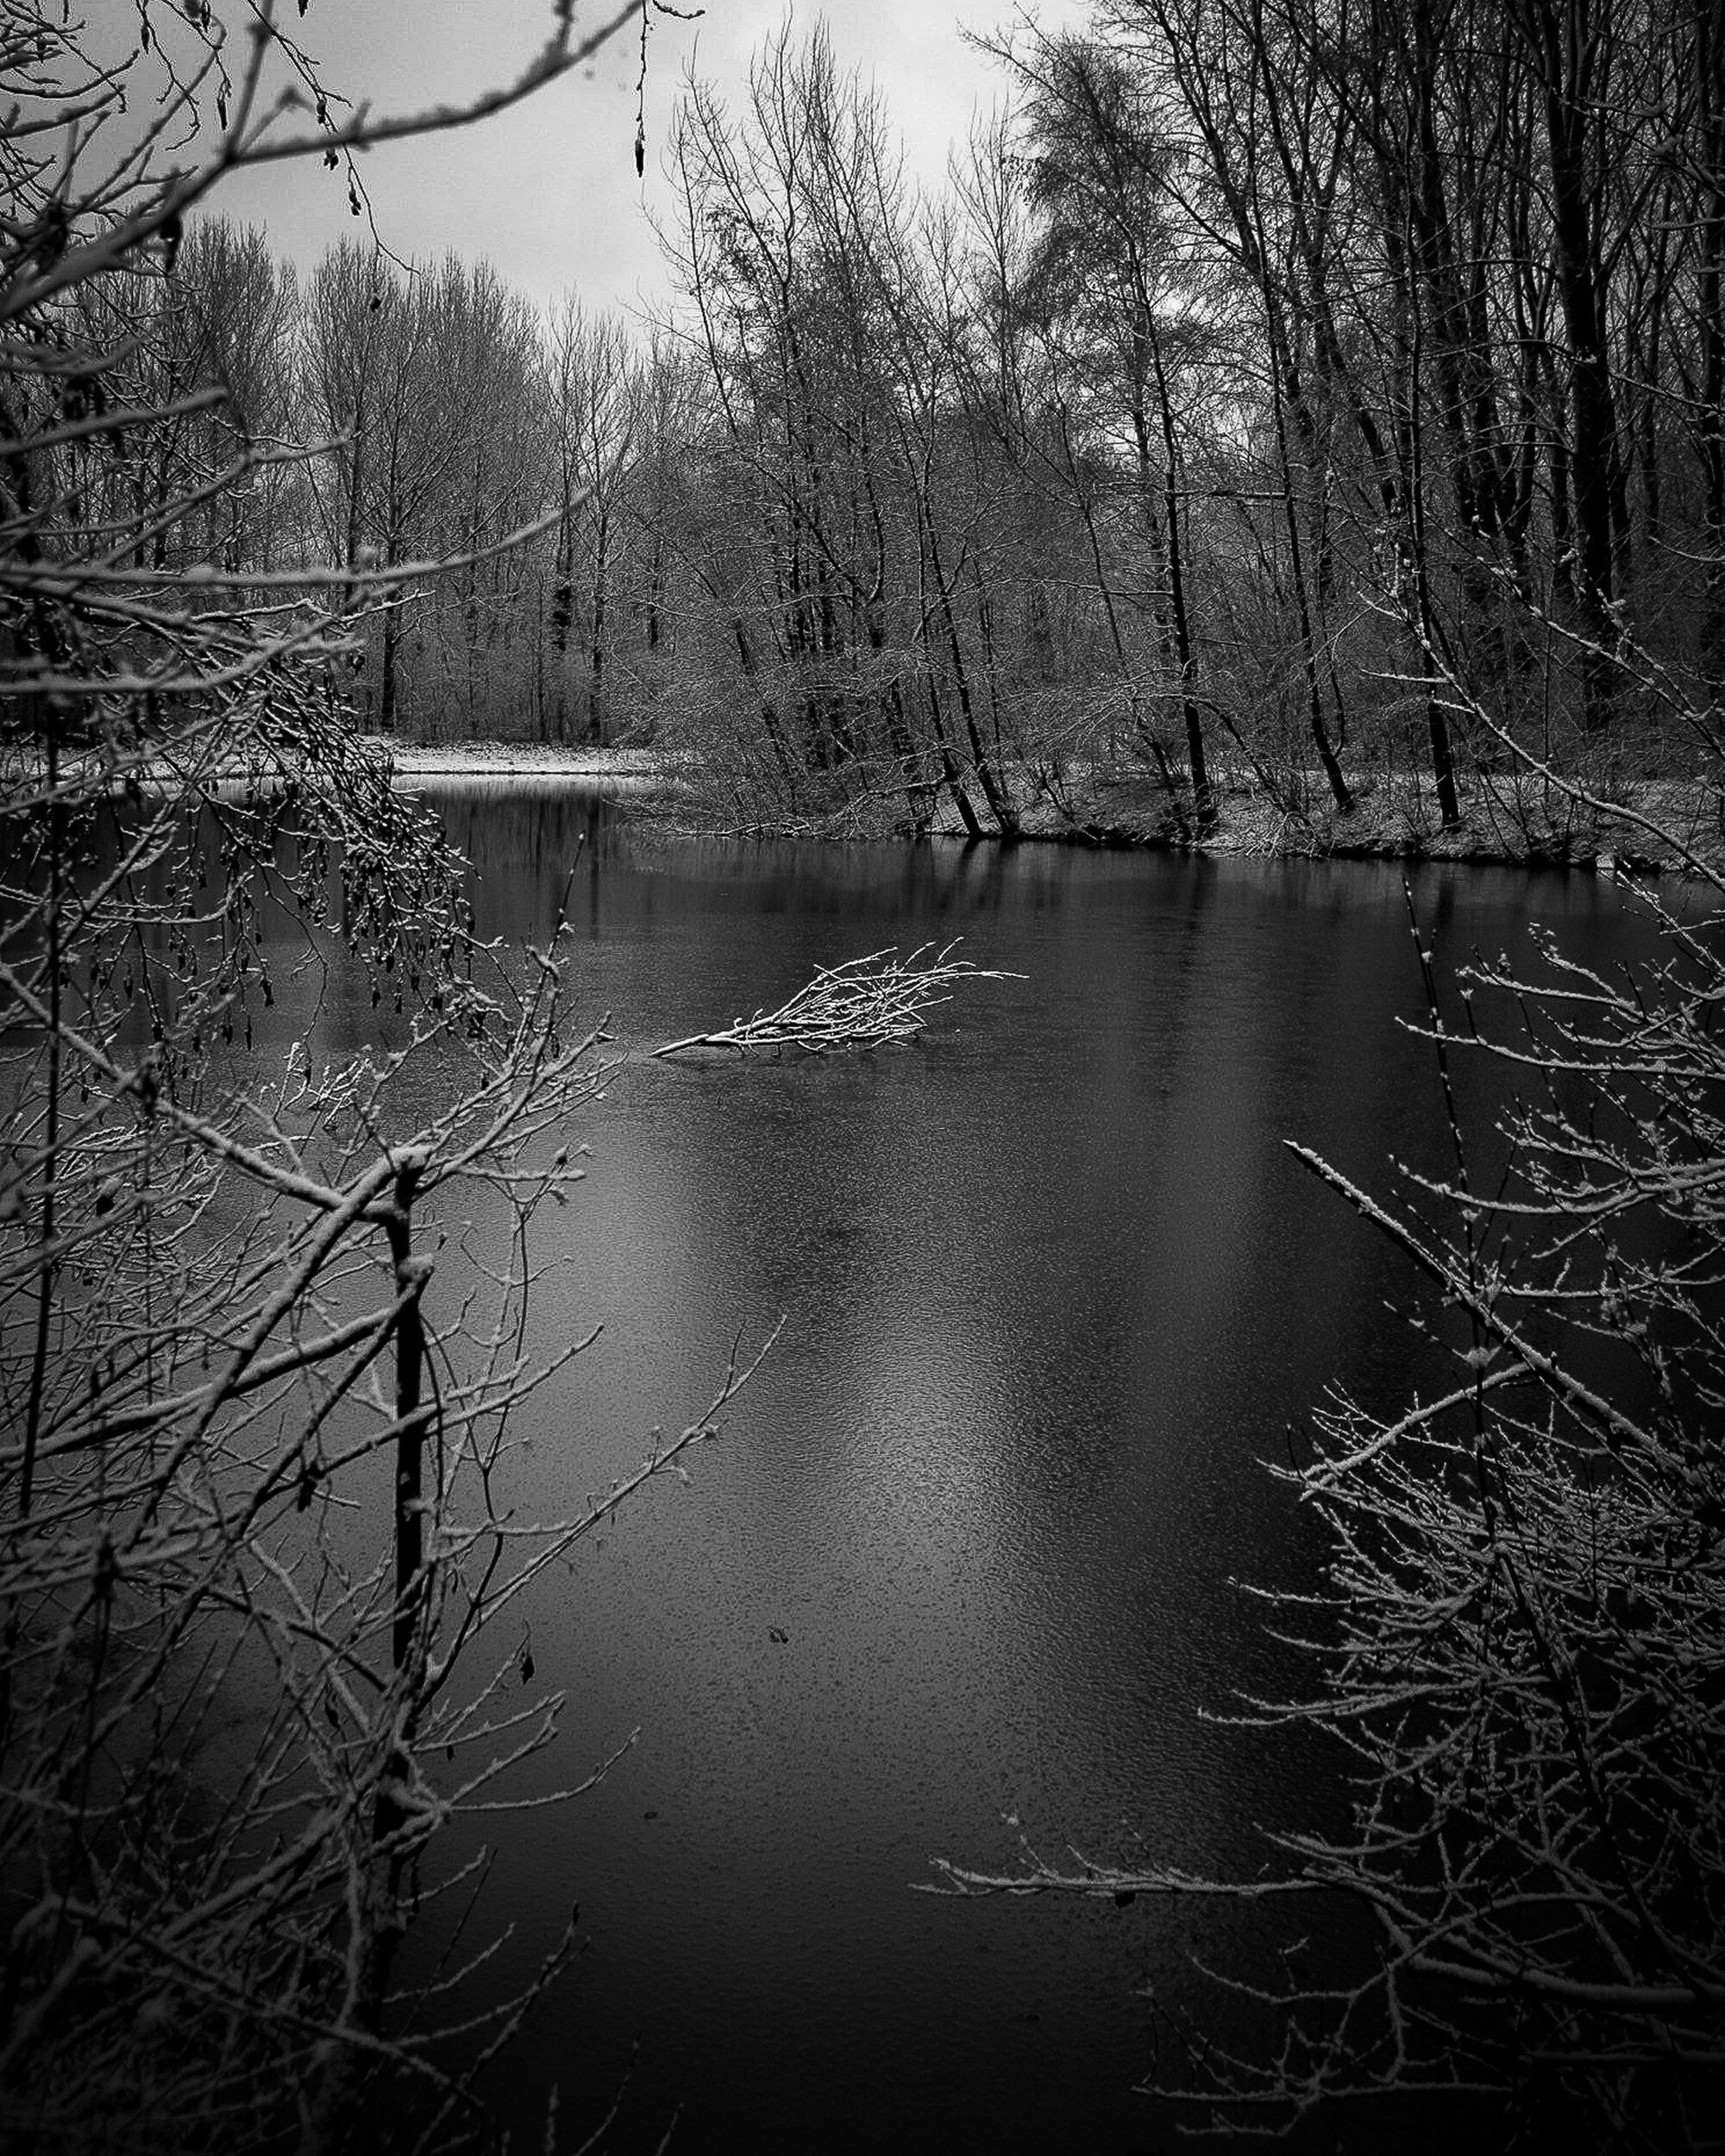
Trees contemplating their coming transformation,
Branches adorned with glistening diamonds;
One last party, closing the season.

Nature covered in purifying white - Kyōkatabira

The Best Way To Update Your Interior With The Color Of The Year 2018
Use Images With Ultra Violet, The 2018 Pantone Color of the Year, To Update Your Interior
Earlier this month Pantone unveiled their 2018 Color of the Year: Ultra Violet. This will be a color much used next…
Use Images With Ultra Violet, The 2018 Pantone Color of the Year, To Update Your Interior

Earlier this month Pantone unveiled their 2018 Color of the Year: Ultra Violet. This will be a color much used next year by interior designers, graphic designers, other visual artists, and manufacturers to meet the latest color trends for interiors, furniture, accents, fashion, packaging, and much, much more.
In this article, I will share some tips and tricks on how to update your interior with this color, and how to use images with Ultra Violet as a trendy asset for your home or office.
About Pantone and the Pantone Color of the Year
Who or what is Pantone?
Most people know Pantone from the colorful Pantone Guides: the fans of sheets with color swatches that designers, painters, product developers, and basically any individual who wants to do something with color uses to "color match" specific colors.
Pantone is a wholly-owned subsidiary of X-Rite, Inc., and a provider of professional color language standards and digital solutions. Pantone services clients around the world through three business divisions: Pantone Standards, the Pantone Color Institute, and Pantone Lifestyle.
What is the Color Of The Year?
The Pantone Color Institute annually declares a particular color "Color of the Year" based on color trends, color studies, and the input from color professionals. Each Color of the Year is considered a significant color direction for products. As such, the Color of the Year impacts every industry: luxury brands, furniture, accessories, automotive; basically all fields of art, design, and manufacturing.
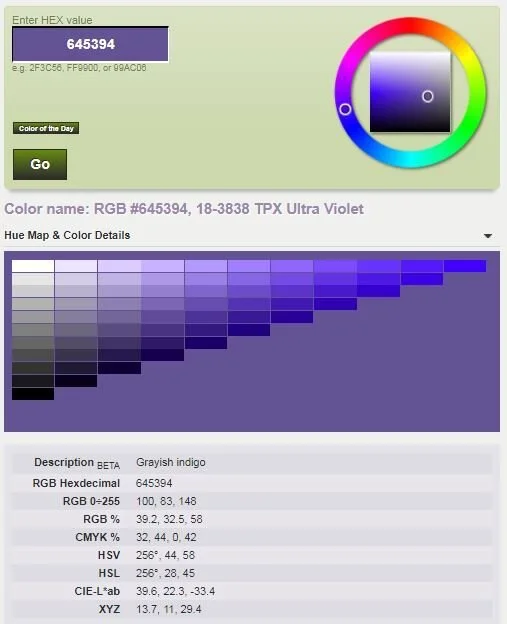
Ultra Violet 18-3838
The Pantone Color of the Year 2018 is Ultra Violet (not to be mixed up with ultraviolet, which is a specific wave length in the light spectrum). Pantone defines Ultra Violet as a dramatically provocative and thoughtful purple shade, communicating originality, ingenuity, and visionary thinking that points us toward the future.
How to match Ultra Violet in RBG, CMYK, and other color models
Pantone Colors are important to artists, designers, and manufacturers because they are part of a standardized color matching system. Each individual color swatch in those nice fans has a unique reference number. As a result, individuals in different locations can reference a Pantone numbered color and be assured that their counterparts understand exactly what colors they are referring to without further explanation or directions needed.
It can be a challenge of course when the artist or designer uses a different program, or works in a different color model than Pantone. Printers for example usually work with the CMYK (Cyan, Magenta, Yellow, Key) model, while photographers and web artists usually work in an RGB (Red, Green, Blue) model. Fortunately there are companies who solved this problem and provide color code conversion tools like this one.
How to use Ultra Violet in interiors
Now that you know what the 2018 Color of the Year is, you can apply several techniques to update your interior with this new color:
Walls:
You can go big and bold, and color your walls Ultra Violet. This will make a dramatic statement and will look great when you for example apply it to one wall. You can achieve this by painting the whole wall, or use stencils or wall paper to apply patterns in Ultra Violet.
Furniture:
A second way to update your interior with the 2018 Color of the Year is to use furniture. A chair, sofa, or cabinet in Ultra Violet definitely will create a focal point in your interior.
Accents:
Finally, and probably less expensive than the other two options, you can work with accents to update your interior with the 2018 Color of the Year. Some strategically placed Ultra Violet cushions and pillows, some ornaments with that color, even some purple flowers will help you create a contemporary styled interior that matches the latest color trend. And of course, after all this is a photography blog, you can use photographs.
Photos with Ultra Violet
When you consider updating your interior with photos and the color Ultra Violet, you have several options available:
Matting and Framing:
Instead of using an image with Ultra Violet in it, you might consider using an Ultra Violet frame. Or use a black (or any other color frame) and place the image in an Ultra Violet matte to achieve the accent color you are looking for. This works great with black and white images, and also can be very well applied when the image used has a color scheme that is complementary to, or contrasting with, Ultra Violet.
Color in photos:
You can use images that have Ultra Violet or a similar color in it (think for example of an image of a purple flower). Or, to create a dramatic effect and focal point, use images that have color palettes contrasting or complementary to Ultra Violet.
Toned and Split-Toned photos:
A specific way of using images with Ultra Violet is the use of toned and split-tone colored photos. Toned images are created by adding one single color to an image. Split-toning basically is adding two different colors to the highlights and shadows of an image.
The examples below show how this looks when using a black and white image (first image) as basis.


Now go ahead and bring some Ultra Violet in your life
As shown in this article, there are multiple ways to incorporate Ultra Violet in your interior, and I hope it provided you with some good ideas and inspiration to update your interior with the 2018 Color of the Year.
Now go ahead and share in the Comments sections below what you are going to do to bring some more Ultra Violet into your life.
Interior Design's Little Black Dress
Black and White Photography: The Versatile Little Black Dress For Any Interior
Ever since its introduction by Coco Chanel in the 1920's the "Little Black Dress" has been considered an…
Black and White Photography: The Versatile Little Black Dress For Any Interior
Ever since its introduction by Coco Chanel in the 1920's the "Little Black Dress" has been considered an essential element of a woman's wardrobe. The popularity and fashionability of the little black dress lie in its versatility: it can be worn as a cocktail dress, as formal business attire, or dressed up for a festive occasion.

In a similar fashion (pun intended) Black and White photography can be considered the versatile Little Black Dress that fits any interior and works in all designs. It is the traditional format of photographic expression: we are used to it, it feels natural, and like the Little Black Dress it never goes out of style.

Several design considerations are important when selecting images to match and complement an interior:
- Subject matter of the image (does it match the overall style of the room);
- Format (e.g. square, panoramic, landscape or portrait orientation);
- Size;
- Matting and Framing;
- Color or Black and White.
While color as I explained in a previous post can have an important role within an image, a Black and White image transforms a scene to its most abstract format: Black and White creates a focus on shape, form, texture, lines, and patterns. It has a magical quality that you can’t quite put your finger on. Or with the words of photographer Anders Petersen: "in black and white there are more colors than color photography, because you are not blocked by any color so you can use your experience, your knowledge, and your fantasy, to put colors into black and white.
Within a Black and White image, there is no distraction from the photograph's subject matter. And, equally important when creating a design for a specific room, a Black and White image does not distract from other interior design elements. Similar to a Little Black Dress being one of the best ways to showcase fabulous jewelry, Black and White photography provides one of the best ways to showcase your interior: it doesn't overwhelm, it doesn't disturb the room's color scheme, and it actually makes accent colors in the room look more impressive. And it provides dramatic contrast in a room in which the colorfulness of the interior needs to be center stage.
Do you have a Little Black Dress to enhance your interior?

Second Saturdays at SEC4P
Behind the Scenes: SEC4P Second Saturdays Photographer Meet Up
Whenever possible I attend the Saturday Coffee event at the South East Center for…
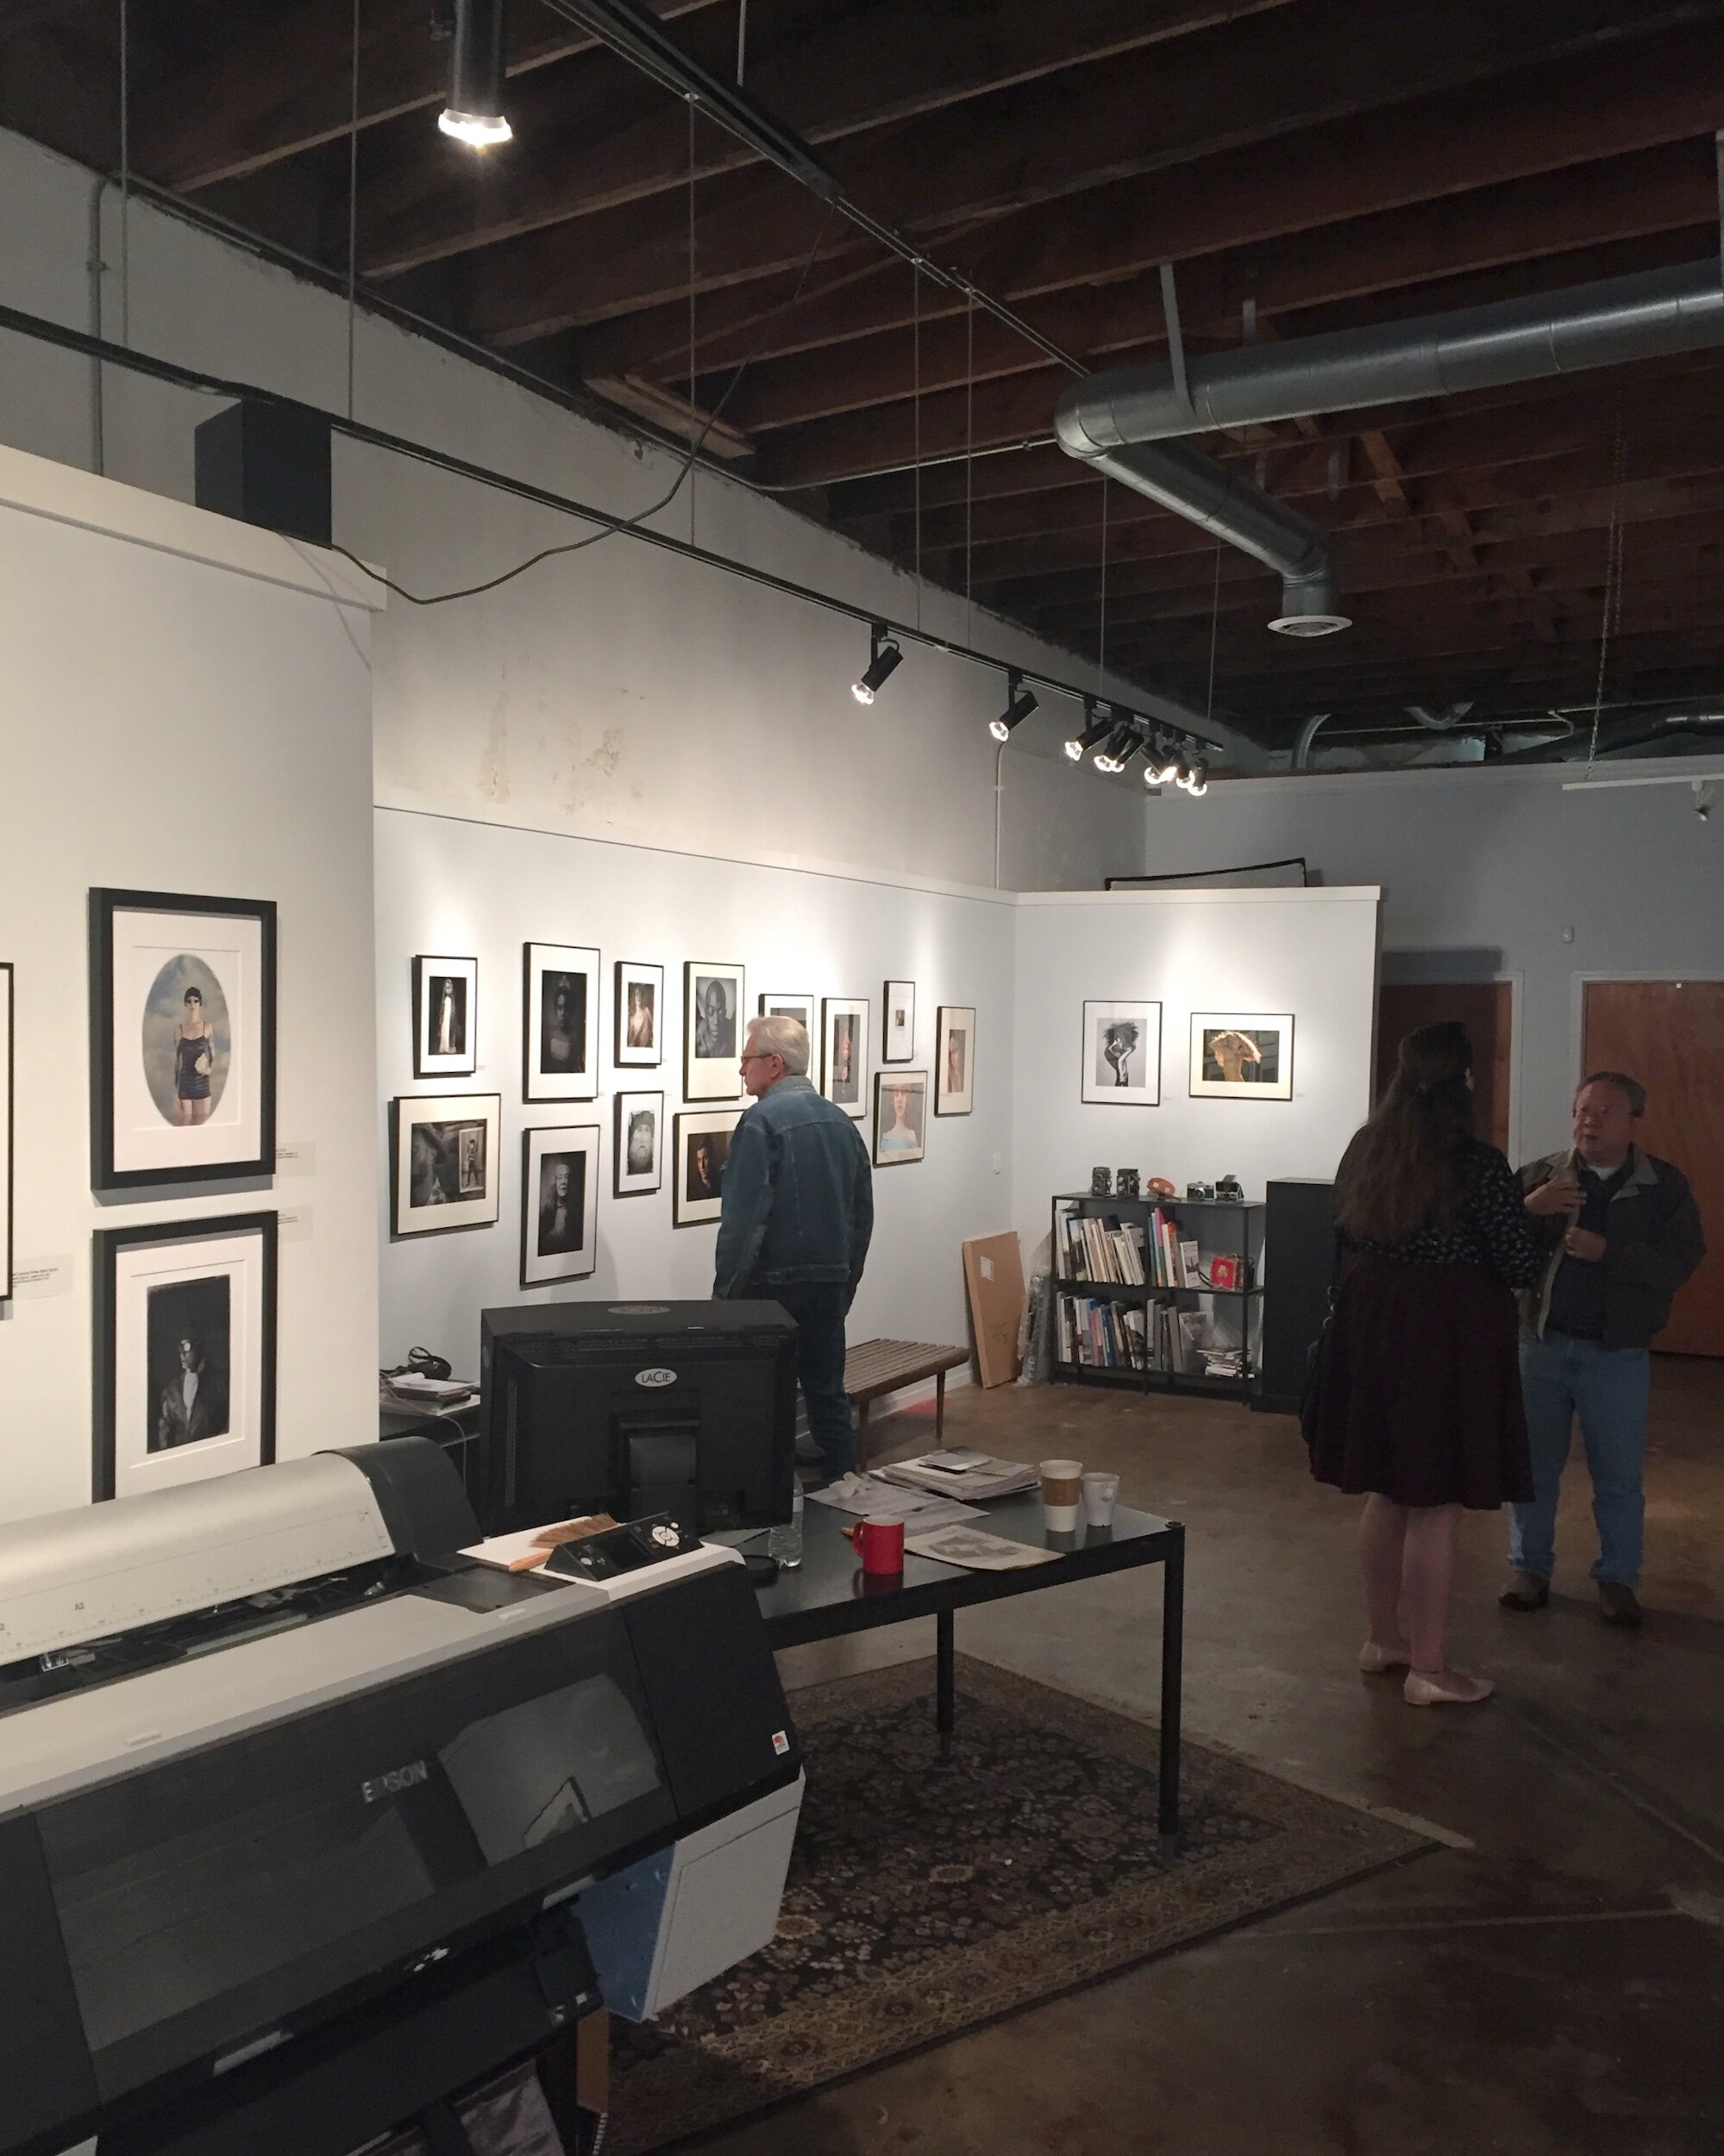
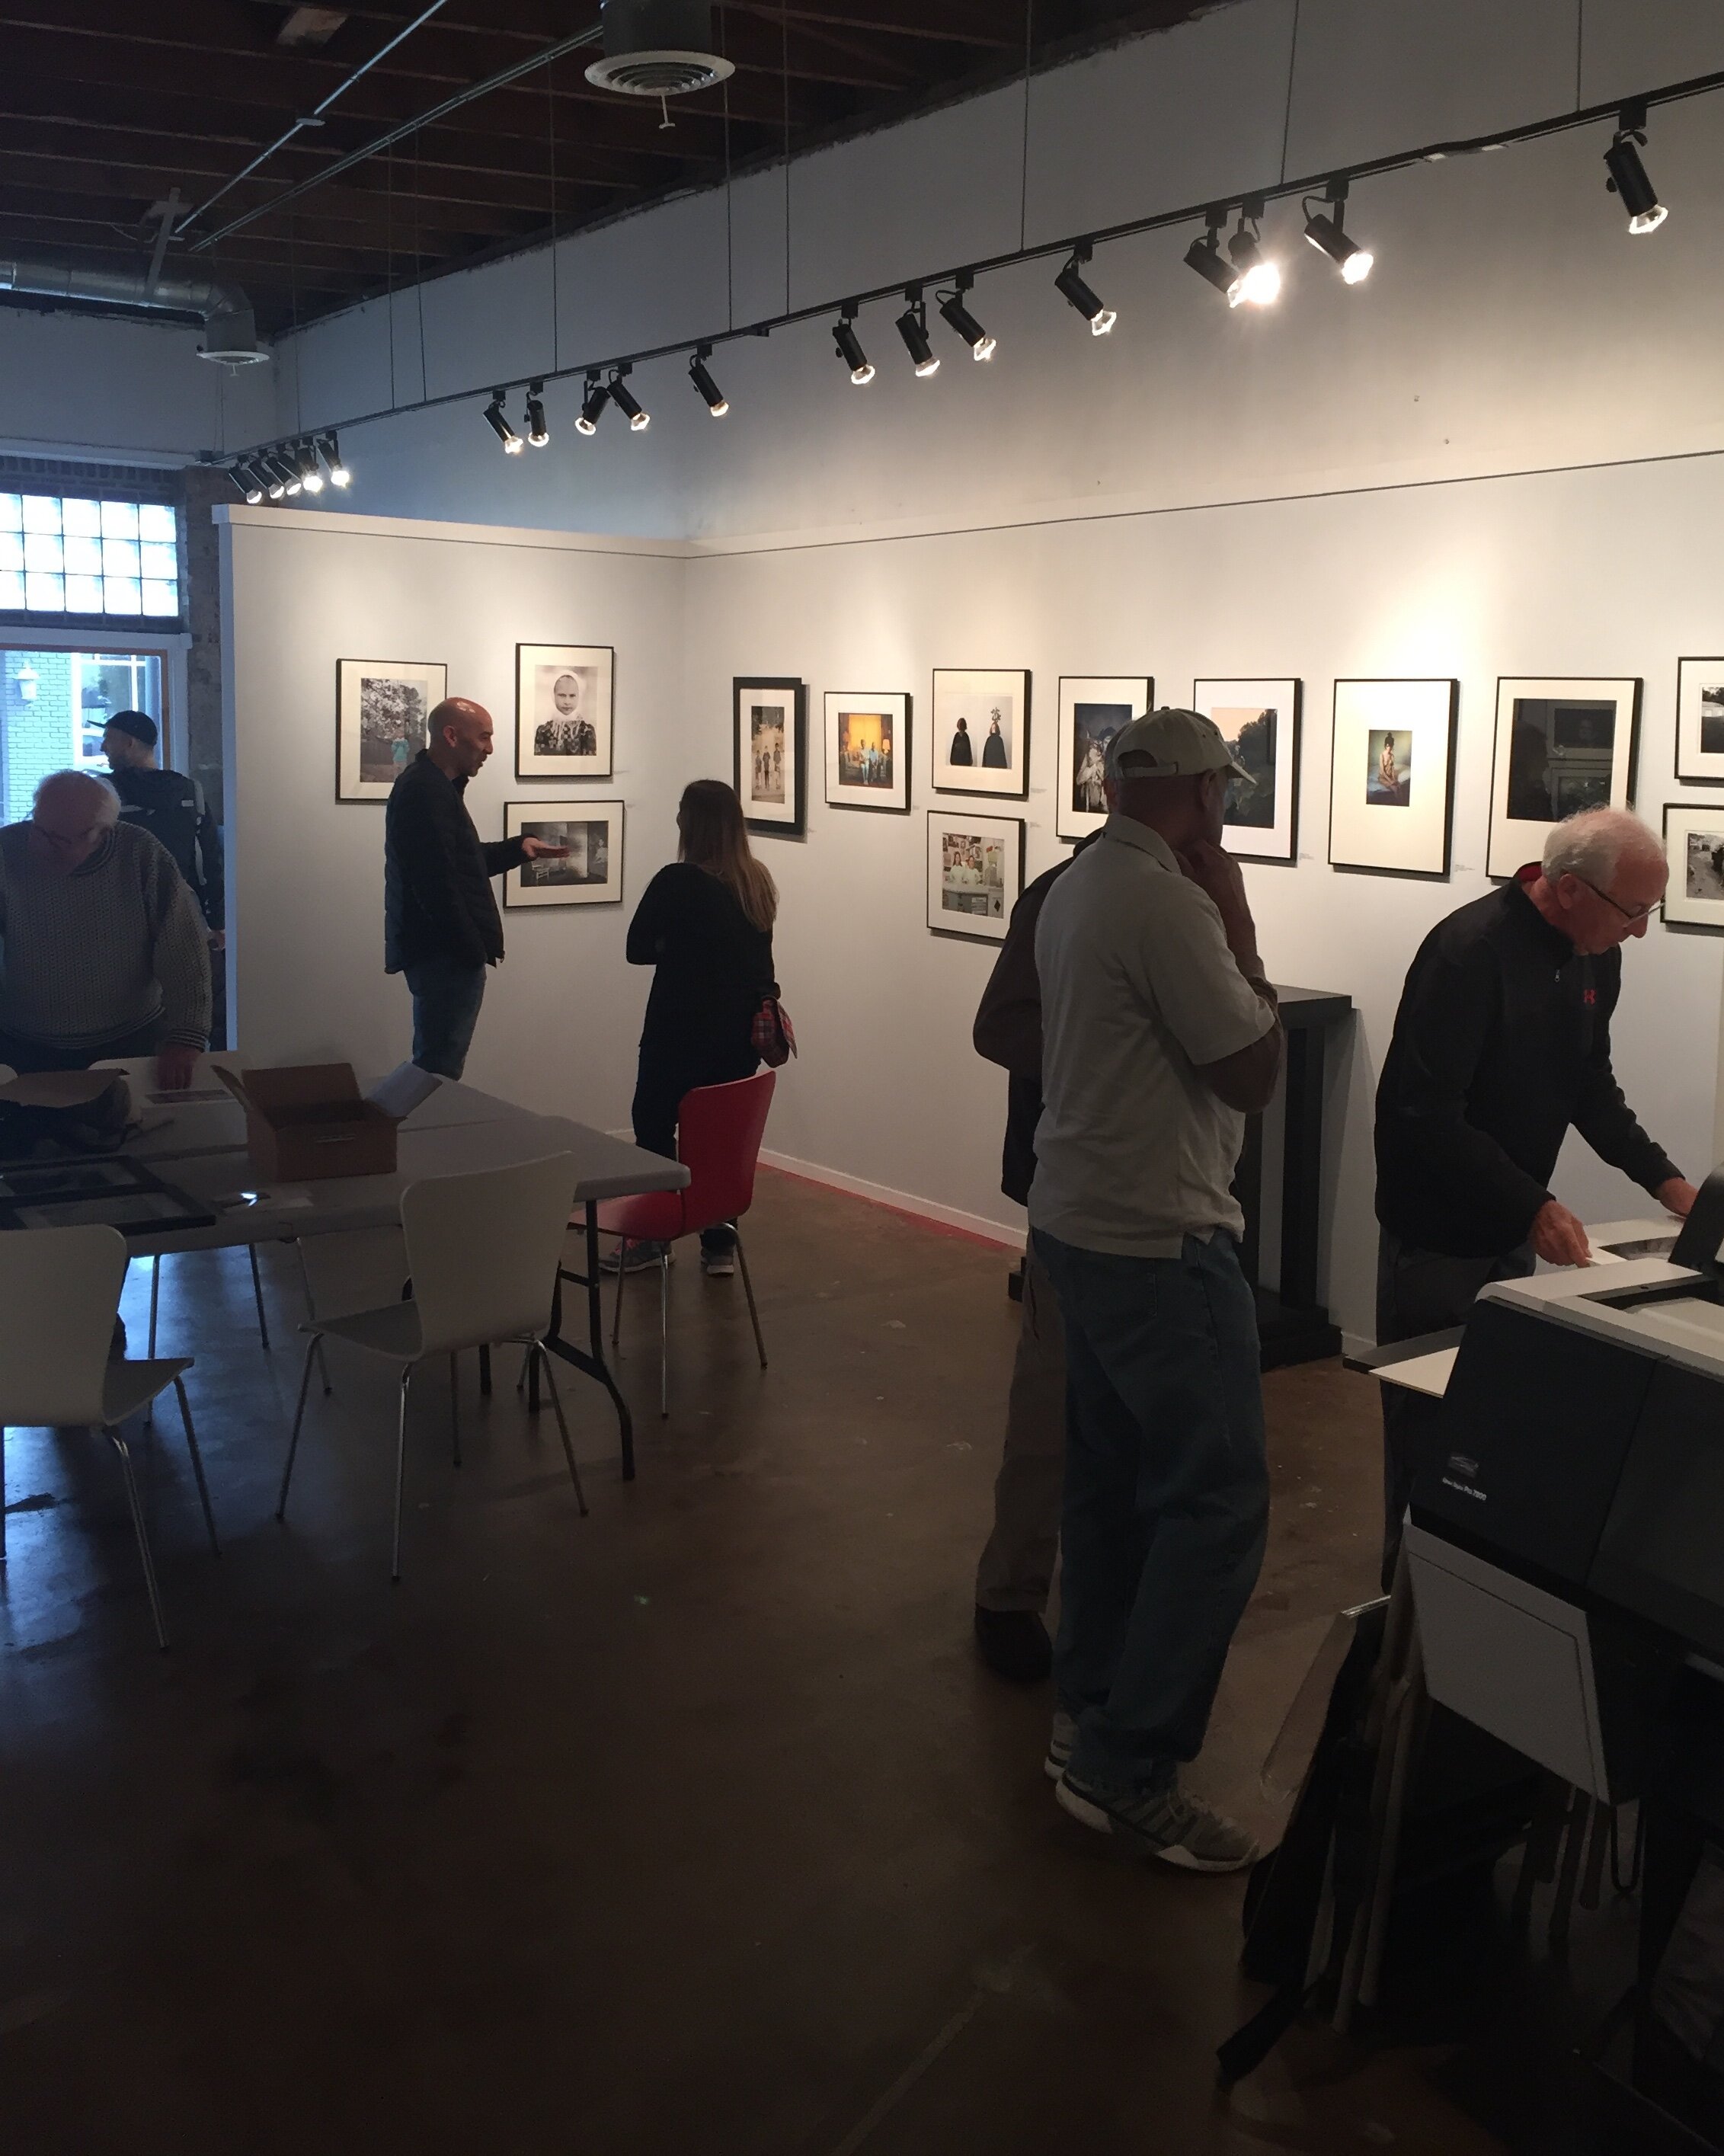
Behind the Scenes: SEC4P Second Saturdays Photographer Meet Up
Whenever possible I attend the Saturday Coffee event at the South East Center for Photography: a great opportunity to meet other photographers, see some new and/or unpublished work, get feedback on my own work, and in an informal setting talk about...photography and all things related.
What is it
The Saturday Coffee is an informal gathering of photographers to discuss photography, each other's work, share experiences and tips, and of course, enjoy coffee and donuts.
Where and When
In principle every second Saturday of each month, from 10 am - 1 pm at the South East Center For Photography (SEC4P), downtown Greenville, SC, at 116 E Broad Street (see map below).
Who organizes
SEC4P is an exhibition and education venue promoting the art and enjoyment of fine photography, owned and led by Michael Pannier.

Through monthly juried exhibitions, local, national and international photographers of all skill levels have the opportunity to have their work presented and enjoyed by collectors, curators, enthusiasts, interior designers, and colleagues. In addition, exceptional photographers will be invited to participate in solo or group shows. The workshops and classes cover a wide aspect of photography and challenges, encouraging and inspiring the photographer in all of us.
Who should attend
I encourage all photographers in the Greenville area (and further away) to attend, whether they are professional or amateur, working with digital or creating their images with analog tools. There is so much to see and discuss, and attendees are passionate and enthusiastic photographers who share their work, provide feedback, and are open to ideas from others.
The Saturday Coffee events in my opinion are also great for collectors, art lovers, and everyone else interested in fine art photography. They provide great opportunities to meet photographers in an informal setting, see the works on display in the gallery, have a chance to see some new/unpublished work, and hear the background stories.
Why Attend
First of all, it is lots of fun to meet like-minded people and talk photography. As mentioned, usually some attendees bring some new or unpublished work. And while you are there, take the opportunity to look at the exhibitions on display. Usually there are two exhibitions up at the same time: one displays work form several photographers, submitted for a themed "call for entries"; the other usually displays work from an individual artist.
And did I mention coffee and donuts?
More Information
More information can be found on the SEC4P website, and of course at the gallery itself.
Review: Blurb Square Book With ProLine Uncoated Paper
A review of my new Blurb book
As I mentioned in a previous post, creating a photo book in Blurb directly from Adobe® Lightroom works very well…
A review of my new Blurb book
As I mentioned in a previous post, creating a photo book in Blurb directly from Adobe® Lightroom works very well. Because it had been a while since I published my Old World Charm and New York, New York books I decided to create another book with some of my Haiku.
This time I wanted to try a small (7x7 inches) square format layout and the ProLine Uncoated paper.
In this review I cover:
The book contents 10 Haiku, previously published on this blog and also accessible on my Haiku page, and it is of course available for purchase on Blurb.

Creating The Book
As mentioned above, I already covered the details regarding how to create a Blurb photo book in Lightroom in a previous post. Since it had been some time however since I created my first two books, I had to remember all steps in Lightroom again. What I (re-) learned is that it is important to first select the folder or collection that contains the images you want to use for your book. If you don't, there is a change that you lose your book layout settings. Saving your new layout is also important, and will prevent quite some frustrating moments. Bottom line it is an easy process, as long as you think through what you want to accomplish and the steps needed.
For me Haiku are quite intimate expressions of thoughts and feelings and I therefore wanted the book also to be intimate and small. A small (7x7 inch) square book was the best match to these specifications. In addition to the introductory page, the book has ten spreads with the Haiku on the left page and the accompanying image on the right page. Although not all images are in the square format, I wanted to keep the left, right, and top margins to be similar on all pages. [Back to Top]
Purchase and Shipping
The order process is quite easy: select your book in your Blurb dashboard, order and make your shipping selection. That's it. Since you are the author, the price of the book you pay is without the markup you have set that will be applied to other buyers. Because this is a print on demand service, you need to keep in mind that the book will not ship immediately since it first needs to be printed. Blurb will send you an email when the book is being printed, and another email when the book has been shipped.
I ordered 10 Haiku the evening of October 30 and shipment started November 3, so production of this specific book took three to four working days. Shipment with USPS took five days and I received my book in the mail on November 8. As a result, the total time between ordering and having the book in my hands was nine days. In my opinion this is a reasonable time, just keep in mind that you need to order in time and 'next day' delivery is not possible. [Back to Top]
Cover
Blurb offers a flexible, high-gloss laminated thick paper soft cover for books with a limited number of pages. It is very glossy and the pictures on it really shine. Although it has a good feeling and looks nice, I would have preferred a non-glossy cover, that would have better matched the paper used inside. [Back to Top]
Paper
You can select several paper types for photo books, from Standard 118 GSM paper to several high quality photo papers up to 190 GSM. As per the information on the Blurb website:

I like the Premium Lustre paper I used for Old World Charm and New York, New York. However, based on and intrigued by the review on the Film Photography Blog I wanted to try the ProLine Uncoated paper. And I was not disappointed!
The color of the paper is some type of off-white which really works well with the images (see also below) and for me really helps establish the emotional connection I want to accomplish with Haiku. Although it is uncoated paper it feels like there is some coating, providing a smooth surface with just a bit of a 'touch' to it. This "eggshell" texture works great and really helped me to accomplish the look and feel I wanted to achieve. [Back to Top]
Binding
The soft cover features durable library binding, which is done very well. Although it does not allow for laying the open book flat, I notice that the binding is quite sturdy. I have the other two books I ordered for a couple of months now, and although they have been handled regularly by different people none of the pages have come loose. [Back to Top]
Print quality
The print quality of the cover images and text is good. The images stand out on the glossy paper and even the small text on the back cover is very well printed and readable. The printed text in the book is also very clear and sharp.
And then the images: the print quality is very good, and the ProLine Uncoated paper really helps achieving the image quality and feeling I wanted to create for the Haiku. The color images are clear and crisp, and the colors really shine on this paper. The black and white images, besides also being very clear and crisp, have great tonality. I am really impressed by the paper and the print quality Blurb offers. Proline Uncoated paper definitely will be a choice for me for any future fine-art photo books. I am actually considering re-issueing my other two photo books with this paper. [Back to Top]
Conclusion
Bottom line: creating a Blurb photo book with LightRoom is a great and easy way to have a book published and available for purchase. The only concern I have is that this process will continue with all the changes LightRoom is going through.
The buying and shipping experience is good. However, when purchasing a Blurb book you need to keep in mind that there will be production time involved. Each book is printed 'on-demand' and not directly available for shipping. Shipping duration is depending on the selections you make.
The general quality of the cover and binding is good, although it would be great if Blurb would offer a matte cover version in the future.
The ProLine Uncoated paper is just gorgeous: the thickness, the feeling of it, and combined with the print quality I definitely recommend this as a way to share your fine art images: not only to sell as fine art photo books but also to promote in book format the images you have available as individual prints. [Back to Top]
Veterans Day 2017
A Day To Honor All Veterans: Especially Those Who Liberated My Home Town During World War II
Next Saturday (11 November 2017) will be Veterans Day in the USA and Remembrance Day in the UK. A day to…
A Day To Honor All Veterans: Especially Those Who Liberated My Home Town During World War II

Next Saturday (11 November 2017) will be Veterans Day in the USA and Remembrance Day in the UK. A day to remember all those alive and deceased who served in the armed forces, many of which made the ultimate sacrifice to ensure the freedom of others.

Living in the Western world it sometimes is easy to take our freedom and freedoms for granted and to forget that they not always come free. On Veterans Day in the USA, and May 4 in the Netherlands (Dodenherdenking), I always specifically have to think about the men from the 3rd Squad, 1st Platoon, 119th Regiment, of the 30th Infantry Division "Old Hickory", who were the first allied troops to enter my hometown of Eygelshoven, the Netherlands on 20 September 1944: John M. Nolan, Edward Knocke, Ernie King, Cletus Herrig, David Hedland, Bill Cline, Frank O'Leary, Vic Kwaitkowsky, and Lt. Gail Kuhn.
Although I never met these guys (I was born about 17 years after the fact), and although this is just a small group of the millions who fought on the Allied side during WWII, they are for me representative of the men (and women!) who took up the burden and fight for other people's freedom. It is worth while to check out the history and some interesting facts about the Old Hickory Division, and it's successor The NC National Guard 30th Armor Brigade Combat Team "Old Hickory".
Let us remember these men and women with the lyrics of a WWII song that many of the soldiers knew, and those still alive will remember; whether they were in the Allied or in the Axis armies, in the European Theater of Operations, or in the Pacific Theater of Operations...
Outside the barracks, by the corner light
I'll always stand and wait for you at night
We will create a world for two
I'll wait for you the whole night through
For you, Lili Marlene
For you, Lili Marlene
Bugler tonight don't play the call to arms
I want another evening with her charms
Then we will say goodbye and part
I'll always keep you in my heart
With me, Lili Marlene
With me, Lili Marlene

Give me a rose to show how much you care
Tie to the stem a lock of golden hair
Surely tomorrow, you'll feel blue
But then will come a love that's new
For you, Lili Marlene
For you, Lili Marlene
When we are marching in the mud and cold
And when my pack seems more than I can hold
My love for you renews my might
I'm warm again, my pack is light
It's you, Lili Marlene
It's you, Lili Marlene
My love for you renews my might
I'm warm again, my pack is light
It's you, Lili Marlene
It's you, Lili Marlene
Text (Marlene Dietrich English version) from Google Play Music
Written by Hans Leip, Norbert Schultze
Copyright © EMI Music Publishing, Universal Music Publishing Group
Fall River
Fall River
Days are getting shorter…
Fall River
Days are getting shorter
The sun stays low on the horizon
playing with golden leaves
Reflections
The river carries them all to the sea

Turning a Disaster Into a Blessing
How this week's Lightroom-Zenfolio Disaster Turned Into an Unexpected Blessing
I experienced quite a disaster last week when transferring updated images from Lightroom to Zenfolio, using Jeffrey…
How this week's Lightroom-Zenfolio Disaster Turned Into an Unexpected Blessing
I experienced quite a disaster last week when transferring updated images from Lightroom to Zenfolio, using Jeffrey Friedl's upload tool.
Whether it was a glitch in either of the programs or my own stupidity clumsiness, I probably never will know, but transferring a batch of images messed up my whole Zenfolio setup. Usually, this transfer works perfect and I really like how Friedl's upload tool makes moving images from Lightroom to Zenfolio a breeze. It also keeps the images connected: if you make further enhancements to an image in Lightroom, it will ensure the image in Zenfolio will be updated too.
Last week, however, something odd happened: after updating a batch of images in Lightroom, I went into Zenfolio and to my utter dismay I noticed that instead of updating the existing images a whole bunch (read: a lot!) of duplicates had been added. A quick check with the Zenfolio helpdesk learned that no other photographers had flagged this (yet). Since I could also not "redo" the transfer, I actually had to first delete all (yes, all!!) images from the Zenfolio Galleries and then upload all back again from Lightroom. And of course, deleting all images from the Galleries, also removed them from the Collections and the blog posts and other pages. I was not happy...
Fortunately, before I started the painful process of restoring the images, blog posts, and other pages I realized that the need to do this might provide an opportunity to review and cull my Portfolio images, and to look at the layout of some web pages.
So how did I change the disaster of having to re-upload all images into Zenfolio into a blessing?
Culling
My first step was to review the images in Lightroom I previously had moved into Zenfolio. Some of these did not make the cut anymore but were still needed because I used them in blog posts. These images now would be moved into a separate "blog only" Gallery.
4:5 Aspect Ratio Images
Then I looked at all the other images and I decided I wanted to re-crop these to the 4:5 aspect ratio and place them in two separate Galleries: one for all Black and White images, and one for all Color images. Having gained some experience with the 4:5 aspect ratio of the medium format images from the Mamiya RZ 67 Pro II, I really like it a lot and have decided to make that format my standard image aspect ratio. I then also decided to change the layout for these Portfolio Galleries in Zenfolio, to create a cleaner look.
The results are shown below, and I am quite happy with it
4:5 B&W only

4:5 Color only

1:1 and 2:1 Aspect Ratio Images
The next step was to look at images in square and panorama aspect ratios.
The challenge was, that these images resided in the same "blog only" Gallery as images I definitely do not want to have visible in my Portfolio. I therefore now have added two additional Galleries: one for square images (1:1 aspect ratio) and one for panorama images (most in 2:1 aspect ratio). Since the number of images in each of these Galleries will stay limited, both contain Black and White and Color images.
1:1 B&W / Color

2:1 B&W / Color

Haiku Page
Whereas I already had my PicTales and Essays pages nicely organized by using tables, I was not happy with my Haiku page: since I had not decided on a specific layout yet, the Haiku were just organized as a list. Because I had to re-import all pictures related to the Haiku anyhow, I also took the opportunity to re-design this page. The design I eventually decided on is aligned with the designs of the PicTales and Essay pages. This looks far better now.

Path Forward
As you can see, when things go wrong, it's sometimes for the best. I have been able to turn the Lightroom to Zenfolio disaster into a blessing by taking the opportunity to review my portfolio images, update images, update portfolio pages, add portfolio pages, and update my Haiku page.
A lot of work, that's for sure, but definitely worth it!
Am I done yet? Unfortunately no. I still have to add portfolio images, re-add images to old blog posts, PicTale, Haiku and Essay pages, and add Portfolio images to specific Portfolio Collections (e.g. Abstract and Still Life, Transportation, Animals). So my site is not 100% up-to-date again yet, something I hope to accomplish over the weekend.
But it looks already a lot better and I am very happy with the changes I made. The new setup and layouts also align better with what my viewers are looking for: separate pages for Black and White, Color, Square, and Panorama images, and some pages for specific subjects like Abstract and Still Life, Transportation, Landscape, etcetera. I hope you also like what I have done, and I appreciate your feedback in the Comments section below.
Black and White Versus Color in Photography
What works better: black and white, or color images?
Browsing through my pictures to see what subject matter I like most to create images of, the other question that…
What works better: black and white, or color images?
Browsing through my pictures to see what subject matter I like most to create images of, the other question that always pops up is: what do I like more, black and white or color images. As I mentioned in a previous post, I have a preference for black and white images; the real answer to this question however, as always, is: it depends...
Below I will share some examples and thoughts on each of these, but first lets have a look at
5 Factors to consider when selecting black and white versus color images
Every image has the potential to work best in black and white or color, depending on:
1. General subject matter;
2. The amount of texture and patterns;
3. The amount of contrast;
4. Whether color is a defining factor for the image;
5. Where and how the image is displayed.
Now let's have a closer look at each of these factors.
1. Subject matter
Some subject matter in general looks better in black in white, while other in general looks better in color. Architectural photography for example usually looks great in black in white, while color is the way to go when photographing flowers and food. However, as we will see, in some architecture color is such an important part of the whole concept that representing it in black and white would leave the essence of the object out (think for example of Gaudí's creations). And whereas color in flowers usually is the reason for taking pictures, when there is a lot of texture it might work to create a black and white image. Food photography generally only can (or should) be done in color: most food and dishes just don't look edible in black and white. But of course, there's always the exception: remember Edward Weston's Pepper No. 30?
2. Texture and patterns
In general, when there is a lot of texture the subject just begs to be photographed in black and white. The monochrome brings out texture and helps the viewer focusing on the patterns.
3. Contrast
This is a bit of a tricky one: I am speaking of "light contrast" here, not "color contrast". When there is a lot of contrast between light and dark areas in an image, I advise rendering in black and white. The monochrome enhances the contrast and brings out patterns and texture. Of course, when there are a lot of contrasting (or complementary) colors in a scene, you definitely should use that to get your story across.
4. Color as 'defining factor'
As mentioned above, this often is the case when photographing flowers and food. But think also about scenes with a lot of complementary colors, and architecture that uses color. In these cases, it is almost a 'no-brainer' to use color images.
5. Display
All the above applies when an image is being looked at in general. But then you also have to consider that image on display. How does the image look in your interior? What looks great on a screen, or hanging in a gallery might or might not work in your own home or office. The total style of your interior (e.g. classic or modern, minimalist or cozy) and, even more important, the color scheme of your interior will have a big impact on how the image you are looking at will work, or not work, in its eventual place of display.
And then there is a big caveat to all of the above: in the end, it is your artistic vision and personal style that will help you define how you want to capture an image, or how it will work in your interior design! None of the 5 considerations I mentioned above is a rule, they are suggestions based on my personal vision and style. And suggestions, even more than rules, are there to be broken.
Some examples
Below I provide some images in sets of two: each set has a color and a black and white rendering of the same image. I will explain which of the two works best for me, and why (you can click on each image to get a bigger view).
What is your preference for these images? Leave your input in the Comments section below.
Grass With Water Drops
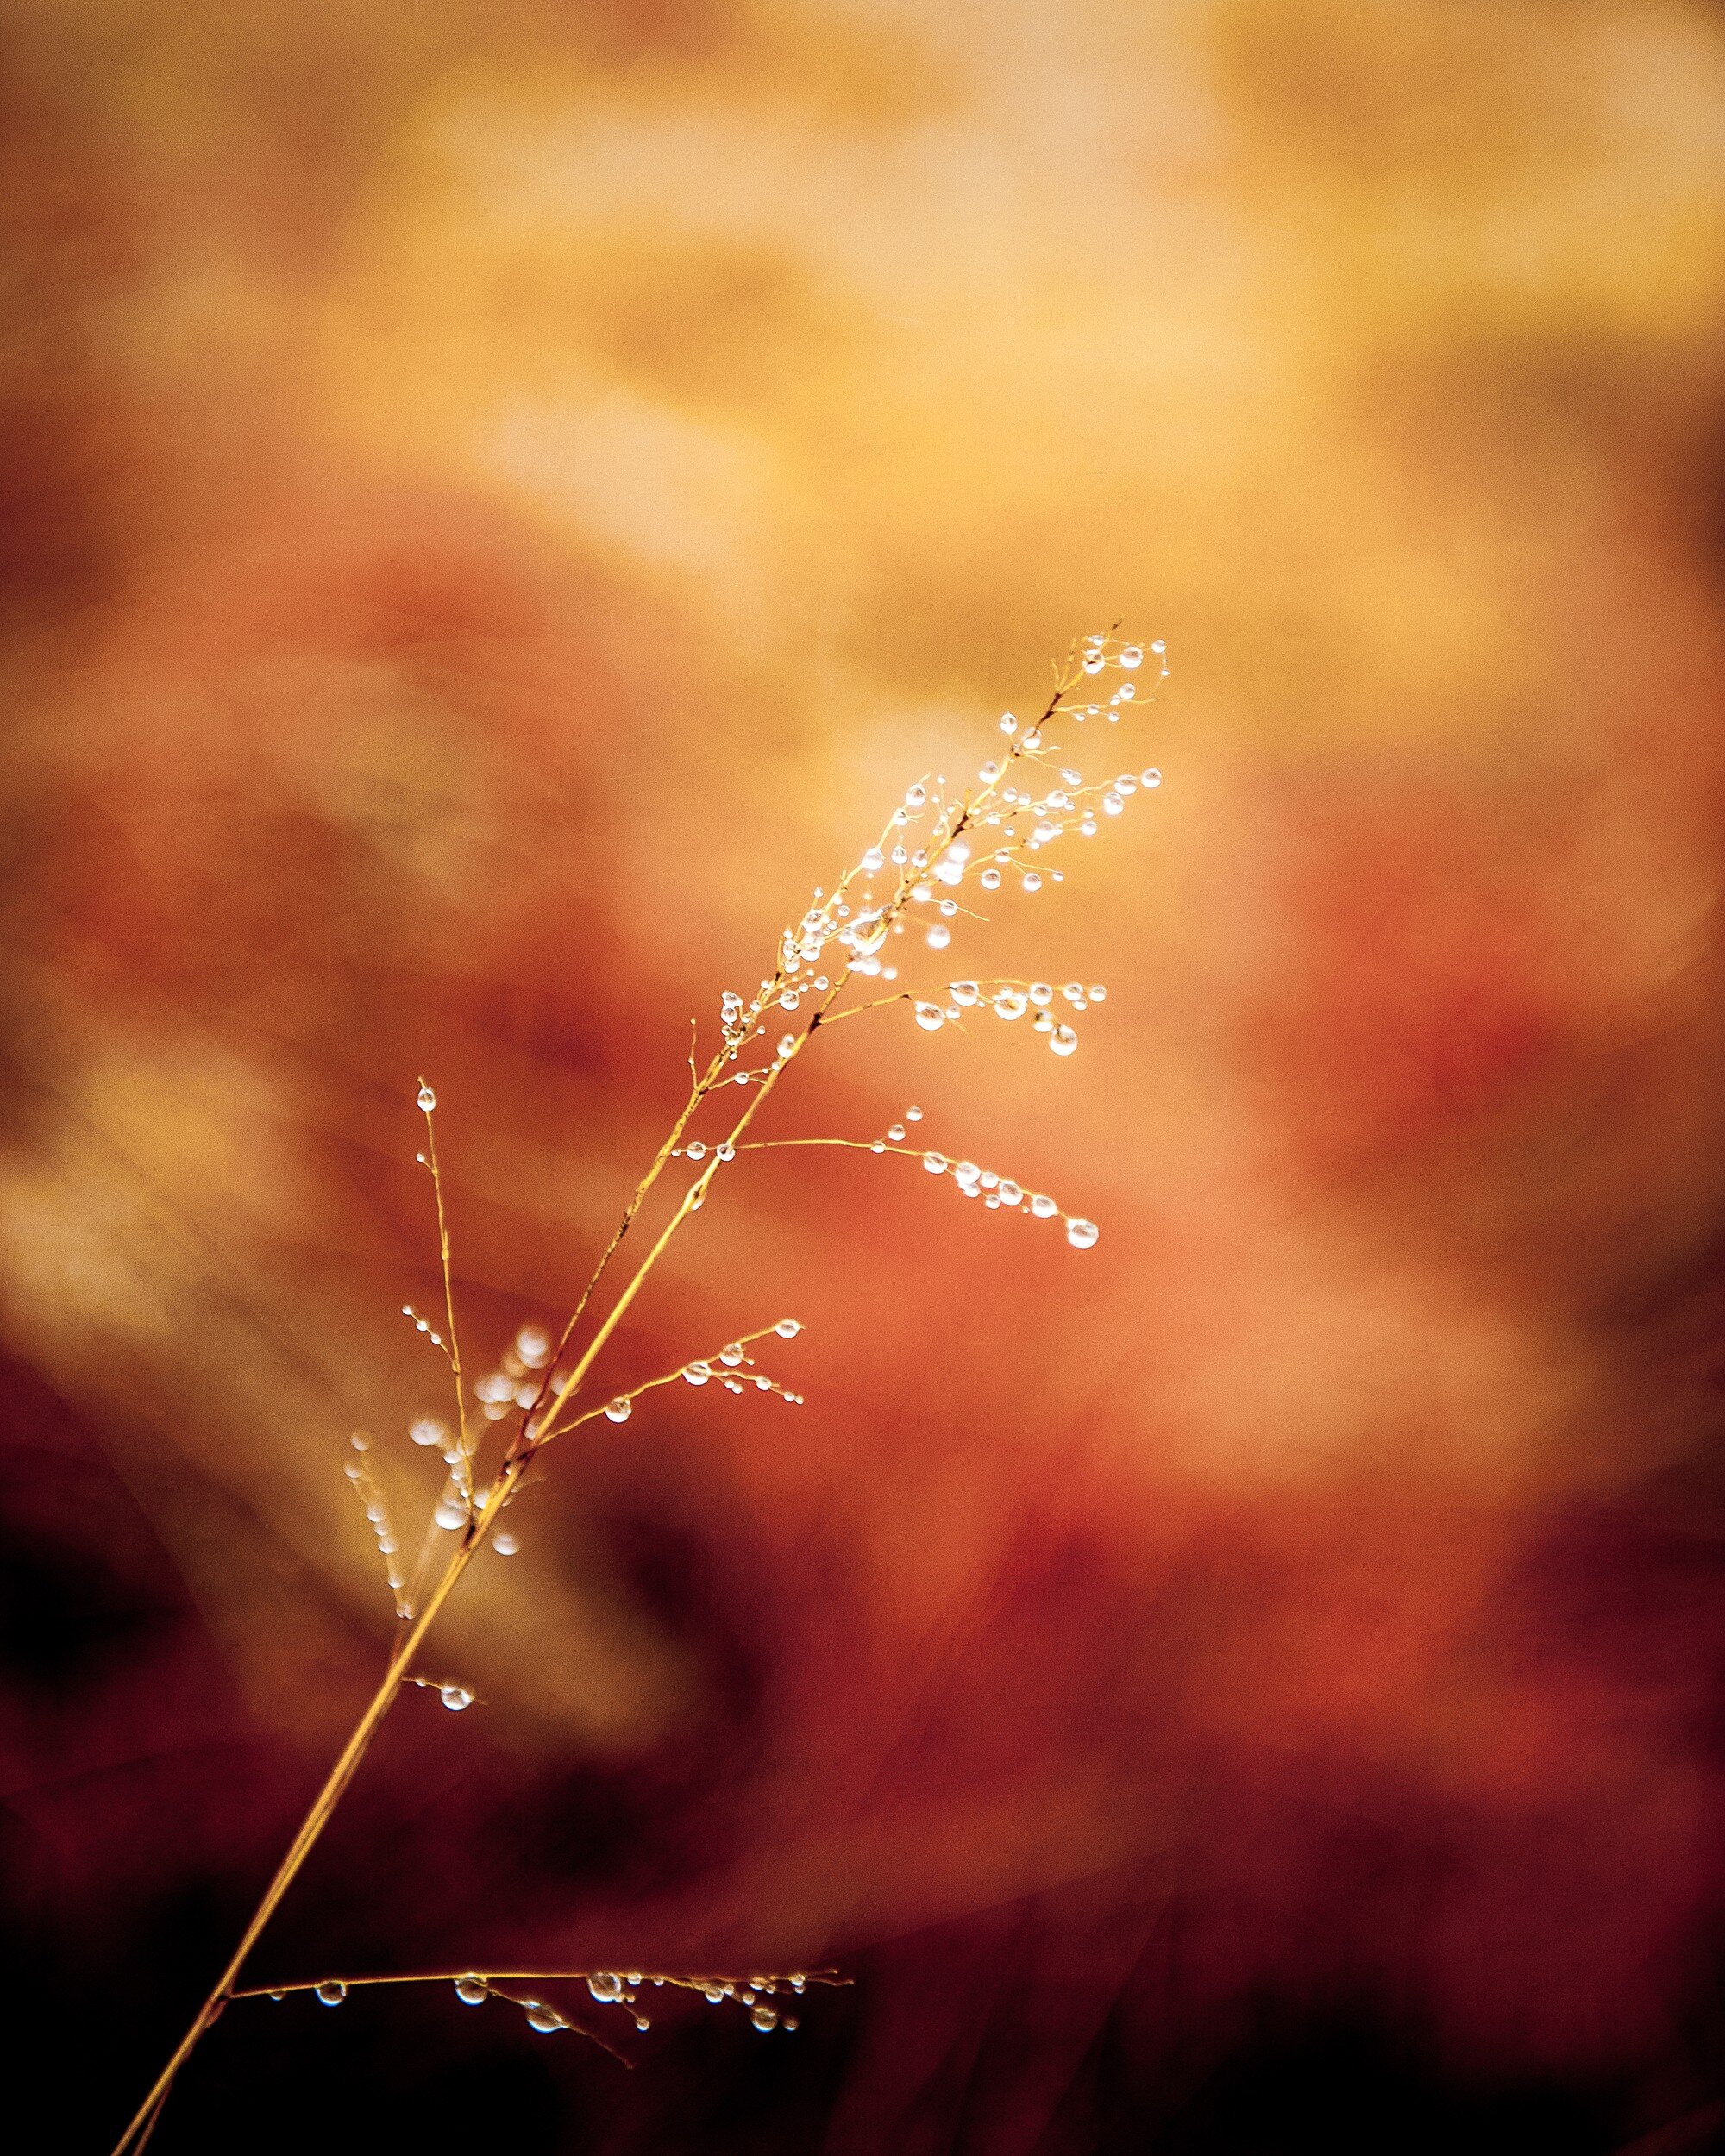
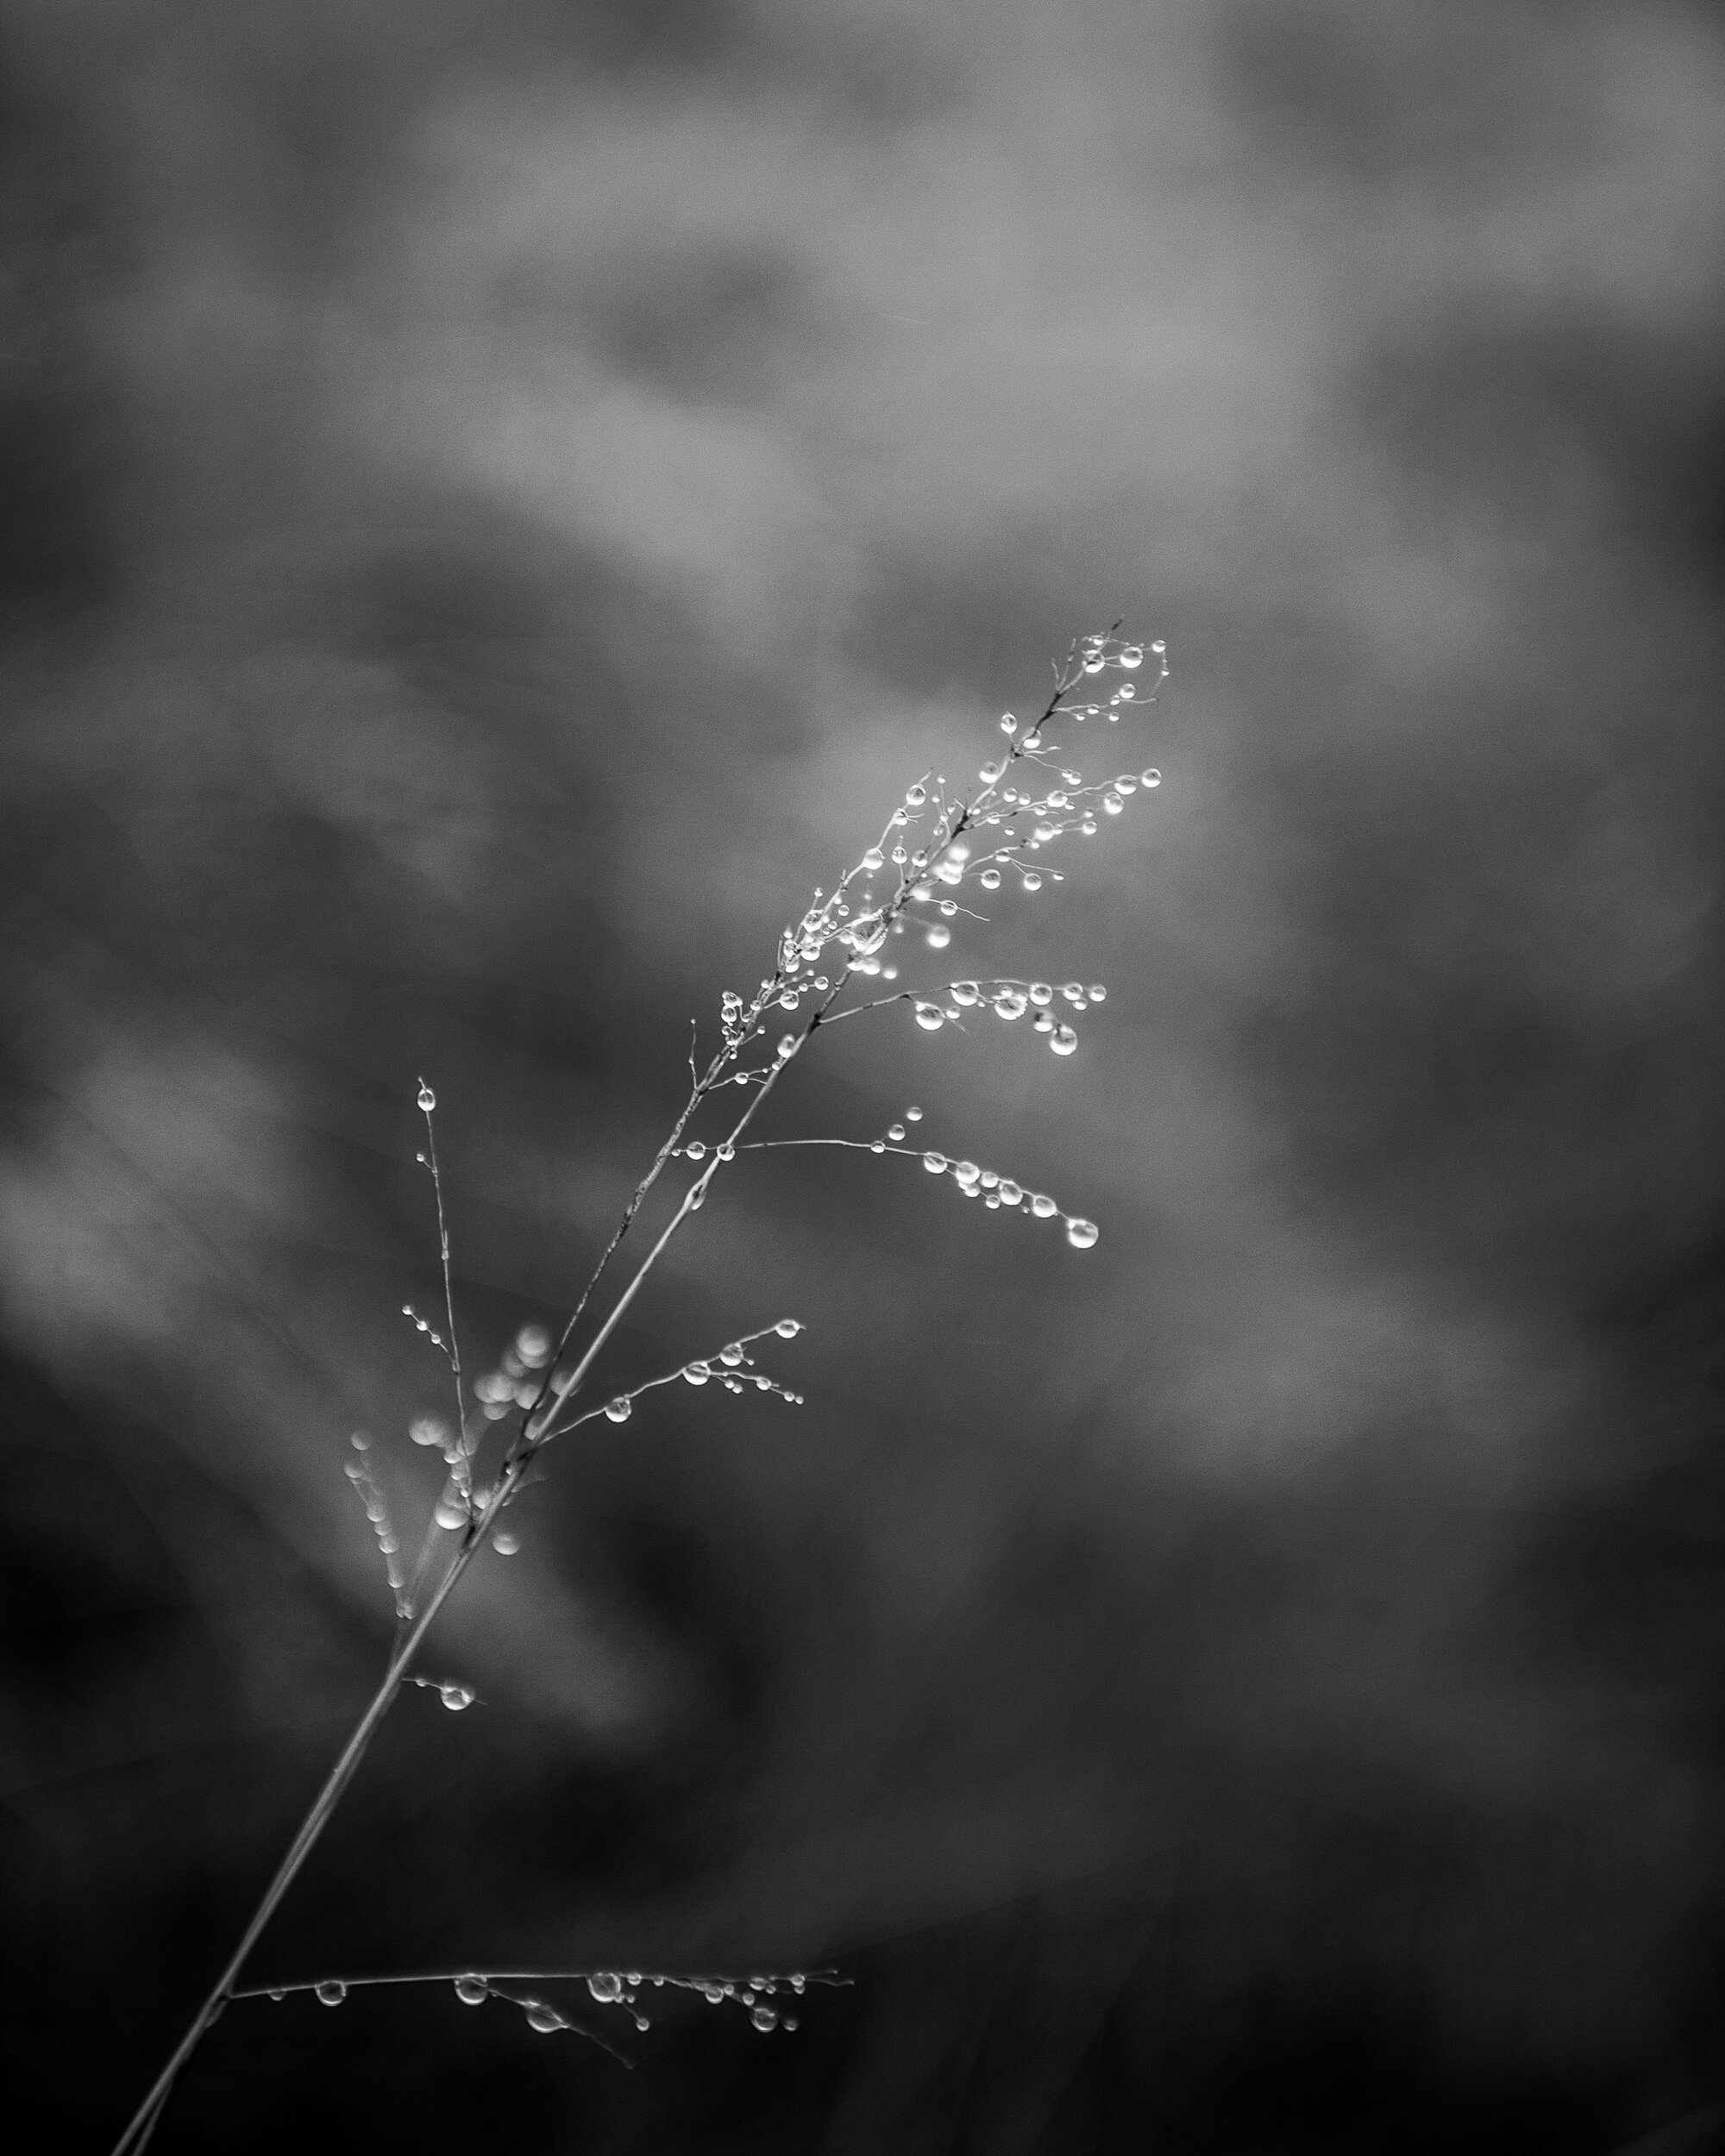
This first example actually is a very interesting one: I can not make a definite choice for a specific rendering of this image. I love how the black and white image brings the grass and water drops to the front and shows the texture of both. The several gray tones behind the grass form an interesting but non-distracting background. In the color image however, the background becomes an important part of the total picture. The reds, oranges, and yellows give the image a dynamic feeling while the grass and droplets still stand out as the main subject of the image.
The choice between these two images definitely needs to be decided depending on how and where it will be displayed.
Stacked Buckets
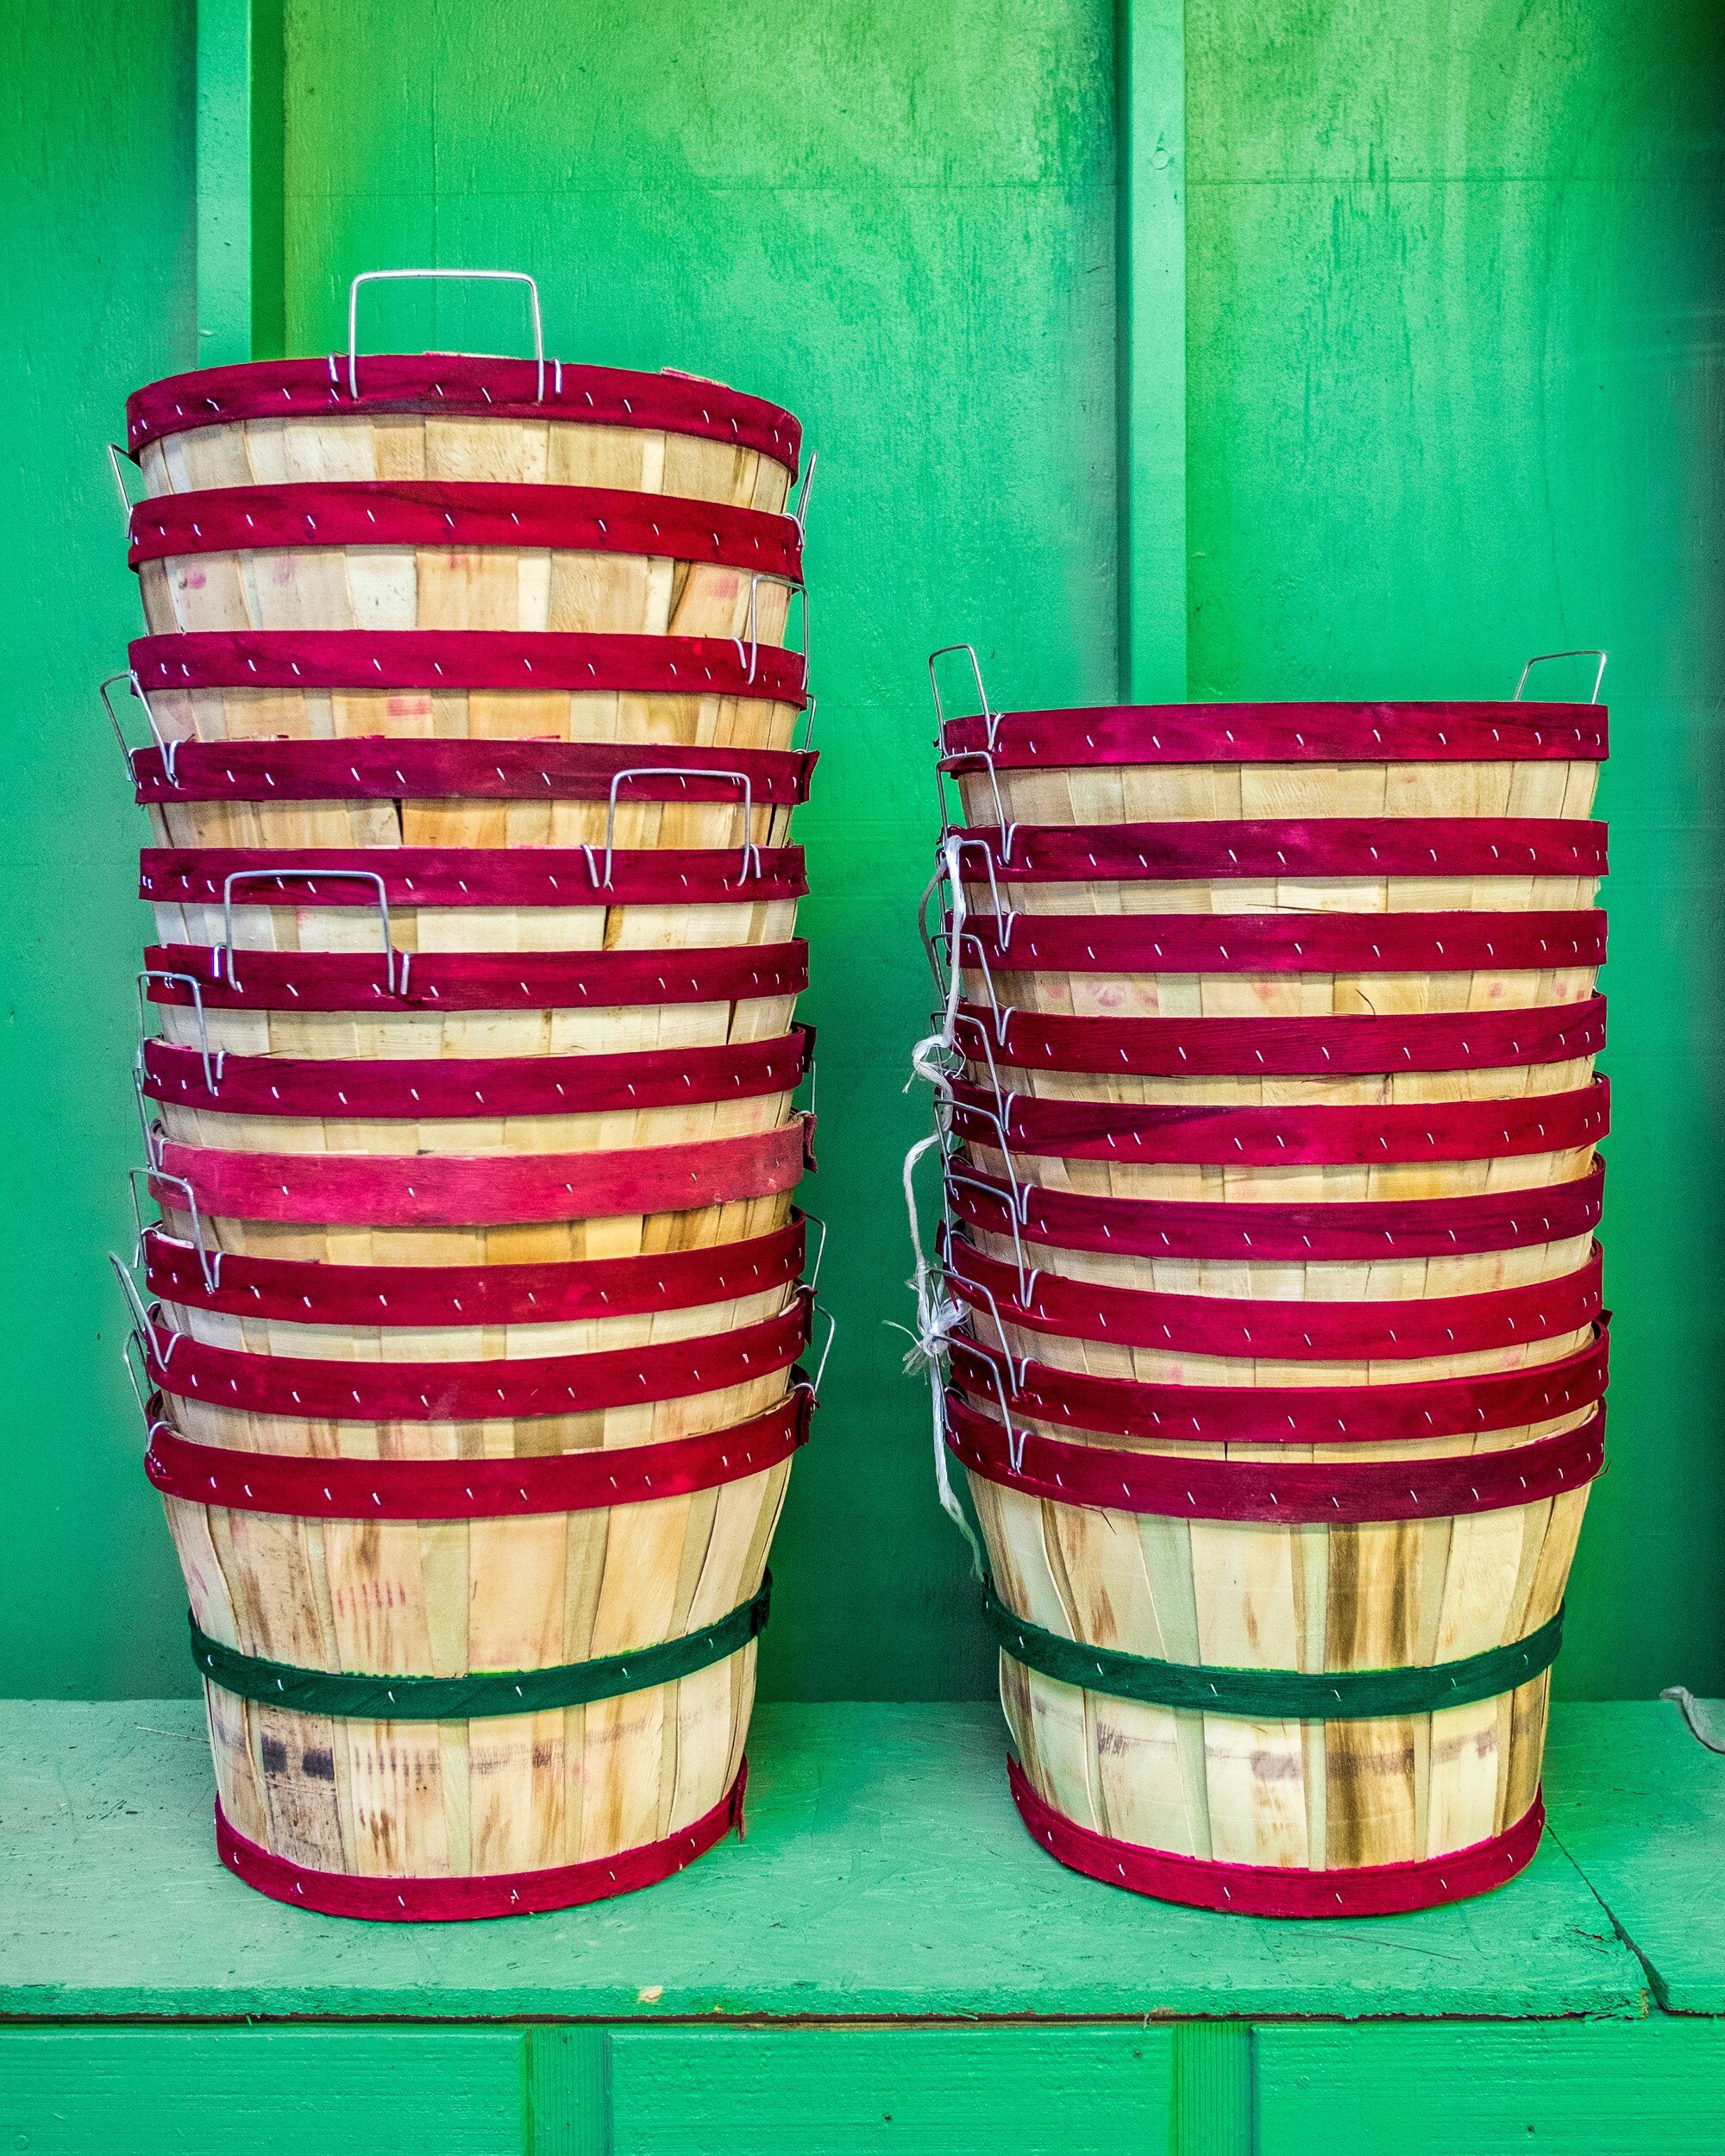
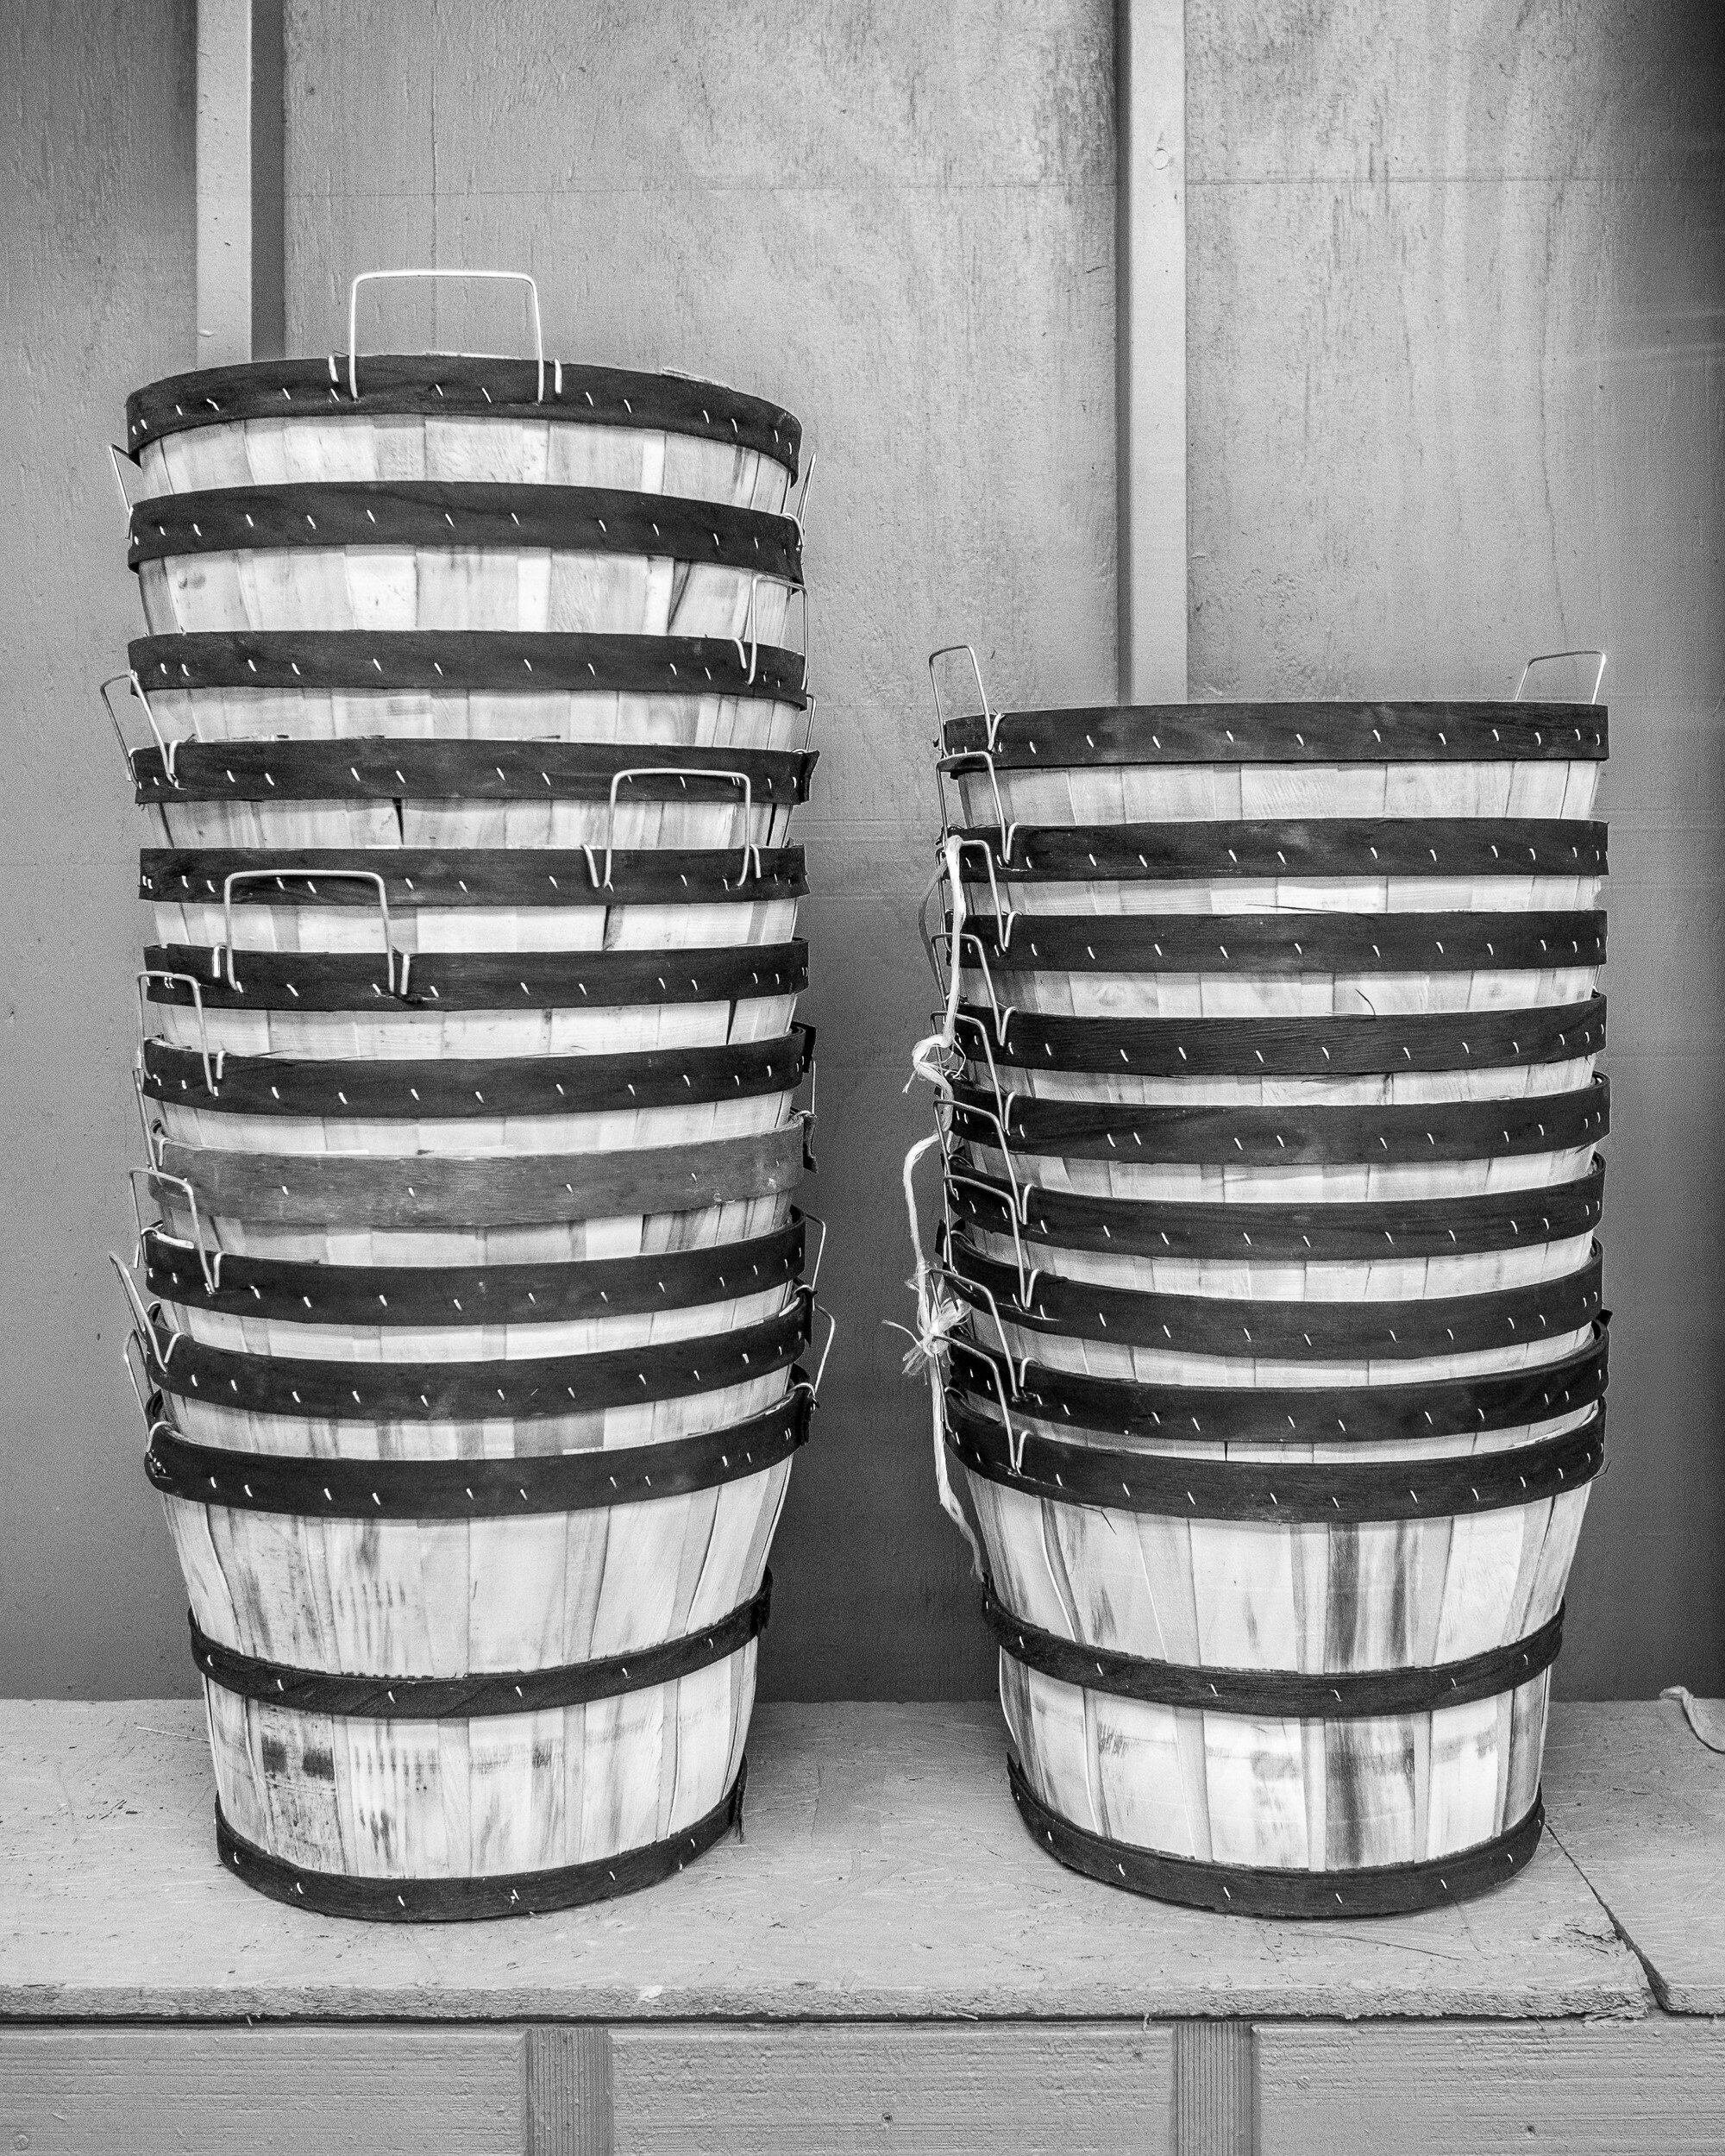
Although the black and white version might work, for this image I definitely would go with color. The contrast between the red on the buckets and the green background really is of the essence for this picture. This is a good example of how complementary colors make an image work.
Boxed
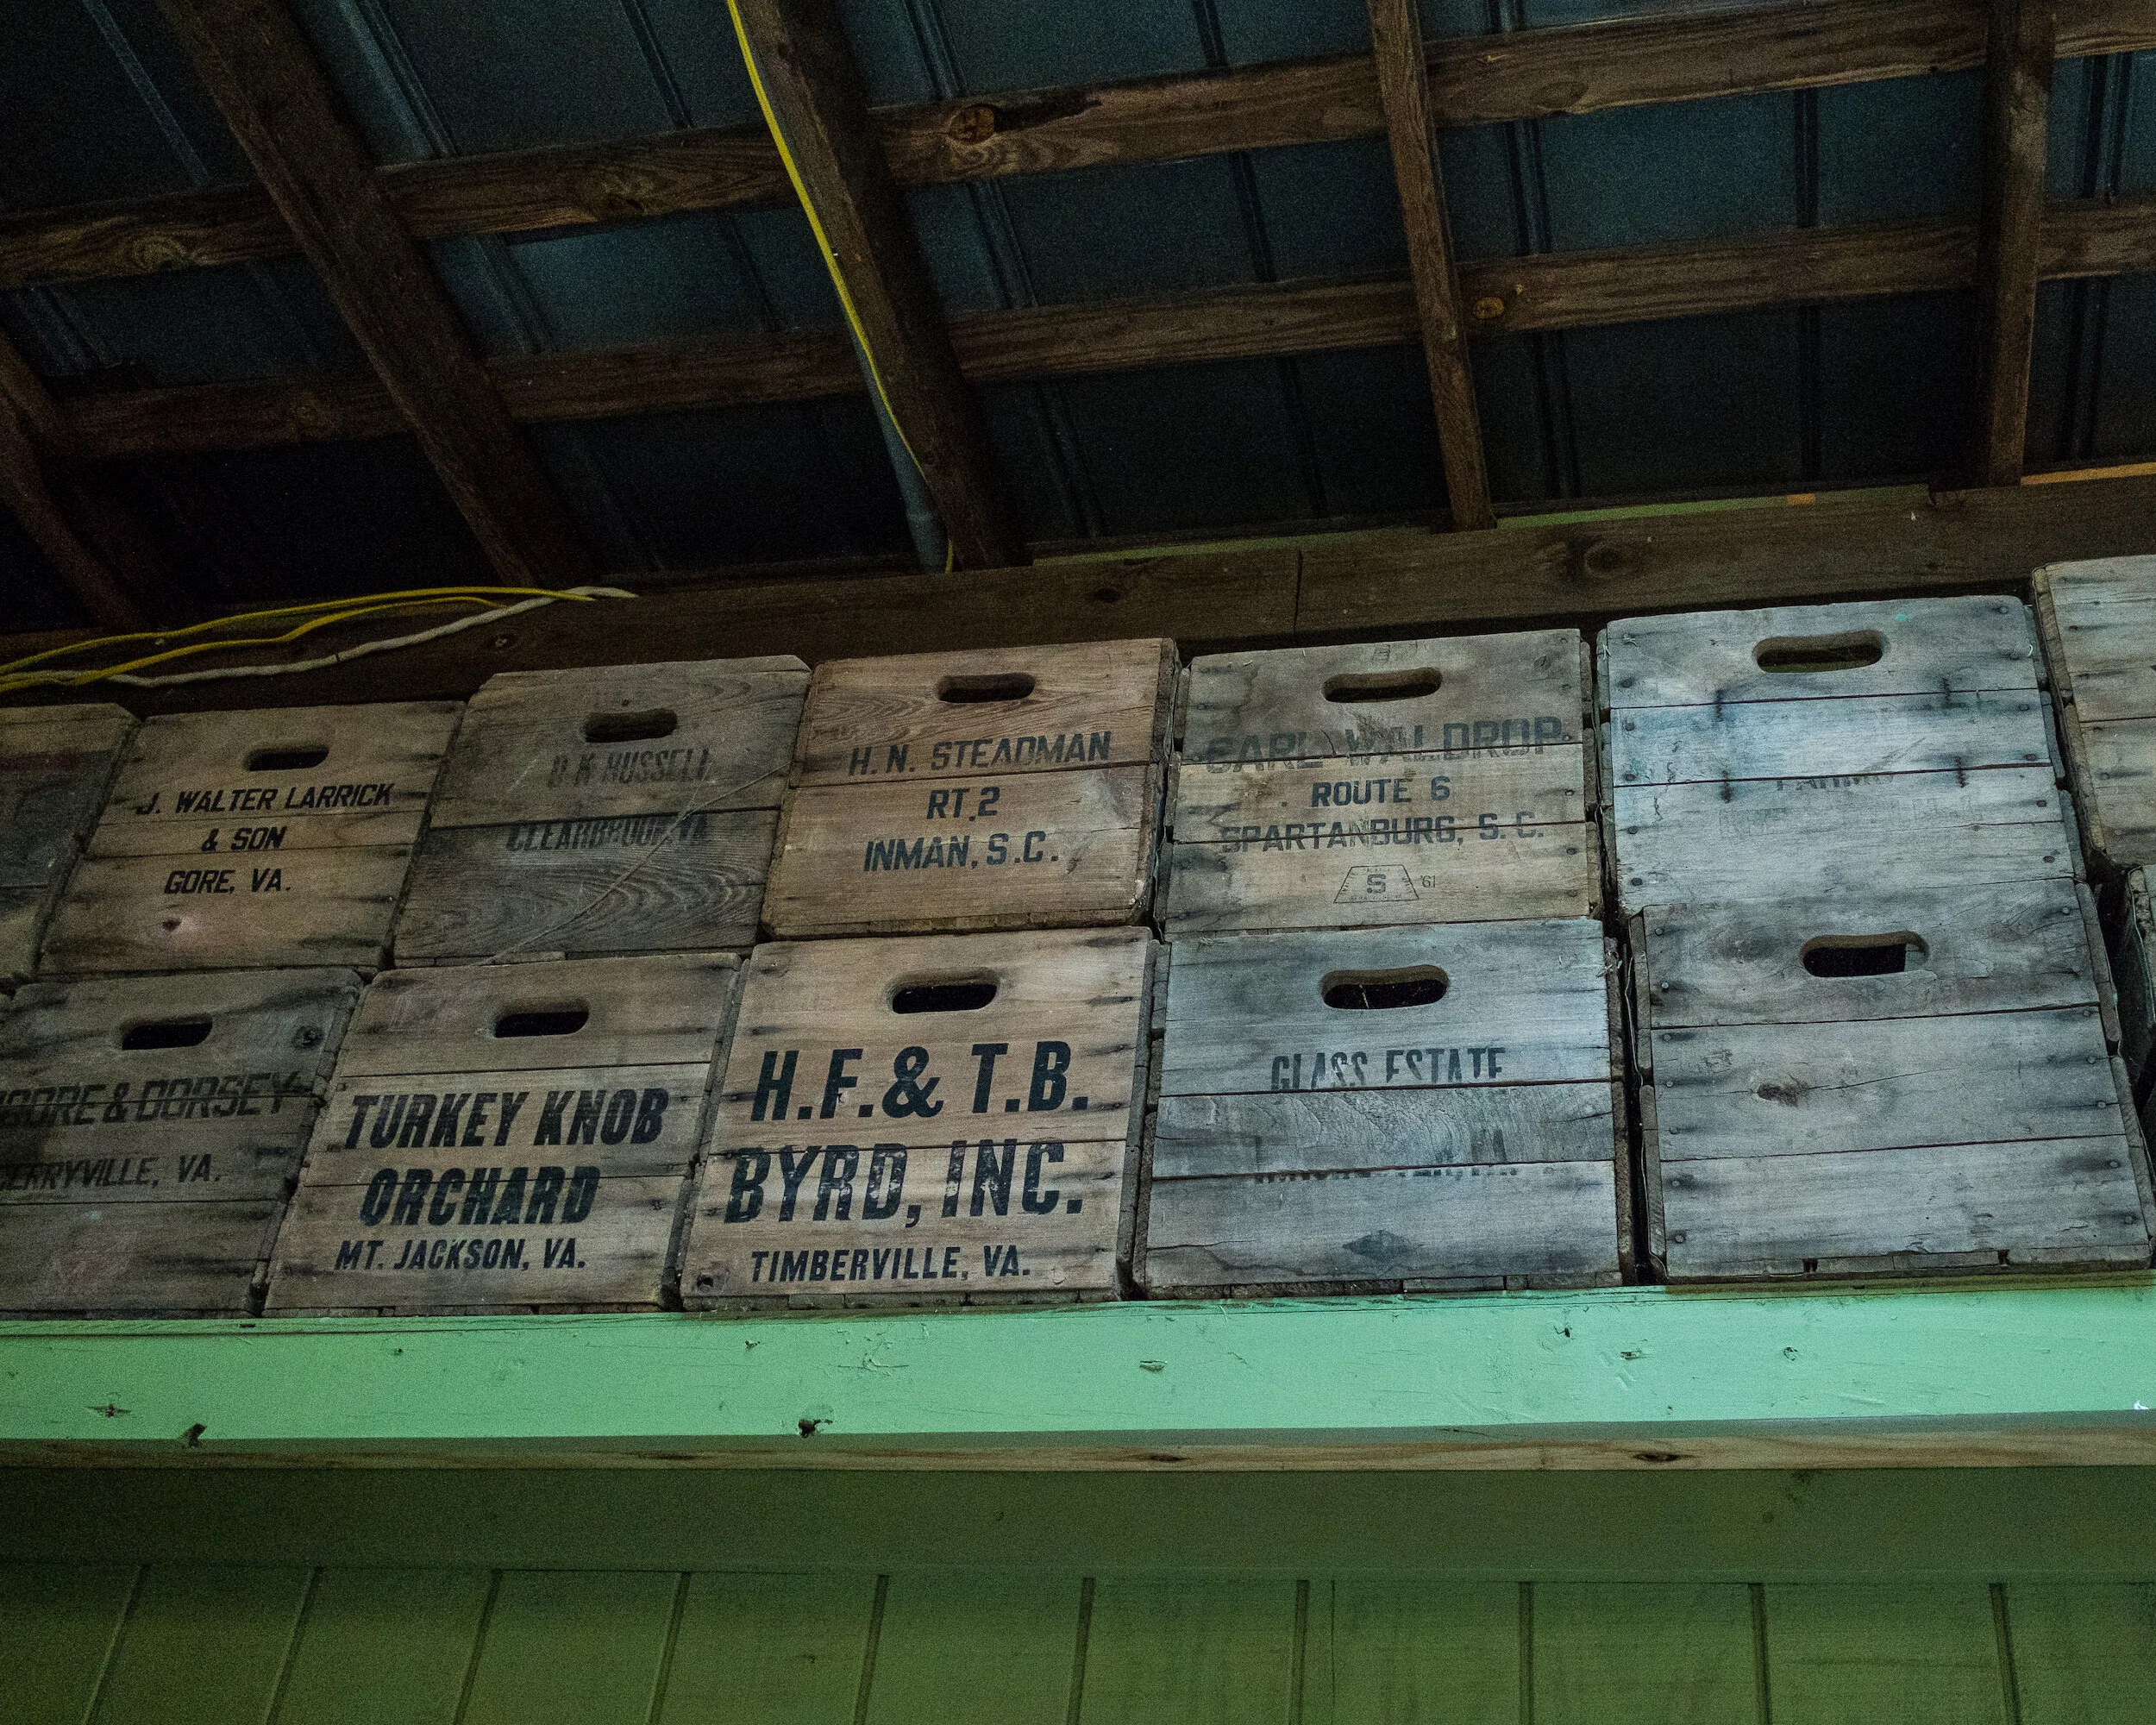
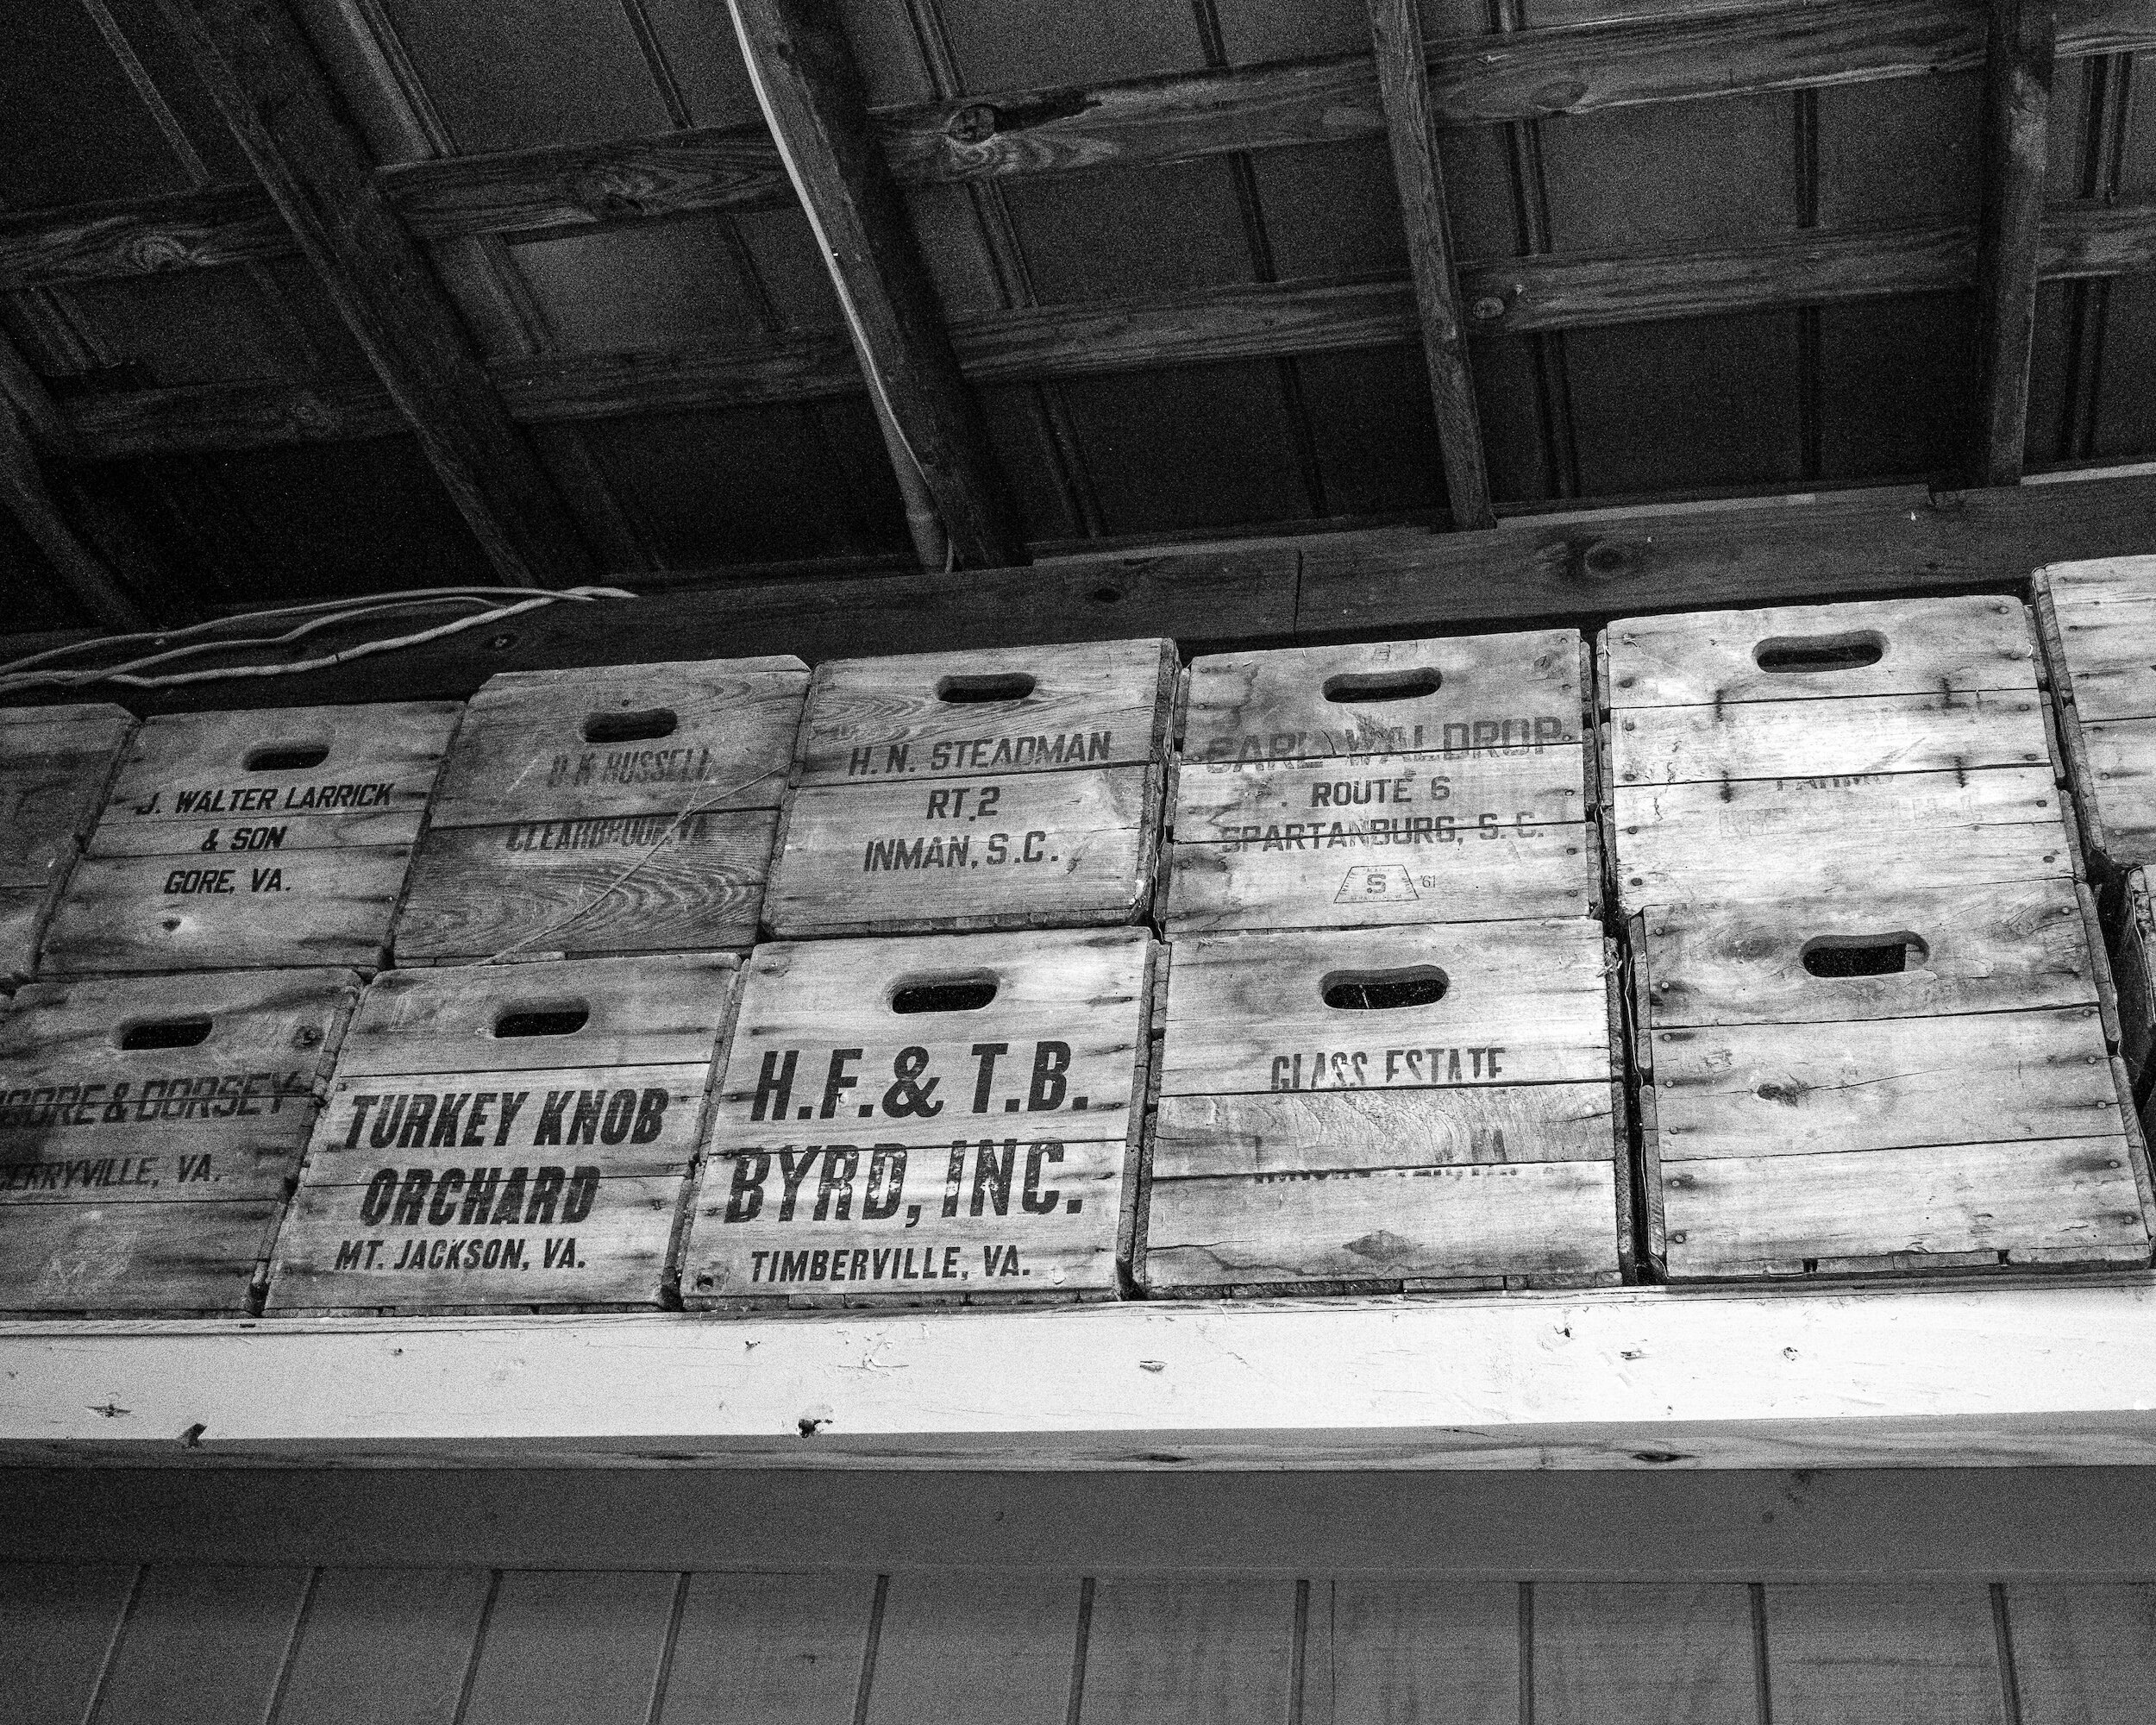
In this case, the black and white version is my favorite. The boxes have subdued colors, and good texture. The colors of the boxes and the green of the shelf don't really add anything of interest to the image. The green actually distracts from the main subject: the boxes. The black and white rendering brings out the grain of the wood and the repeating pattern of the stacked boxes.
Red Roses
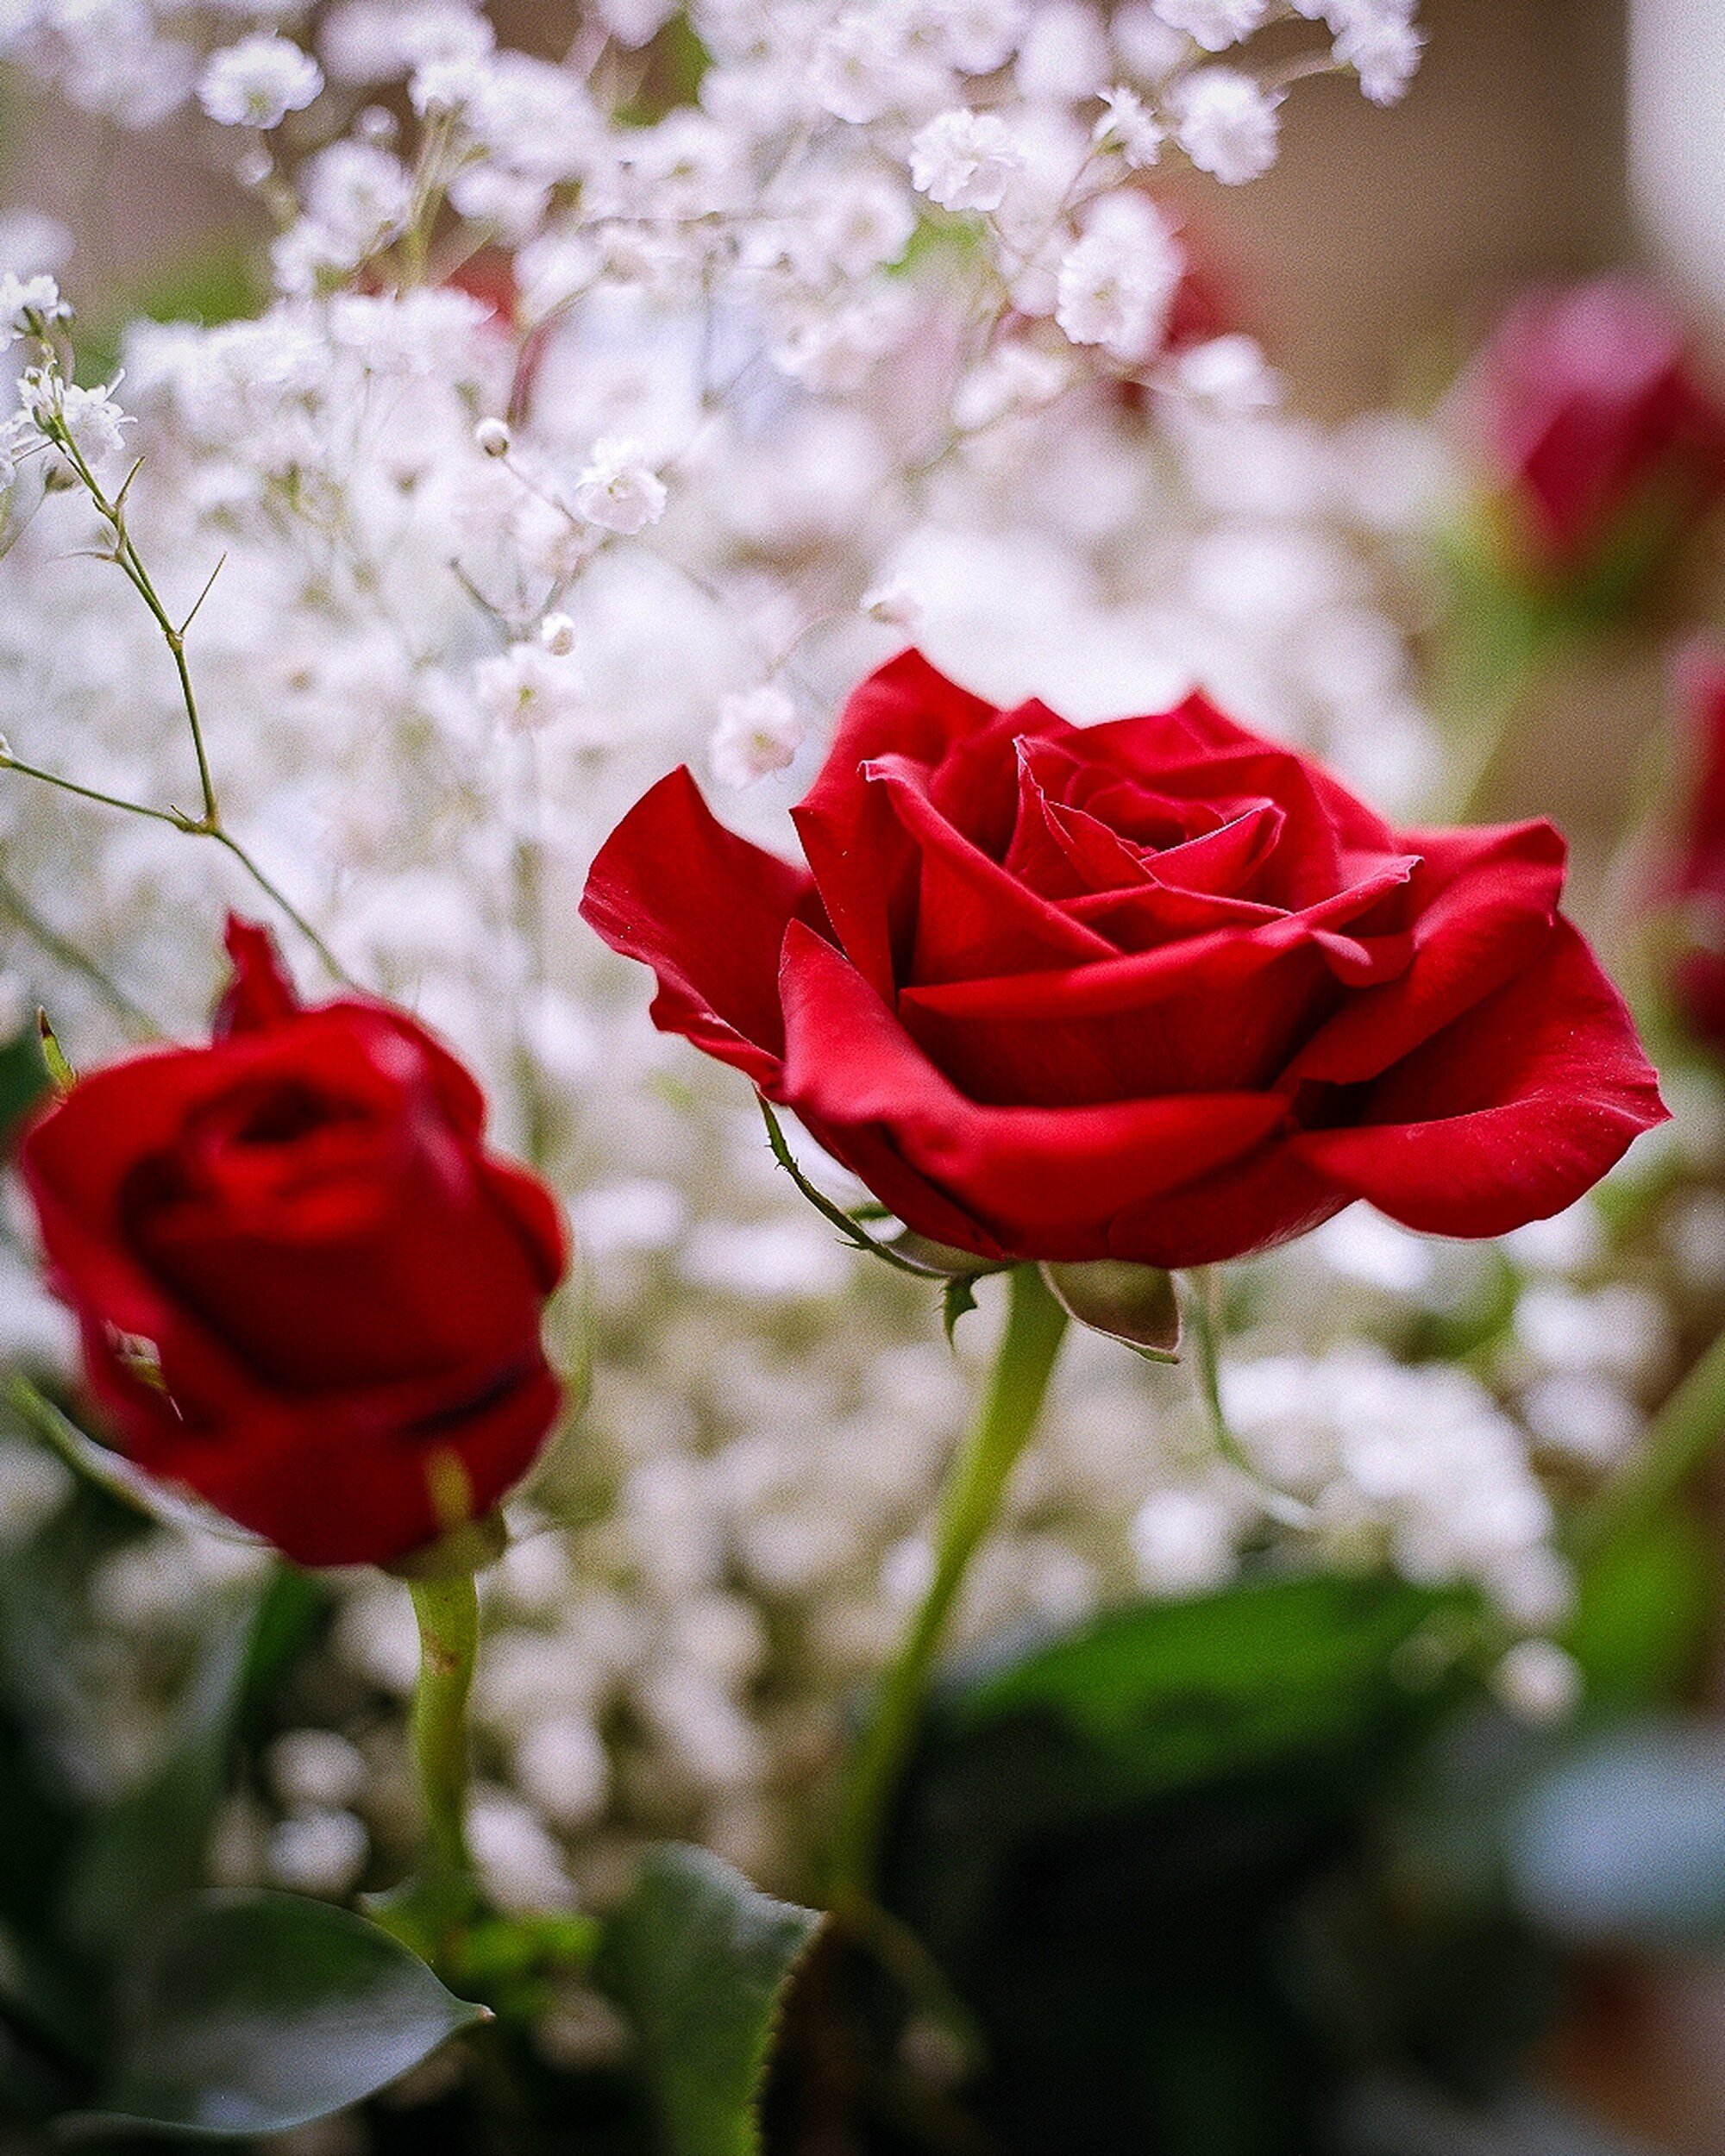
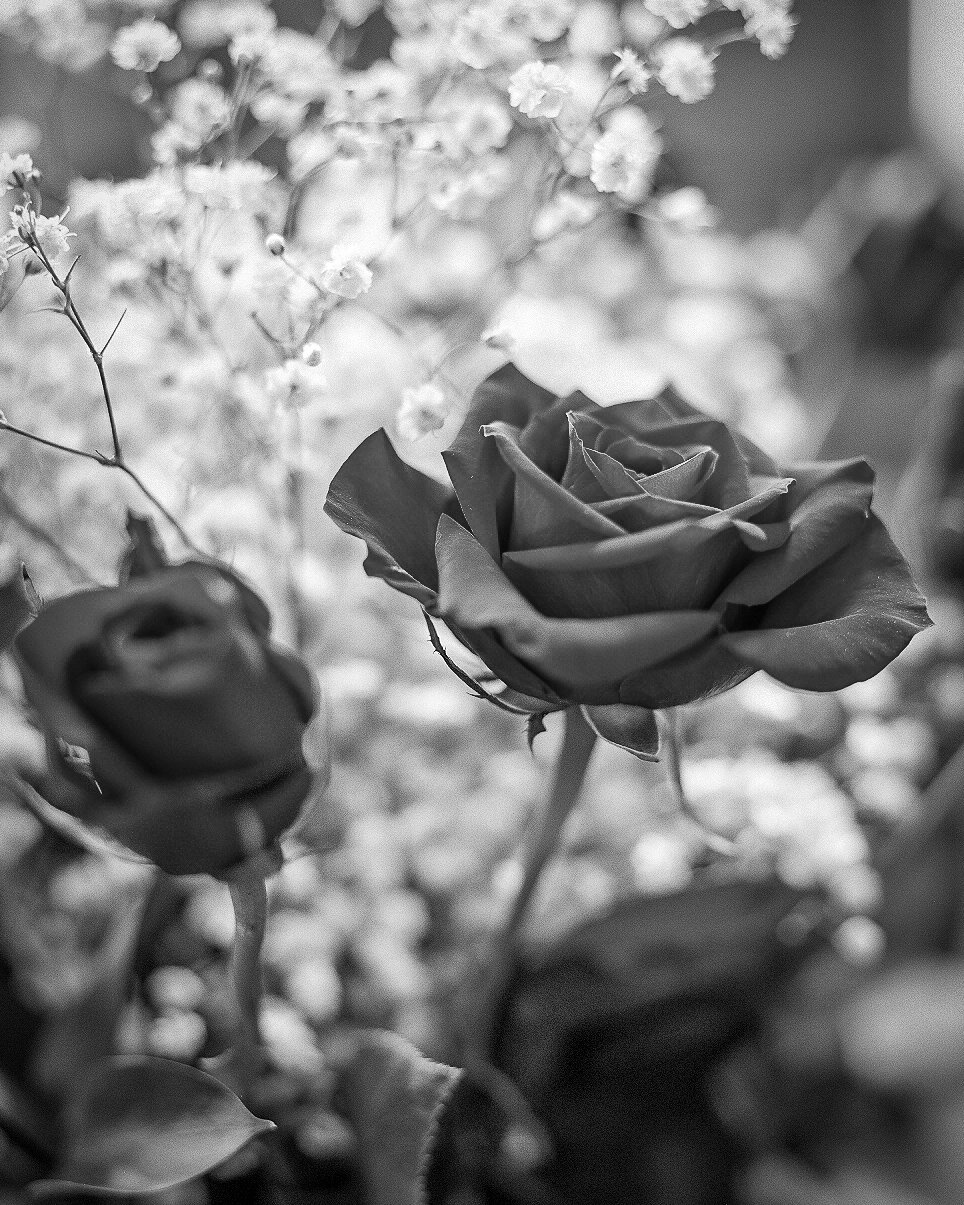
A nice example of photographing flowers. My first inclination would be to say that the color version works best: nice red roses, nice white flowers in the background, color being of essence. However, the longer I looked at this image, the more I started to like the black and white version: printed on a big format, and in the right interior this might actually work very well.
An important lesson learned here is that you need to take sufficient time to look at an image before making a decision on which version to use. While first impressions are important, you really need to digest what you are looking at and how it will work in your interior.
Mushrooms
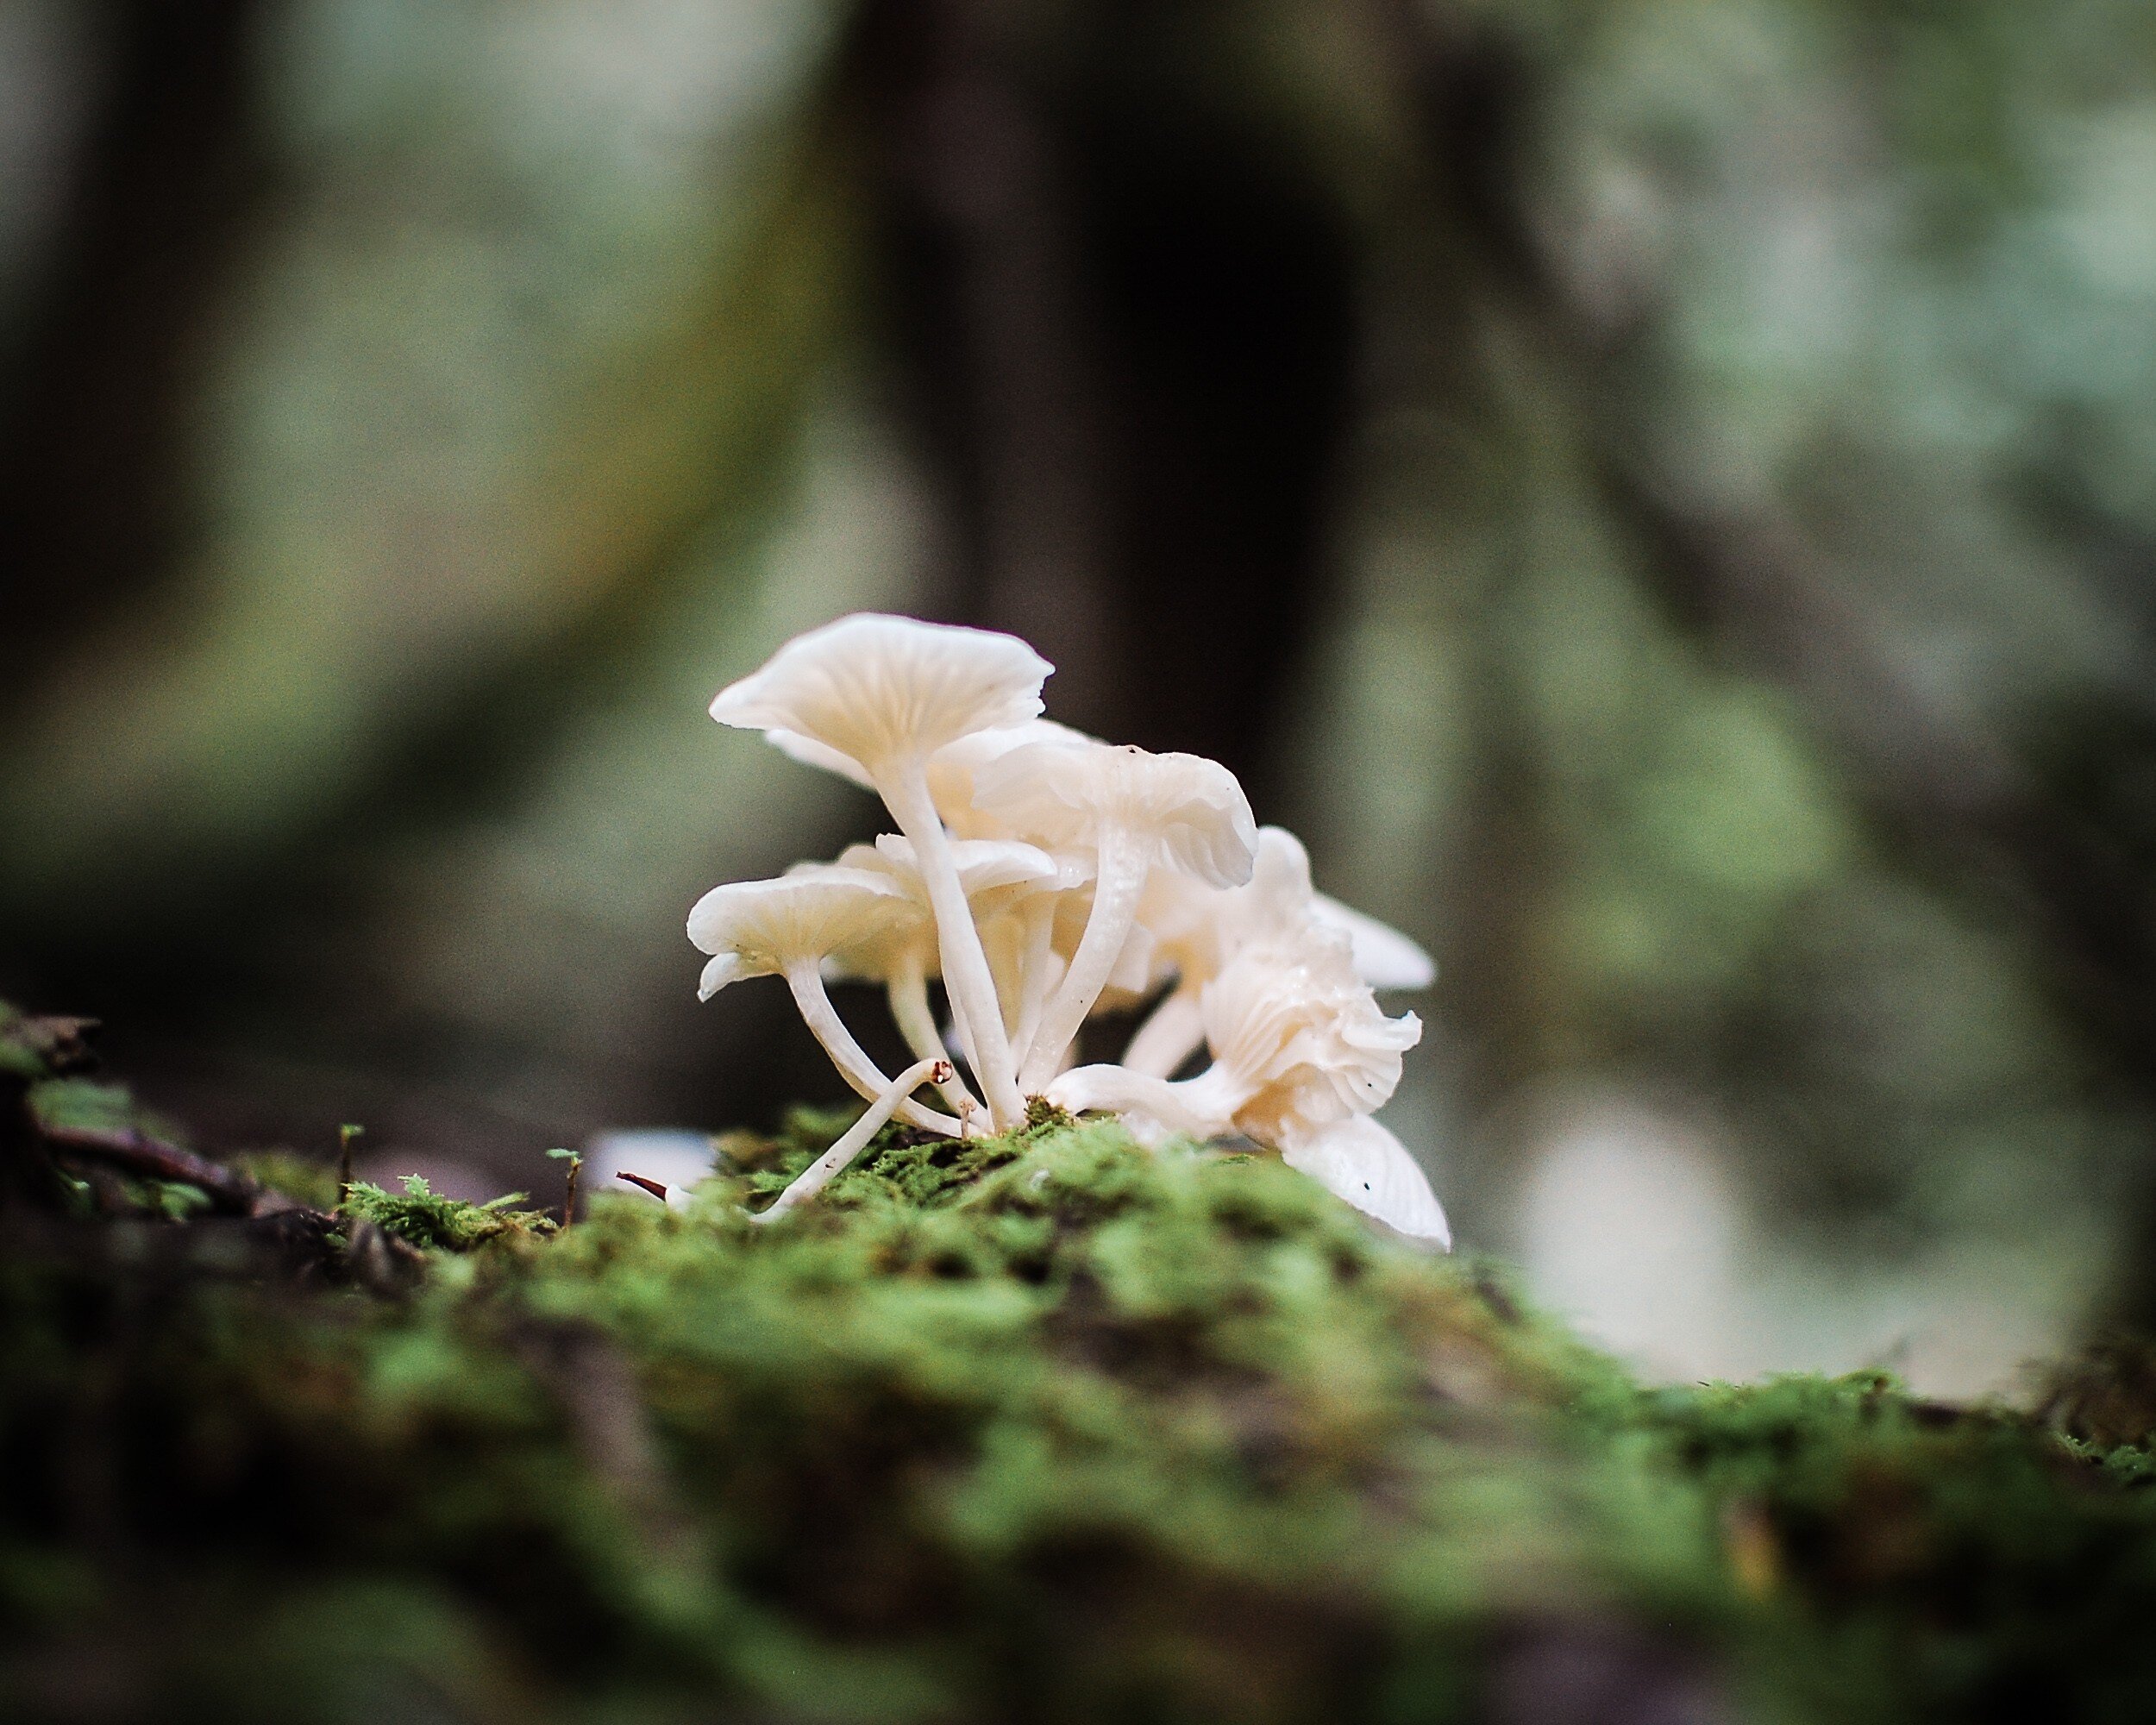
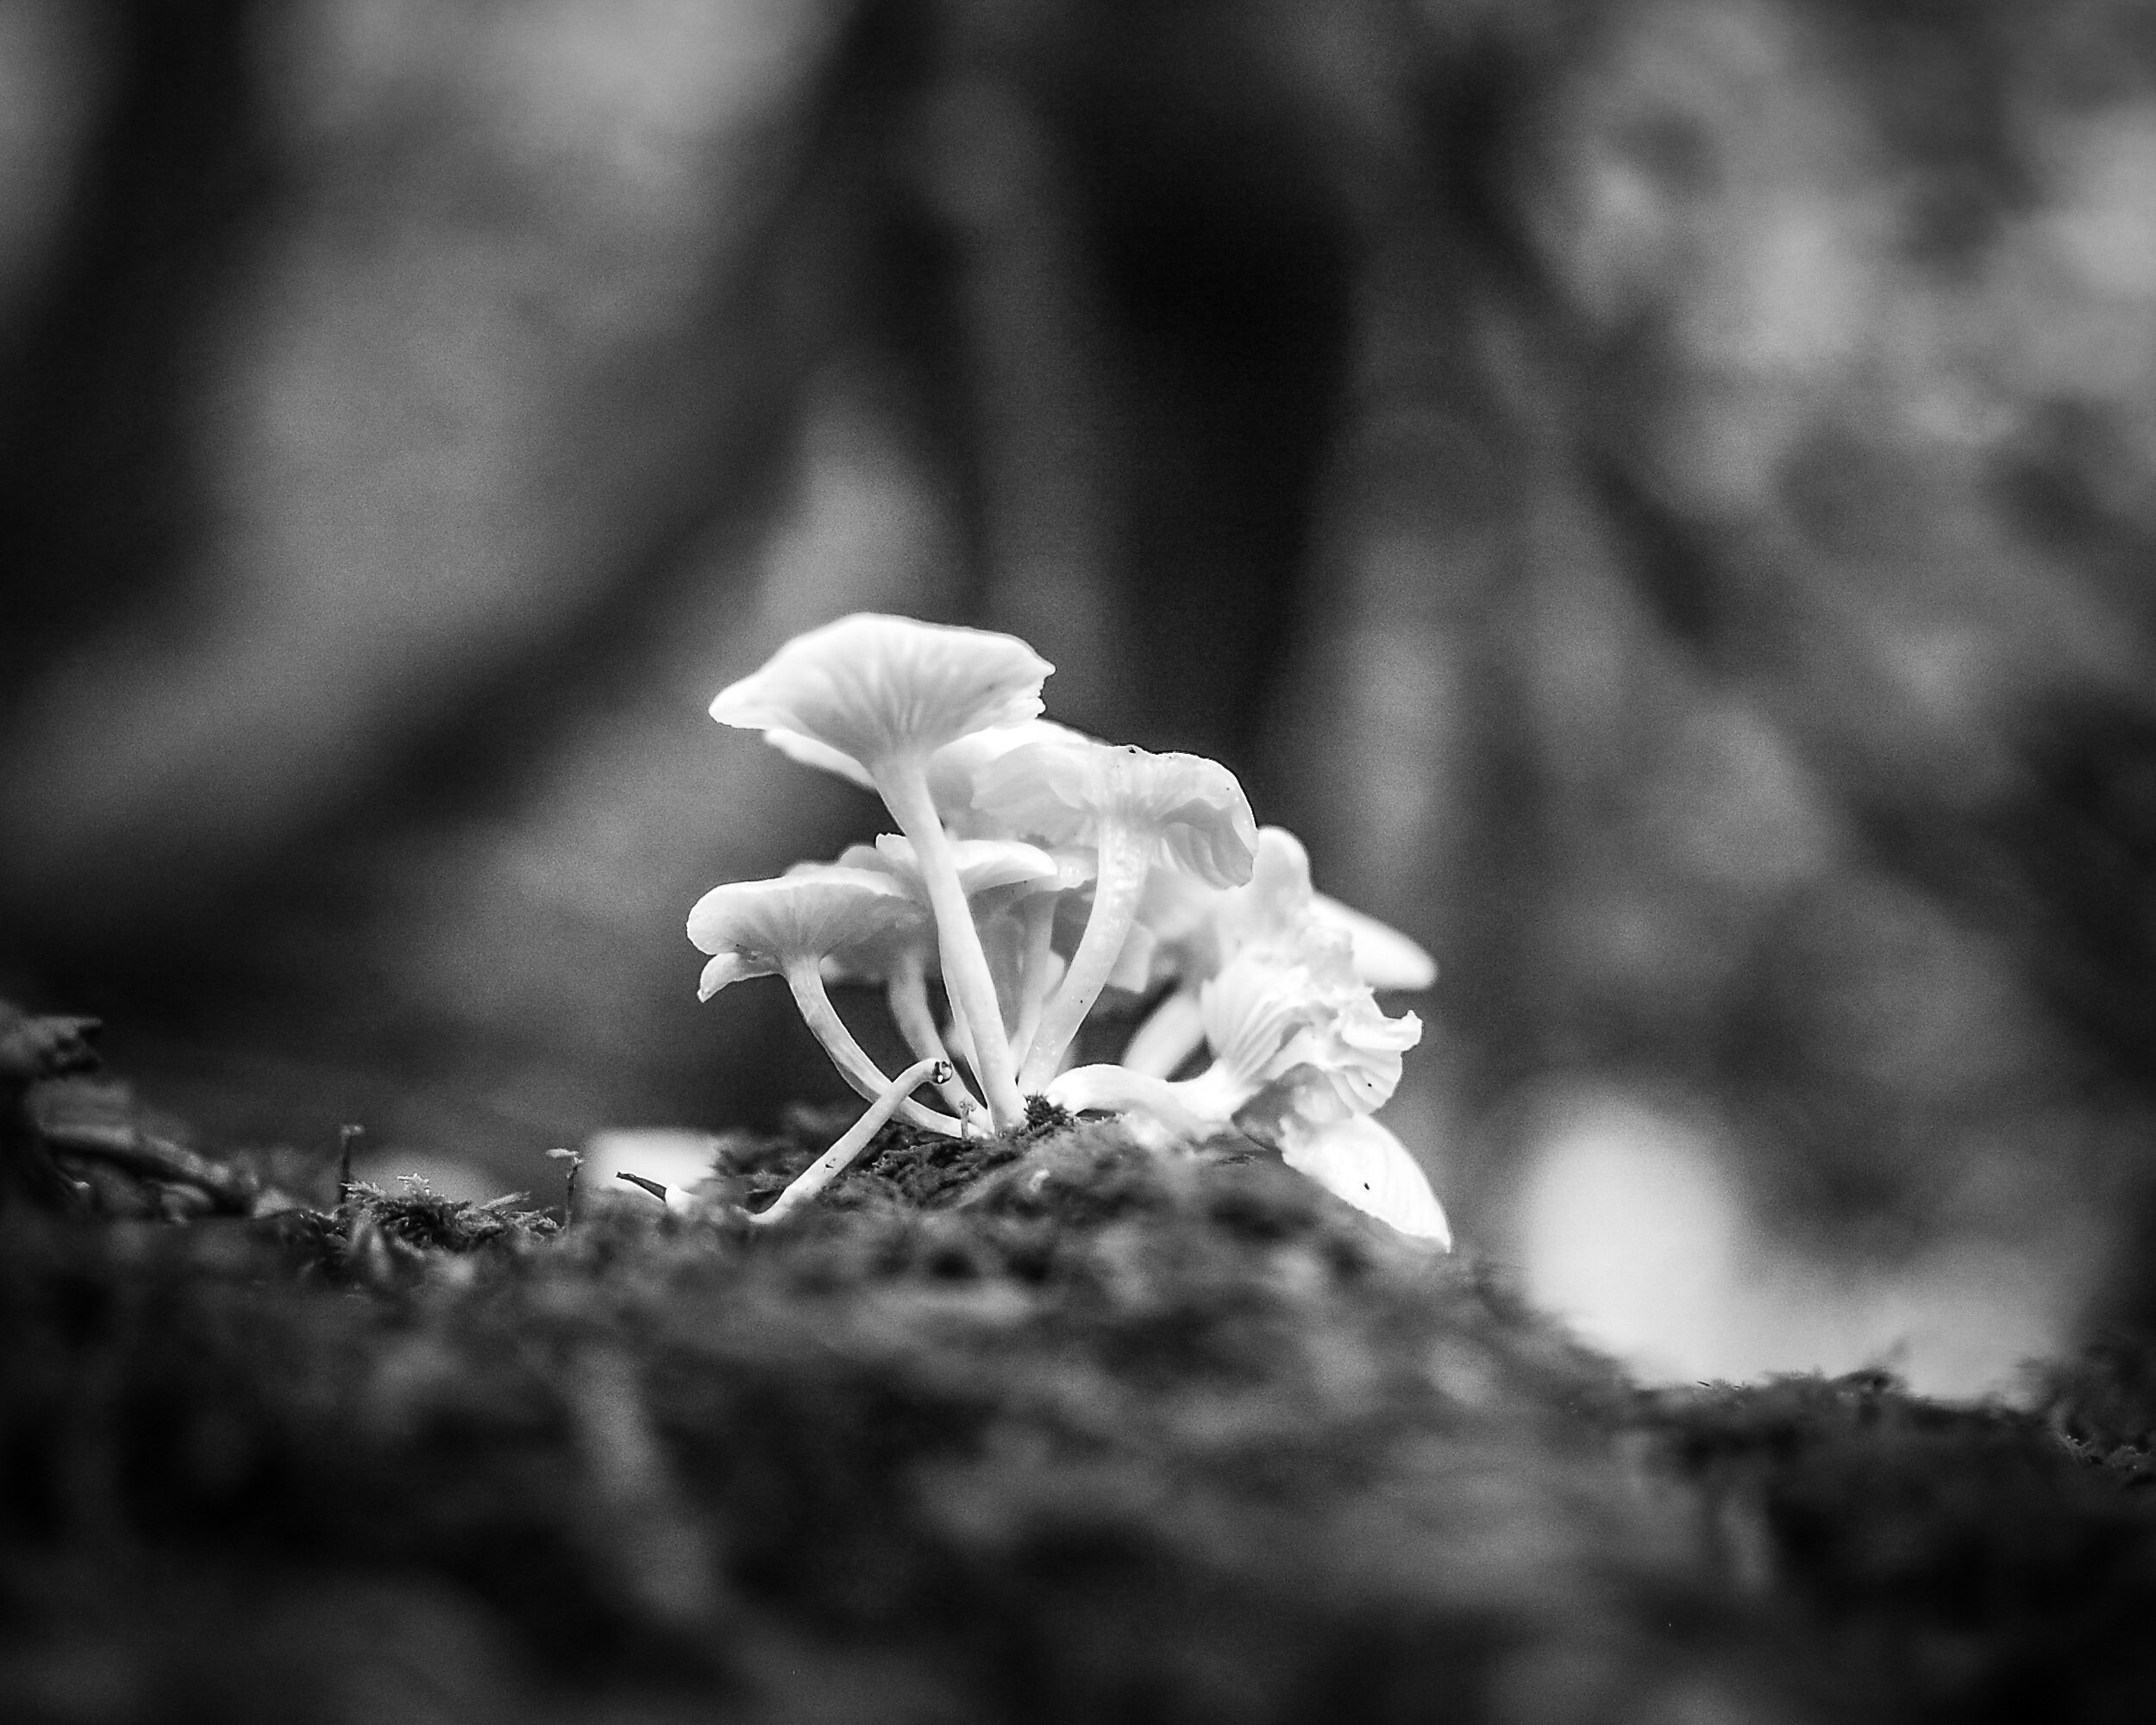
Here I had exactly the reverse experience from the one I had with the Red Roses Image. My preference was immediately for the black and white version: the shallow depth of field makes the mushrooms stand out against the background and the monochrome rendering makes background and foreground blend in and away from the main subject.
However, after looking longer at the color version I noticed how the green in the foreground actually helps to lead the eye towards the mushrooms. The dark vertical (a tree) in the background and the lighter triangles to the left and right of it help to lead the eye upwards; even more, than they do in the black and white version. Another example of taking the time to look and to digest the total image.
San Remo Apartments


Architecture, so in general rule #1 says: black and white. But no, not really in this instance. Although the apartment building clearly is the main subject of this image (that it is nicely centralized in the image might provide a hint for this) the color of the trees, the pond (with reflection), and the blue sky are to me essential to this image. I don't think the black and white version doesn't work at all, but my preference for this image is color.
Campbell's Covered Bridge
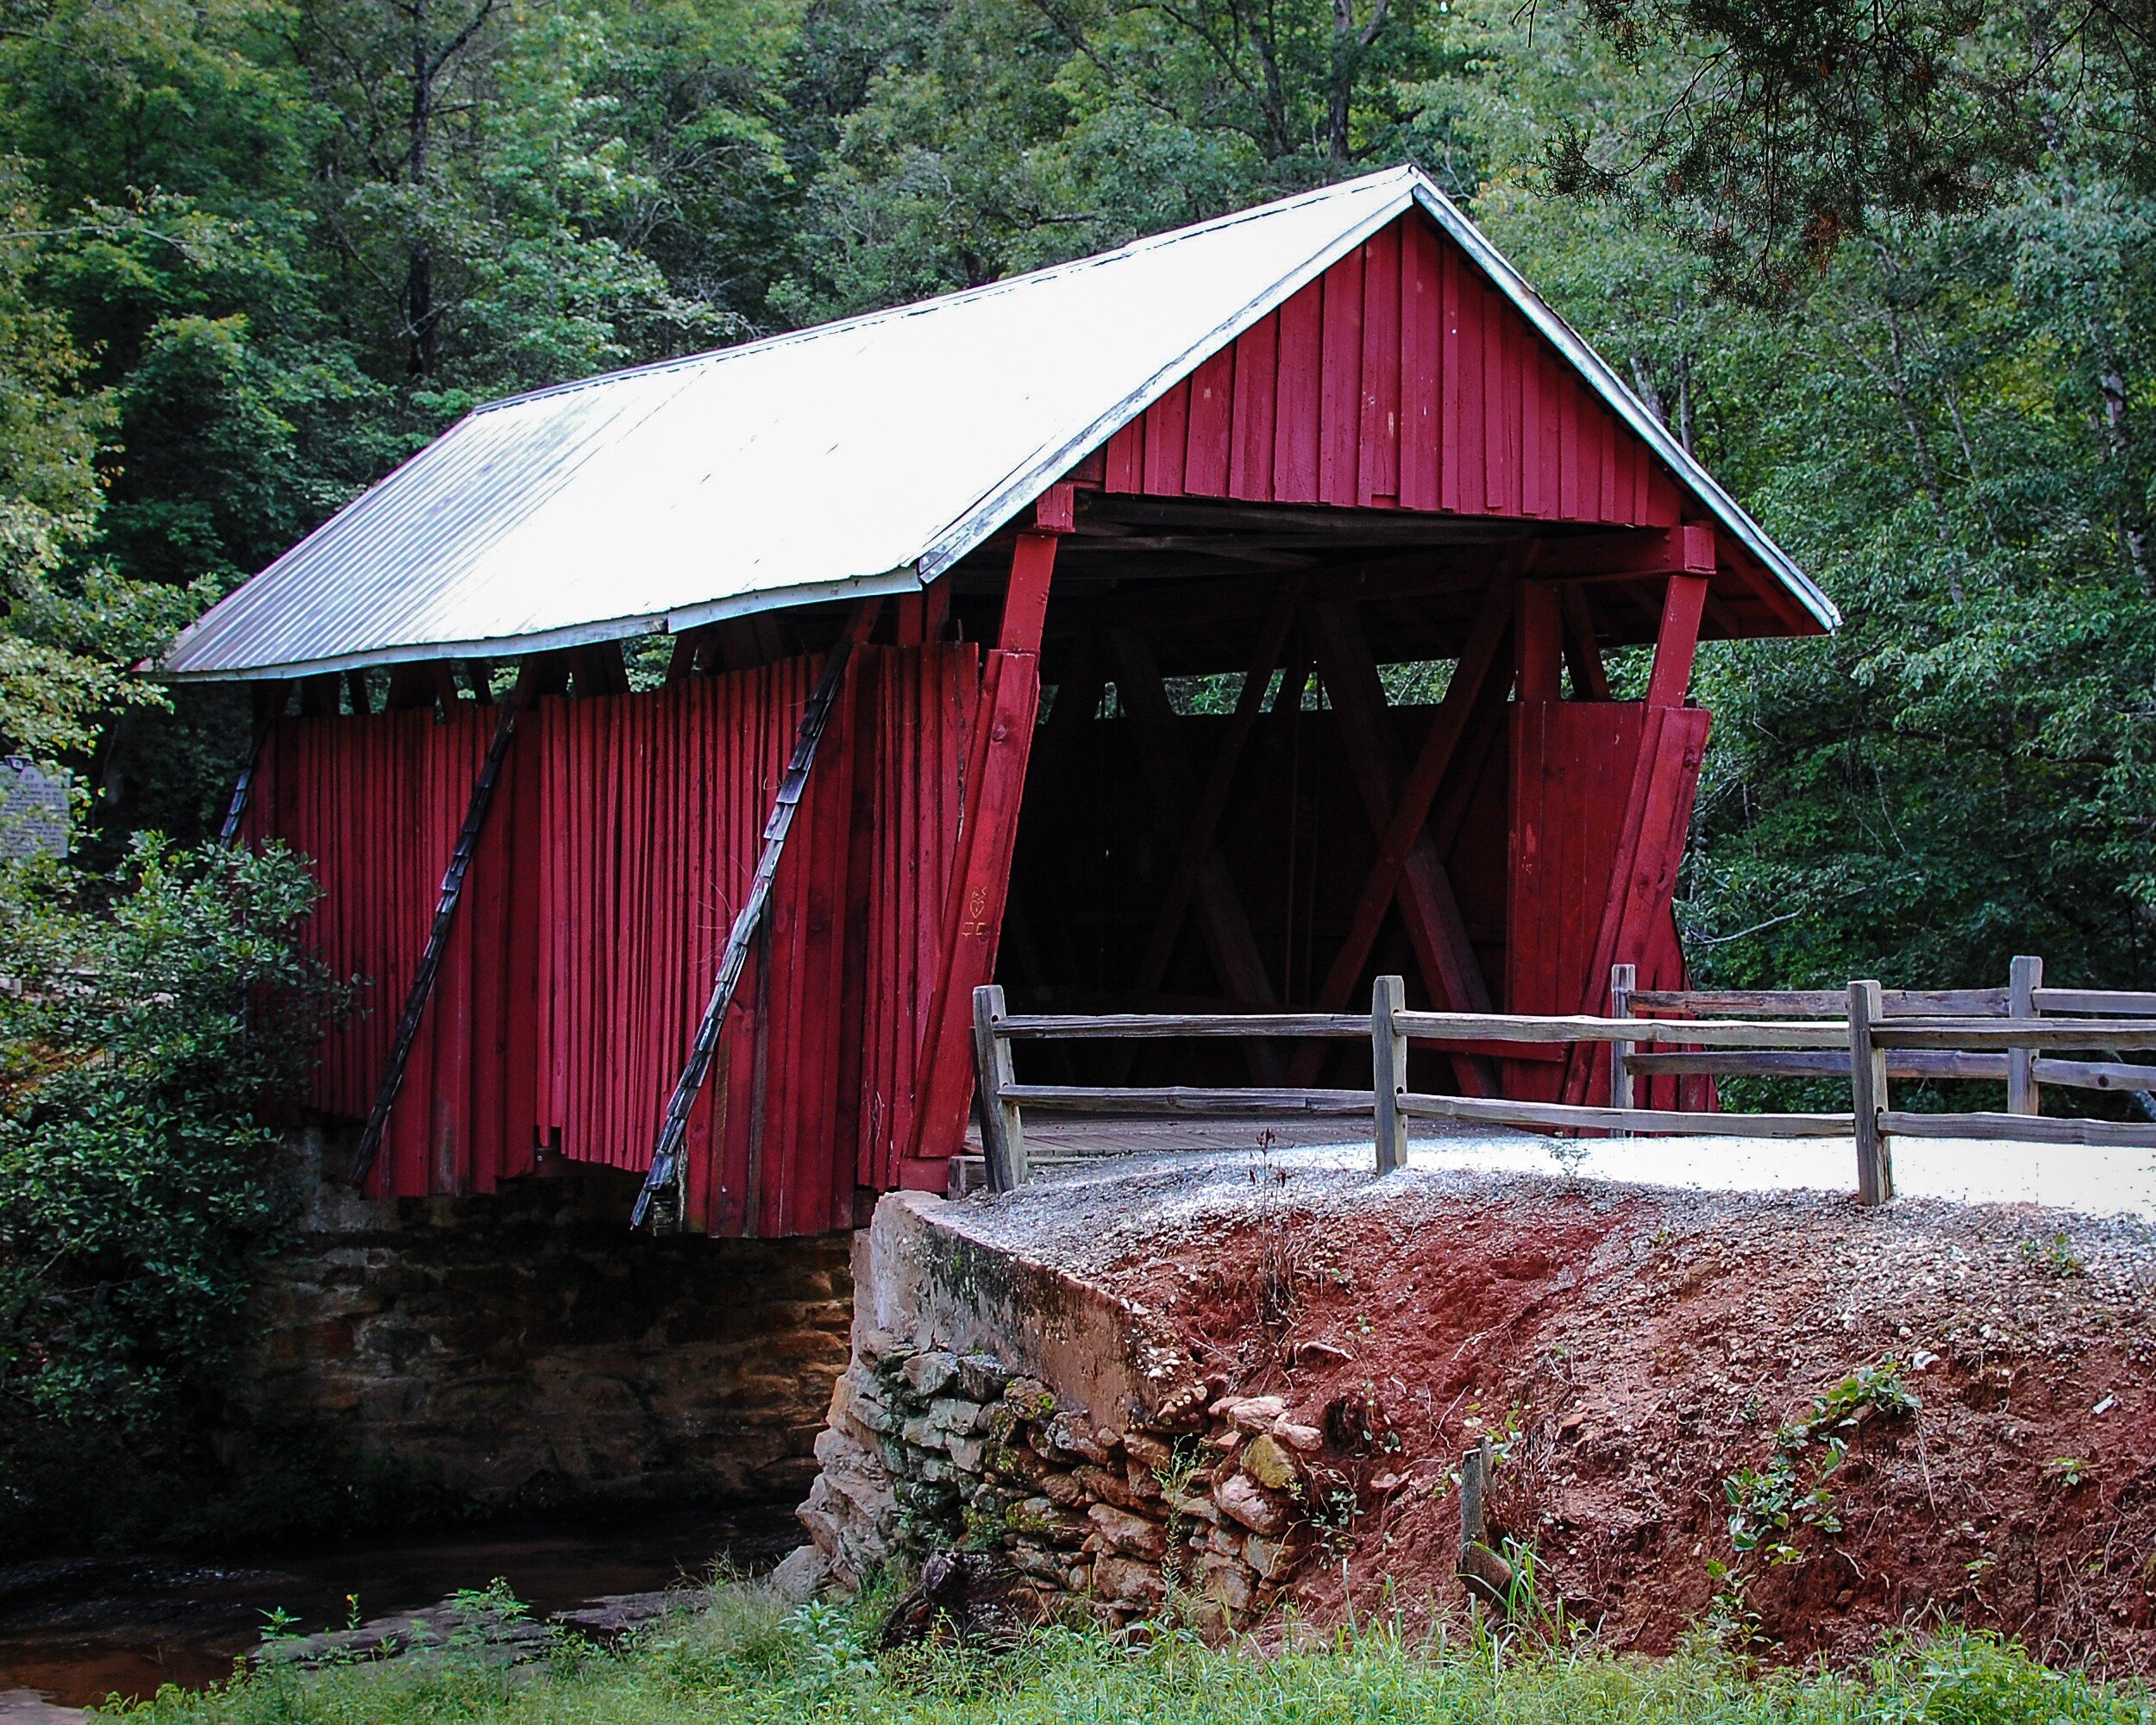
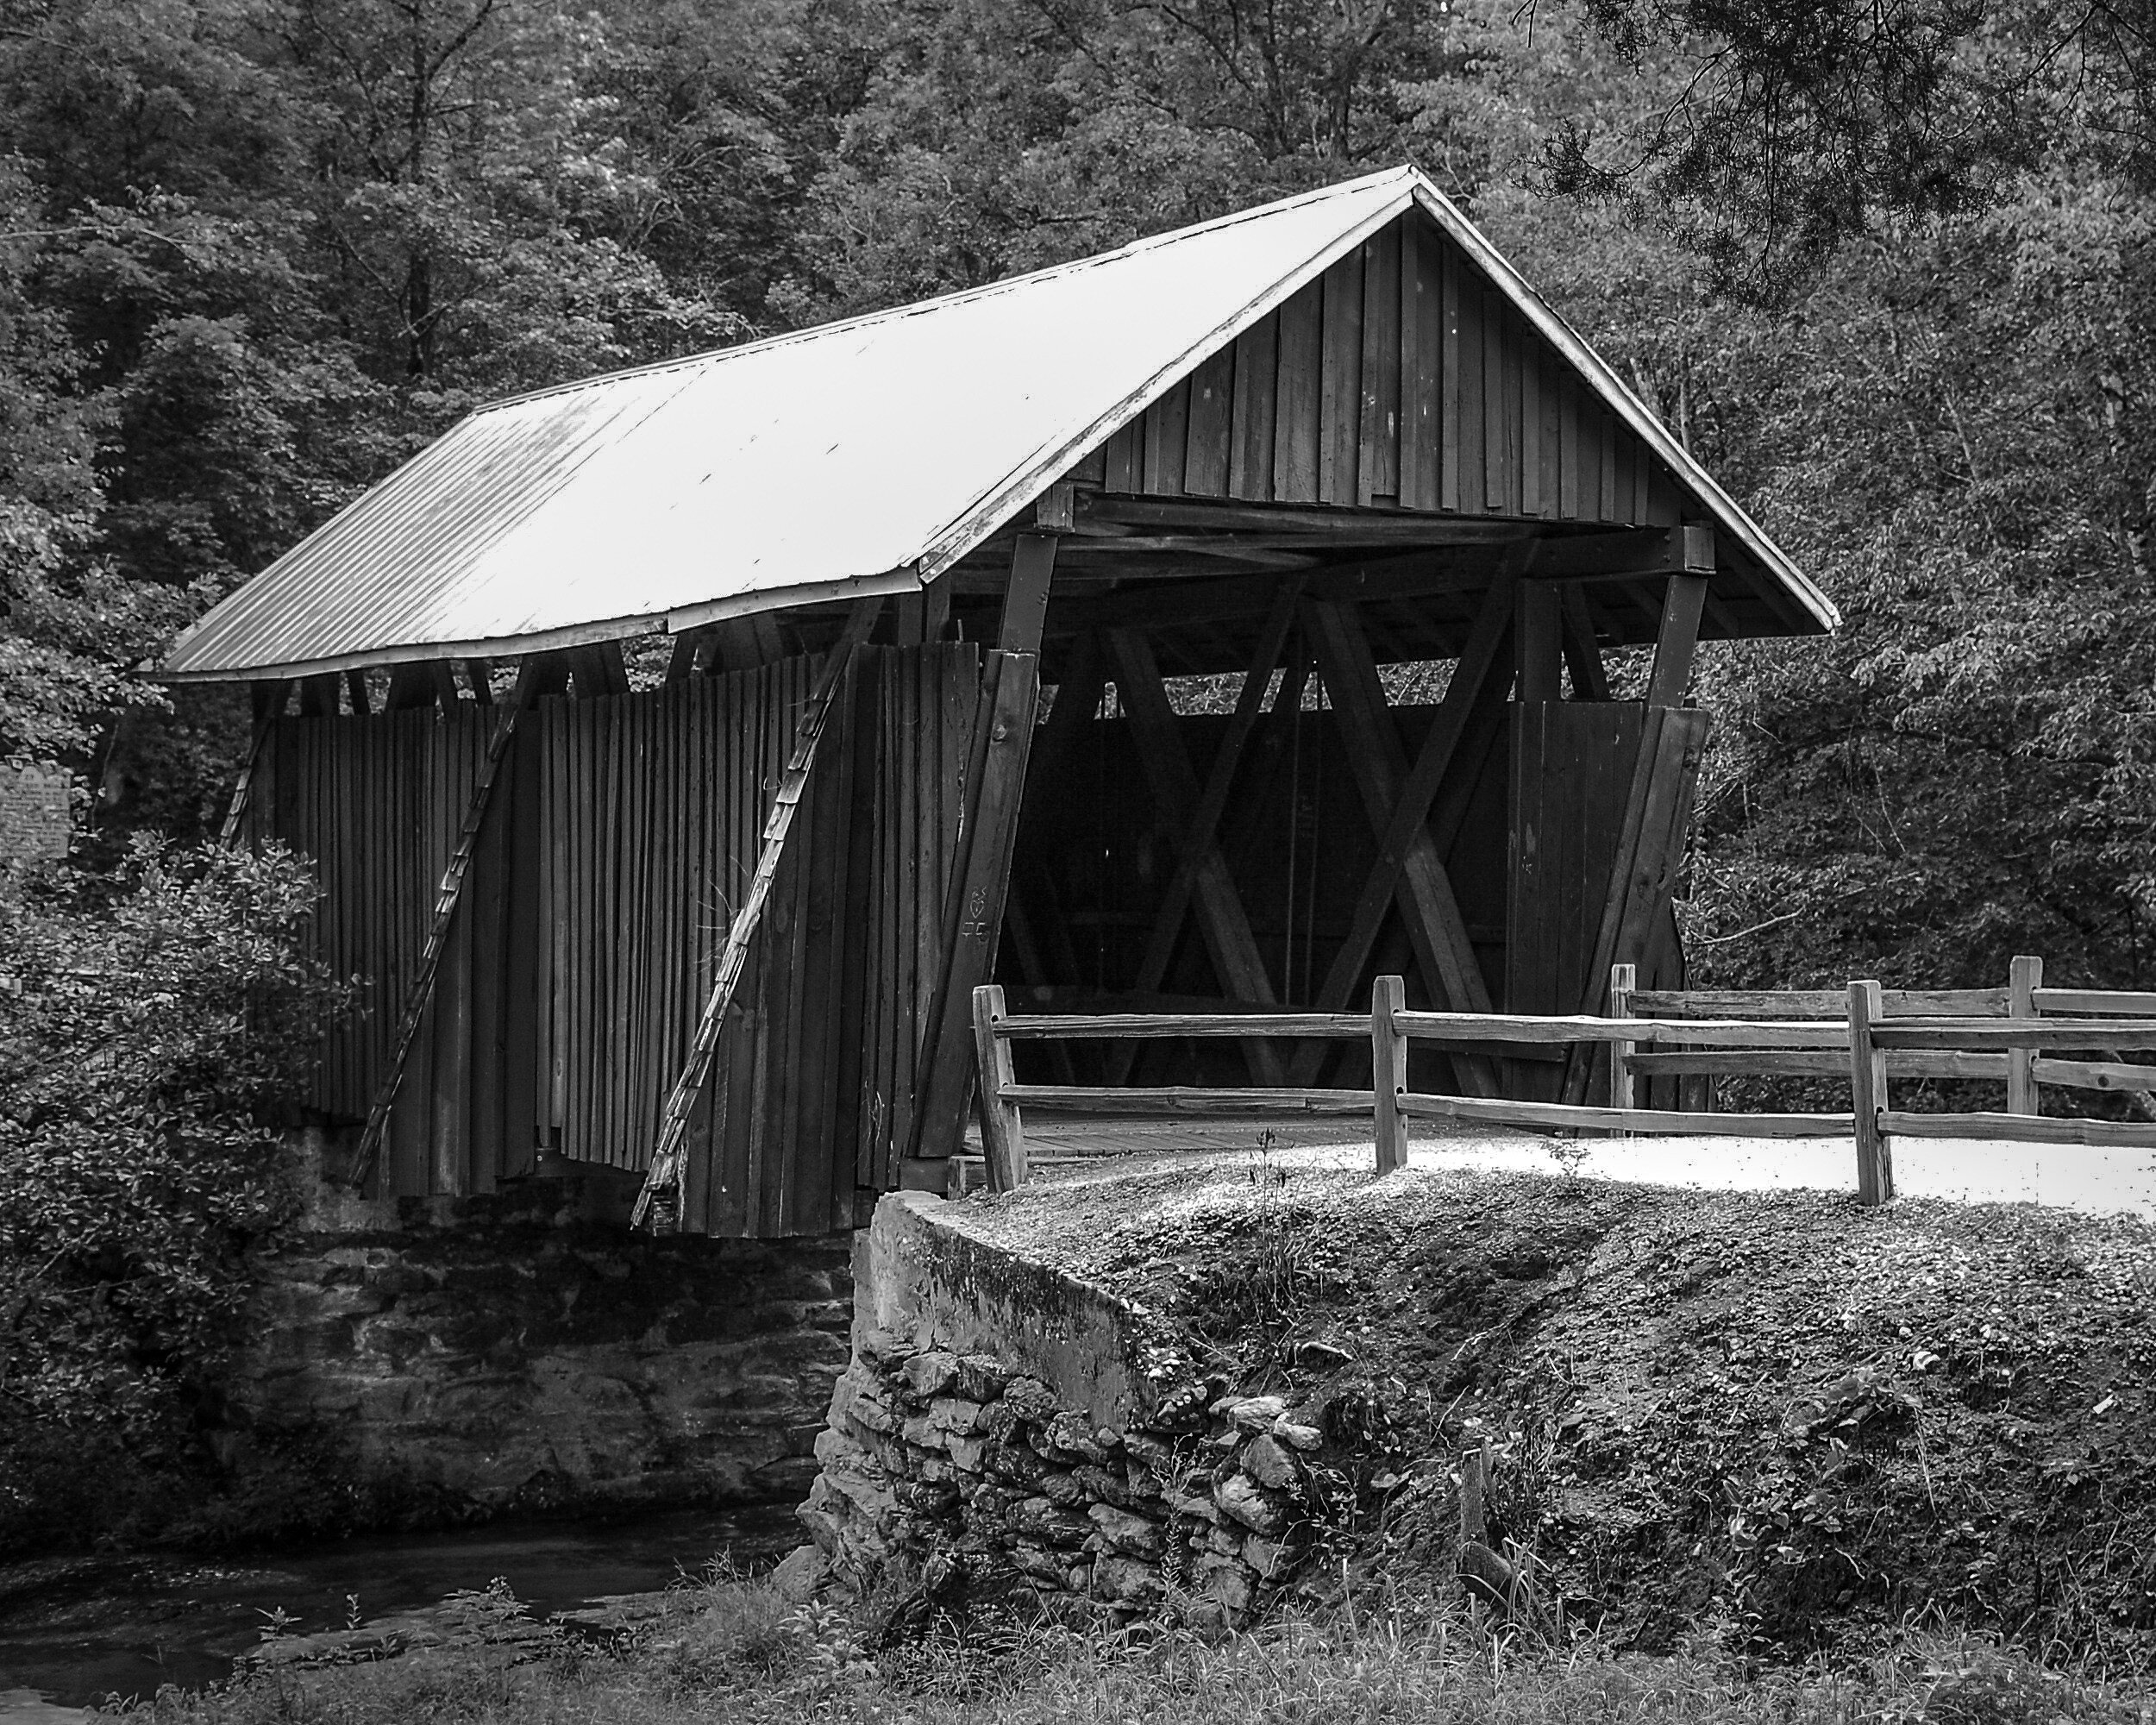
Another example where for me an image of an architectural structure works better in color than in black and white. The red paint is a very distinct feature of the bridge, and the juxtaposition of the red with the green of the trees in the background makes the bridge really stand out. The black and white version in contrast looks quite flat.
Capitol Hill

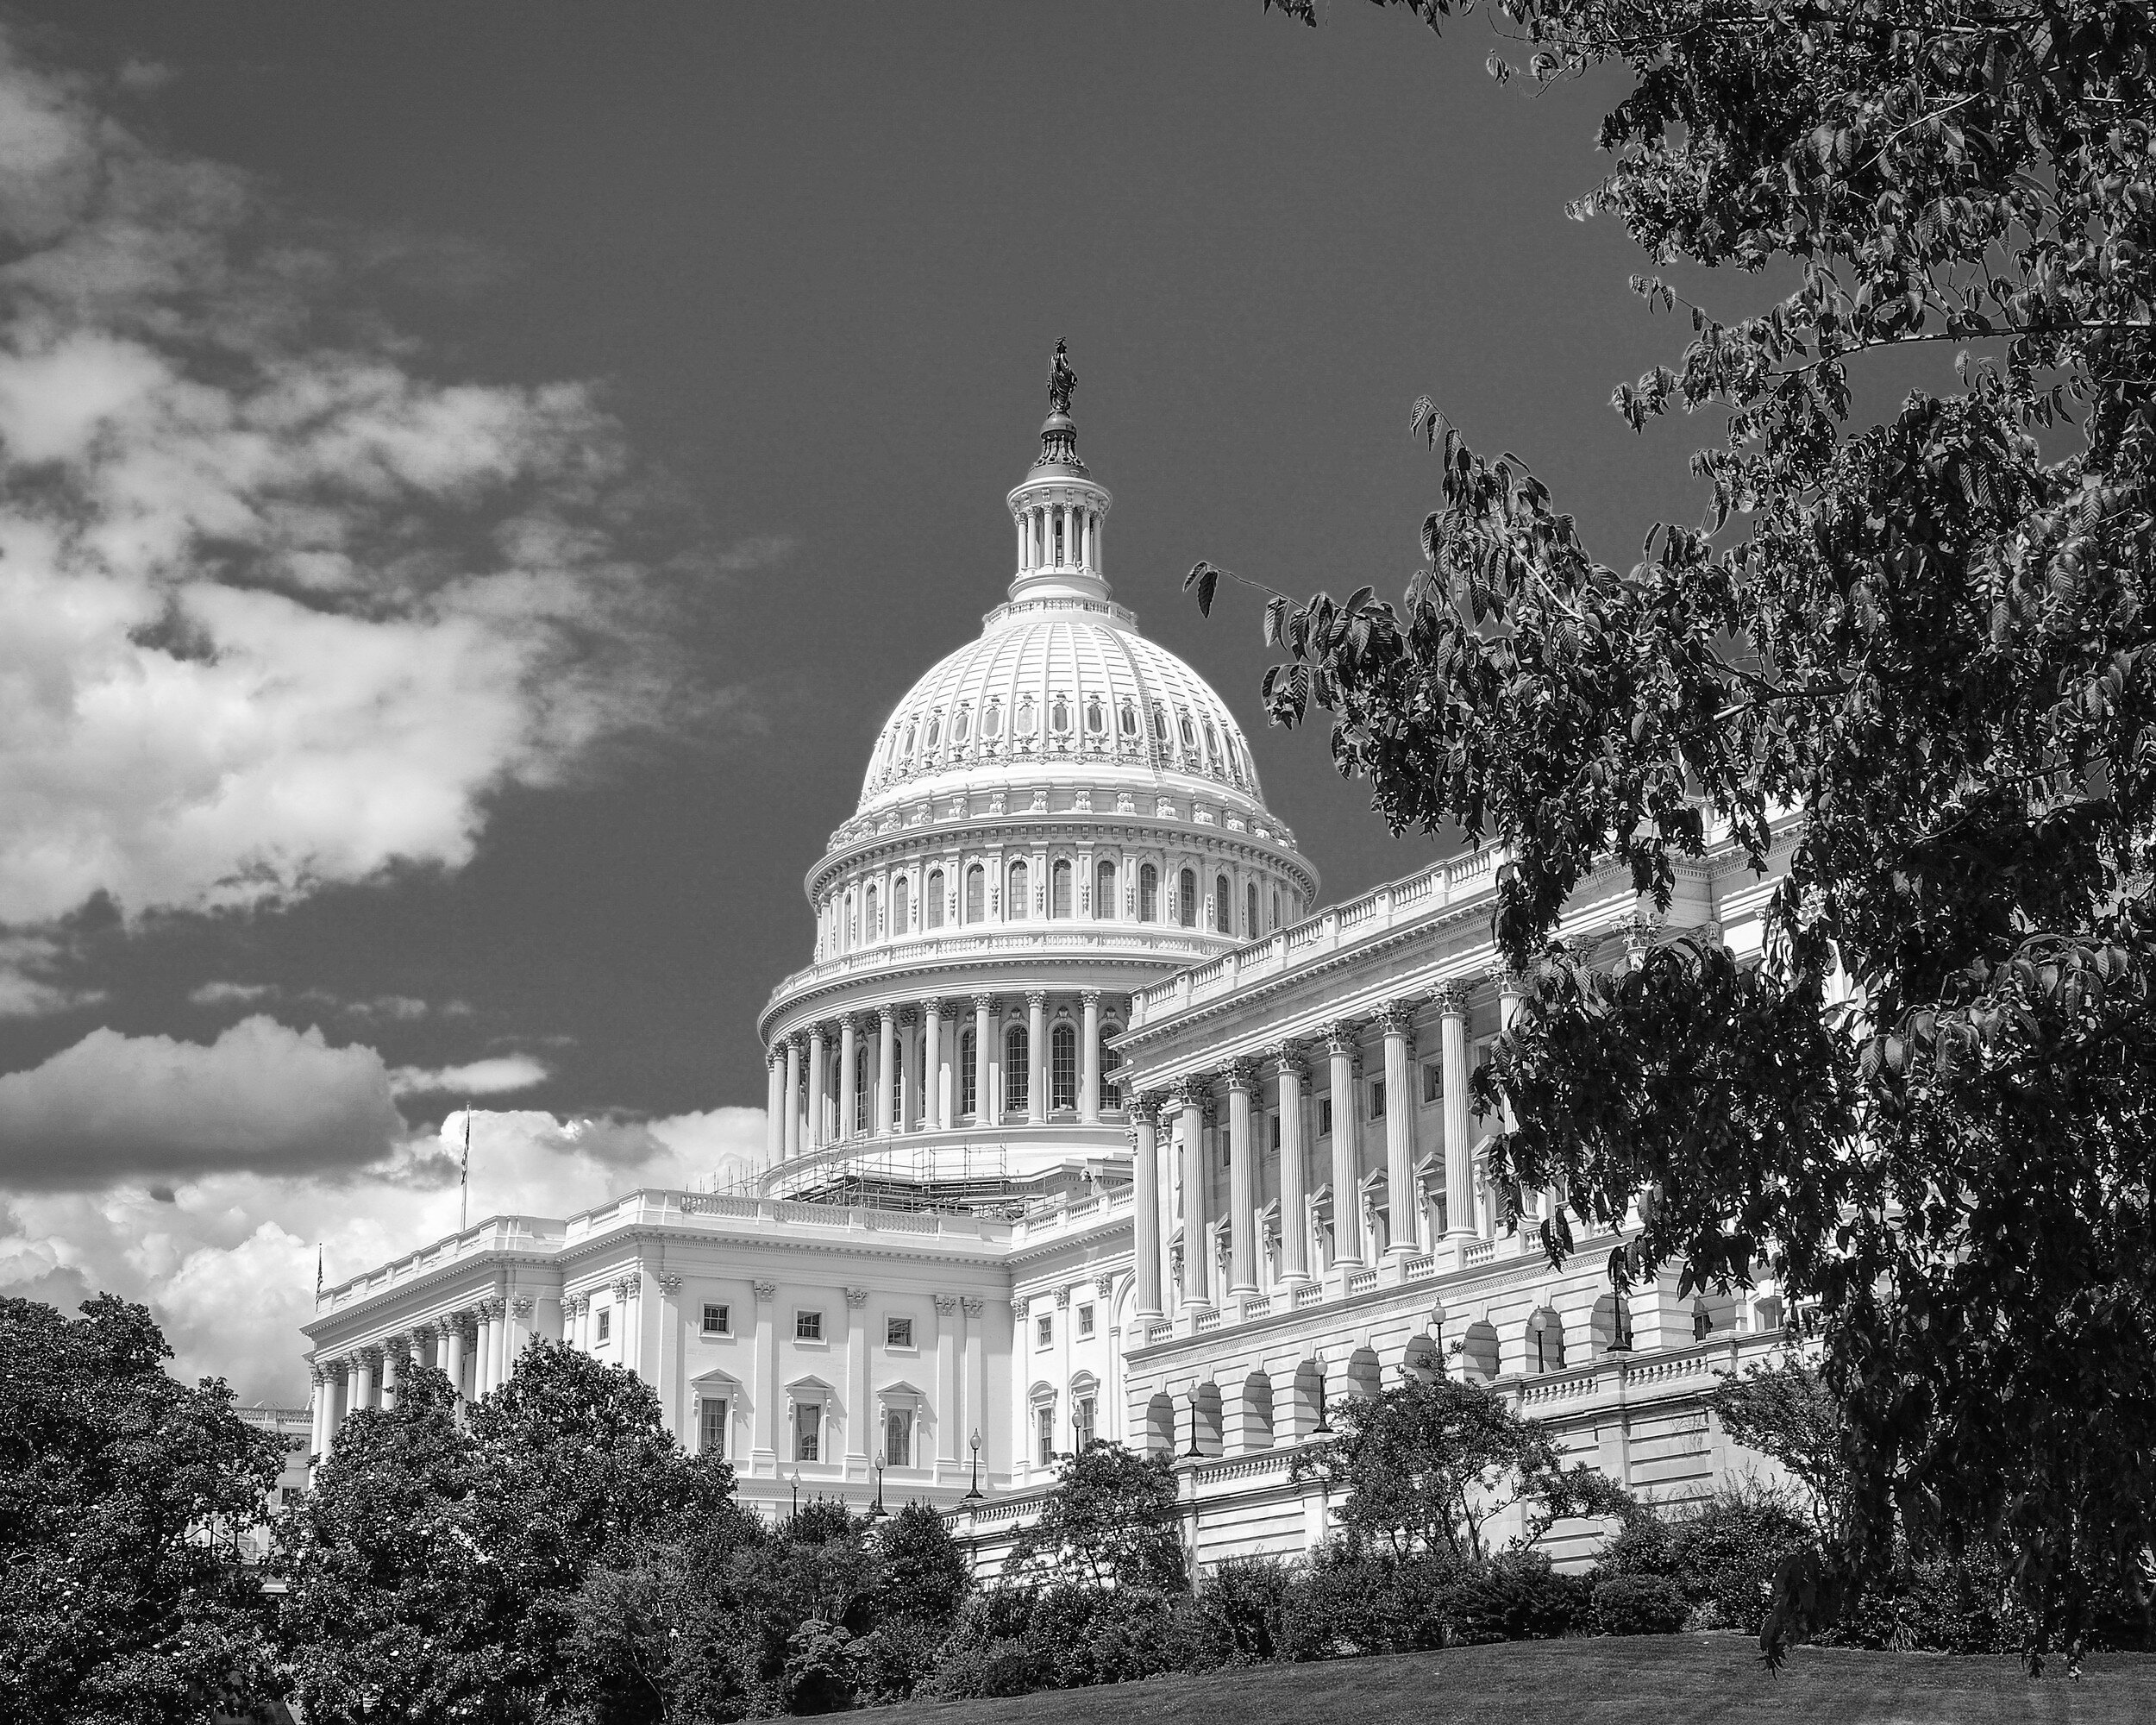
In this example both images work well for me. The black and white version provides a very clear and clean image of the Capitol and because the building is very light it stands out against the backdrop of the gray sky and the darker trees in the foreground. I like the color image because it shows the natural color of the Capitol's marble while it stands sufficiently out from the blue sky and green foreground.
Washington Monument
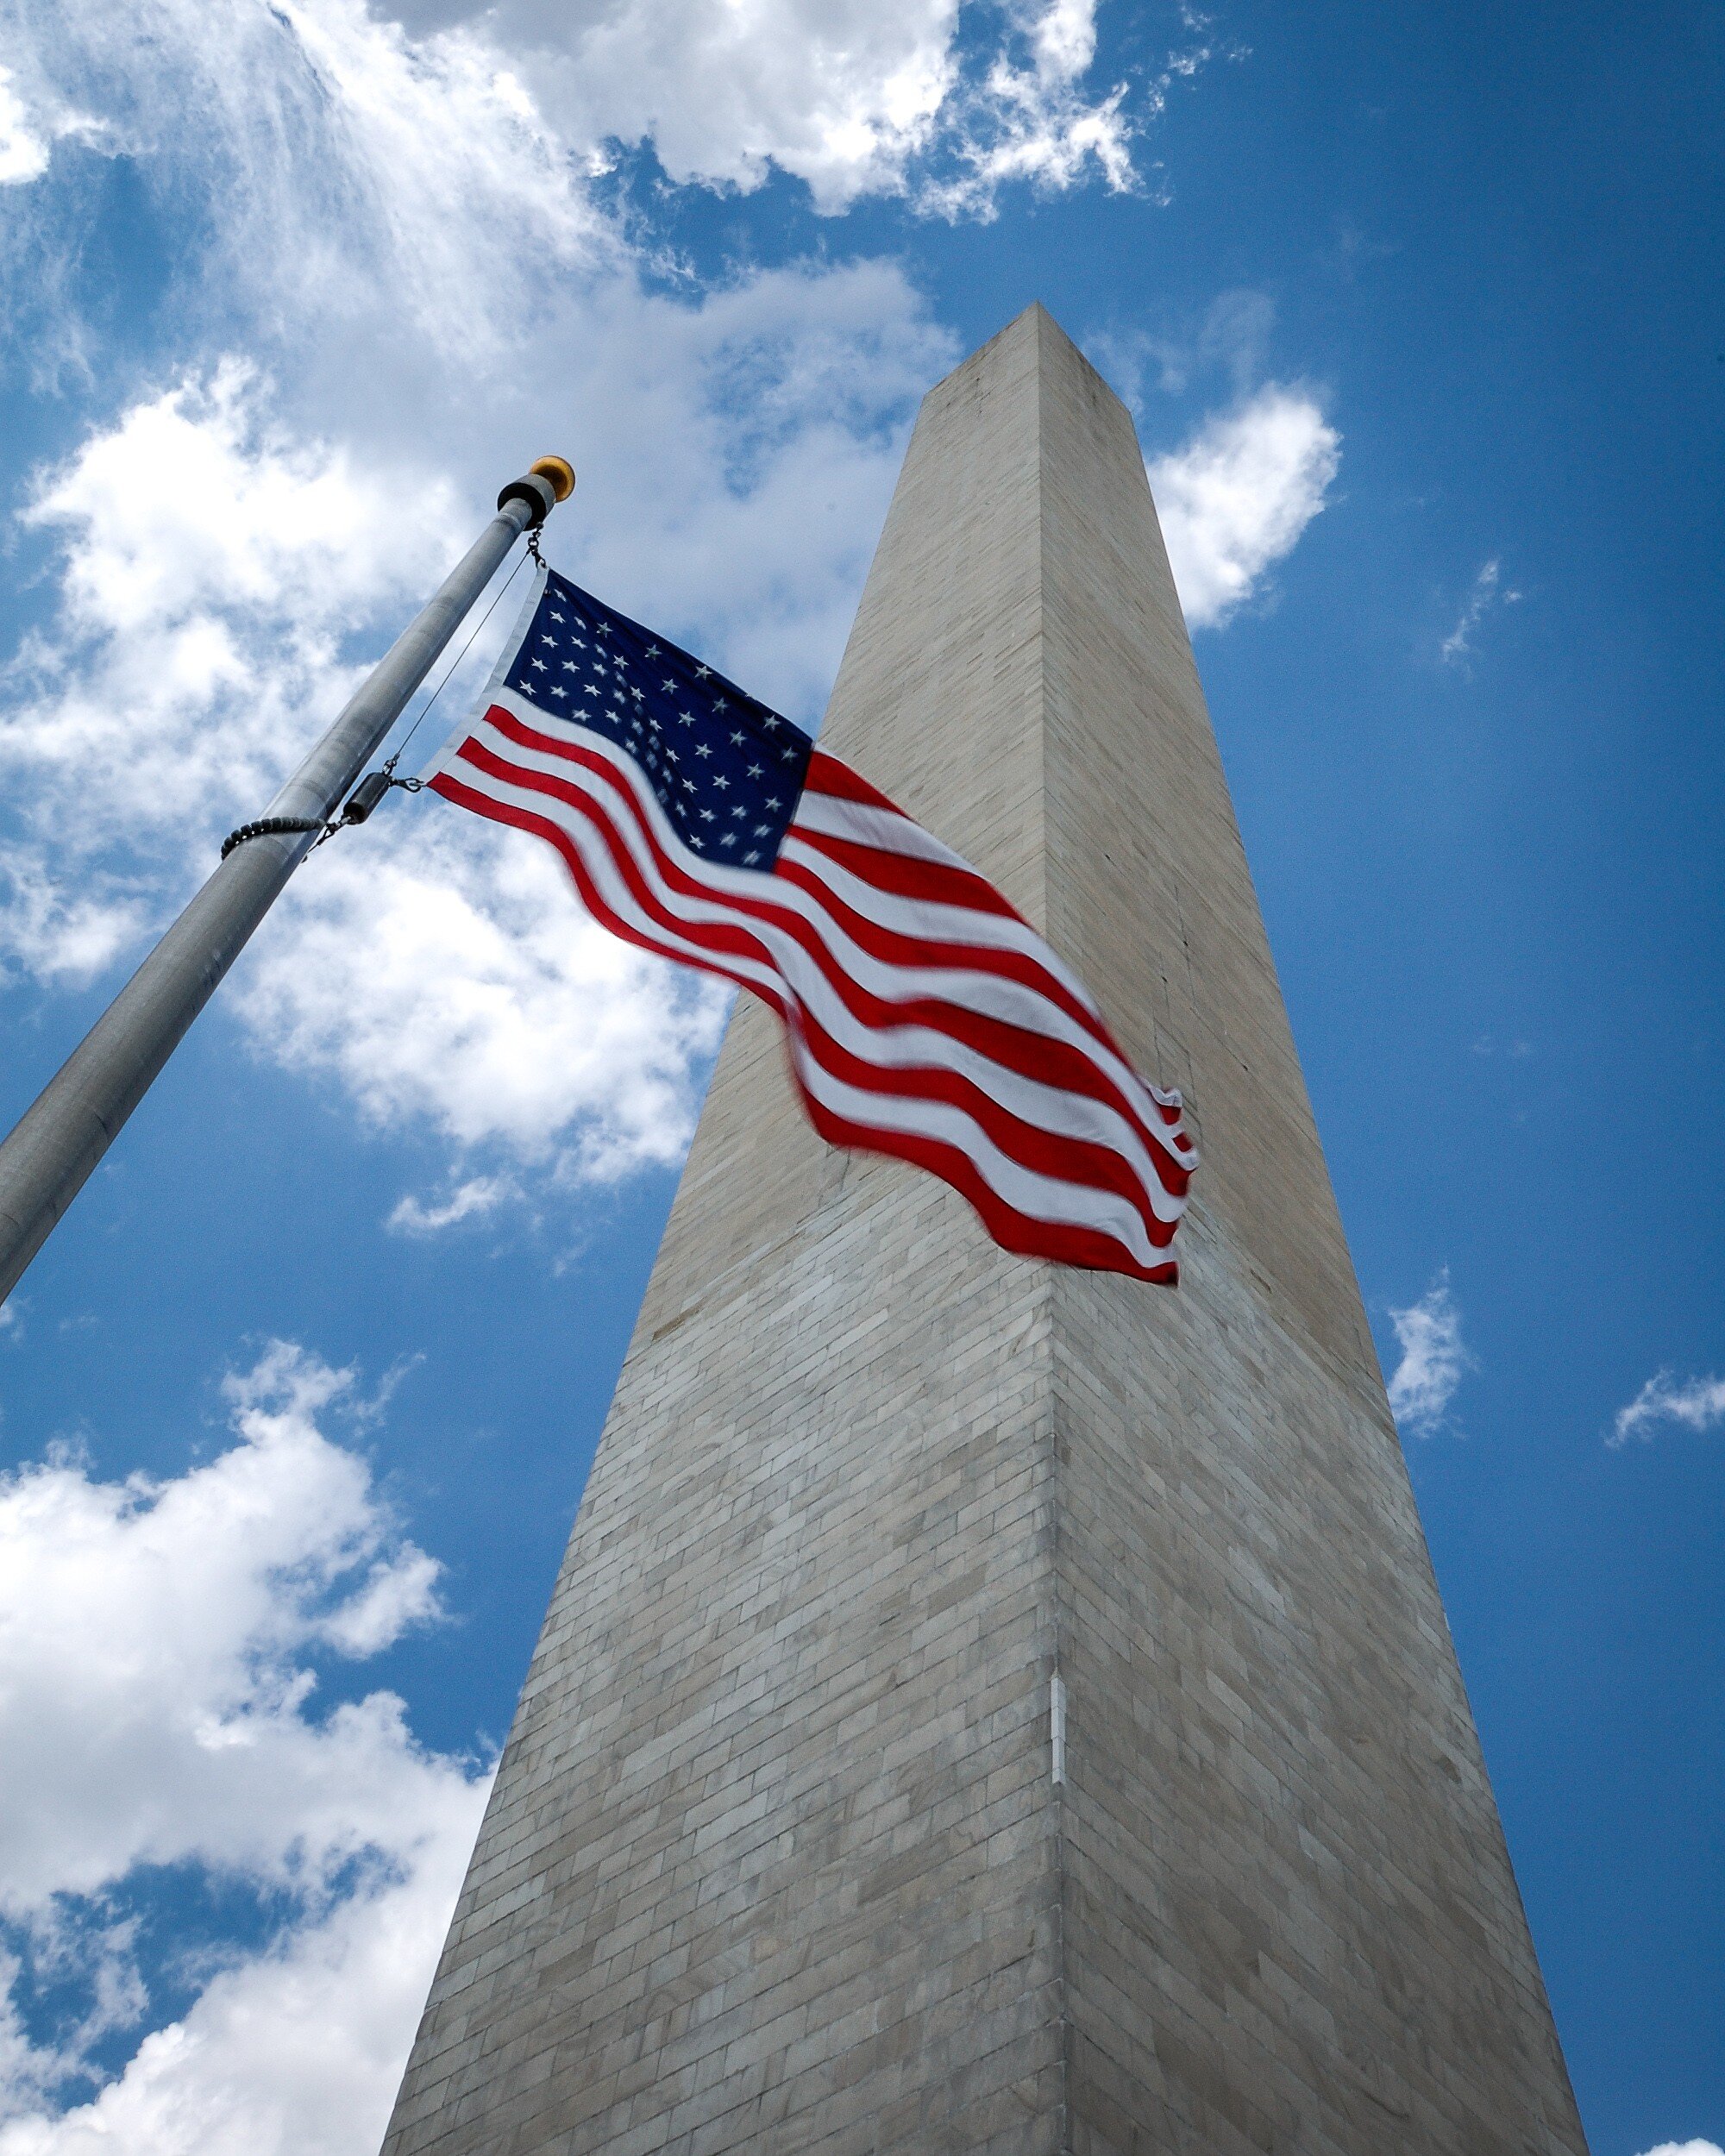
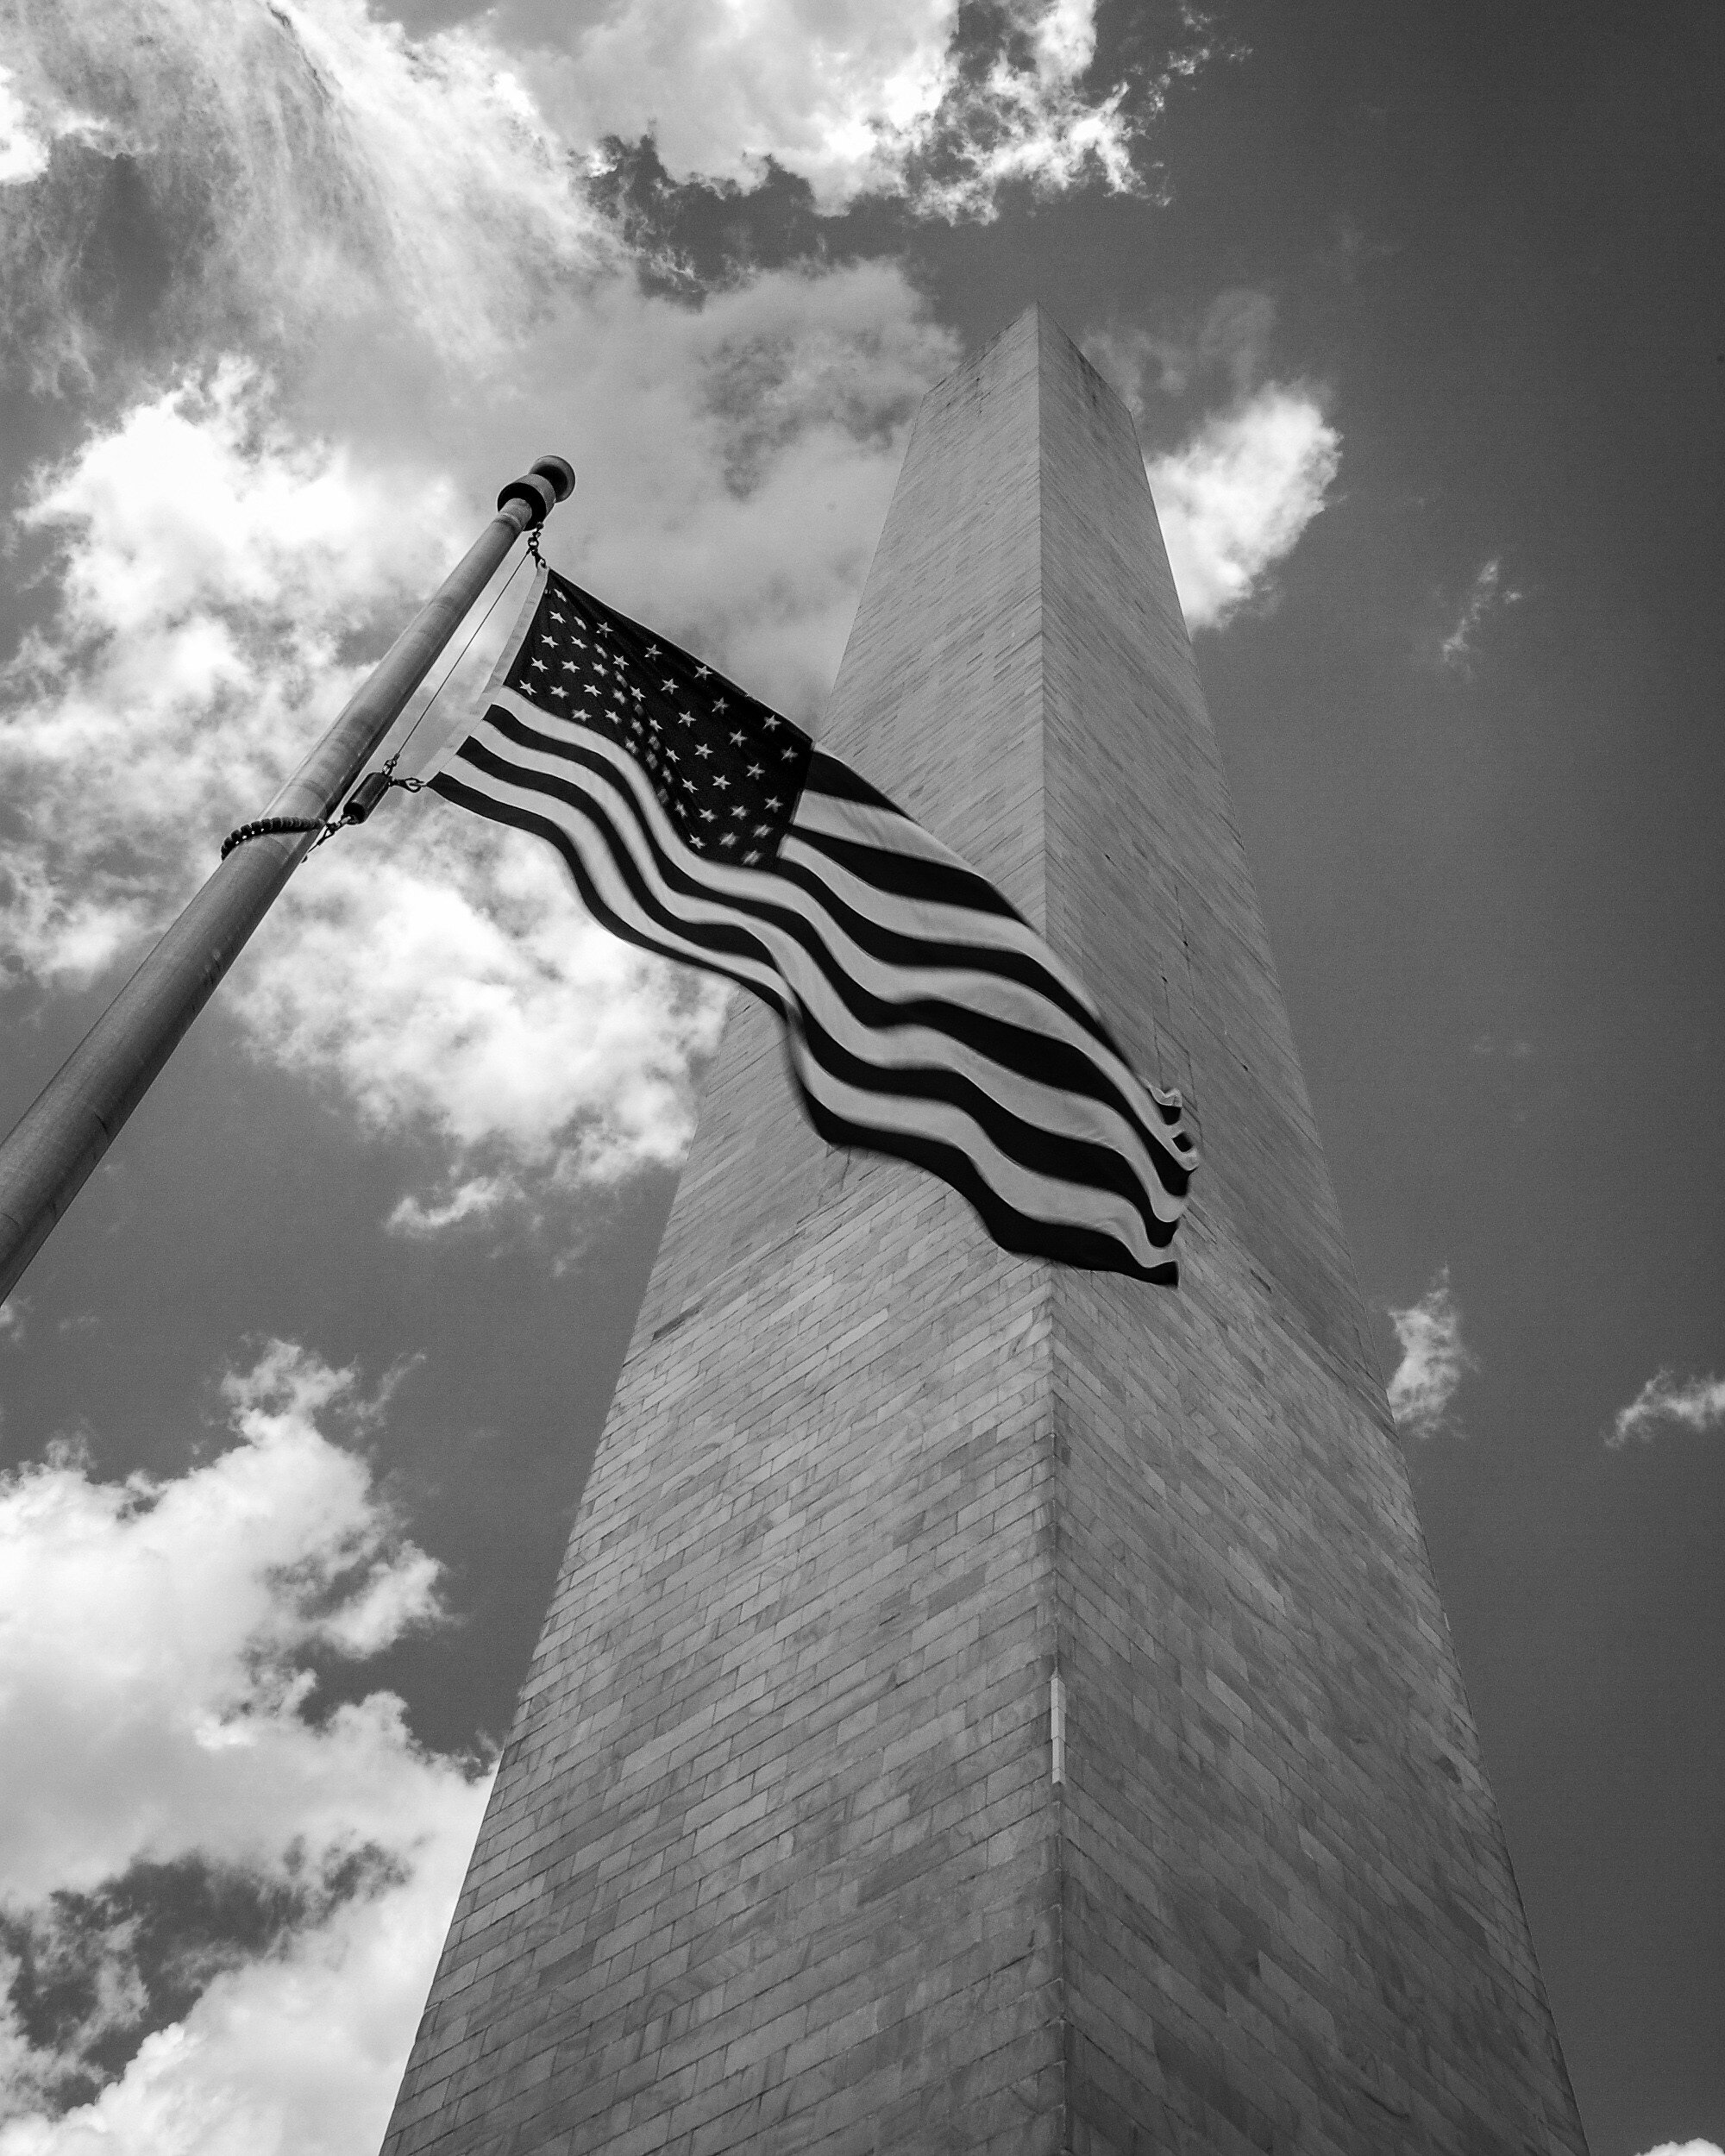
For me this image just needs to be in color. The bright red of the flag stands out; the dark blue of the flag is enhanced by the bright blue of the sky; the grayish color of the monument standing out from the blue and white of the sky directs the viewers eye clearly directed upward and provides depth. This does not happen as much in the black and white version because the gray of the monument blends with the gray of the sky.
Grain in Spain
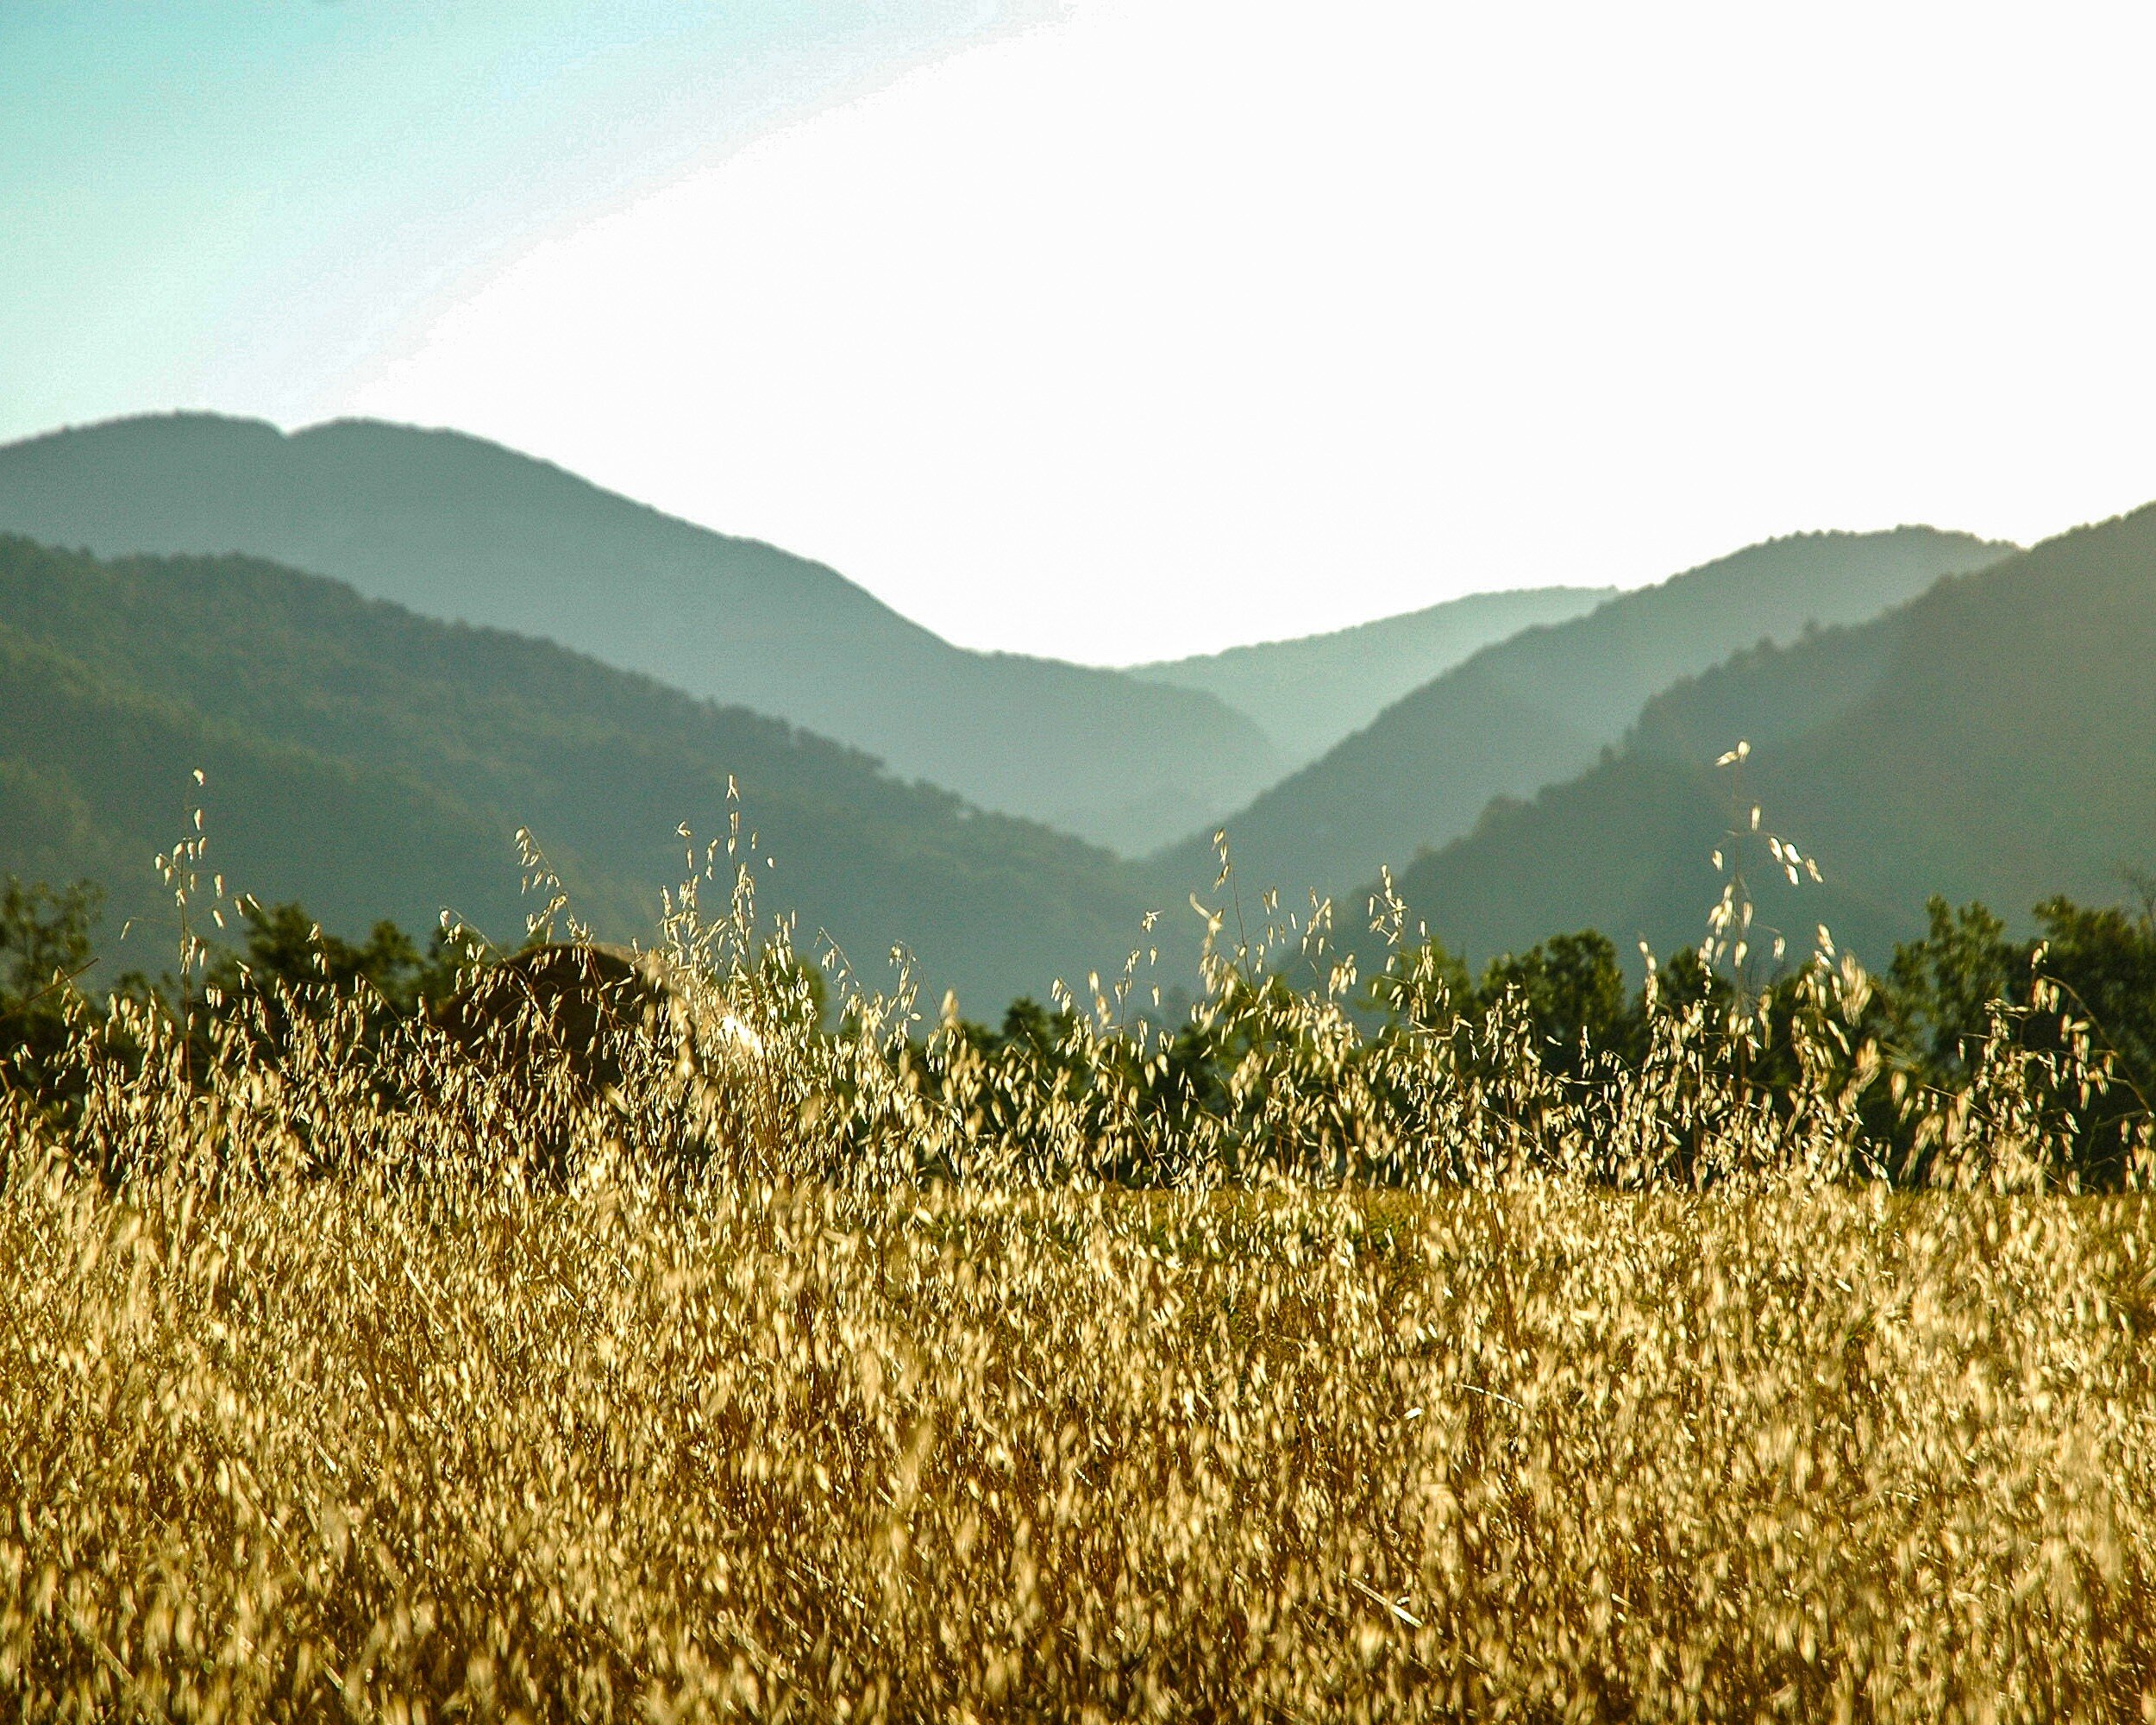
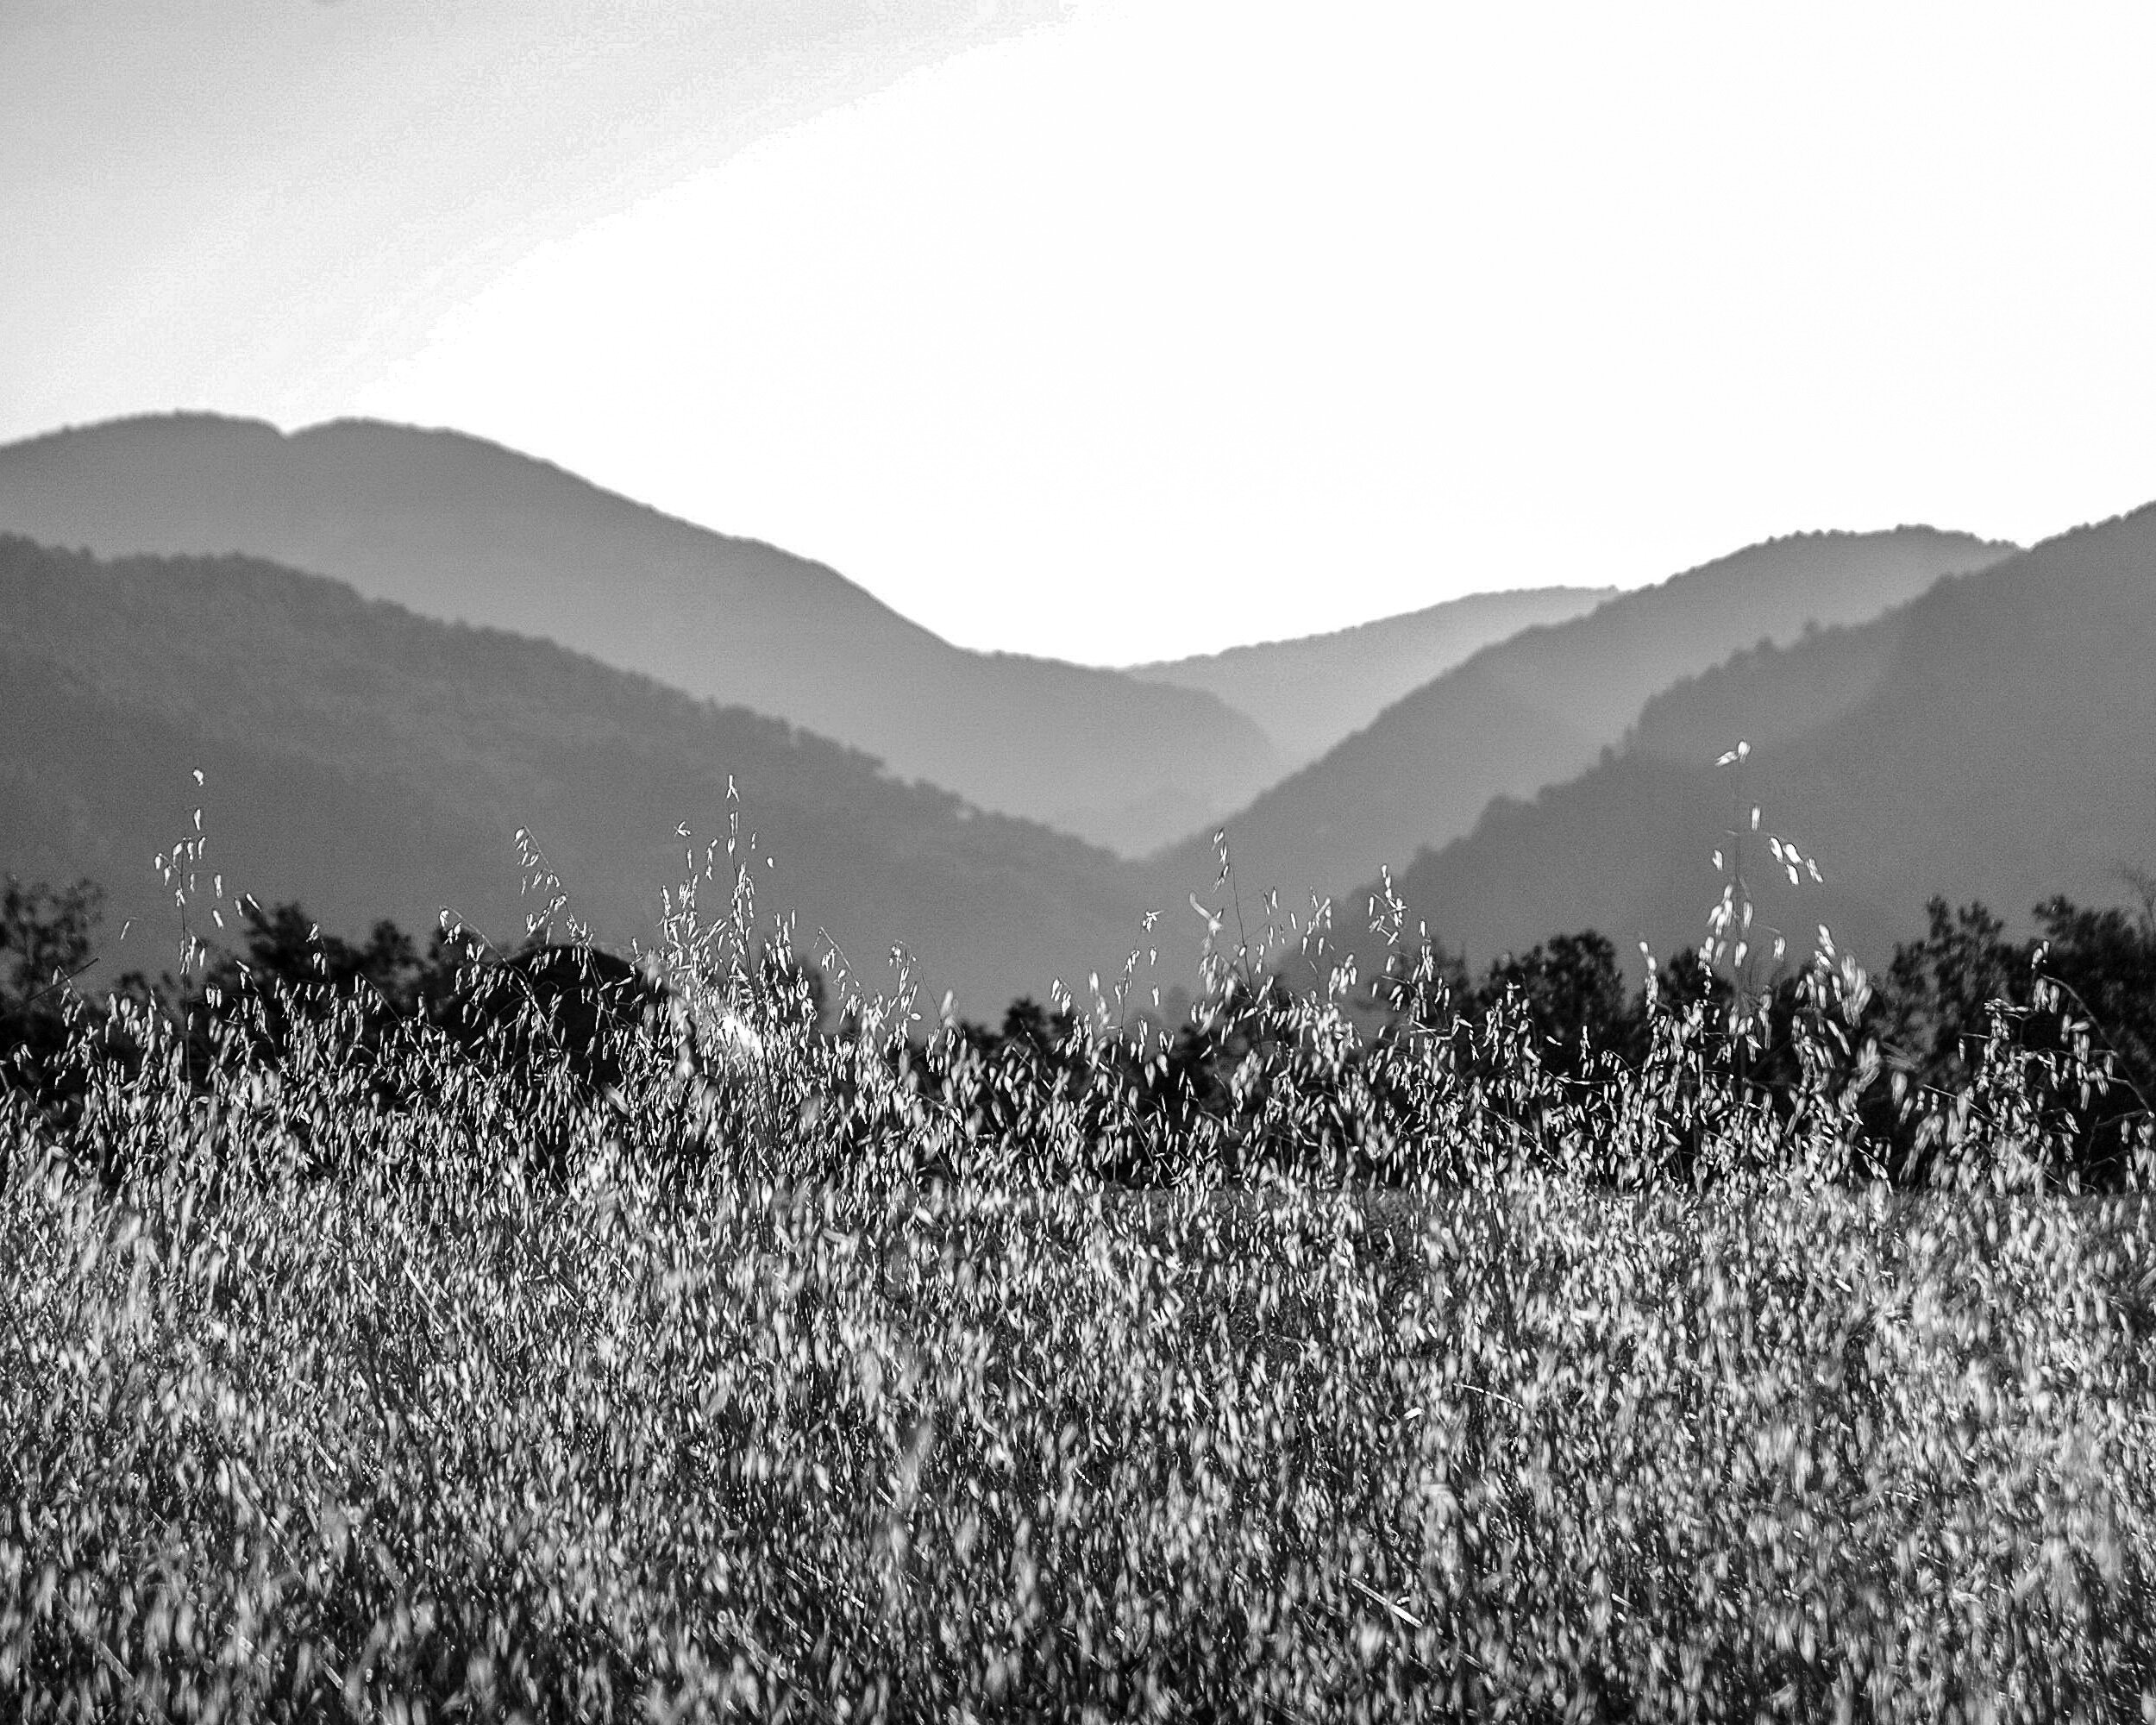
This final example again is an image that works for me in color and in black and white. Because it has several shades of gray, the monochrome works quite well showing the different layers in the picture: from the light grain in the foreground, to the darker and mid-tones in the middle, and then some lighter tones in the background again. The color version works in a similar manner: the bright yellow in the foreground, and then different shades of green from the middle to the back going fro darker to lighter. While the different shades of gray or color lead the eye in bot images, the focus in the color image is more on the yellow grain in the foreground whereas the eye wanders a bit more around in the black and white image, settling more in the middle.
Final Thoughts
While there are five factors to take into consideration to decide whether an image works best in black and white or in color (subject matter, texture and patterns, contrast, color as defining factor, and display) these are only general guidelines. In the end it is your personal taste that should make you decide what you like best for a specific image. Each image is different, and should be looked at individually.
Besides your personal taste, the most important of the five general considerations will be Display: where and how you are going to display the image will have a big impact on how it will work in your interior. The main lesson learned therefore is to take your time when selecting a black and white versus a color image: your view of the image might change after some reflection, and after considering how it will fit in your interior design.
Now how do you look at images and how do you decide on choosing a color or a black and white version for your interior? Share your thoughts in the Comments section below!