

Why You Should Use Third-Party Lenses on Fujifilm X-Series Cameras
It Is Probably Not For The Reason You Expect
In last week's article, I mentioned that I purchased a TTArtisan 23mm f/1.4 lens for my Fujifilm X-Pro 1…

It Is Probably Not For The Reason You Expect
In last week's article, I mentioned that I purchased a TTArtisan 23mm f/1.4 lens for my Fujifilm X-Pro 1.
The initial motive for this purchase was to get a lens with a 35mm full-frame equivalent focal length. However, there is a second reason why I use this and other third-party lenses on the X-Pro 1.
And it is not about image quality.
Why I Use Third-Party Lenses on the Fujifilm X-Pro 1
While there are multiple third-party lenses with excellent image quality, I mainly use lenses other than Fujinon x-mount ones because these have distance and depth-of-field scales.
According to Fujifilm's overview of x-mount lenses, there are currently only three lenses with distance/depth-of-field scales: the 14mm f/2.8 R, the 16mm f/1.4 R WR, and the 23mm f/1.4 R.
While the 23mm would perfectly do the job and probably be easier since it would auto-focus, it also is about seven times the cost of the TTArtisan 23mm. So that would be an additional reason to go third-party.
As mentioned last week, I added the 23mm to my toolbox for focal length consistency because it matches the 35mm full-frame equivalent of the Summaron on my Leica M4.
Sometimes, however, I want to use a slightly longer focal length. For example, when I do not want to get too close to my subjects or when I can not get close enough to them because of the actual situation.
In those cases, I want to use a lens with a full-frame equivalent focal length of (about) 50mm or 75mm.
For these instances, I have several third-party lenses available that can either be directly used on the Fujifilm X-Pro 1 or by using an adapter:
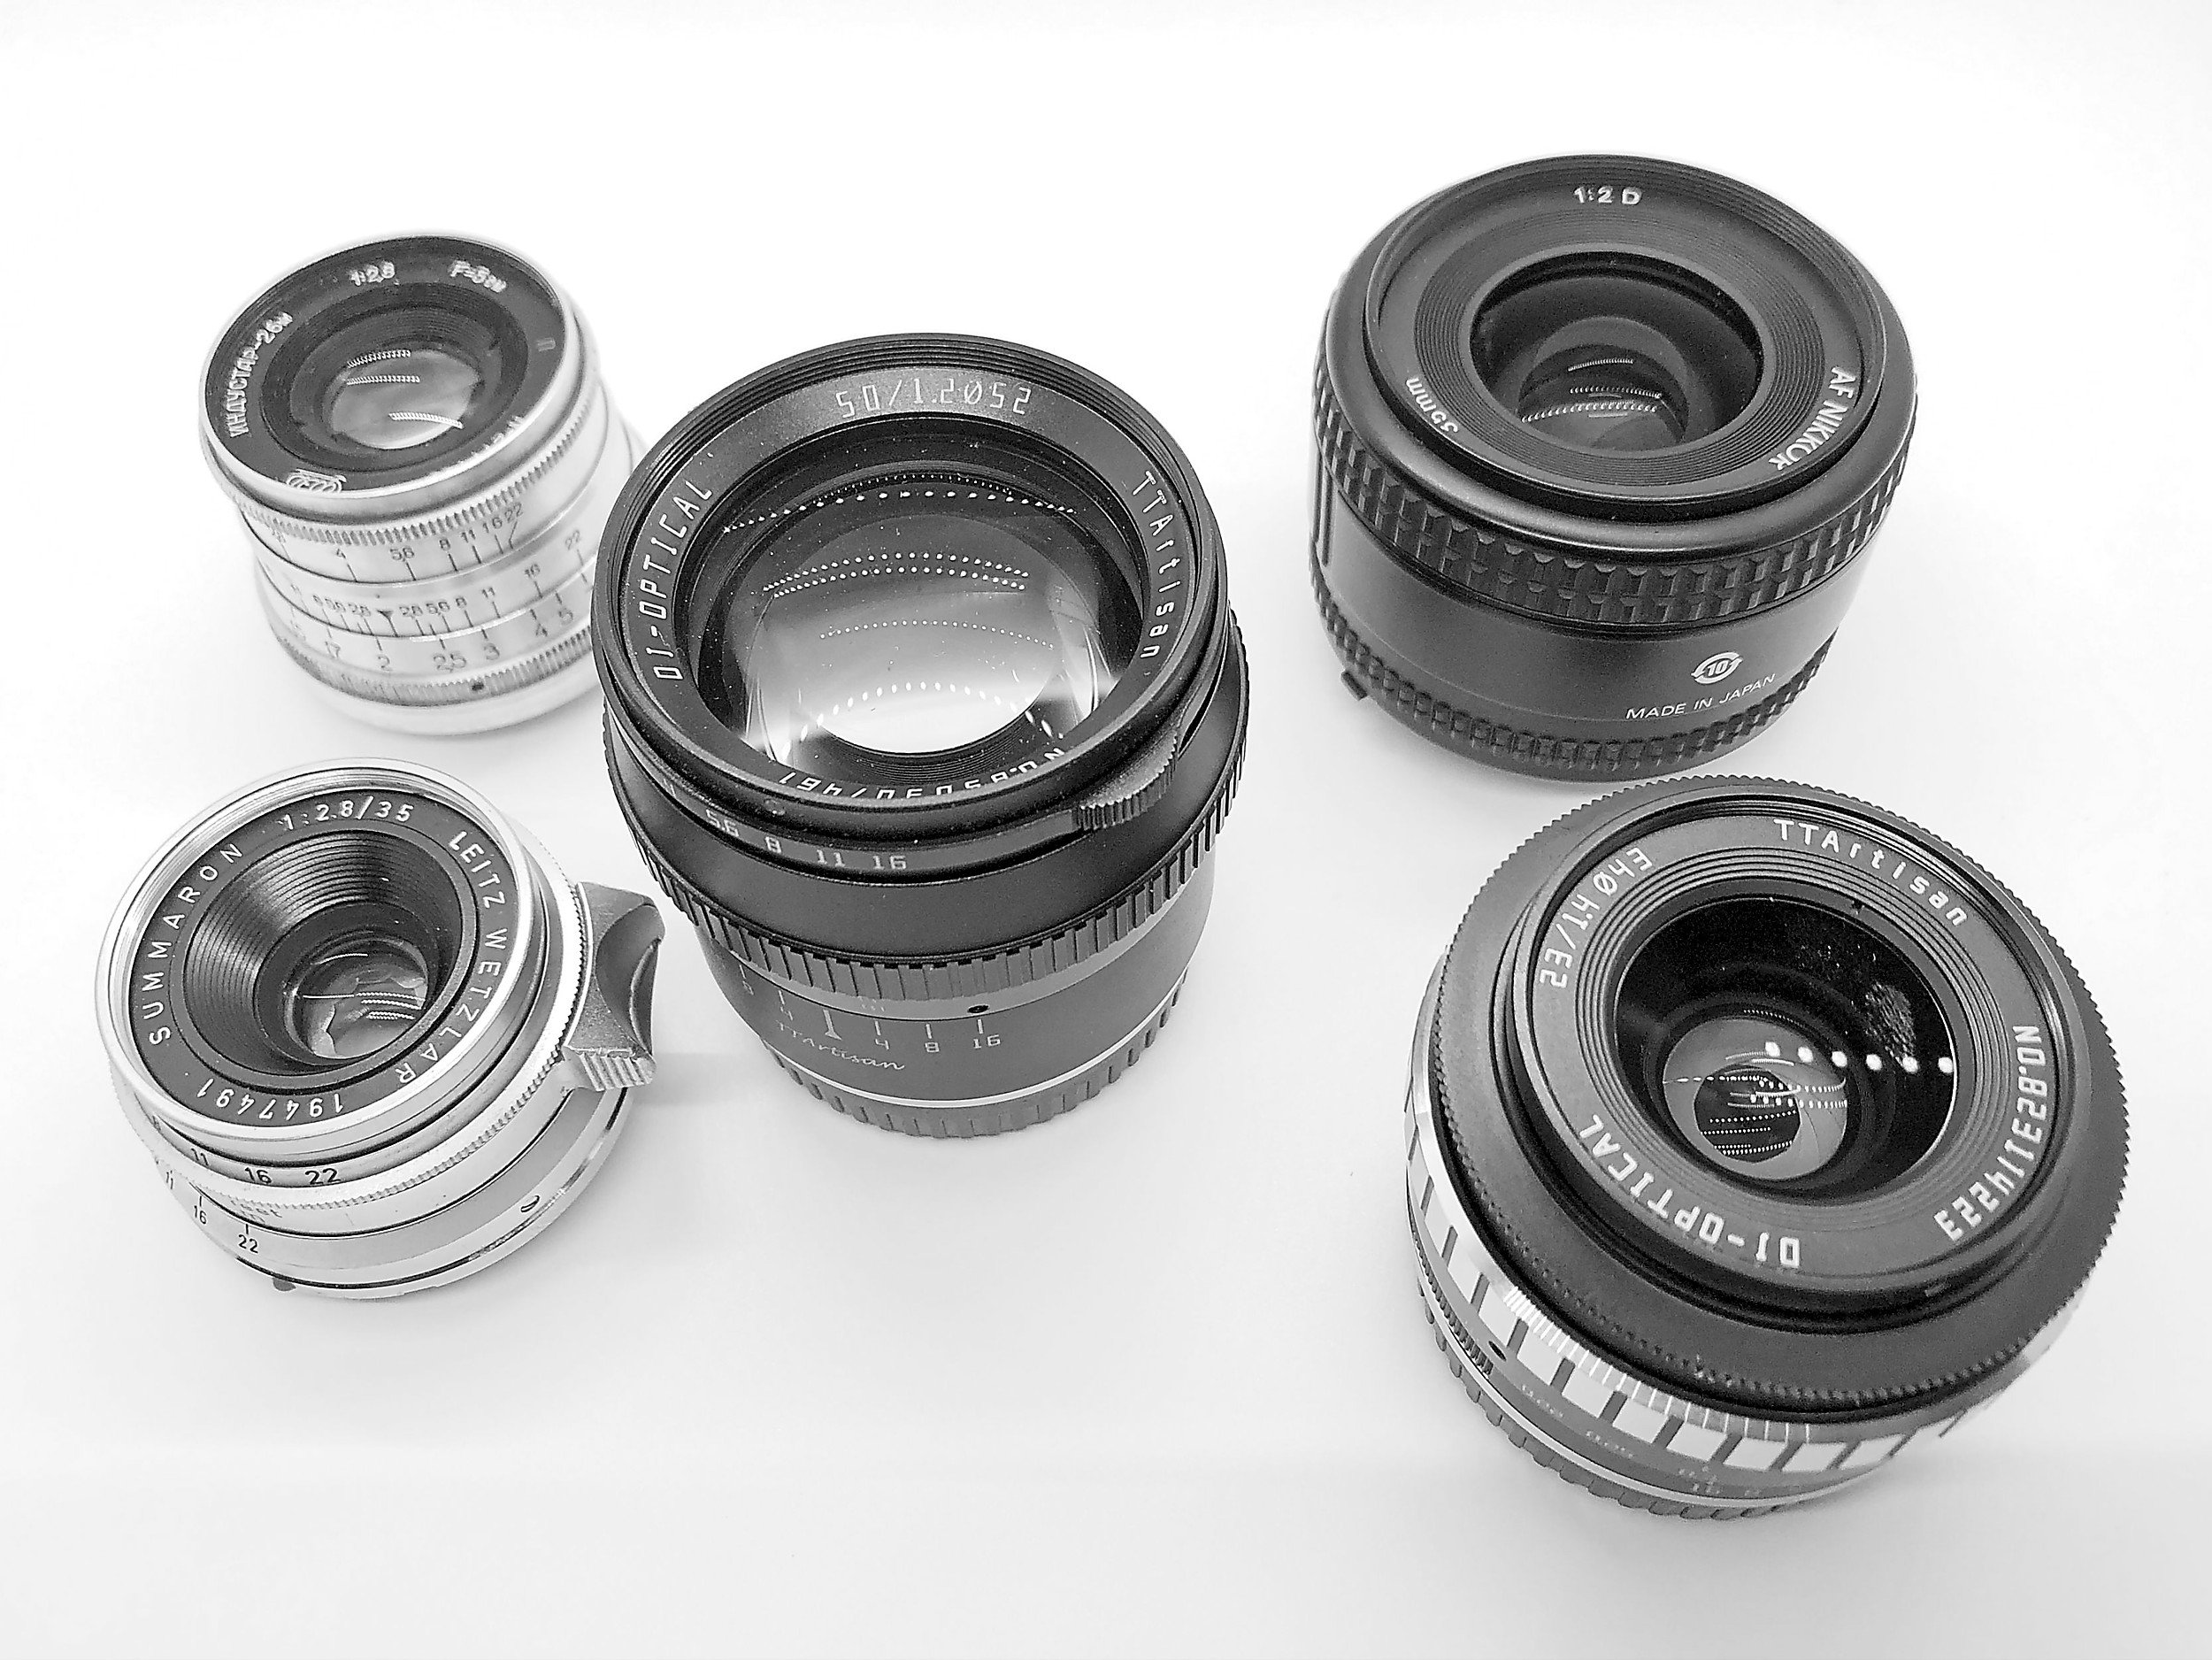
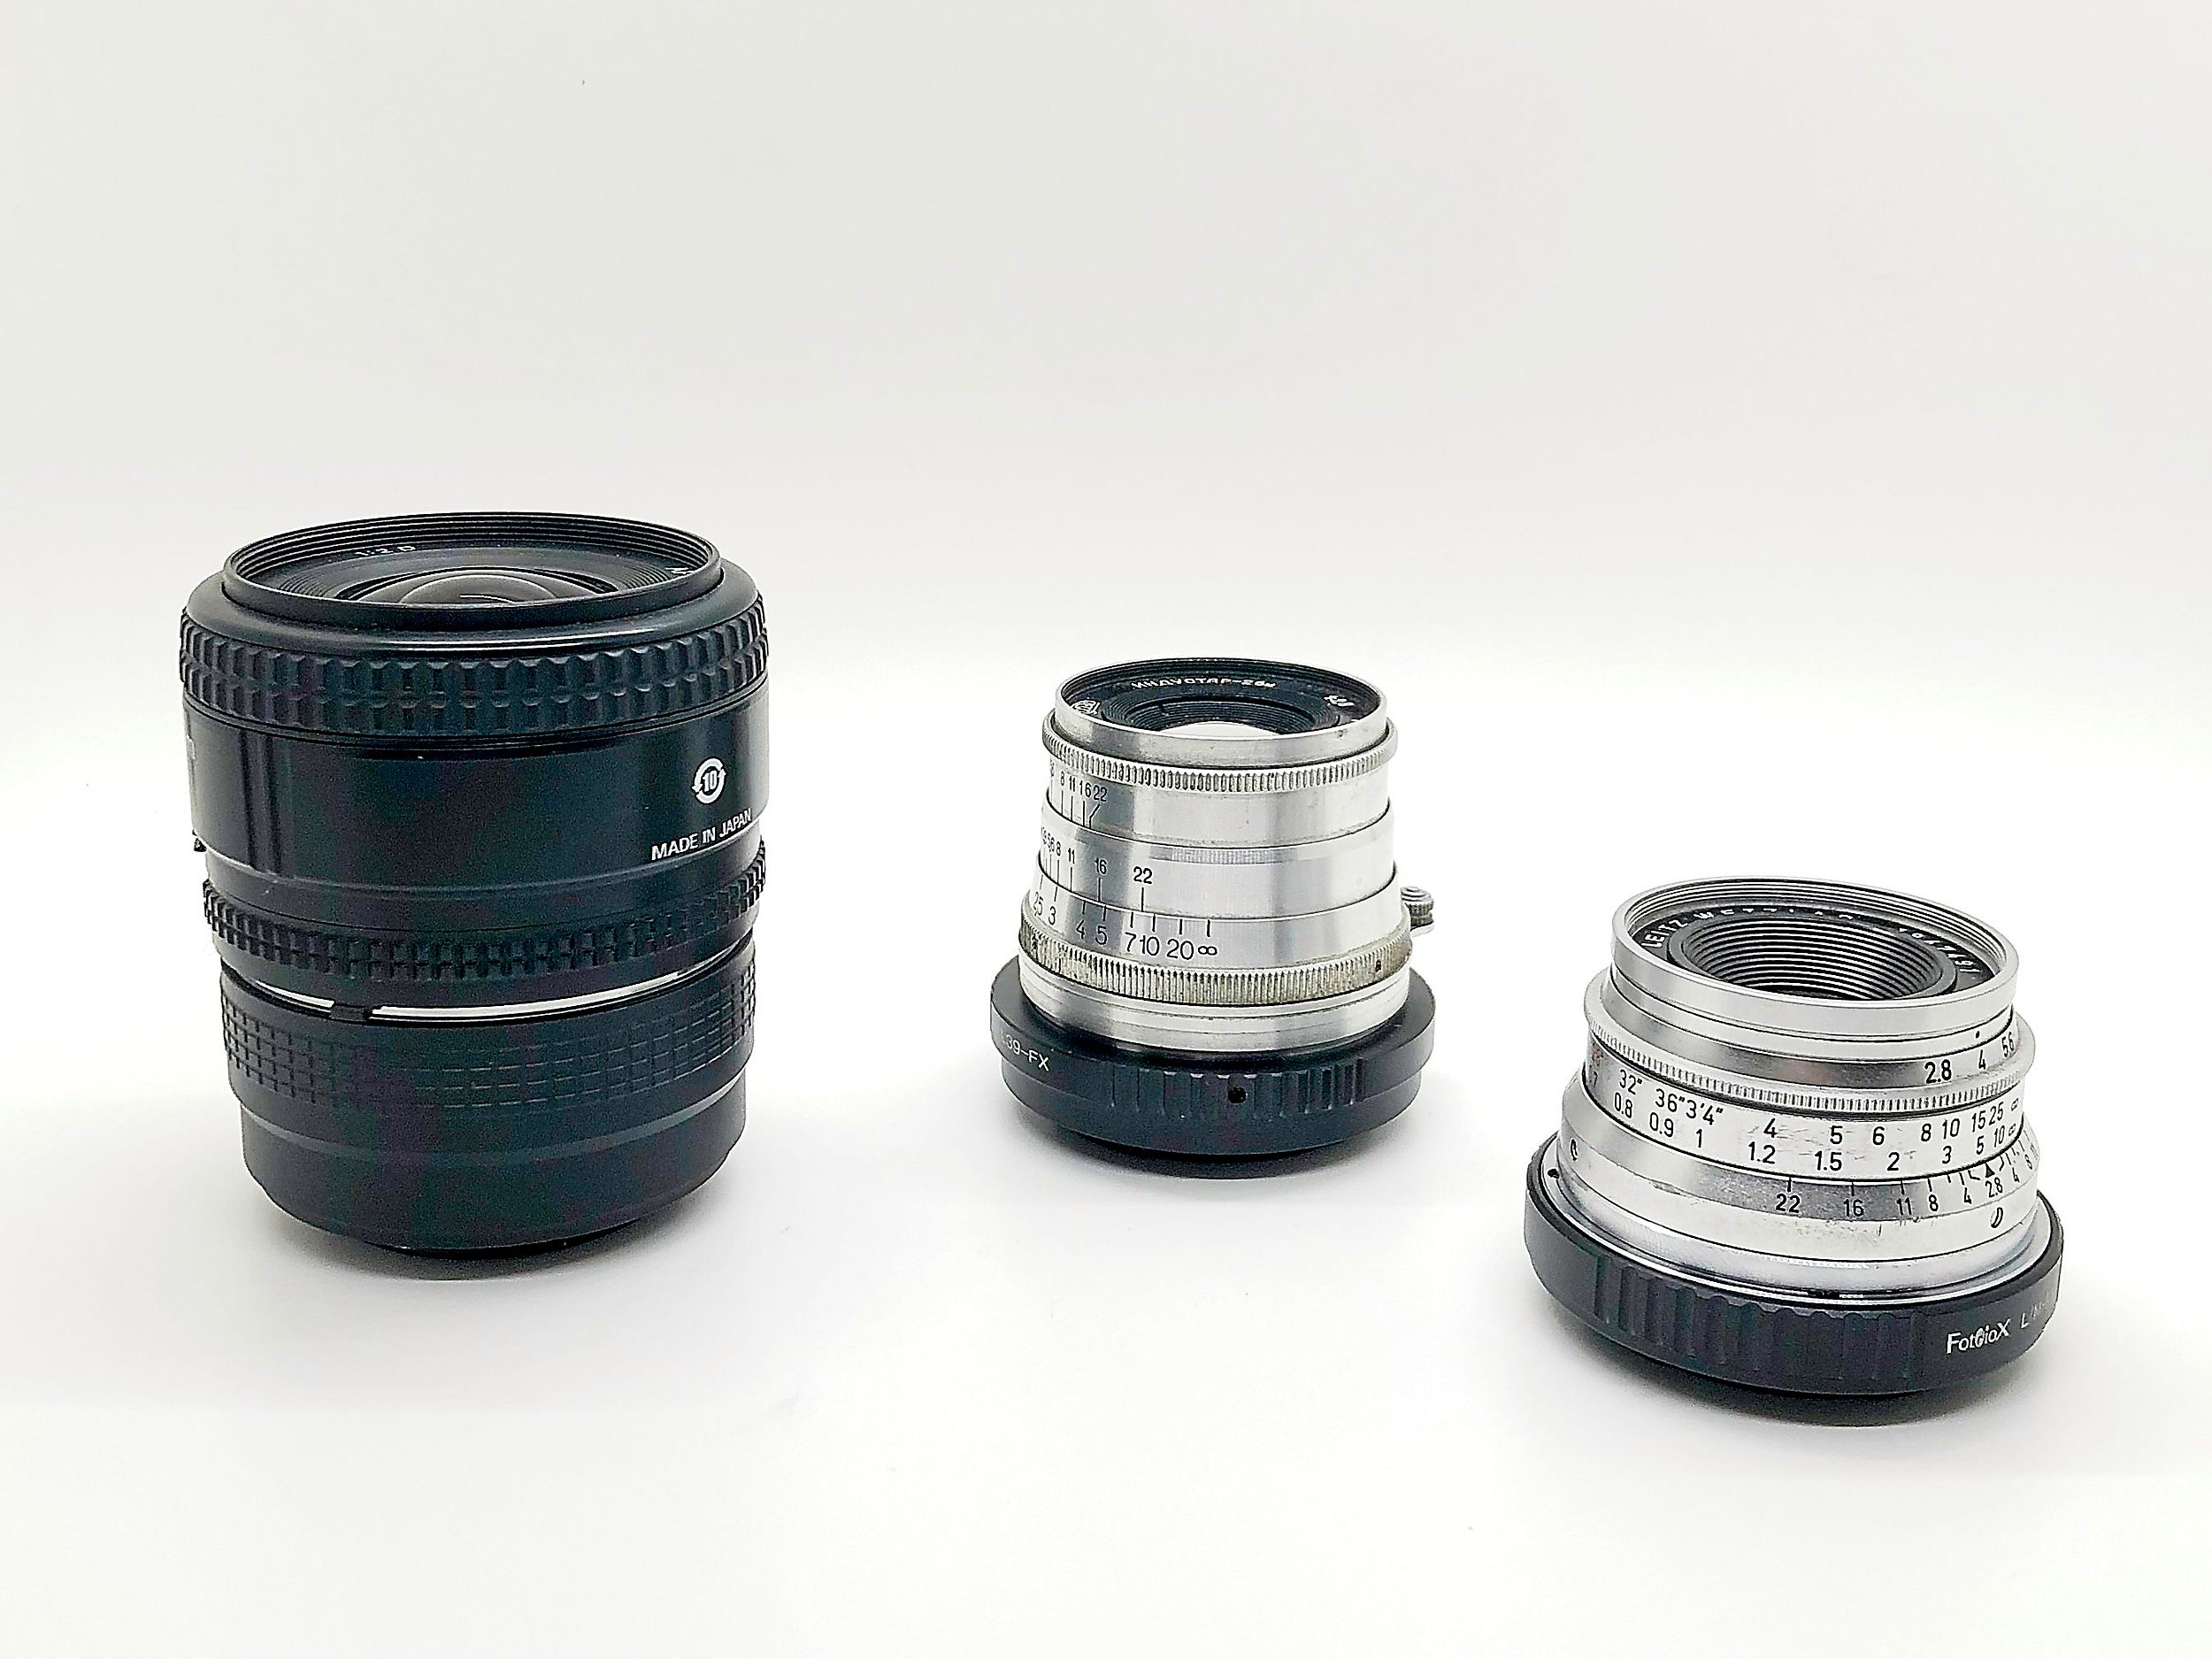
An AF Nikkor 35mm f/2.0D, which is a remains from my Nikon days
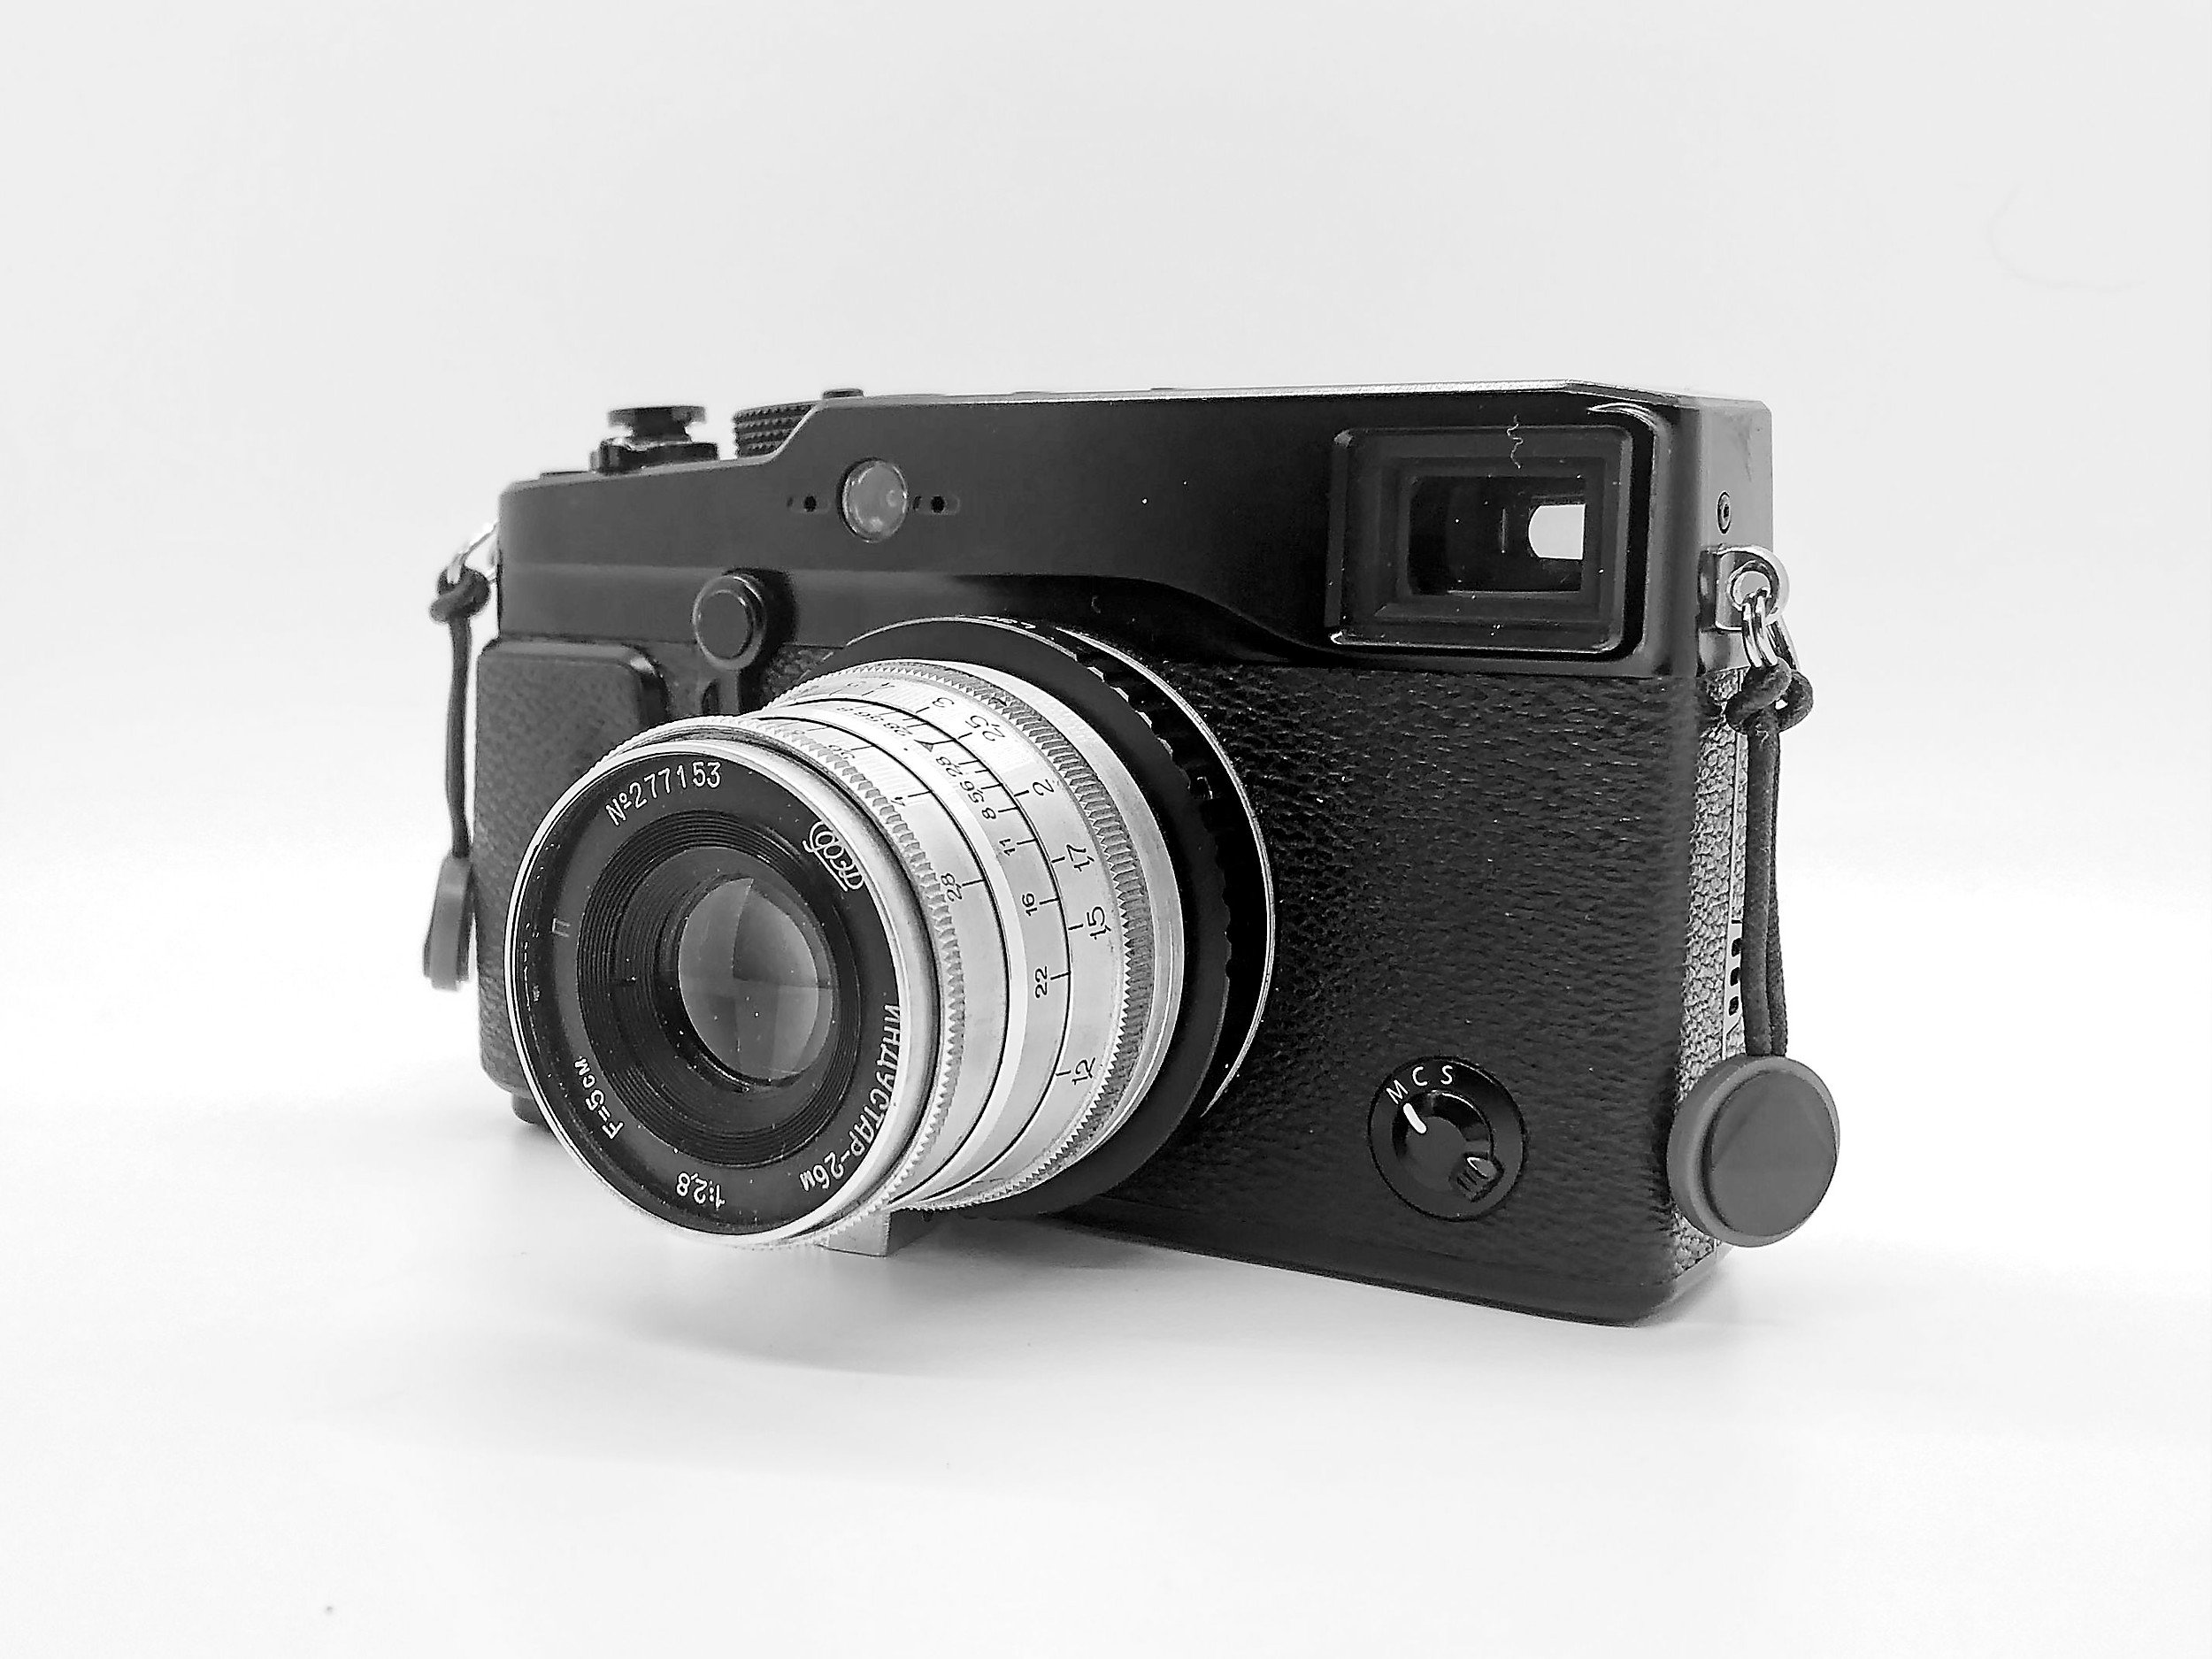
An Industar 26M 50mm f/2.8, which usually lives on the FED-2
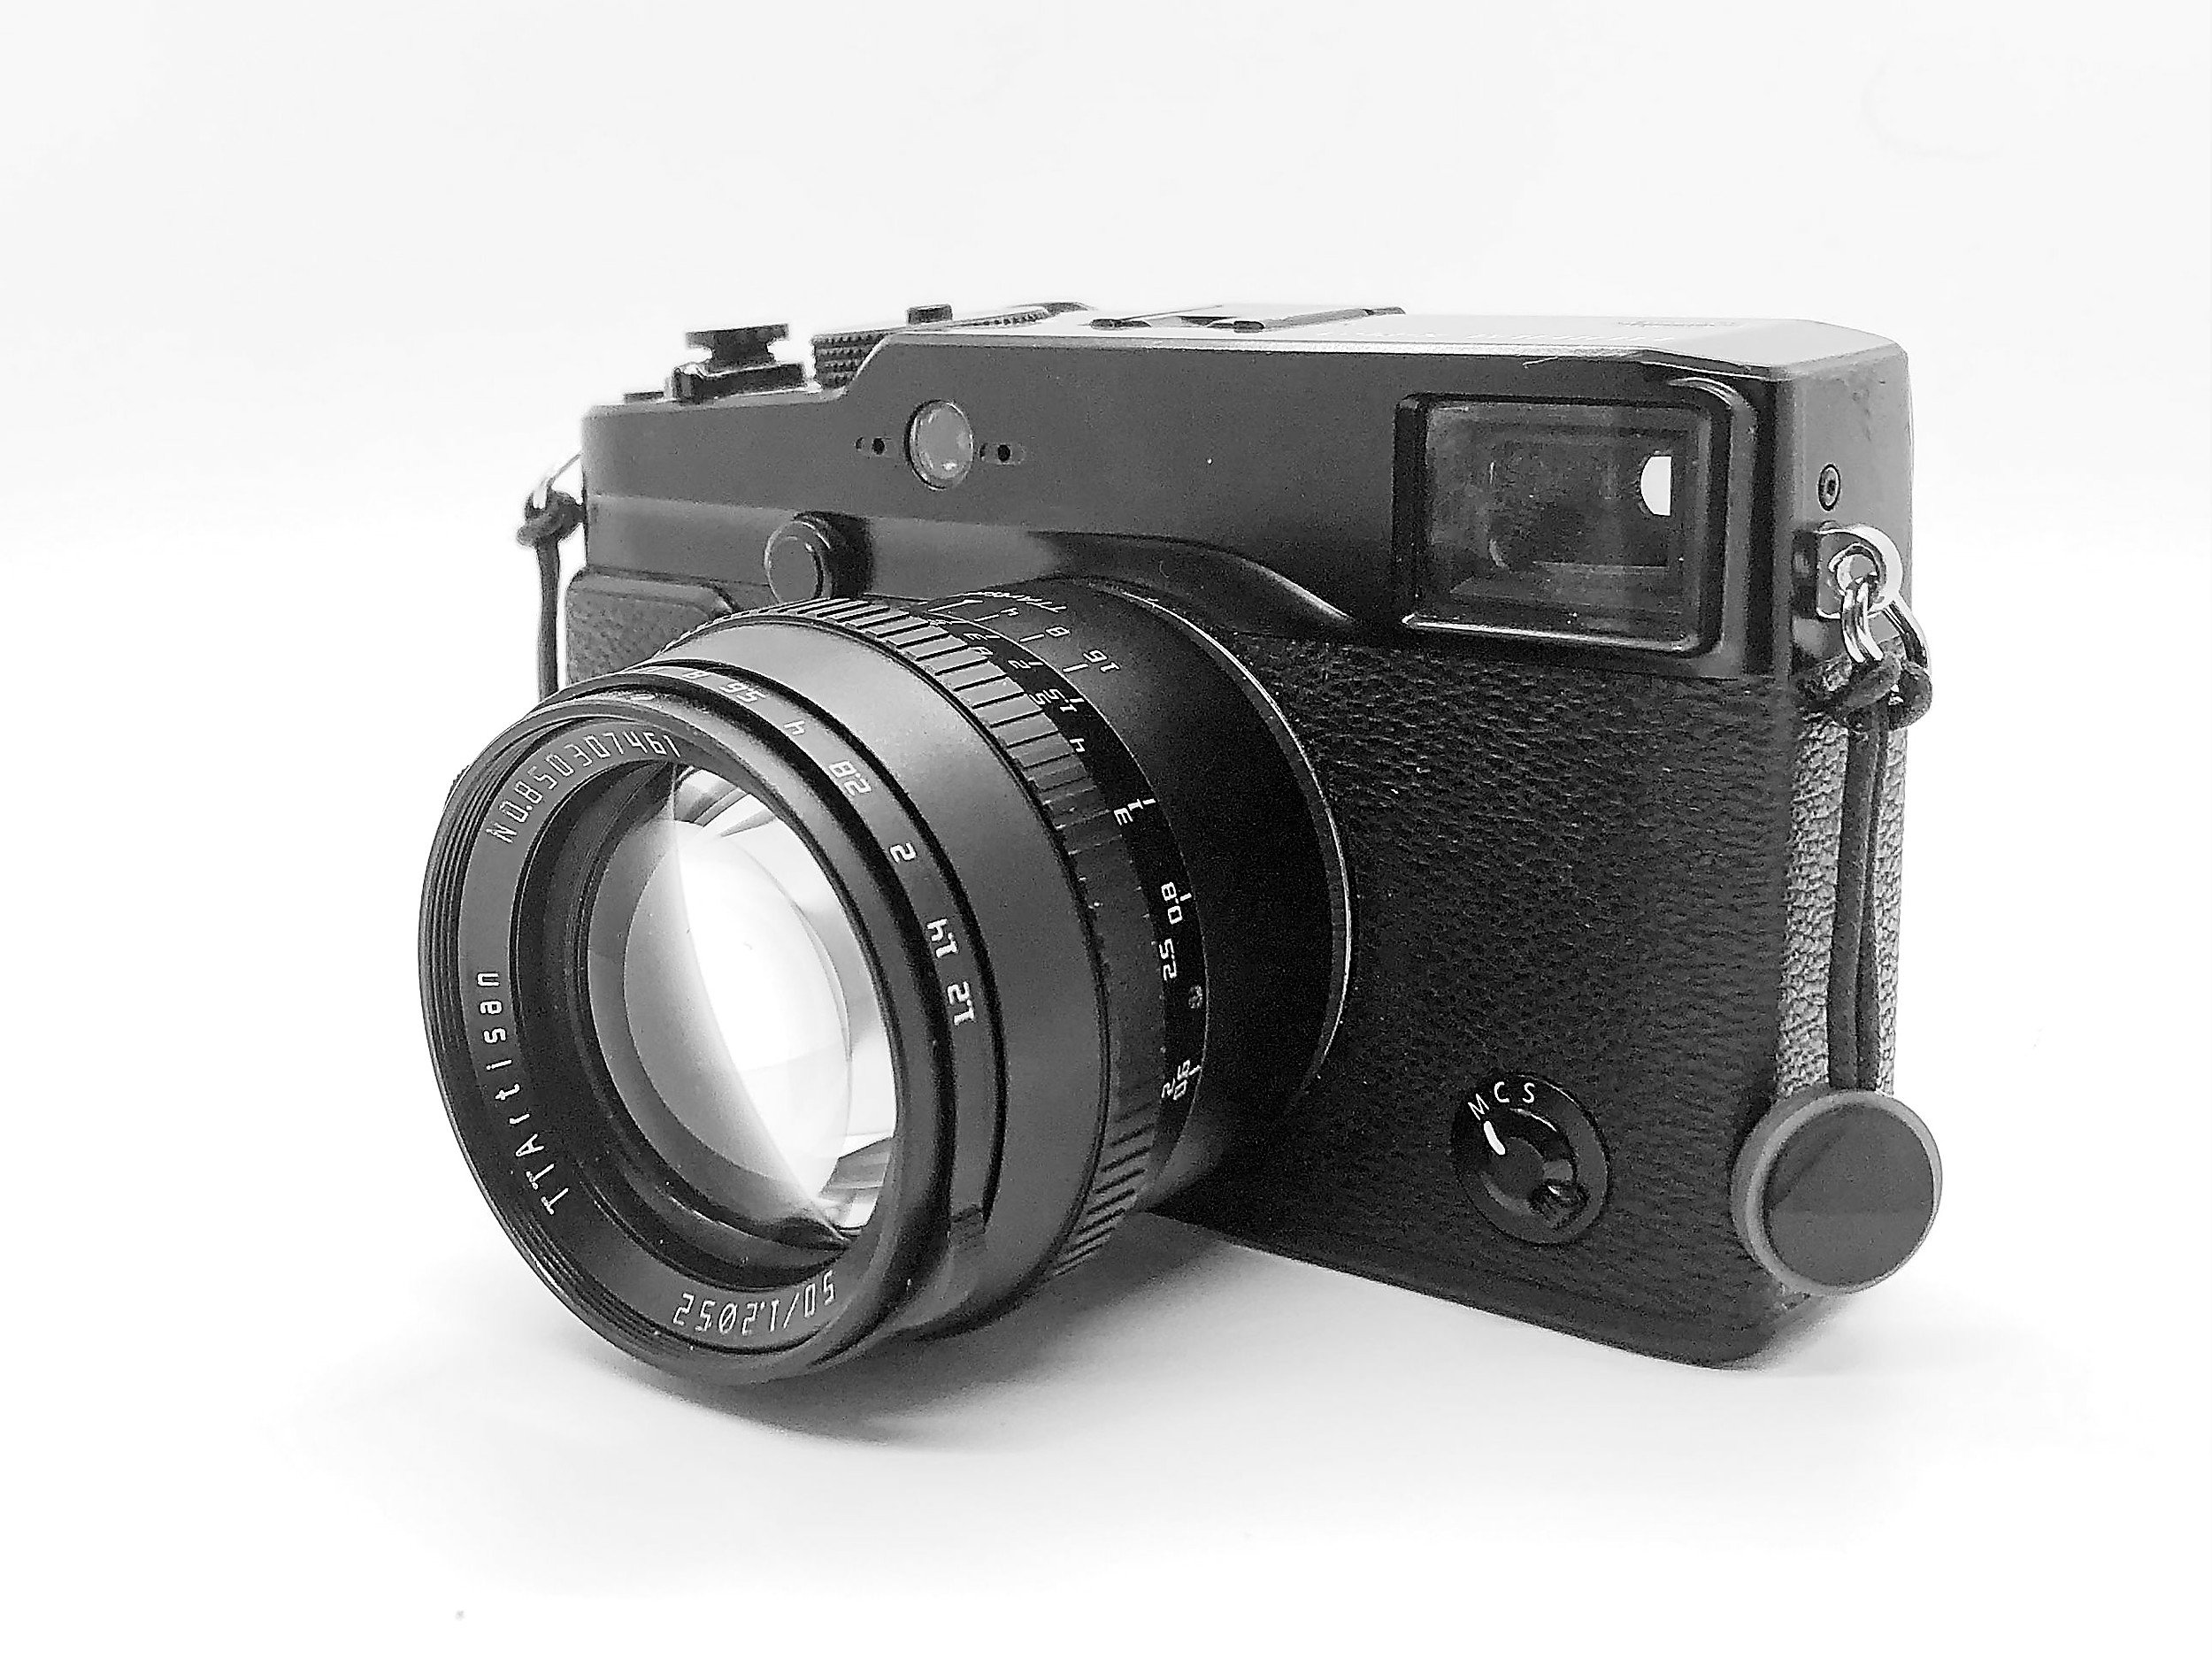
A TTArtisan 50mm f/1.2, with x-mount
And, of course, the Summaron 35mm f/2.8 from the M4
The x-mount TTArtisan goes directly on the X-Pro 1; I have specific adapters for the Nikkor, the Industar, and the Summaron.

Why Is A Depth-of-field Scale Important
As mentioned above, the depth-of-field scale is the main reason to use third-party lenses on a Fujifilm x-series camera.
This is important because it lets me use the zone and hyperfocal focusing techniques, allowing for extremely quick image-taking in the streets.
While all third-party lenses I have are either fully manual or only work as manual lenses on the X-Pro 1, zone-focusing with these lenses is quicker than autofocusing with Fujinon lenses!
If you don't know what zone-focusing is, you can read more about it in an article about zone-focusing with a Fujifilm x-series camera I published a while ago. In that article, you also can read how to zone-focus with x-series cameras when using lenses without depth-of-field scales (such as the fixed lens of the Fujifilm X100F).
How To Use Third-Party Lenses On A Fujifilm X-Series Camera
Since my third-party lenses only can be used as manual-focusing ones, I need to adjust several settings of the X-Pro 1.
First, set SHOOT WITHOUT LENS to 'ON' in Shooting Menu #3.
This allows for taking images without a Fujinon lens mounted.

Secondly, you can adjust the MOUNT ADAPTOR SETTING in Shooting Menu #3 to reflect the focal length of the lens you will be using. Note that this will not help or impact the actual use of the lens. This setting only registers the focal length of the lens you are using, which is then captured in the image's EXIF data.

Lastly, in Shooting Menu #5, I recommend setting MF ASSIST to PEAK. This will help get the correct focus using the Electronic View Finder (EVF). Focus peaking settings on the earlier x-series cameras, such as the X-Pro 1, are limited. The newer x-series cameras, however, have more extensive possibilities.

Notably, when zone-focusing with these manual lenses, I do not even have to use focus peaking and can actually use the Optical View Finder (OVF) of the X-Pro 1. However, especially with wider angle lenses, of course, I then need to be aware of possible parallax errors.
The Trinity Is No More
One Camera Is Gone, And It Is Probably Not The One You Would Expect
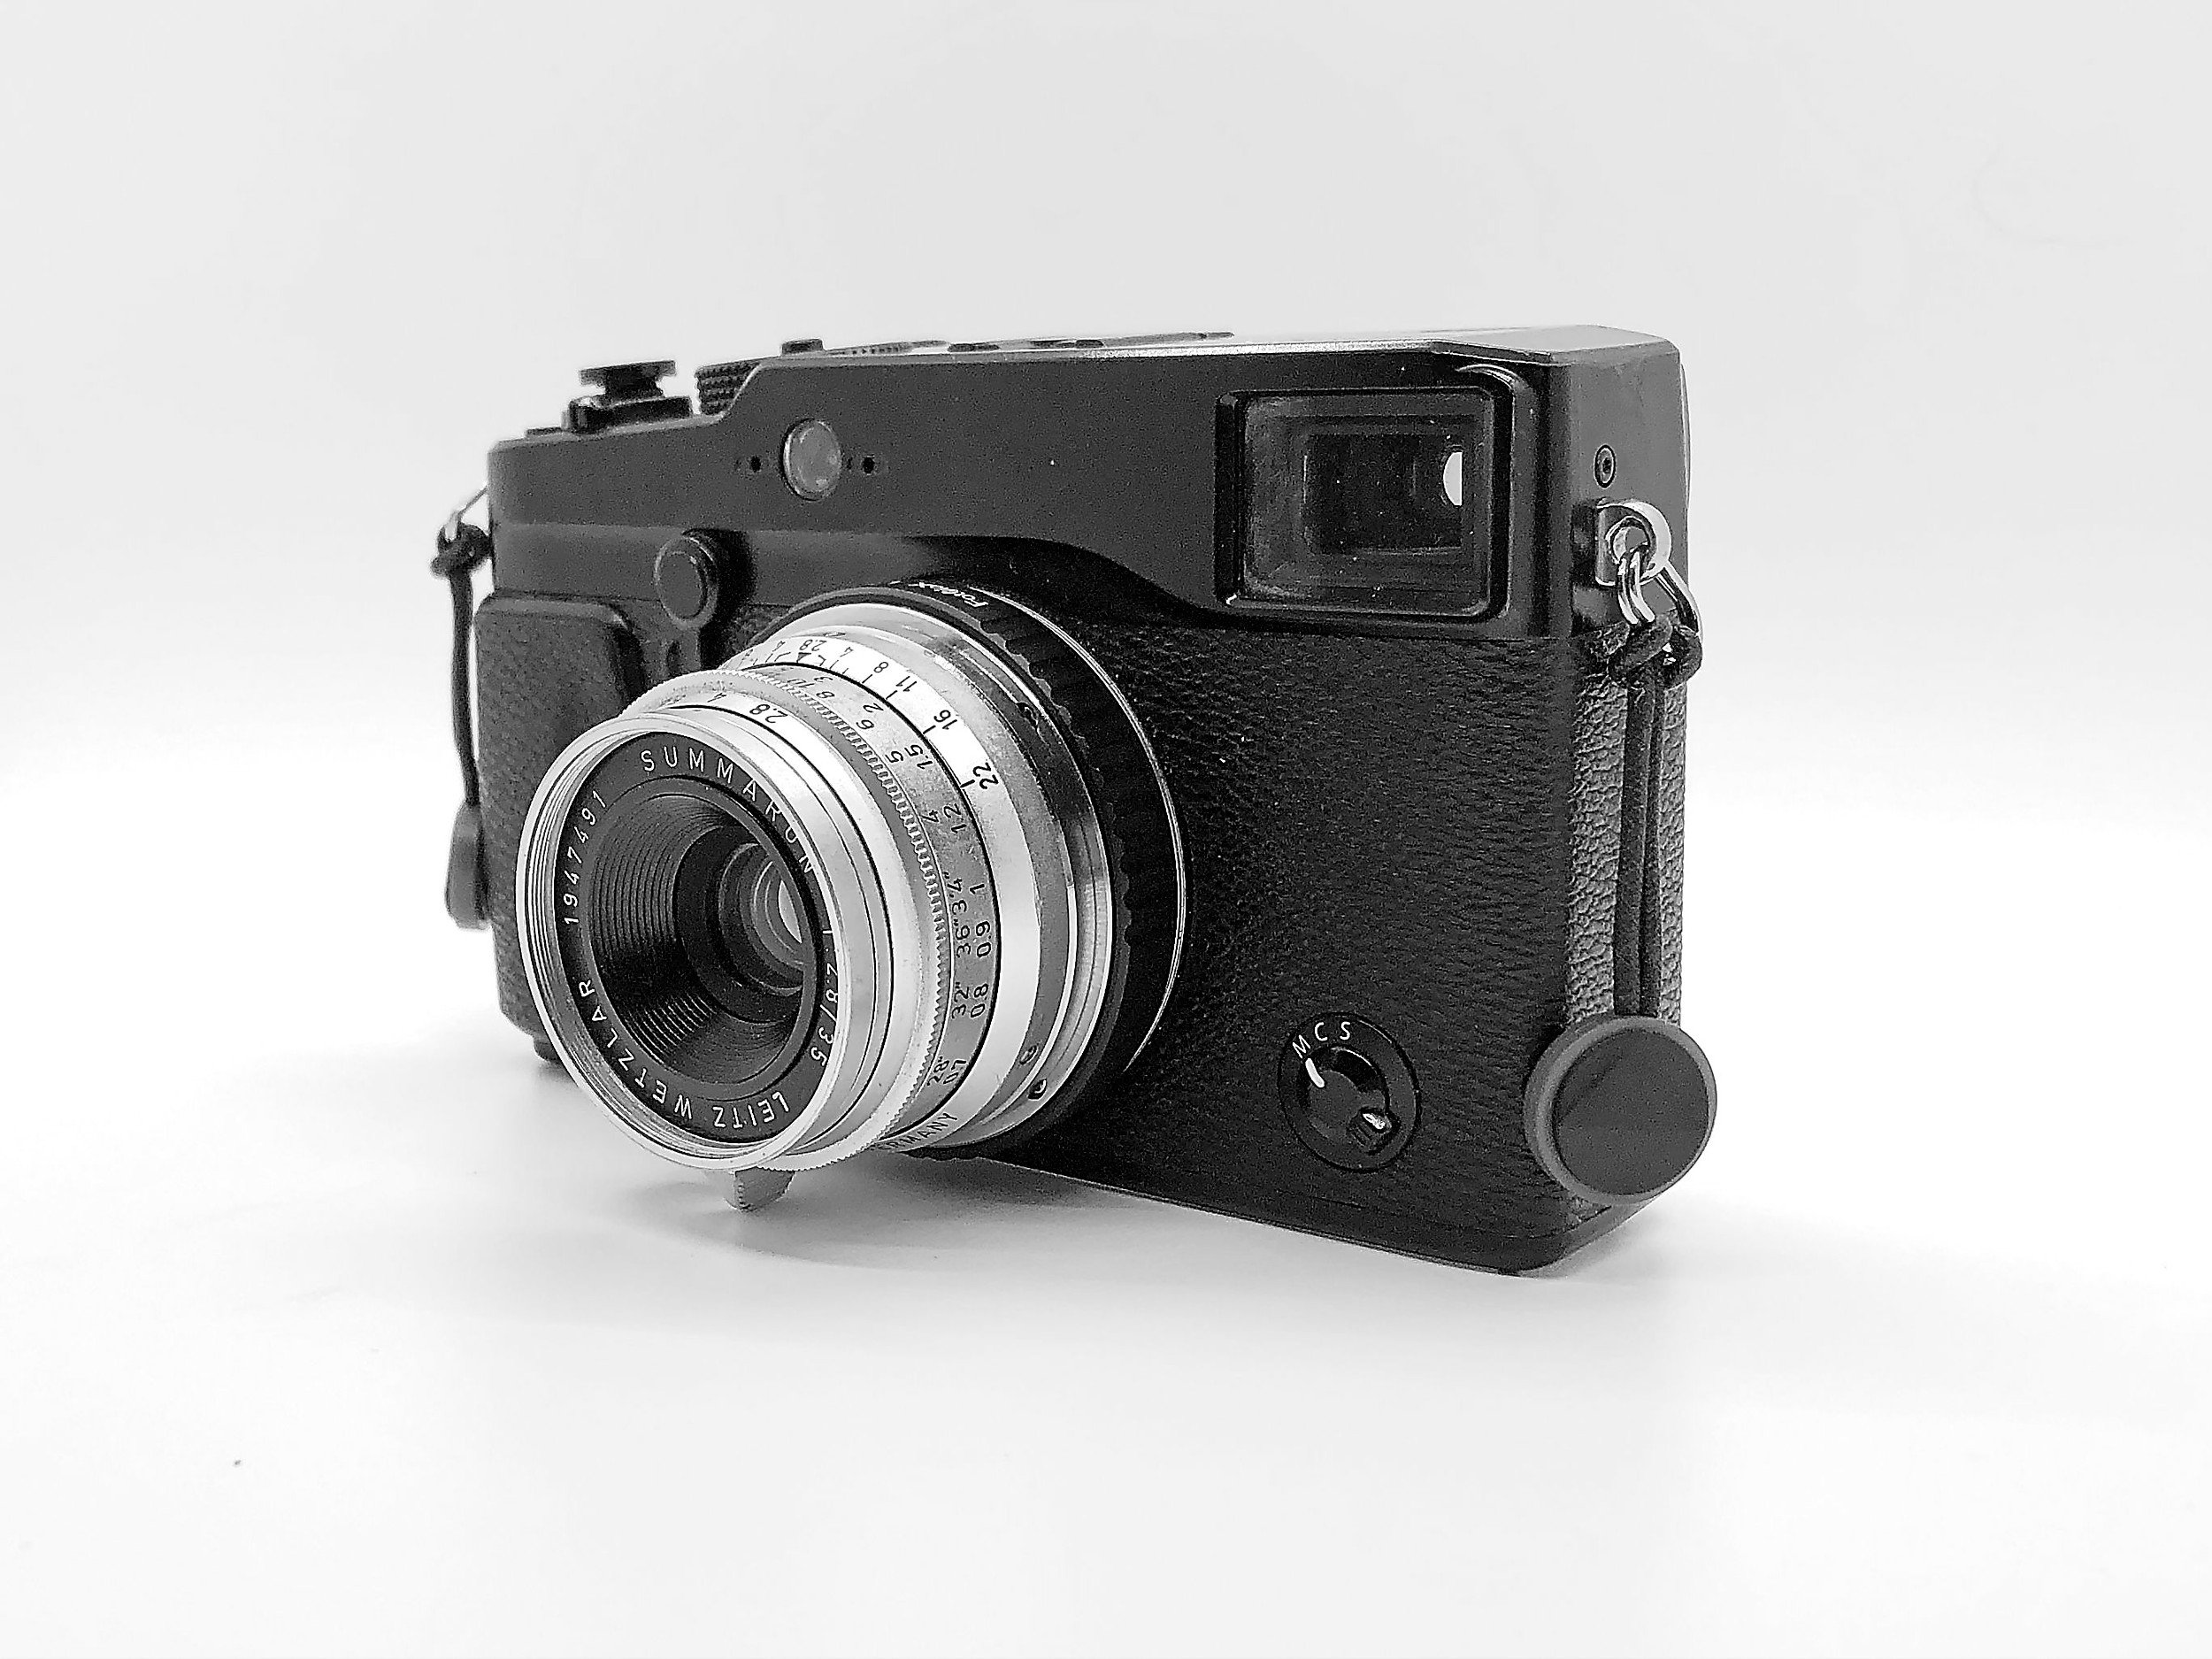
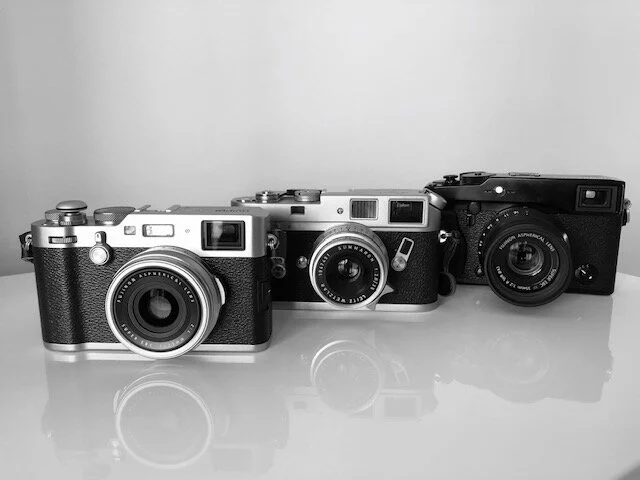
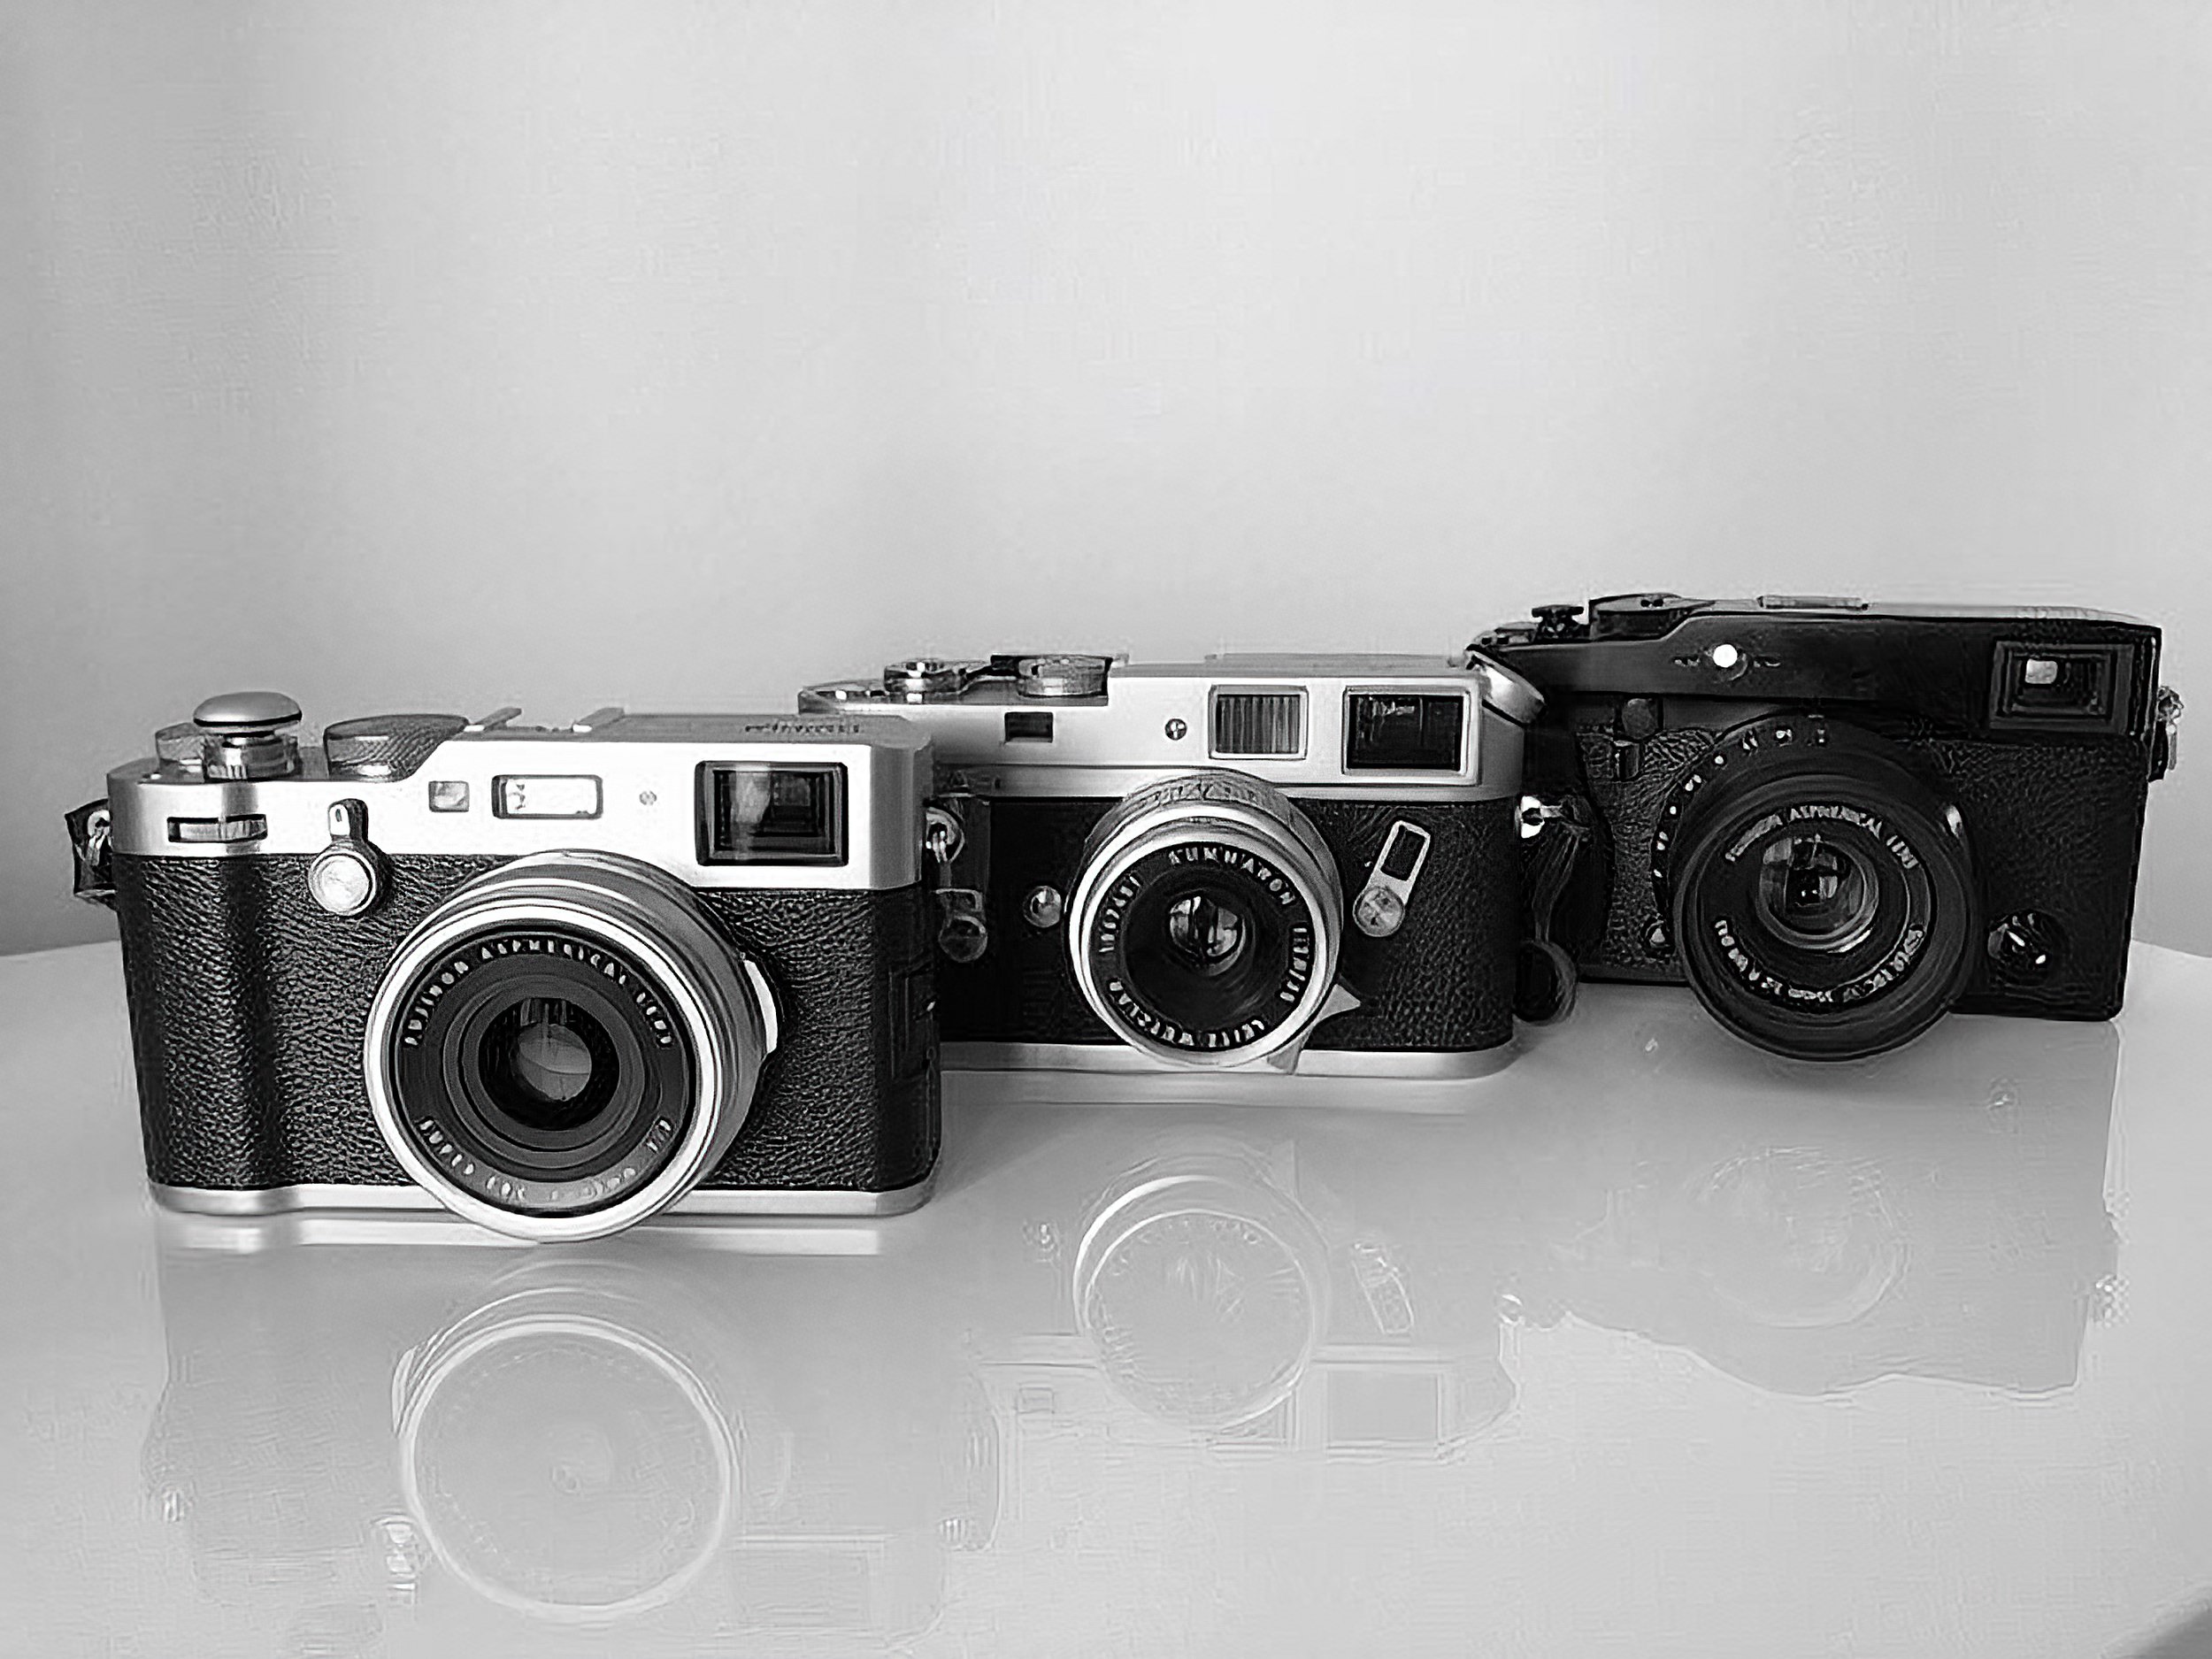
In 2019, I was fortunate to obtain two new cameras that were an excellent accompaniment to my Fujifilm X-Pro 1 and supplemented each other: a new Fujifilm X100F and a used Leica M4.
As I wrote, these three cameras became my Trinity.
One Camera Is Gone, And It Is Probably Not The One You Would Expect
In 2019, I was fortunate to obtain two new cameras that were an excellent accompaniment to my Fujifilm X-Pro 1 and supplemented each other: a new Fujifilm X100F and a used Leica M4.
As I wrote, these three cameras became my Trinity.
The X-Pro 1 was going to be my exchangeable-lens camera for when I wanted to create images with wide-angle (broader than 35mm full-frame equivalent) or longer lenses.
The X100F (with its 35mm full-frame equivalent lens) and the Leica M4 (with its 35mm Summaron) would be my daily go-to cameras, depending on whether I wanted to shoot digital or analogue.
This setup worked well; I created many street and social documentary-style images and essays with these three tools.
And now I broke the Trinity up.
What happened?
Did one of the cameras break? Did I not like any of them anymore?
Fortunately, none of those.
One of my daughters went to study abroad in September of this year and wanted to take a real camera with her. Although she has the ubiquitous iPhone, she wanted a real camera (insert dad doing a happy dance).
After researching several alternatives and the cost involved, I decided that I was going to give her the X100F.
Yup, I parted with this lovely camera to give my daughter an excellent tool and a fantastic shooting experience.
It is easy to set the Fujifilm X100F up as a 'point and shoot camera, and if she wants to go manual, that is still a possibility.
So there you have it: the X100F is no longer part of my daily toolkit.
While my daughter was thrilled with this decision - and she is making great memories with the X100F in Bonny Scotland - it gave me a challenge and an opportunity.
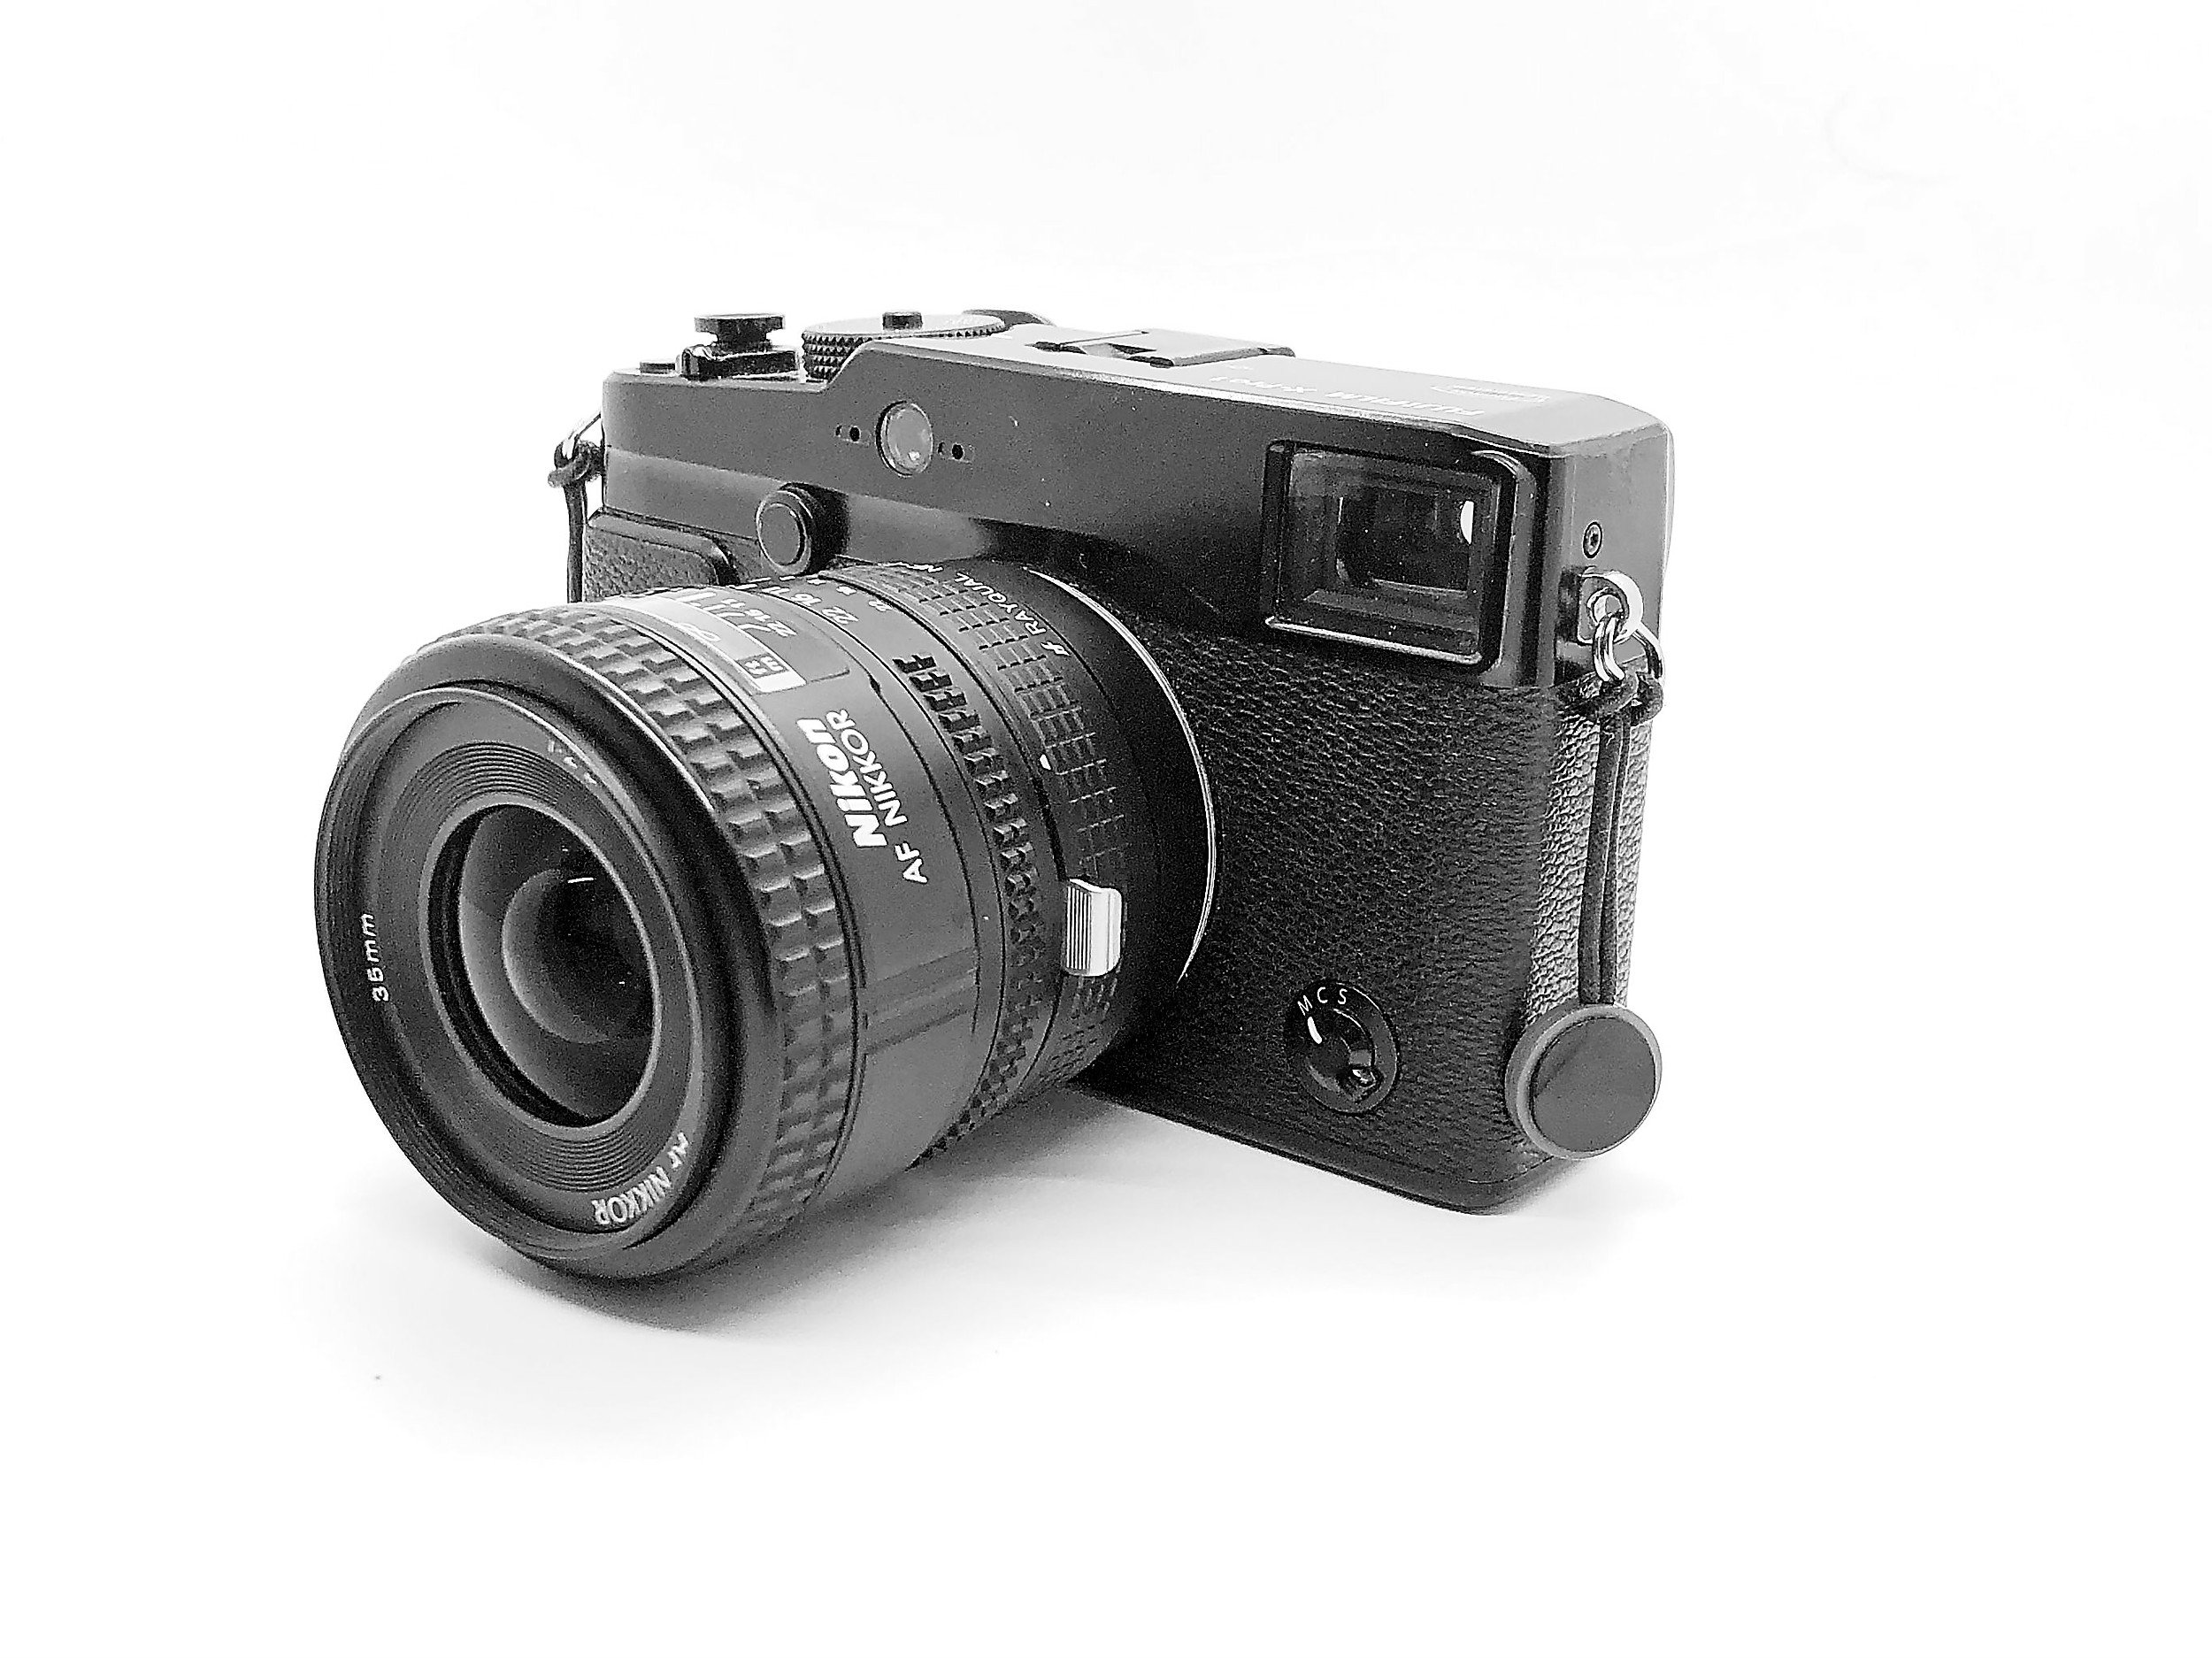
Without the X100F and its 23mm lens (35mm full-frame equivalent), I no longer had a direct digital match to the 35mm Summaron on the Leica M4. Because the only lenses I had for the X-Pro 1 were a Fujinon 18mm/1.2, a Fujinon 35mm/1.4, a Fujinon 35mm/1.2 XF, and a TTArtisan 50mm/1.2.
All great lenses, which I still use today, but none of them are a direct match to the 35mm angle of the Summaron.
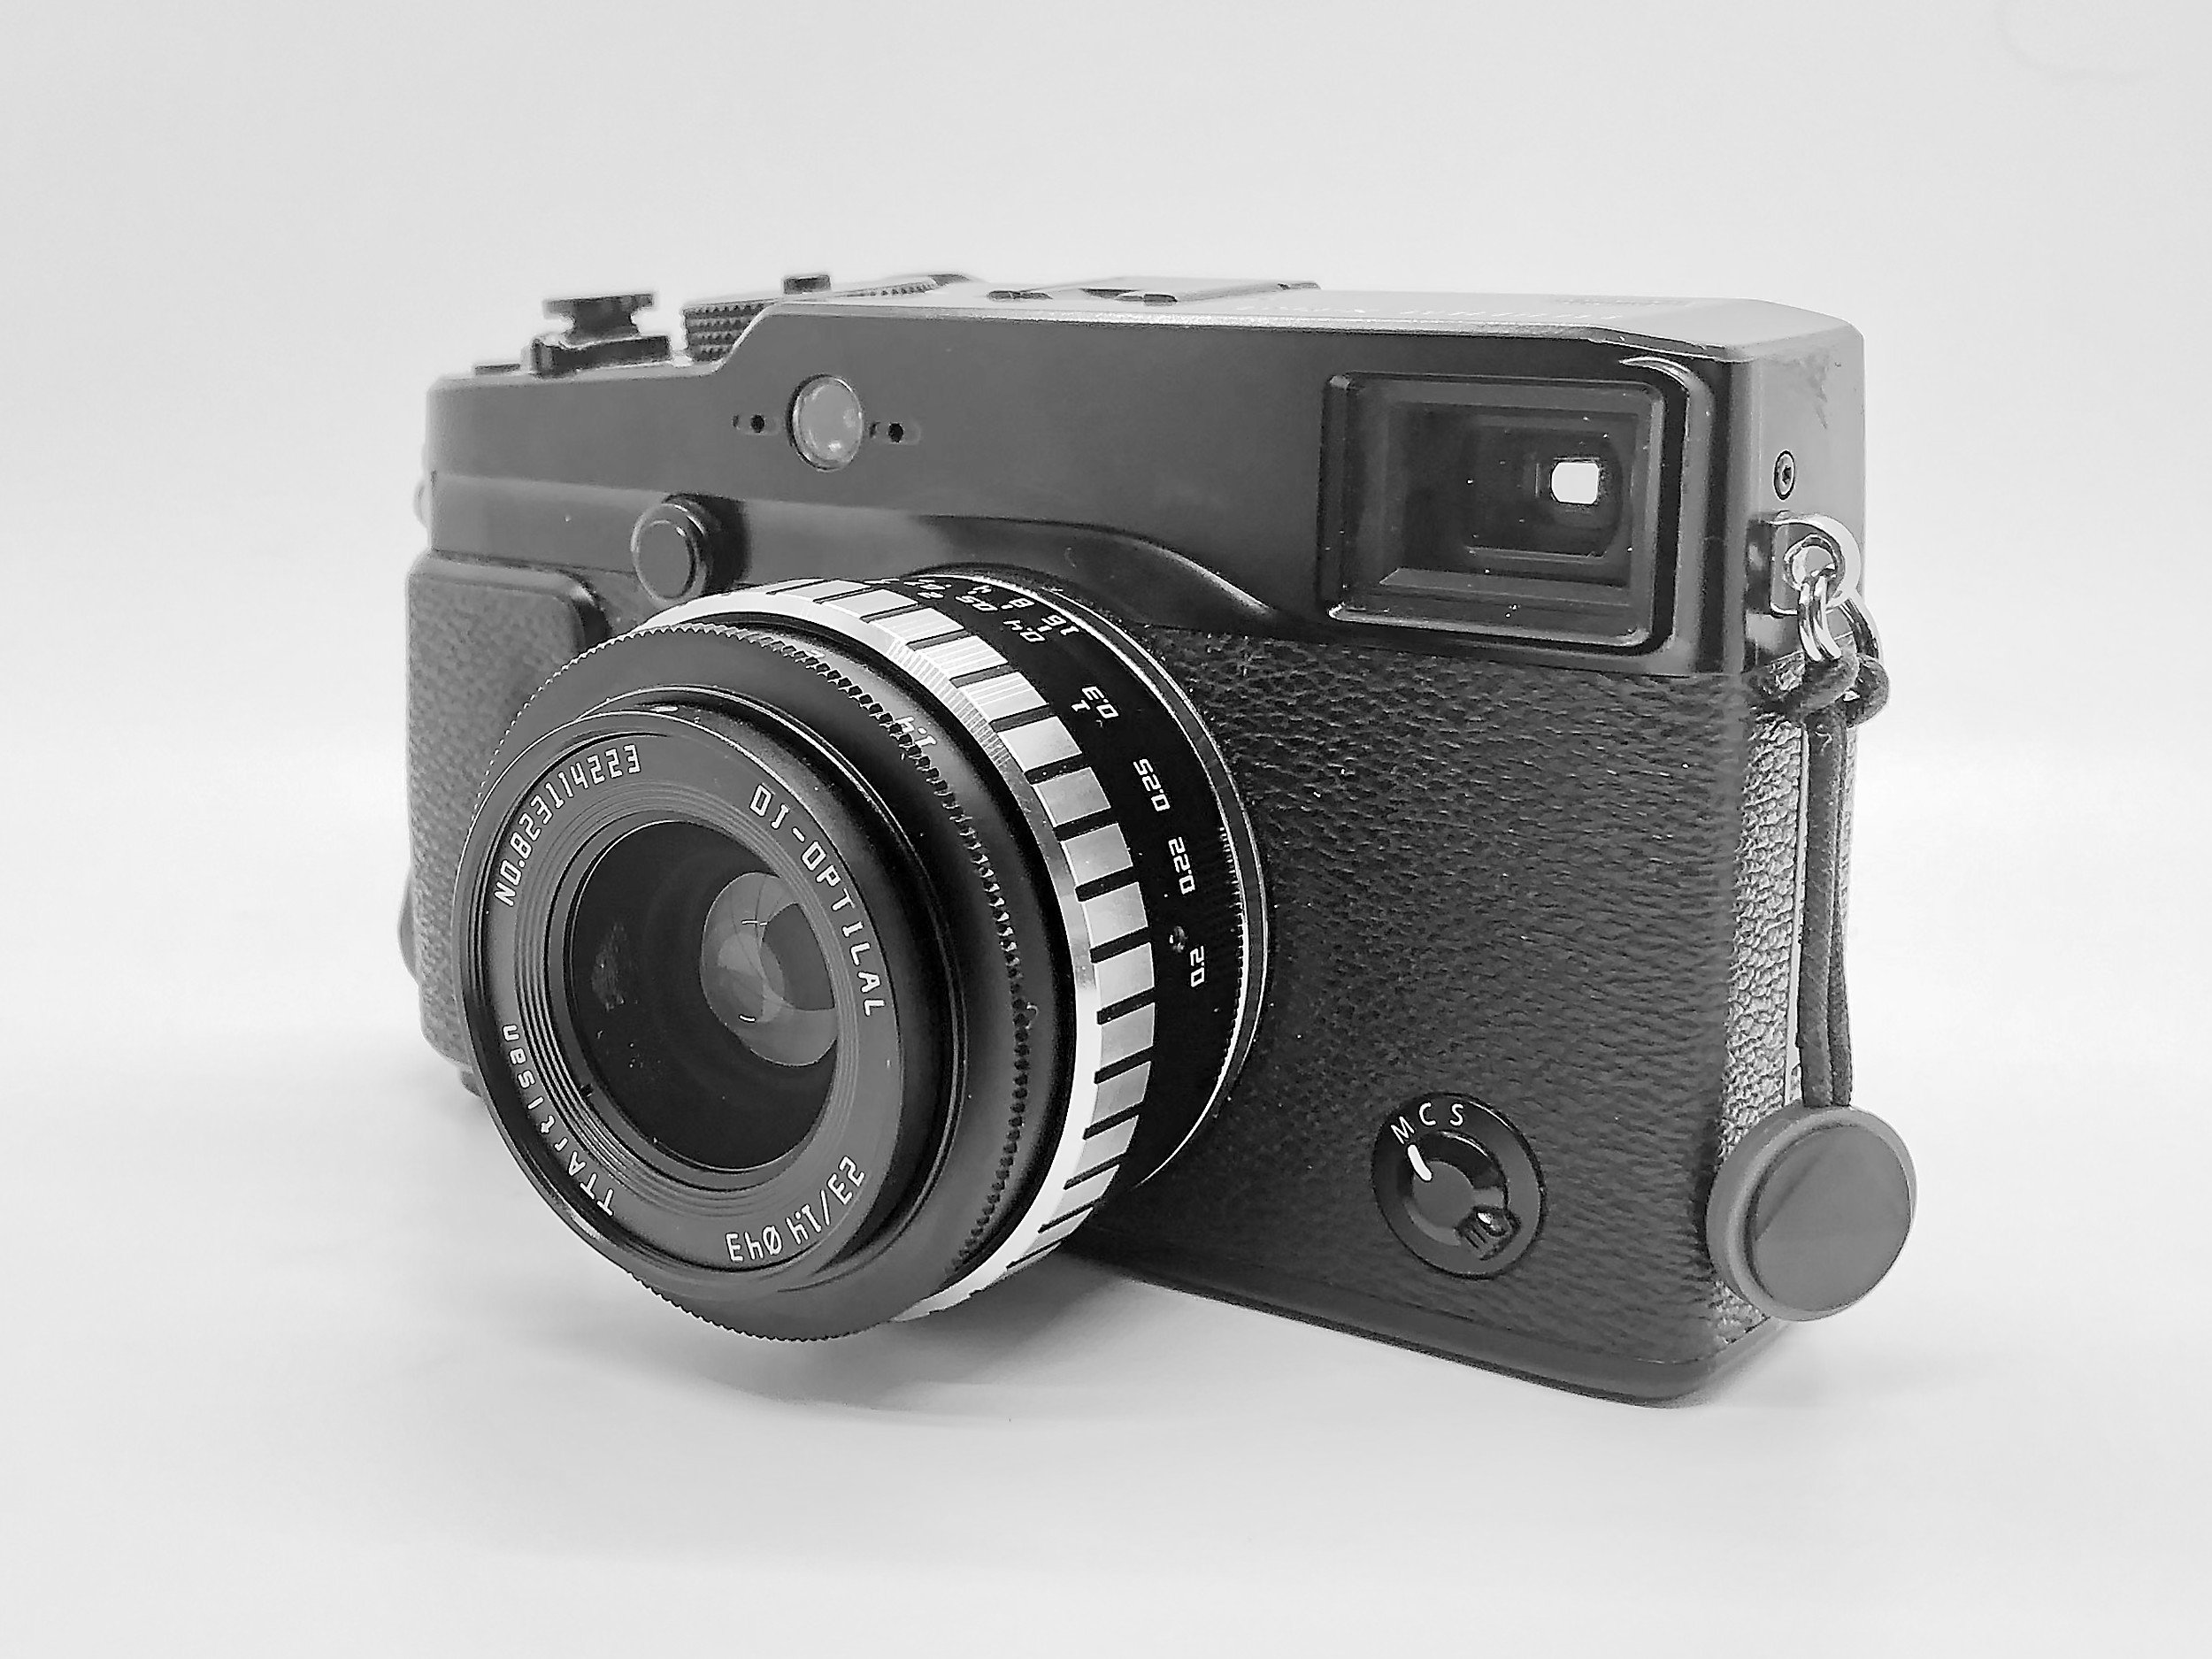
Enter the TTArtisan 23mm/1.4
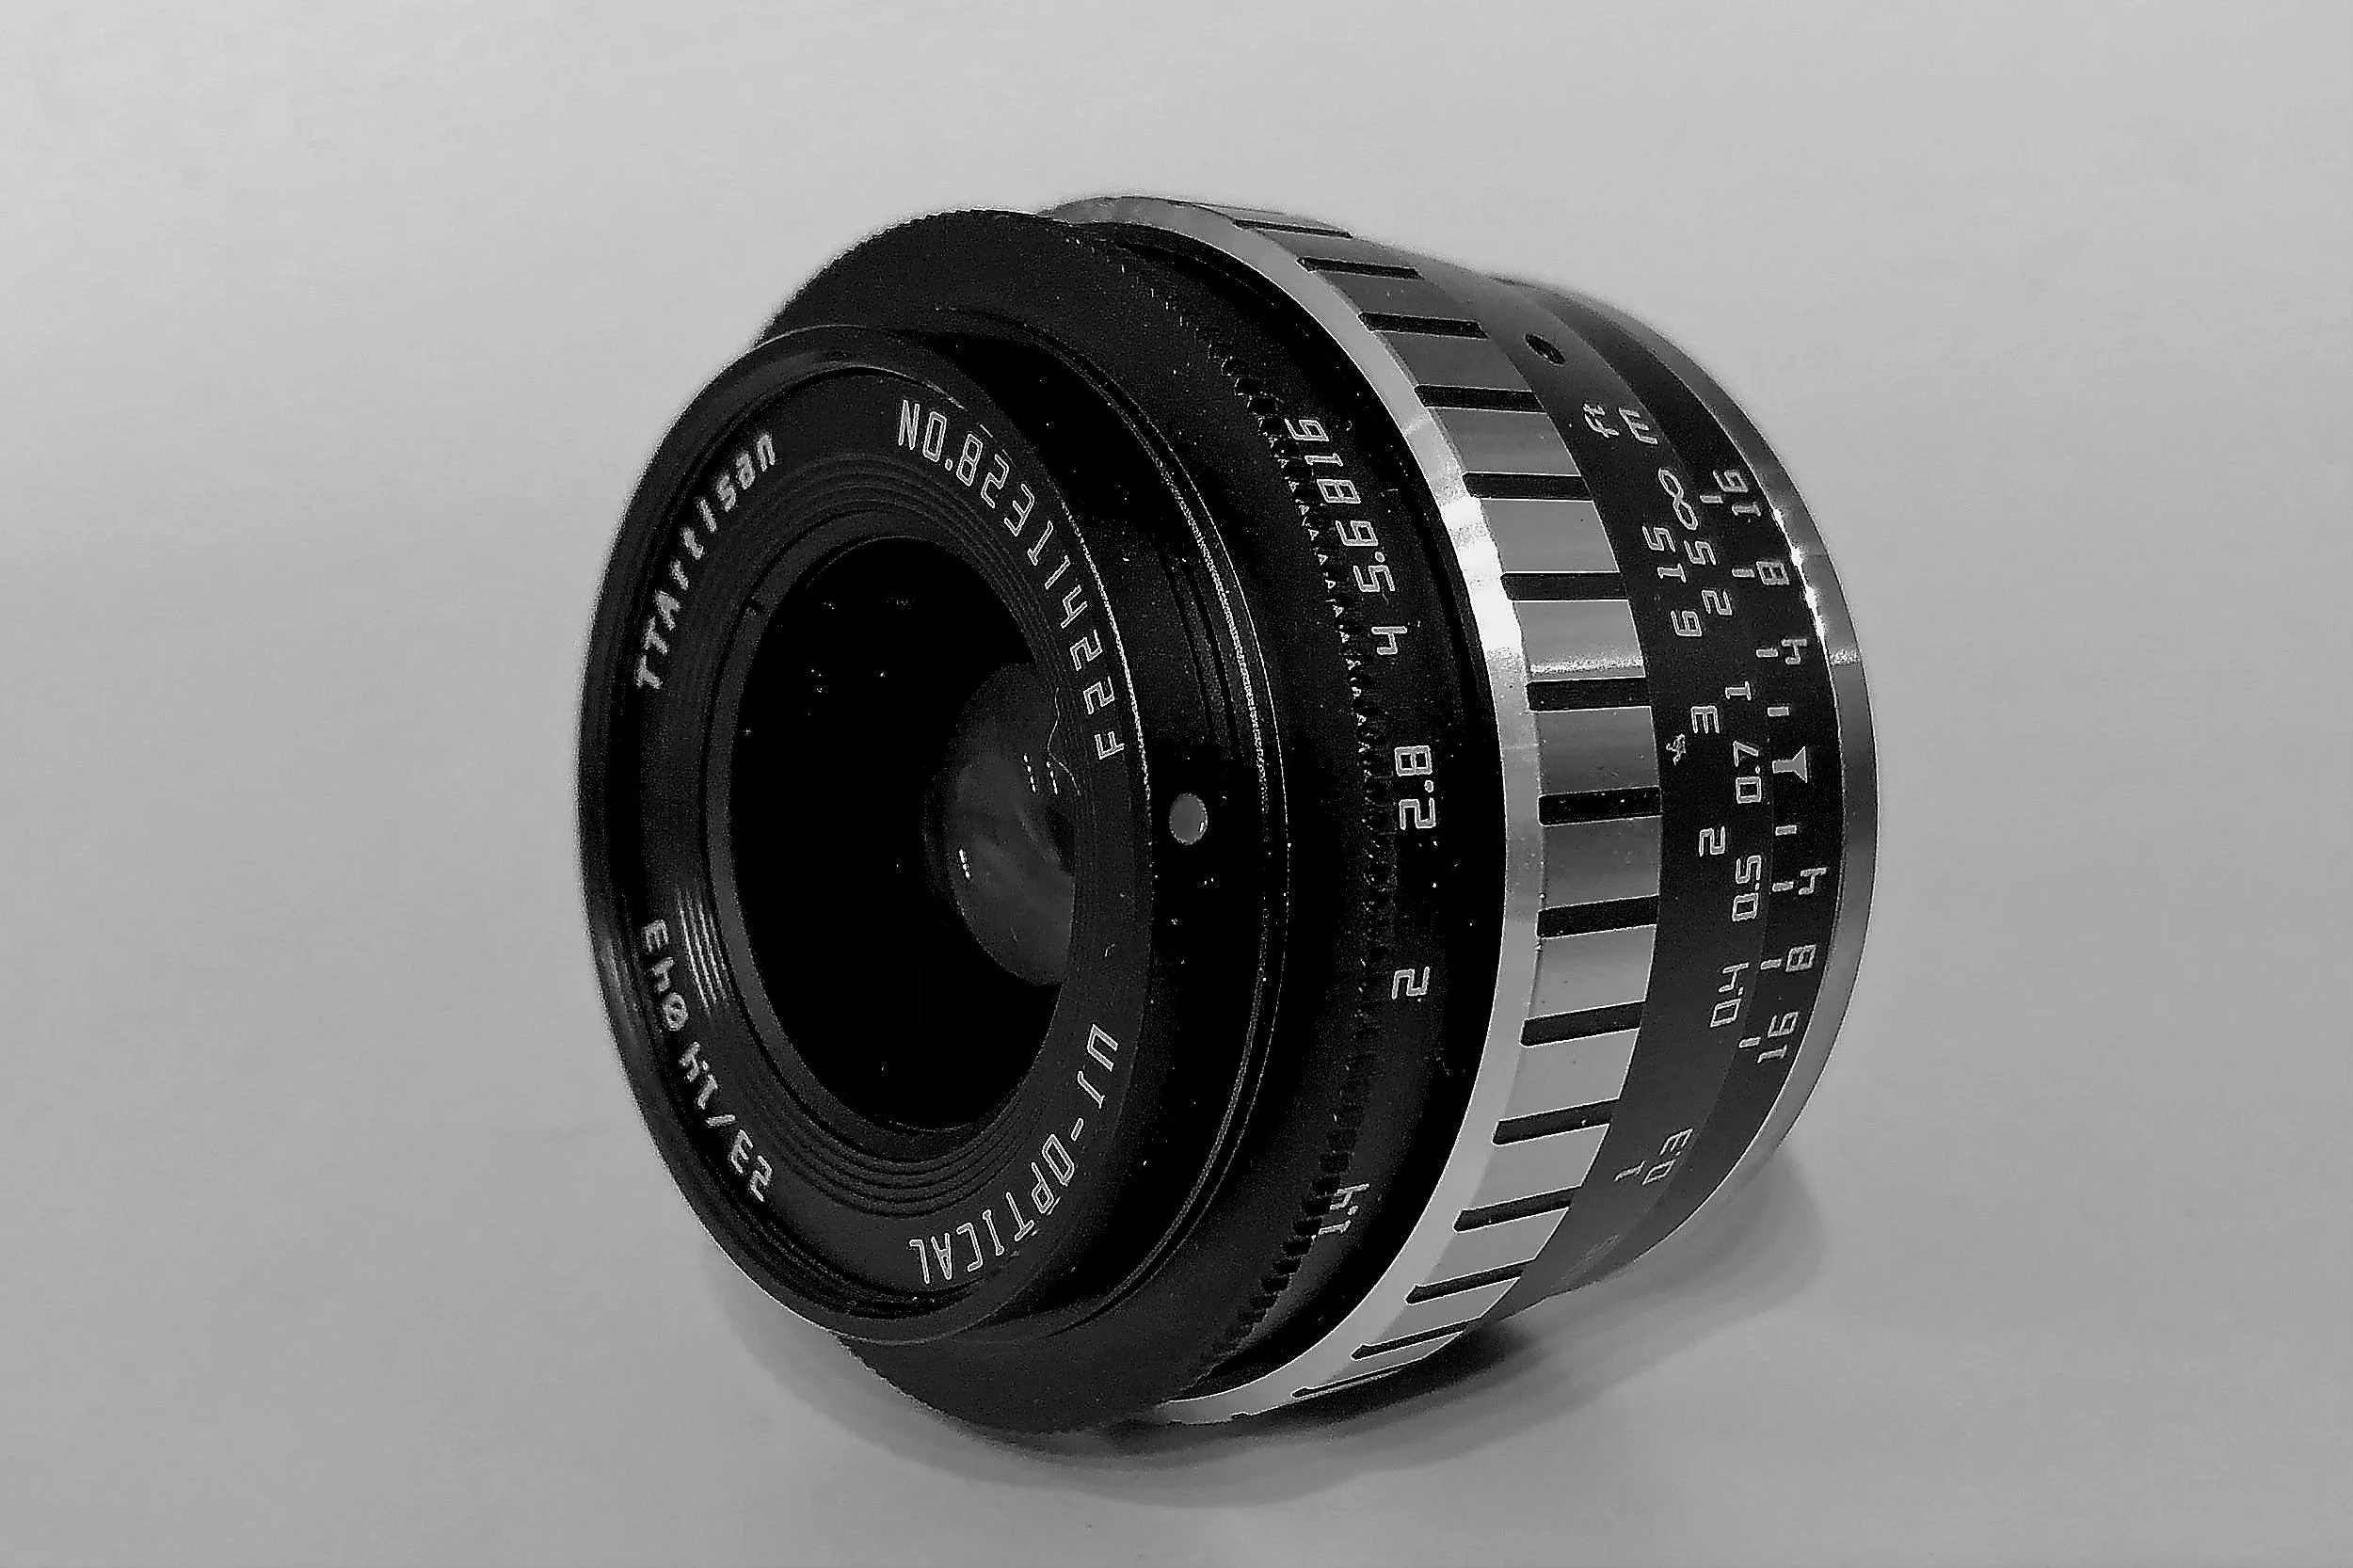
After some deliberation and research, I decided on this lens for several reasons.
It is extremely reasonably priced.
It is small.
It has a nice, solid feel to it.
It balances nicely on the X-Pro 1.
It looks cool.
And most importantly, it delivers excellent image results.
Considering this, I couldn't find a lens with a better price/quality ratio.
And there is another spec to this lens, which for me is essential: it has a distance/aperture scale which allows for zone and hyperfocal focusing! Unfortunately, the only Fujinon 23mm lens with this feature (the 23mm/1.4 R) is just over seven times more expensive.
[note: I have no affiliation with TTArtisan or Pergear, and I purchased this lens myself]
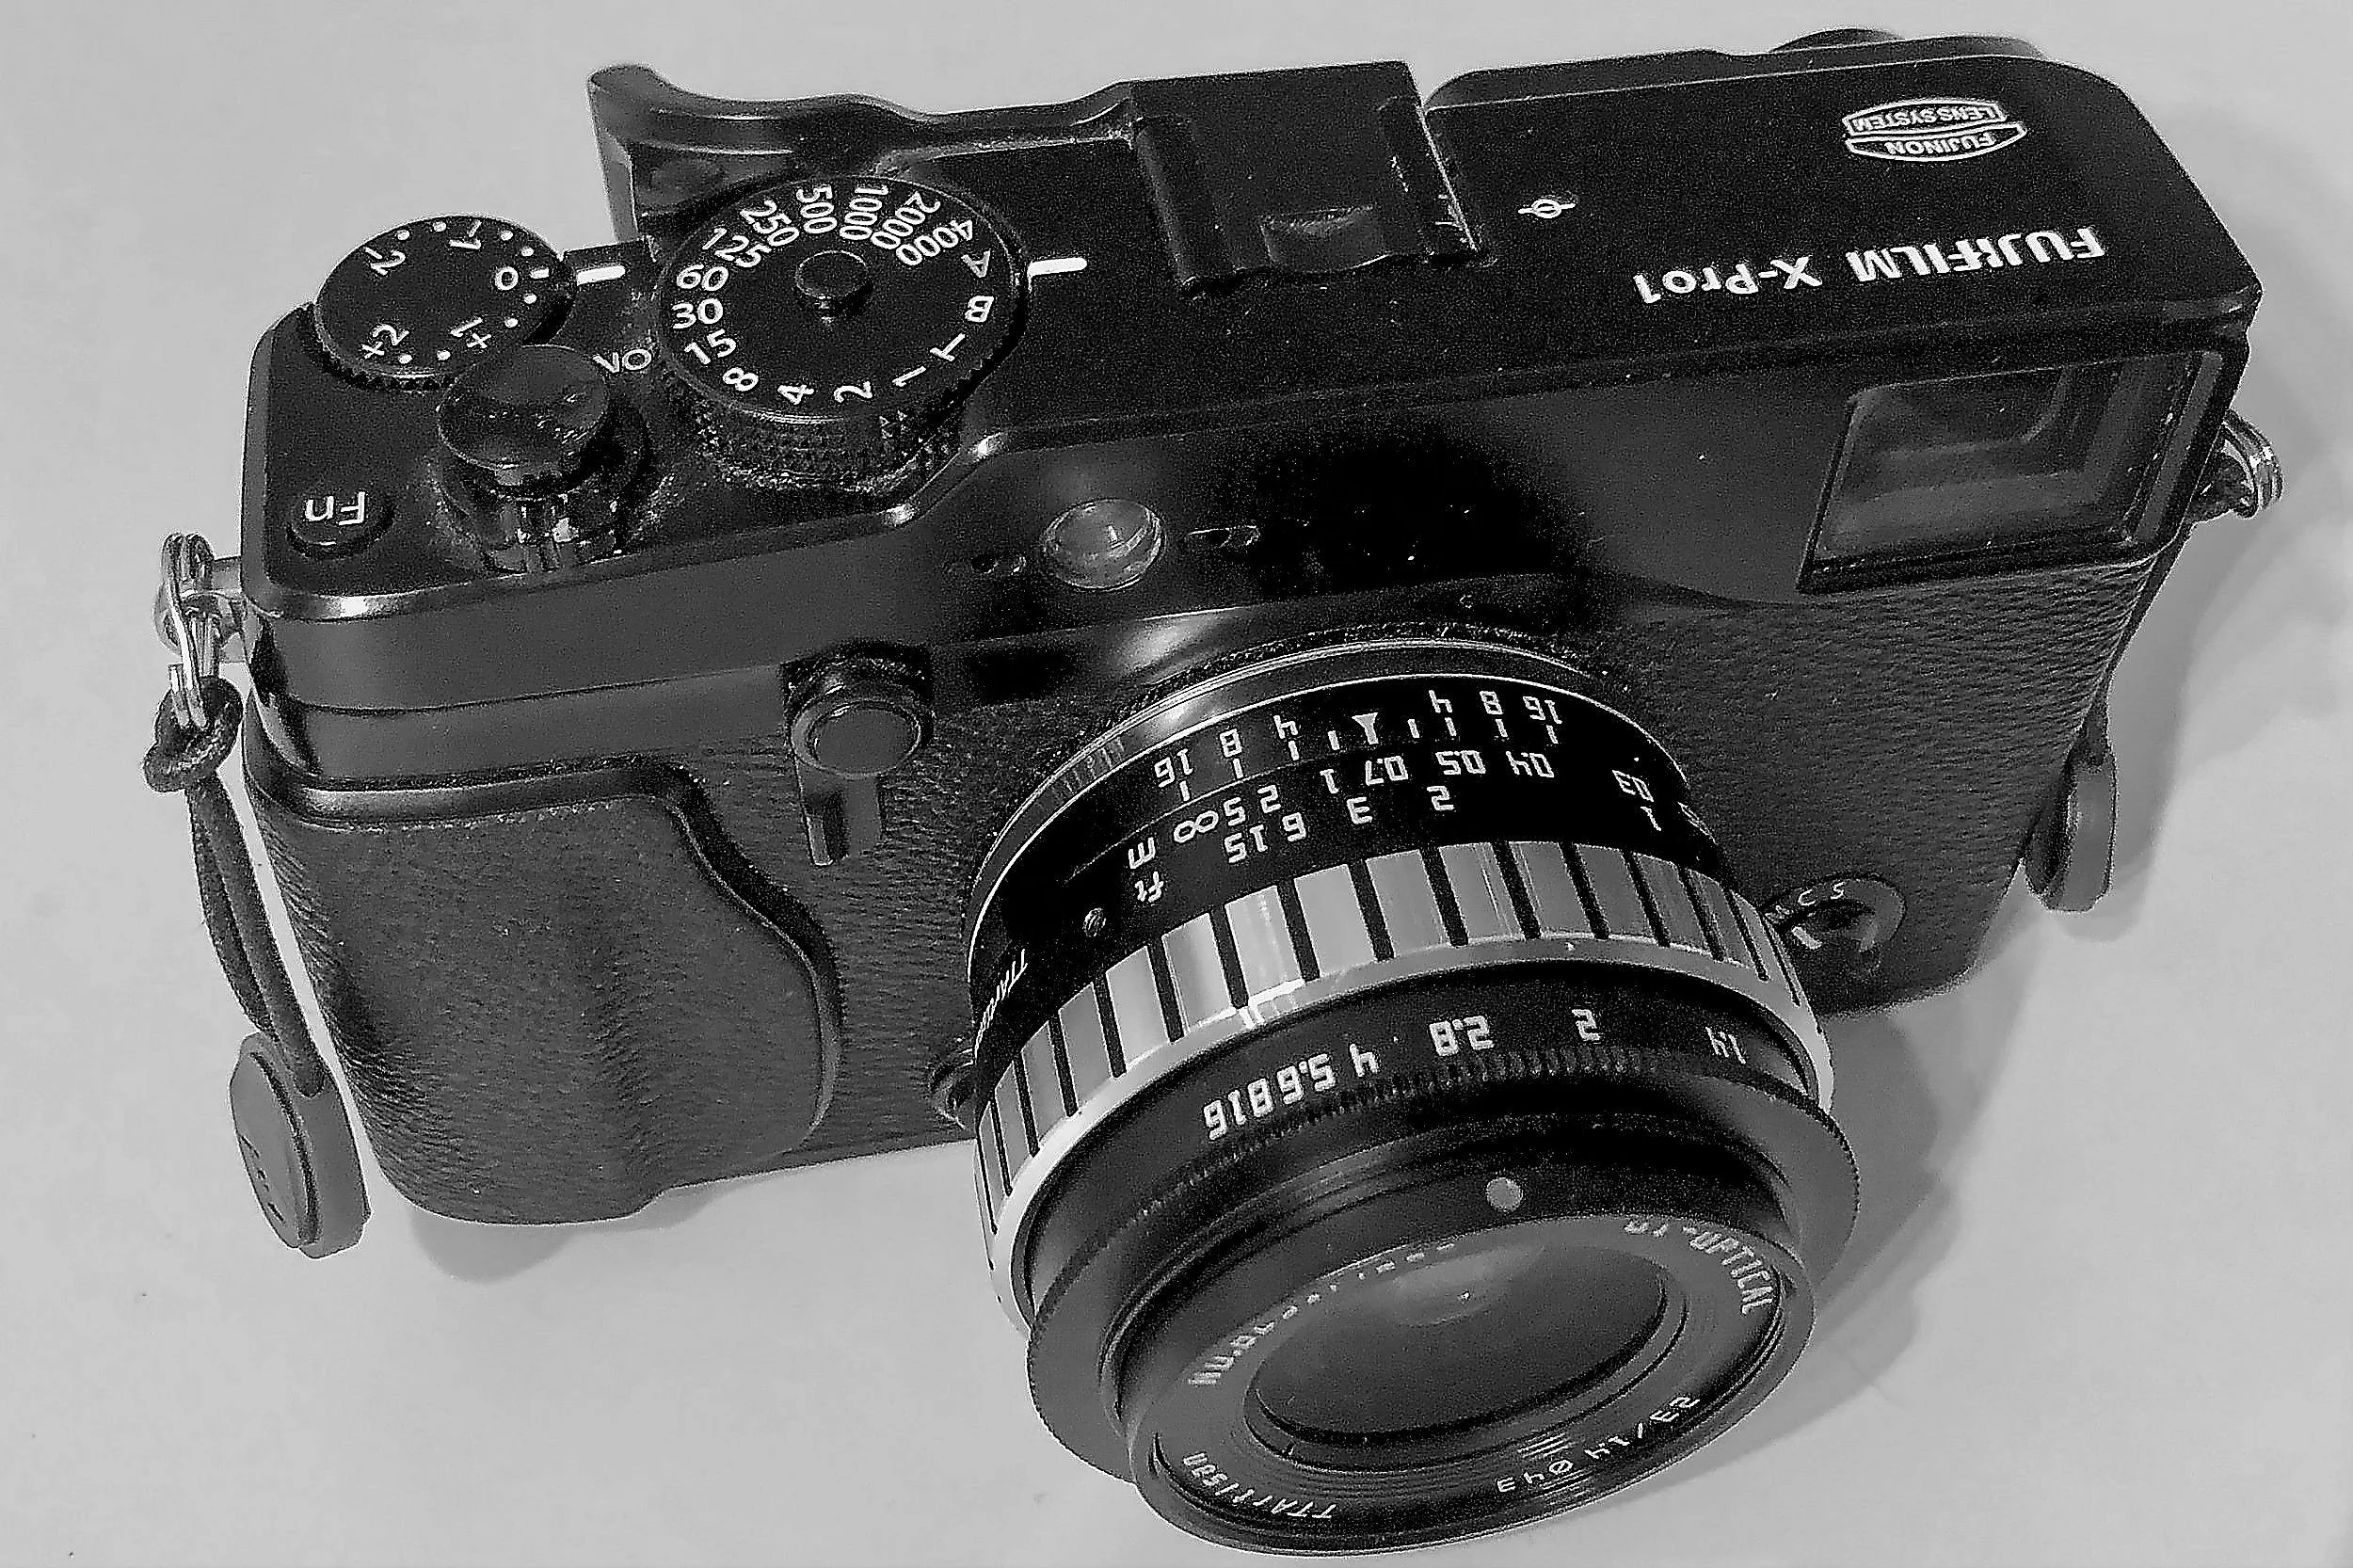
So now I am back to two daily cameras: the Leica M4 with the 35mm Summaron and the Fujifilm X-Pro 1 with the 23mm TTArtisan, which makes life also a bit easier because I don't have to choose between three cameras when going out on the street.
The images below are the first results of shooting with the TTArtisan 23mm (all are SOOC jpegs).
Admittedly, there is some learning curve since the lens is fully manual and does not communicate with the camera. I am finding, however, that the use of this lens is not much different from using the Summaron (all Leica devotees now probably are shaking their heads and un-friending me). And zone focusing even allows me to get great results using the X-Pro1's OVF.


Never Too Old To Play
New York City NY | Hester St. Playground | Feb 2019
New York City's China Town area is a treasure trove for street photographers and cultural experiences.
New York City, NY | Hester St. Playground | February 2019
New York City's China Town area is a treasure trove for street photographers and cultural experiences.
I noticed two gentlemen near the Hester Street playground playing the Chinese game of Xiangqi.
I didn't know if they played for toothpicks, hard dollars, or fun, but they were having a good time, and the bitter cold temperature didn't bother them.
Several onlookers were sitting and standing around their table, undoubtedly providing their advice for the next move.
Unfortunately, I had to move on and never got to know who won.

Getting The Shot: Preventing Lens Flare
Using A JJC Lens Hood To Prevent Unwanted Lens Flare
One of my most popular images shows a considerable amount of lens flare, which, in this instance, adds in a positive way to the general mood and feeling of the picture…

Using A JJC Lens Hood To Prevent Unwanted Lens Flare
One of my most popular images shows a considerable amount of lens flare, which, in this instance, adds in a positive way to the general mood and feeling of the picture.

Sometimes, however, lens flare is not desired in an image and needs to be prevented.
What Is Lens Flare?
Before discussing some general ways to prevent lens flare, and my specific solution, let's first look at what lens flare is.
Lens flare is the appearance of light diffused or flared in a lens, often due to bright light - e.g., from the sun - scattered inside the lens because of internal reflections.
The more elements a lens has, the bigger the chance of lens flare because of the larger number of surfaces that can increase internal scattering.
Why Prevent It
Flare can manifest itself in two ways: as distinct artifacts and as haze across the image.
Visible artifacts might appear as sunbursts patterns caused by the aperture diaphragm, but it can also add (semi) circular halos or odd-shaped artifacts.
Glare makes the image look washed-out because it reduces contrast and saturation.
When To Use It
While lens flare is often undesired, it sometimes enhances the artistic essence, adding a soft color cast to the scene and adding mood and drama to the image.
For example, in the picture above, the flare adds drama and makes clear to the viewer why the people are seen as silhouettes.
How To Prevent Flare
As mentioned, flare generally occurs when shooting towards the sun or with the sun or another strong light source to the camera's left or right. Fortunately, you can take a couple of easy steps to prevent it from appearing in your images.
Use high-quality lenses
While these are expensive, high-quality lenses have fantastic coatings that significantly reduce or even eliminate flare.
Use prime lenses
Prime lenses usually have fewer optical elements. And fewer elements means less chance of flare.
Change your composition
Changing where the light source is in your frame or placing objects within your composition to partially or entirely obstruct any flare causing light sources can make the difference between a clear image or a washed-out one.
Block the light source
An easy method to reduce lens flare is using your hand or something else, e.g., a grey card or an umbrella, to block off the light.
Use a lens hood
And saving the probably most apparent solution for last: a good lens hood can virtually eradicate flare.
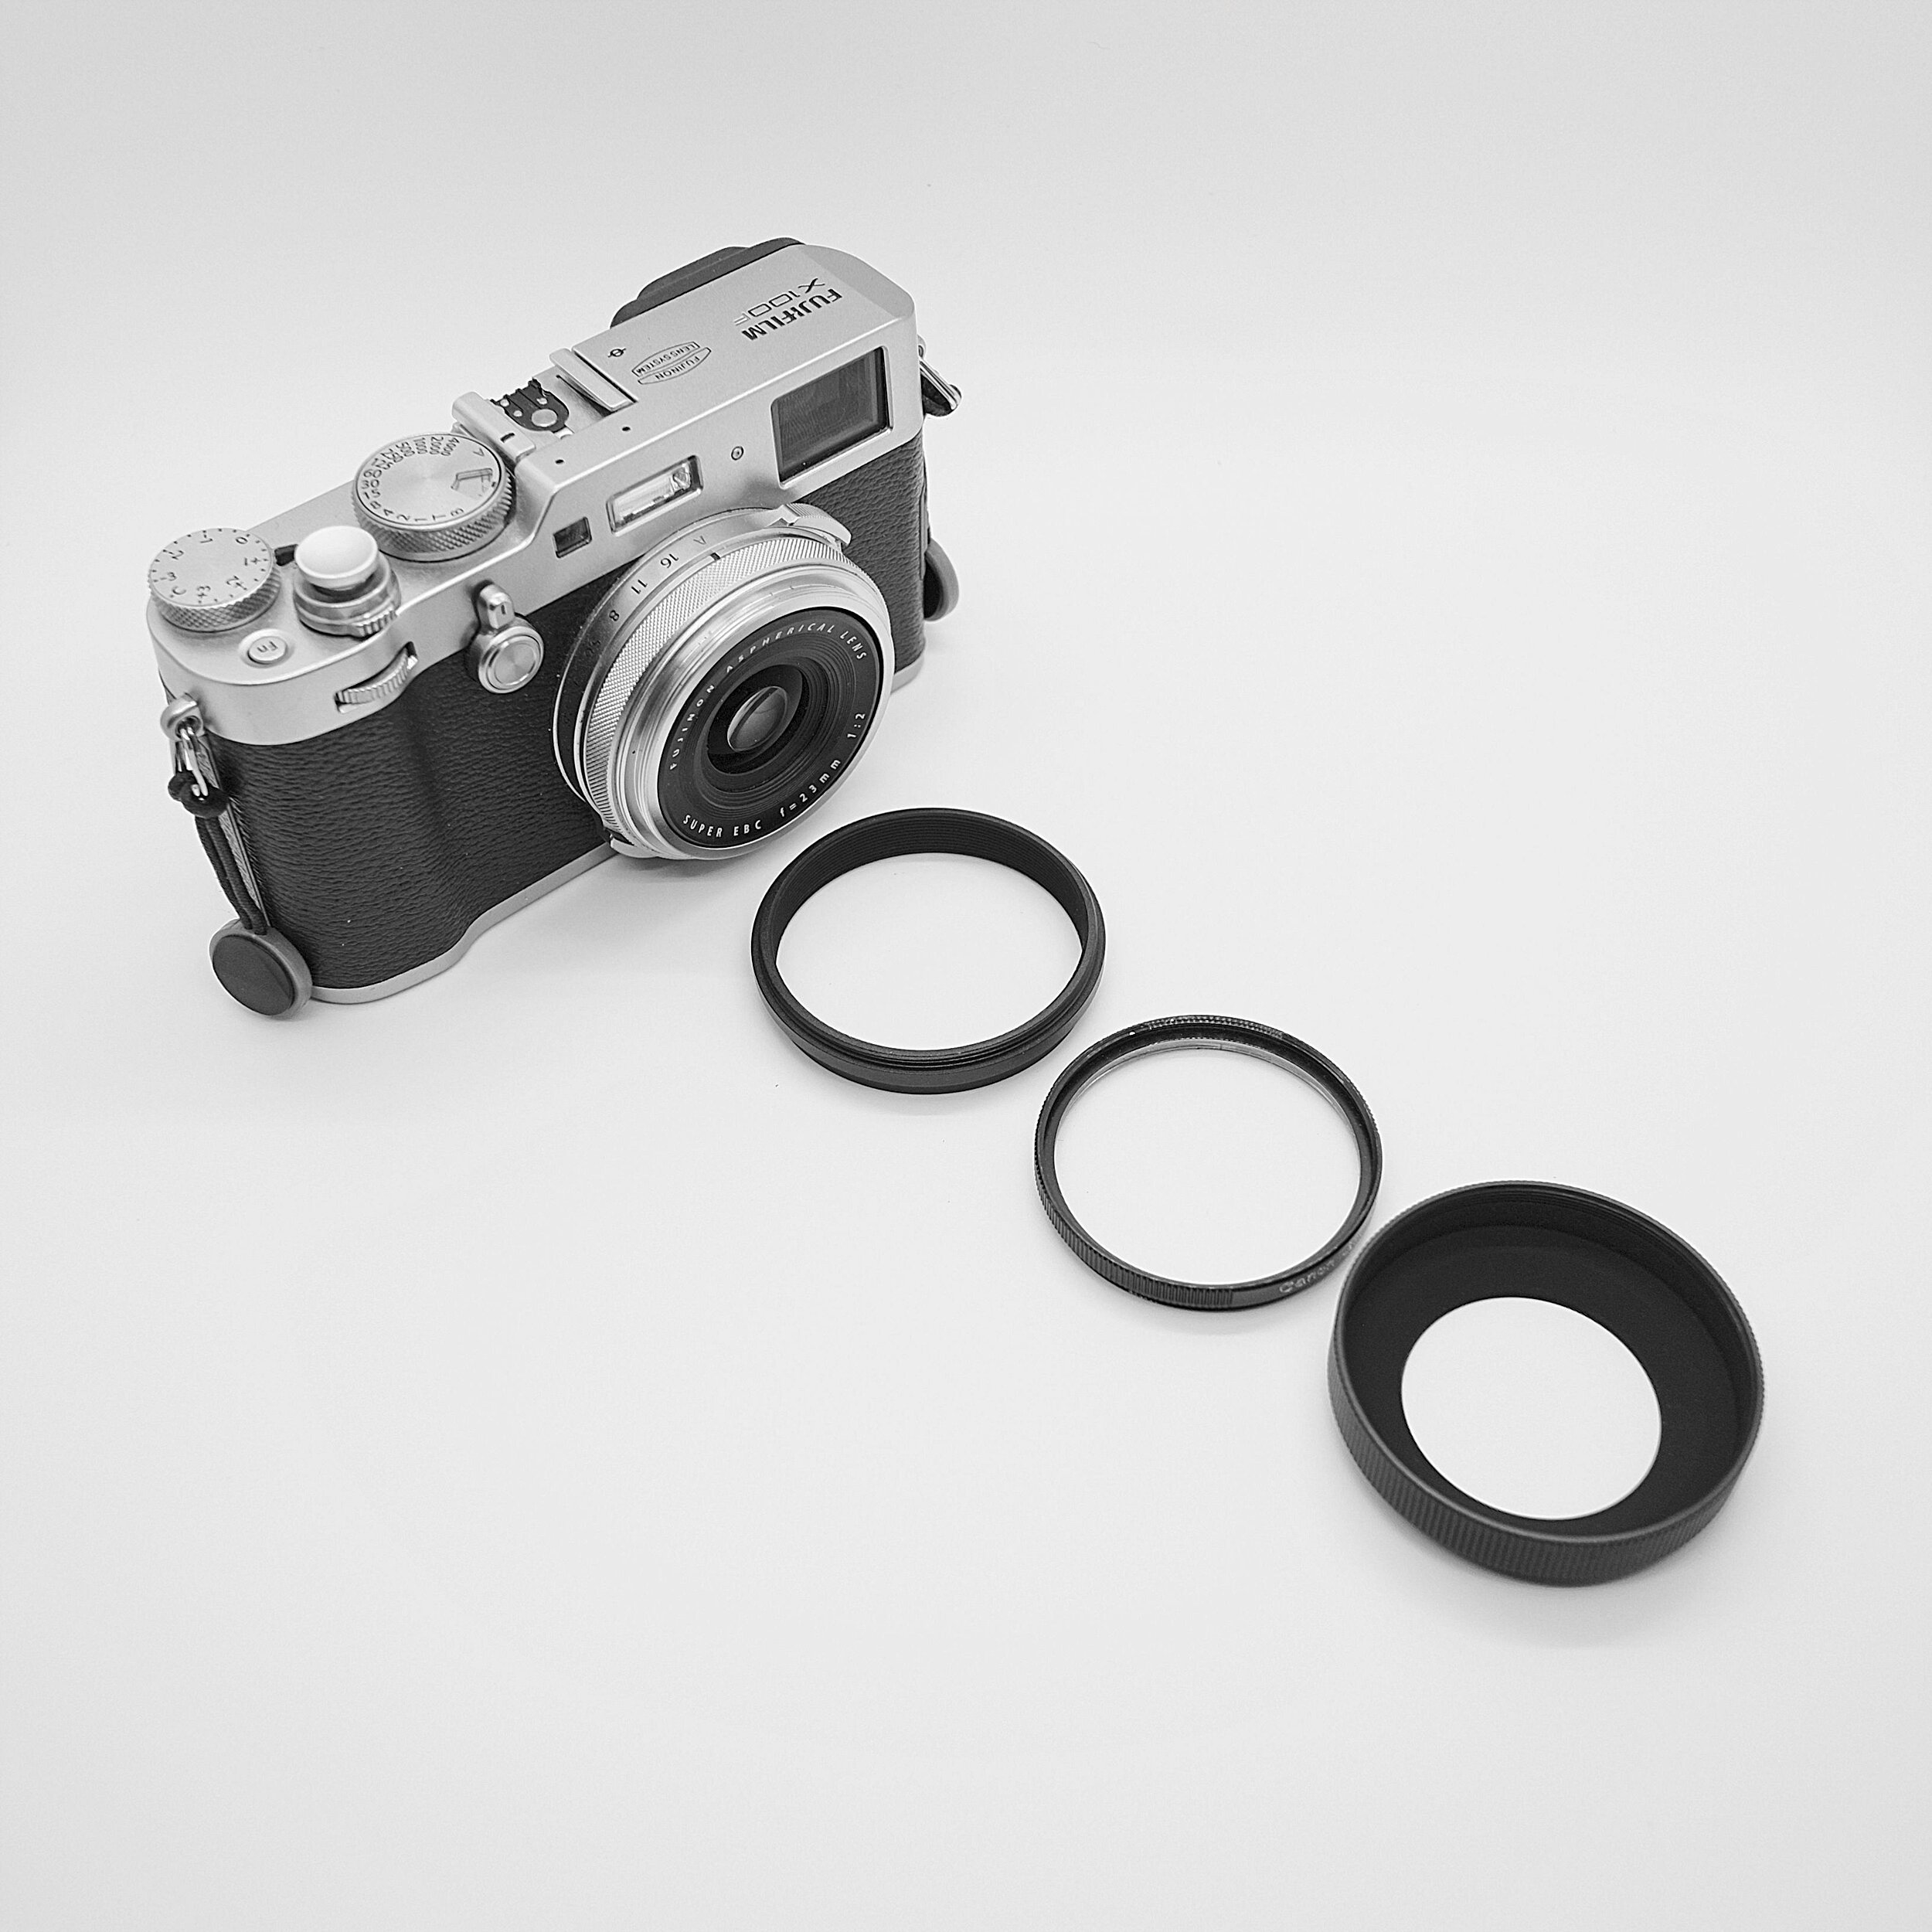
My Solution For The Fujifilm X100F
While most of the exchangeable lenses I use came with a lens hood specifically designed for that lens, the Fujifilm X100F setup did not include one for its fixed 23mm (35mm full-frame equivalent) lens.
After researching possible solutions, I quickly discovered that most lens hoods had one flaw: in almost all cases, their design resulted in obstructing the view through the viewfinder.
This would not be a problem when using the electronic viewfinder (EVF), but since I like to use the optical viewfinder (OVF) - I want to see the real world when taking images - it probably would start annoying me quickly.
Fortunately, I discovered lens hoods explicitly designed for use with rangefinder type cameras. These lens hoods have an inwardly curved design, which means that they will not block the view from the viewfinder. To see what I mean, look at the images below.
Several brands manufacture these lens hoods, and I purchased one from JJC. To be specific: model LH-JX100II, which is compatible with the Fujifilm X100, X100S, X100T, and X100F cameras.
To mount this lens hood on the X100F, you need to replace the front ring at the front of the lens with a unique mounting ring that comes with and is part of the hood.


An additional benefit of this lens hood is that it allows for positioning filters between the mounting ring and the actual lens hood.
The lens hood is well manufactured, with an eye for detail like the felt matte black inside, which prevents any reflection of light into the lens.
I have this hood now for about ten months, and I am very pleased with it. It is very discreet and works very well in the field, doing its job as expected.
An additional benefit of its design is that it does not add much to the camera's size and - a bonus - that it is compatible with the original Fujifilm lens cap.


Where To Get
If you are interested in a similar type of lens hood, I recommend looking at the JJC products on Amazon (not an affiliate link).