

A Cure For Boring Hotel Rooms
How Documentary Style Branding Photography Can Improve The Guest Experience
Over the years my day job has provided me with many ‘opportunities’ to stay in hotels…
How Documentary Style Branding Photography Can Improve The Guest Experience
Over the years my day job has provided me with many ‘opportunities’ to stay in hotels.
And except for, maybe, of one or two outstanding exceptions I need to say that hotels and hotel rooms, in general, are very boring.
Partially because of the standard layout of the rooms (how creative can you be designing one room, with one or two beds, and a shower/bathroom?).
Partially because of the pictures and other art on the walls: usually run-of-the-mill images or abstract paintings that have no connection with the hotel, its people, or its environment
Would imagery in hotels not be more engaging when it would show, for example, the people who work in the hotel in a documentary, street photography style?

That would connect the rooms and the guest experience more directly with what is happening in the hotel, and it would provide the hotel an opportunity to recognize and celebrate the people who make the guest’s stay comfortable and pleasant:
Showing hotel staff being dedicated, having fun at work, doing a great job;
Showing how much work hotel staff puts in every day to provide the guests with a great experience;
It would allow a peek behind the scenes, and on a subconscious level provide reassurance to the guests that they are well cared for.
Examples of this type of photography can be:
Cooks in the kitchen
Maids making the beds
The pool guards
Setting the dinner table
Using this type of documentary/street photography style images not only can be used to increase the room environment; this style can also be used throughout the hotel: corridors, lobby, lounges, etcetera.
In addition, documentary-style photography can be used to link the hotel to its (immediate) surroundings: e.g. the valet boys at work, or showing a picture of the cook in the kitchen next to a picture of the cook shopping for fresh groceries; or show people participating in activities near the hotel.

The type and style of these images also can be adjusted to align with the branding of the hotel and the lifestyle of your guests. For example sportive, classic, modern, or black-and-white versus color. The possibilities are endless, and the results would make for a more enjoyable hotel stay.
Let's no longer settle for the standard boring hotel images, let's work towards a fresh and engaging style.

My Father's Tools
Labor Day: Remembering My Father And His Tools
Sunday is Labor Day…
Labor Day: Remembering My Father And His Tools
Sunday is Labor Day.
This day always reminds me of my dad, who worked for almost his whole life as long as he could.
From his stories, I learned that he started working at about age 14. First, as a barbershop apprentice and later he worked at a concrete tiles factory. Probably after his military service, he finished his craft training as a bricklayer and worked in that profession until an eye injury prevented him from doing so. But even then he could not "do nothing": he rented a patch at a community garden and spent years busy growing his own vegetables.
Although a bricklayer by profession, he was trained in an old-fashioned way and as such had very specialized skills which currently probably are not that common anymore: building twisted columns, arches, and other special constructions. As a consequence, he was often asked by the companies he worked for to attend to their more special projects.
I still have some of his tools, including these chisels.
Happy Labor Day, triggering fond memories.


Taking The X100F To Madrid
Street Photography With The Fujifilm X100F in Madrid
Last week I spent a couple of days in Europe to meet my wife and youngest daughter during my first leave
Street Photography With The Fujifilm X100F in Madrid
Last week I spent a couple of days in Europe to meet my wife and youngest daughter during my first leave after starting my assignment to South Africa in March this year.
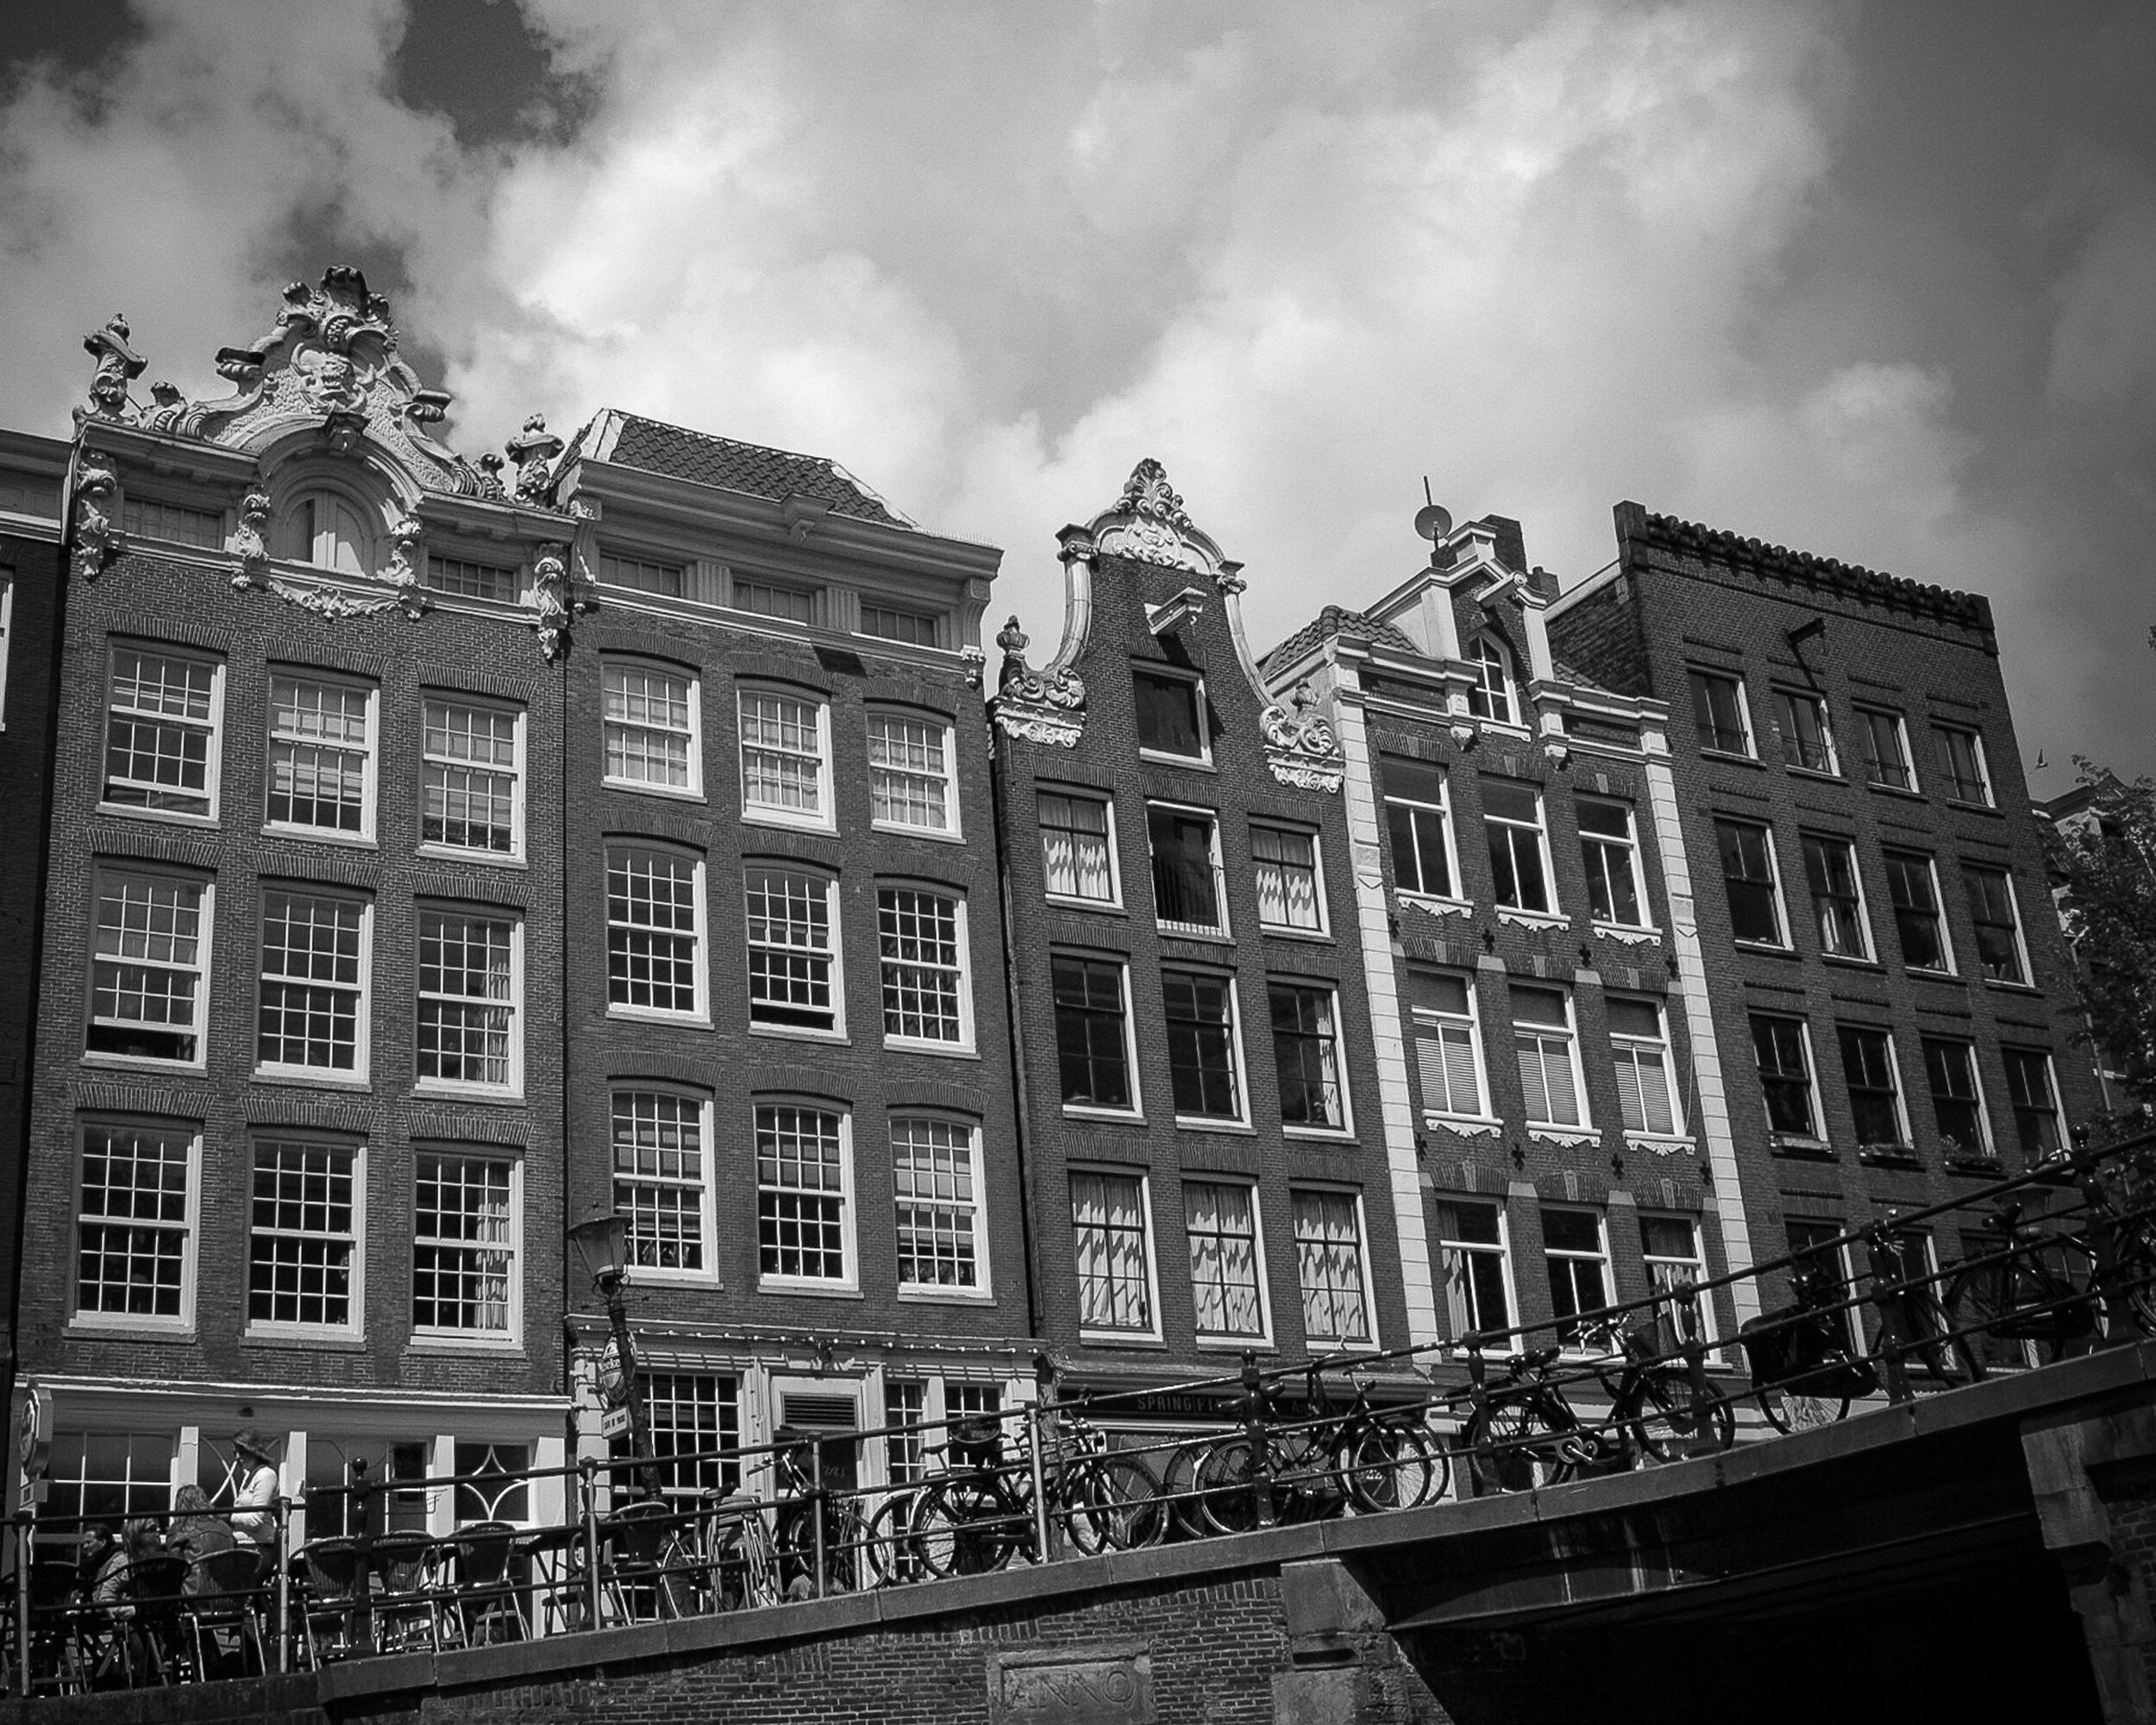
True to my original plan, I took the trinity with me with the intent to shoot some street photography in Madrid and The Hague. Although I have not processed all digital images yet, and I still need to send the film rolls to the lab, I already want to share two images to show what the X100F is capable of.
From a shooting perspective, it is interesting that the Leica M4 saw most use. My wife brought the Voigtlander VC II light meter from home, which made defining aperture and shutter speed very easy without having to rely on the sunny 16 rule.
The Fujifilm X100F was, according to plan, used during night time while I did not use the Fujifilm X-Pro1 at all. Maybe I am more comfortable with the 35mm (full-frame equivalent) focal length than I thought?
Anyhow, below are two first impressions from the shots with the X100F. Bot images have been converted to black and white in ON1: although I have in-camera black and white jpegs the Acros + Red Filter setting was too contrasty. I probably need to change my settings if I am going to use the X100F more for night scenes.
I will share more images of this trip soon!


Learning From The Masters: Saul Leiter
Saul Leiter: The Man Who Brought Me Back To Color
Saul Leiter (3 December 1923 - 26 November 2013) was an American photographer who was active from…
Saul Leiter: The Man Who Brought Me Back To Color
Saul Leiter (3 December 1923 - 26 November 2013) was an American photographer who was active from the mid-1940s until his death in 2013.
Leiter was in the first instance mostly known for his fashion photography for Vogue, Harper's Bazaar and other big magazines. His personal work, which was mostly in color, was only discovered and printed in the later stages of his life, from the 1990's onward, and only really recognized and appreciated after his death.
Searching for more information on several photographers whose work I admire, I discovered the documentary below. It has many take-aways I learned from Leiter's work and his life.
From a photographic perspective, the biggest discovery was for me how he captured color. While I have been focusing on black-and-white photography for the last couple of years, his work showed me the beauty of color work and enticed me to start experimenting with color photography again.
His use of color in composition is very abstract. The human form, for example, even when recognizable is often transferred to an abstract that complements the composition of the image rather than being the subject of the image.
But it is not only his technical approach to photography and his immense body of work that inspires me.
In the video, he shares his, what I would like to call, philosophical approach to photography. Although being a bit the 'grumpy old man' type in the documentary - and keep in mind that this was filmed just one year before he passed away - he has a lot of good life lessons for the aspiring photographer and professional alike.
He displays a lot of humility about his work and his own importance. And I like how he also downplays the importance of other people: "a window covered with raindrops interests me more than a photograph of a famous person."
And although he recognizes that "nothing in photography is new", his continuous search for beauty kept him creating images until the end of his life, "enjoying taking pictures, not caring too much what others think of your work."
To me, his is a great example of continuous development, continuous looking for subject matter. As he said "everything is suitable to be photographed. Everything is a photograph" and "photography teaches you to look and appreciate all kind of things."
He just "enjoy[ed] catching certain moments", and is that not the essence of street photography?!
In No Great Hurry - 13 lessons in life with Saul Leiter
A 2012 documentary by Tomas Leach; shared on YouTube in 2019 by Pixeldust

Trinity: M4, X100F, X-Pro1
My Current Camera Setup: Leica M4, and Fujifilm X100F and X-Pro1
With the recent purchase of the Leica M4, I now have three cameras with me: the Leica and the Fujifilm…
My Current Camera Setup: Leica M4, and Fujifilm X100F and X-Pro1
With the recent purchase of the Leica M4, I now have three cameras with me: the Leica, and the Fujifilm X100F and X-Pro1. Going forward this will be the trinity of my street photography endeavors.
You might ask: why three cameras; and why do you not just use one of them exclusively?
Of course, I can, but there are a couple of considerations why I still want to use all three.
I want to shoot as much as possible with film;
While my preferred focal length is 35mm (full-frame equivalent), I sometimes want to be able to shoot with a 50mm lens;
I do not want to change lenses while on the street;
When I travel, my maximum film ISO needs to be 400.
After the break my explanation of how this camera trinity will make this possible, and when I will use which camera.

Combining these three cameras will enable me to achieve the objectives I mentioned above.
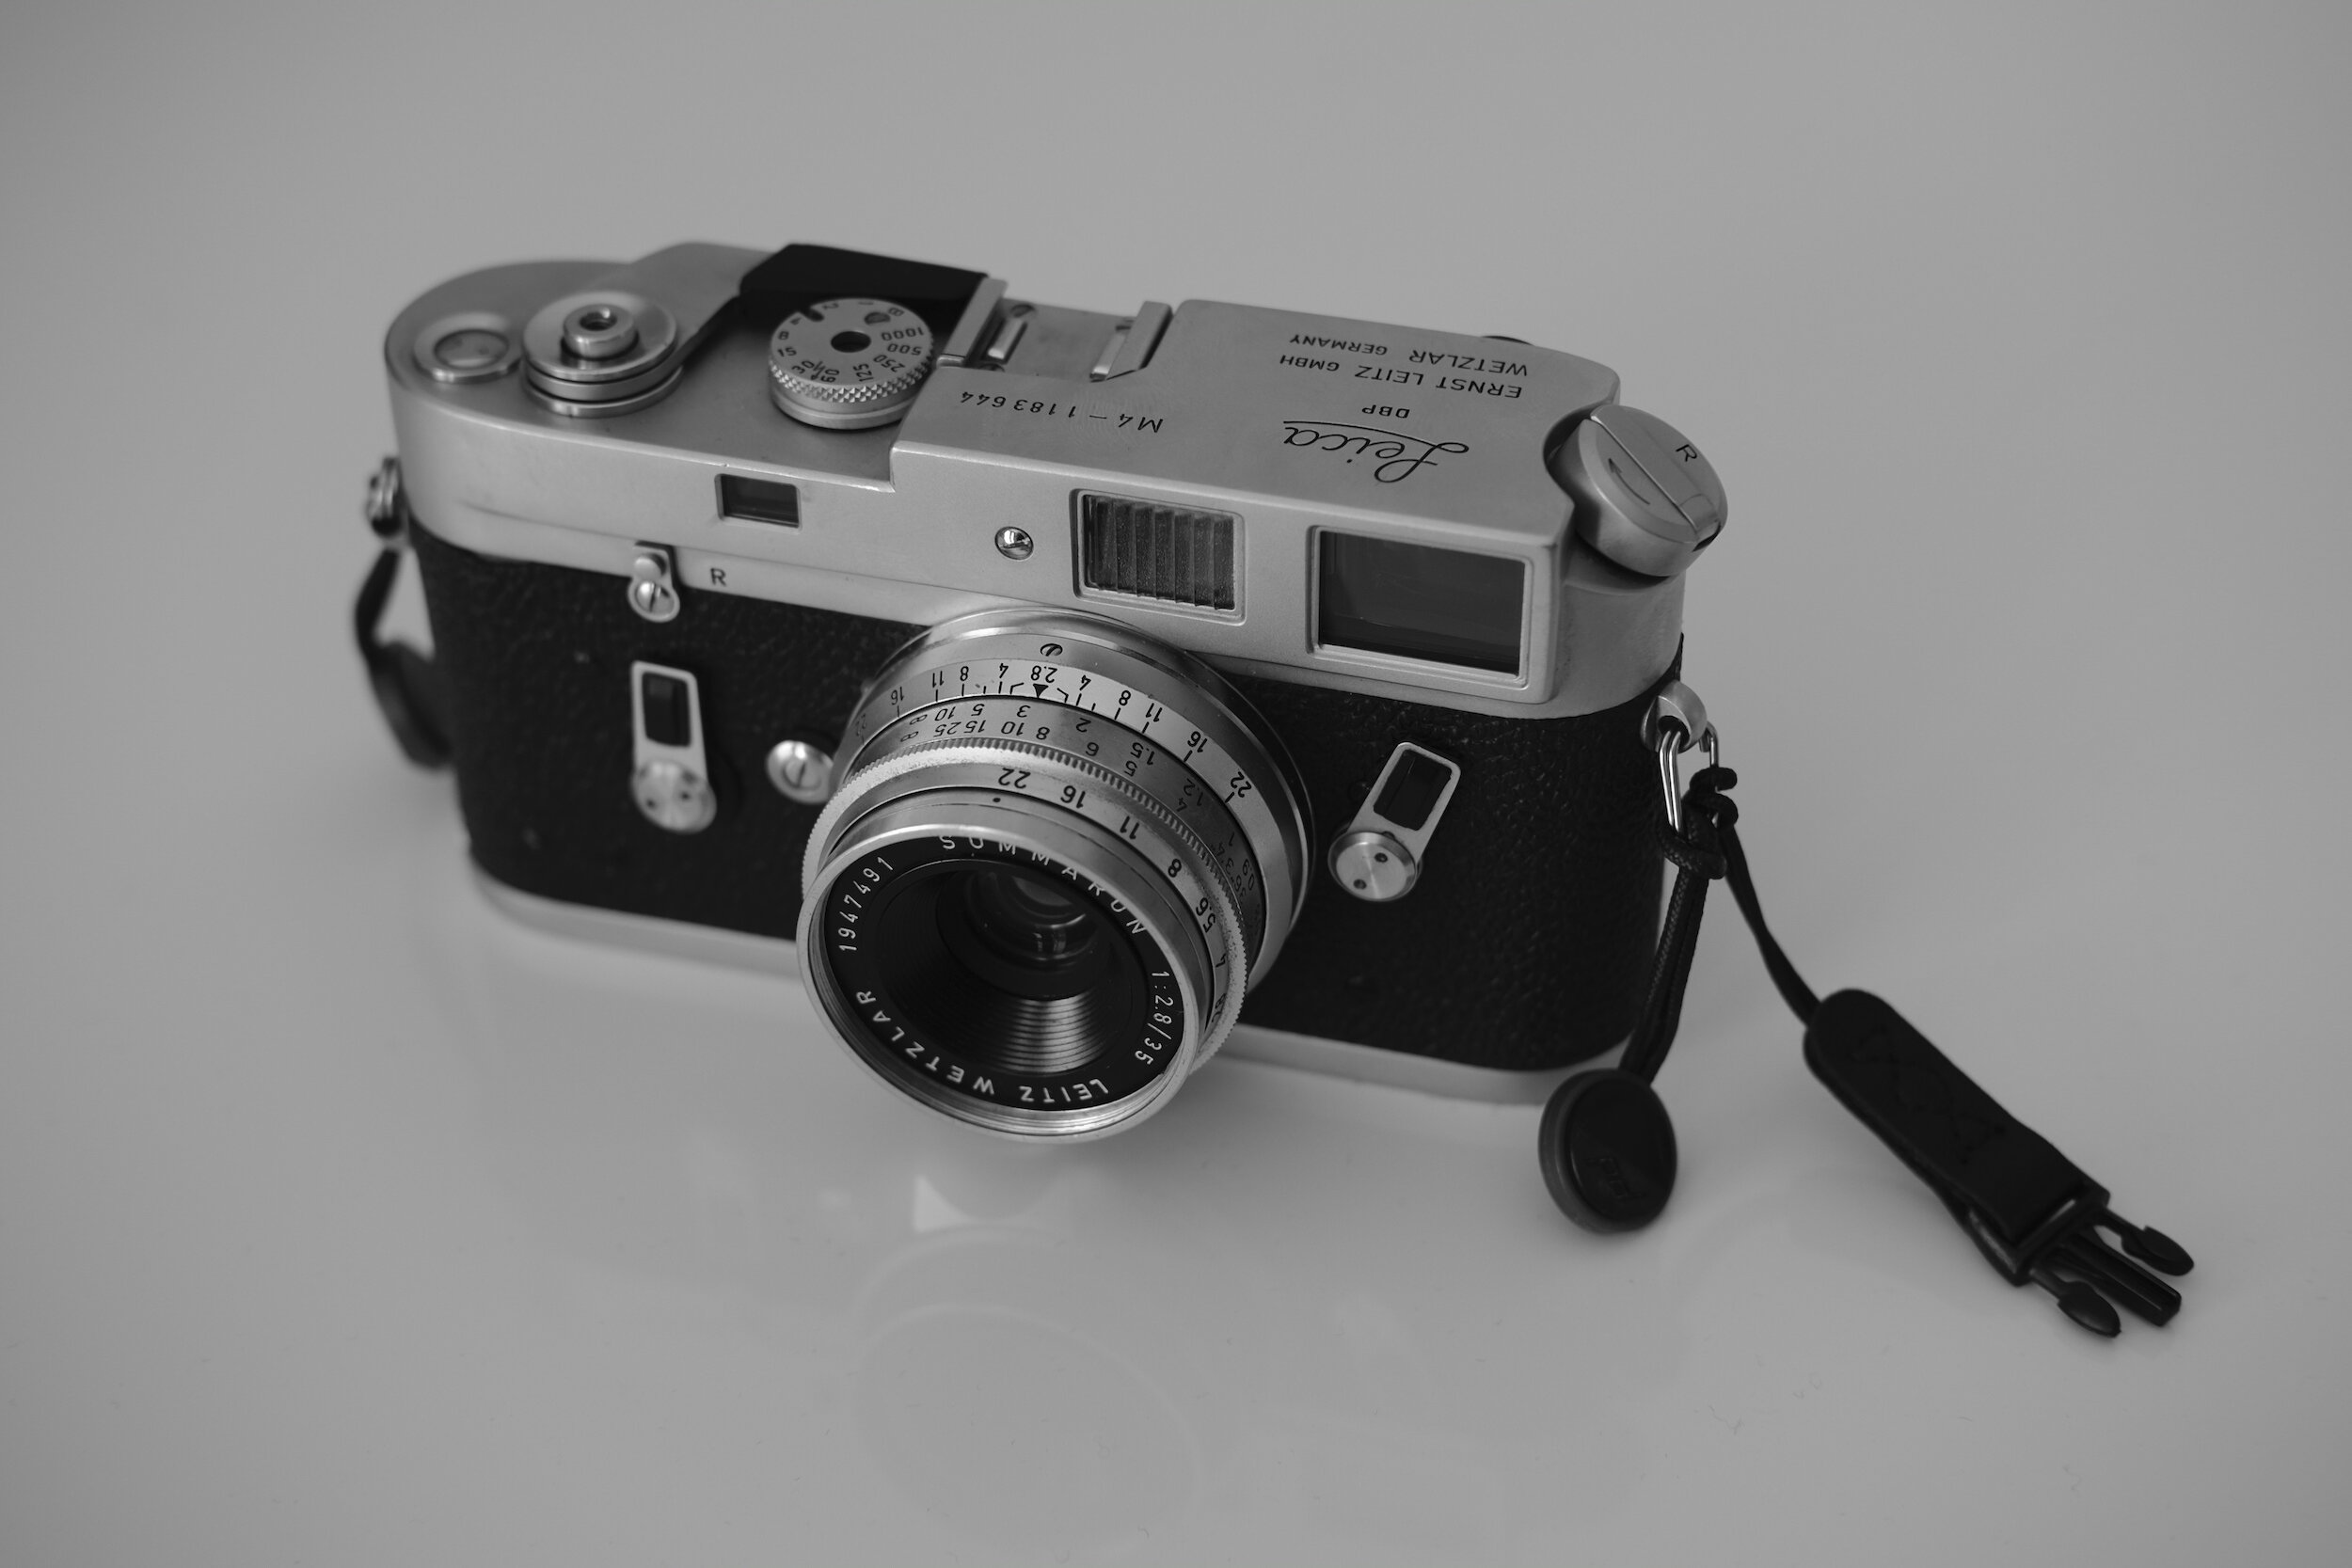
My preferred tool is the Leica M4. It has the 35mm f/2.8 Summaron mounted and since it shoots film it meets both of my primary criteria: shooting film and using a 35mm lens.
I do not want to carry films faster than 400 ISO with me when traveling. While most airport security personnel is very friendly and willing to manually check faster film, this is not always the case and I do not want to risk having to take for example ISO 3200 film through an x-ray machine.
That is where the Fujifilm X100F comes into play: with its excellent high-ISO capabilities, it is an ideal camera for low light photography. This is the tool I will use for night street photography or when I know that I will be shooting a lot inside buildings. Although not film, it still has the 35mm (equivalent) lens.
The Fujifilm X-Pro1, finally, has a 50mm (equivalent) lens mounted and will be used in those instances where this focal lens makes more sense than the wider 35mm.
I have to admit that until now this is only theory: I have not used this setup yet, it is something I intend to do during my upcoming trip to Europe.
This will mean that although I will take all three cameras with me, on a daily basis and depending on the shooting situations I anticipate to only carry two cameras on me in one of the following combinations:
The M4 and the X-Pro1, or
The X100F and the X-Pro1
When I expect that sufficient light will be available to shoot film, I will take the Leica M4 as the main camera and the Fujifilm X-Pro1 for those instances that I want to use the 50mm (equivalent) lens.
When I expect that I mostly will encounter low light situations, I will take the Fujifilm X100F as the main camera and the X-Pro1 for 50mm (equivalent) shots.
Probably there also will be days that I want to travel as light as possible and take only one camera with me. Then it will most likely be the M4 or the X100F.
I am actually quite excited to see how this will work out and if my intended setup will be practical.
I will share my experiences, and images of course, when I am back in South Africa.

Is Photography Art?
Can Photography be considered an art form, or is it just creating a copy of reality?
Update, July 2019: The article below was originally published on this blog in 2016. At that time my focus was…
Can Photography be considered an art form, or is it just creating a copy of reality?
Update, July 2019:
The article below was originally published on this blog in 2016. At that time my focus was predominantly on creating images of landscapes, cities, architecture, and airplanes, and the conclusion that photography is art was quite clear to me.
Now that I am moving more towards documentary/street photography I need to revisit the question and make it more specific about these genres.
Following the same reasoning as I did before, I actually come to the same conclusion:
Good street photography, street photography with a soul, needs the same or maybe even more creativity and skill to move the viewer. All those decisions the creator of landscape, architecture, still life images need to make are also decisions the street photographer needs to make. Whereas however, in other genres the photographer can take some time to check composition, lighting, etcetera, the street photographer needs to make these decisions within a fraction of a second!
And an additional challenge is that the street photographer knows that she can not make a lot of changes in post-production if any at all. Some cropping and maybe some exposure adjustments are okay, but street photography (and documentary photography even more!) does not 'allow' much of this.
The street photographer needs to master her skills even more than any other genre photographer!
So do I consider street photography art? The answer is a very clear "yes"!
There seems to be quite some discussion with regard to the question "is photography art": is it to be considered an art form on its own, or even at all? Most outspoken probably has been the interchange between The Guardian columnists Jonathan Jones and Sean O'Hagan. The first being a clear opponent of the idea of photography being art. The latter passionately defending the place of photography among the other art forms. My vision, which already might have become clear through an earlier post about fine art and photography, is that photography definitely is an art. Let me explain this a bit more after the break.
Let's start with the definition of the word 'Art' as found in the Merriam-Webster online dictionary.
An important part of that definition reads:
“something that is created with imagination and skill and that is beautiful or that expresses important ideas and feelings”
The key-words we need to focus on here to determine whether photography can meet the criteria of being art are "...created with imagination and skill..."
Taking a photo in my opinion definitely is a creative process. The photographer has to make decisions on how to take and display the picture. Lighting, composition, shutter time, aperture, post-production, printing and/or publishing on digital media are choices each of which have an impact on what the viewer will see and experience.

It is not just an automatic process that results in a visual copy of reality. Even when the photographer uses her camera in fully automatic mode choices have to be made with regard to the composition and lighting: what angle to take the photo from, to take a picture of the whole or of detail, and so on.
And that is only with regard to taking the picture in the first place. World Press Photo has clear rules on what is and what is not allowed with regard to post-production. This is a clear indication that changing the look feel and emotion of a photo is a generally accepted and done thing. It indicates that photographers have the ability and also the 'need' to change pictures to their own artistic insights. To create something according to their imagination. But nothing new here: cropping, dodging, and burning has been done for many years already in the traditional darkroom environment.
For me, imagination is the most important and powerful tool that photographers have to create the image in a way that is most meaningful to them. Having mastered the technical photography skills, however, is necessary to achieve exactly the image as the photographer had in his mind prior to creating it. Without these skills getting the desired bokeh, compressing depth by using telelenses, creating the digital HDR image, printing those saturated colors, will be a process of trial-and-error that even might kill the creative desire.
Caveat: although I appreciate the post-production skills of, and the great images thus created by other photographers, my own approach mostly is to create images as 'natural' as possible and to achieve all effects I want in-camera (the most important exception to this probably being black and white rendering of digital and film images in post-production).
The question "is photography art?" to my opinion definitely needs to be answered with a clear "yes". Photos should be viewed with the same respect as other works of art. And of course: similar to other art forms, in photography, we have the few great masters, and we have the hopeful many. It is up to us, the photographers, and irrespective at what level we are today to keep making our images, and sharing our skills and imagination.

Learning From The Masters
Everybody Street: Walking NYC With The Masters
It is said that the best way to learn photography and to learn about photos is to look at pictures and read…
Everybody Street: Walking NYC With The Masters
It is said that the best way to learn photography and to learn about photos is to look at pictures and read photobooks. Another great way to learn about photography and from the masters themselves is to watch a documentary. Especially one as good as Everybody Street.
Although this documentary is as much about New York City as it is about street photography, it is an ongoing parade of masters of street photography: Joel Meyerowitz, Boogie, Ricky Powell, Martha Cooper, Jeff Mermelstein, Bruce Davidson, Elliott Erwitt, Jill Freedman, Jamel Shabazz, Mary Ellen Mark, Rebecca Lepkoff, Clayton Patterson, Bruce Gilden. You name them; they make an appearance.
And they not only make an appearance! They share!
They tell their stories: what drives them, what does (street) photography mean to them, what are their subjects, the challenges of street photography, and so much, much more.
I have watched this documentary now at least seven times, and I keep watching. Every time I discover new gems.
And it asks me questions.
Each of these photographers brings their own wisdom. And sharing of this wisdom triggers questions.
Starting with: why street photography?
Or as Joel Meyerowitz states at the beginning of the documentary: "Why do some photographers go to the street and other photographers go to the studio?"
And while he provides the answer to his own question "Some people want to pretend it's a movie; other photographers walk into the world and they say 'show me'", it makes me think. Why do I have this appetite for street photography, to tell stories, to share the world with my audience?
Maybe it is for the same reason that Martha Cooper says: "You might have captured something that might be of interest in the future". And realizing that you have not captured it when it is gone! Or maybe because it is so real; in Jill Freedman's words: "this is not a movie, this is not tv". And maybe it is just because what I see in the street is a metaphor for my vision of the world; as Bruce Gilden explains: "People are symbols for what I see...And it's how I express what the world is."
The most important lesson, however, is that street photography is as diverse as it's photographers: with different backgrounds, different styles, different equipment, and different subjects. Which made me realize that it is as important to learn from these master, as it is important not to copy them. I need to find my own vision and voice, and share that with the world.
Always keeping Meyerowitz's guiding principle in mind: if you don't believe the world will present itself to you, you won't see it; you have to look for it!
Now enjoy the documentary, and share in the comments what you took away from it!
Everybody Street
A 2013 documentary produced by Everybody Street LLC and directed by Cheryl Dunn; shared on YouTube in 2017 by ShutteRev.
Leica M4: First Impressions
First Shots With My New Used Leica M4
I really needed to buy a new camera...
First Shots With My New Used Leica M4
I really needed to buy a new camera...
No not really, let's start this story correctly.
When I went on my assignment to South Africa I only took digital cameras with me, The Fujifilm X-Pro1 and the Fujifilm X100F, assuming that it would be quite difficult, if not impossible to buy film and find a film processing lab in Johannesburg.
I was wrong: since I couldn't help myself, I started Googling for labs and actually found one about 30 minutes drive from the office where I work. That's when GAS (Gear Acquisition Syndrome) started popping up its head again. At this time, however, it was just 'gas' and not yet 'GAS'.
Next thing that happened was that I went to Kameraz in Rosebank Mall to buy a used 35mm (50mm full frame equivalent) lens for the X-Pro1. That is when I saw it, or rather...them. In their 'used' department the shop had a Leica M3 and a Leica M4 for sale. And, as I learned later through research on eBay and other used camera sales sites in the US and Europe, at quite good price points.
I purchased the 35mm I came for and went back to my apartment. But the seed had been planted. I love to shoot film, I can buy film here and have it developed, and there are these beautiful film cameras for sale at an affordable price. My 'gas' was becoming 'GAS'. It took me a couple of weeks of pondering, researching pricing, convincing myself that I did not need an additional camera (didn't work), convincing myself that this was a great opportunity to acquire a Leica (which it actually was).
So here it is!

Going back to Kameraz I inspected both the M3 and the M4. Based upon the information I had obtained before purchasing, I eventually opted for the M4 and the Summaron 35mm f/2.8 (which also, after some haggling, came at the right price).
Back in my apartment I loaded a roll of Ilford Delta 400 and started to take some test shots.
Now that I have the camera for a couple of weeks I can share my first impressions using the Leica M4 and the results of the test roll.
The Camera
First of all: this is not a new camera. The M4 was produced from 1966 to 1975 (the serial number on mine indicates it is from 1967) and a lot of information and reviews are already available. This is not a technical review, but a subjective overview of my findings regarding handling and image results.
The camera is in excellent condition: with only a very tiny piece of vulcanite missing, no dents, and a very small scratch on the bottom plate, I would rate this camera maybe not as Mint- but definitely an Exc++.
The first impression when holding this camera is that it is massive. Although not super big it has a hefty weight to it, which I like. It fits nicely in my hands and all controls are very easily accessible. Now keep in mind that there are only five controls that matter when making images: the shutter speed dial, the shutter release button, the film transport lever, and the aperture and focusing controls on the lens.
All controls are of excellent quality and work very smooth. It seems that some people 'complained' about the plastic tab attached to the film transport lever, but I rather like how it creates a small angle that makes using it a bit easier.
The two reasons I had to choose the M4 over the M3 were the number of frame lines (the M4 displays frame lines for 35, 50, 90 and 135 mm lenses) and the improved film take-up spool. While the M3 has a loose take-up spool that needs to be taken out of the camera before attaching the film to it, the M4 has an integrated take-up spool with 3 slots that grip the film. After watching a YouTube instruction on how to insert the film in the M4, it was pretty easy to do holding the camera in my left hand and inserting the film with my right.
Making images is very easy, focusing using the rangefinder or zone focusing and the shutter release is very smooth. The shutter is not silent, but the sound it makes is dismissible.
Because I wear glasses, the 35mm frame lines are a bit difficult to see in the viewfinder but since they cover almost the whole viewfinder anyhow this is not a problem. It is pretty clear to see what will be in the image and whatnot.
The Images
The Leica M4 is a fully mechanical camera without a light meter. Although working with the Sunny 16 rule can be easily done here in South Africa, I wanted to have a bit more certainty for my settings. I, therefore, used the Pocket Light Meter app on my phone to define my aperture/shutter speed combinations.
I had the film developed and scanned by The RGB Pixel Lab in Sandton.
The images below are a selection from the first test roll, and I am quite pleased with the results. Although I inspected the camera at purchase and it was CLA'd by the shop, the first thing I looked for was possible light leaks. Of which there were none.
Then, looking at the images and the notes I took when I made each image, it was clear that shutter speeds (high and low) are correct.


Conclusion
I am very happy that I had the opportunity to purchase this excellent condition Leica M4 at a great price. The next thing will be to put some color film through it because that is one of the reasons I like to make images on film.

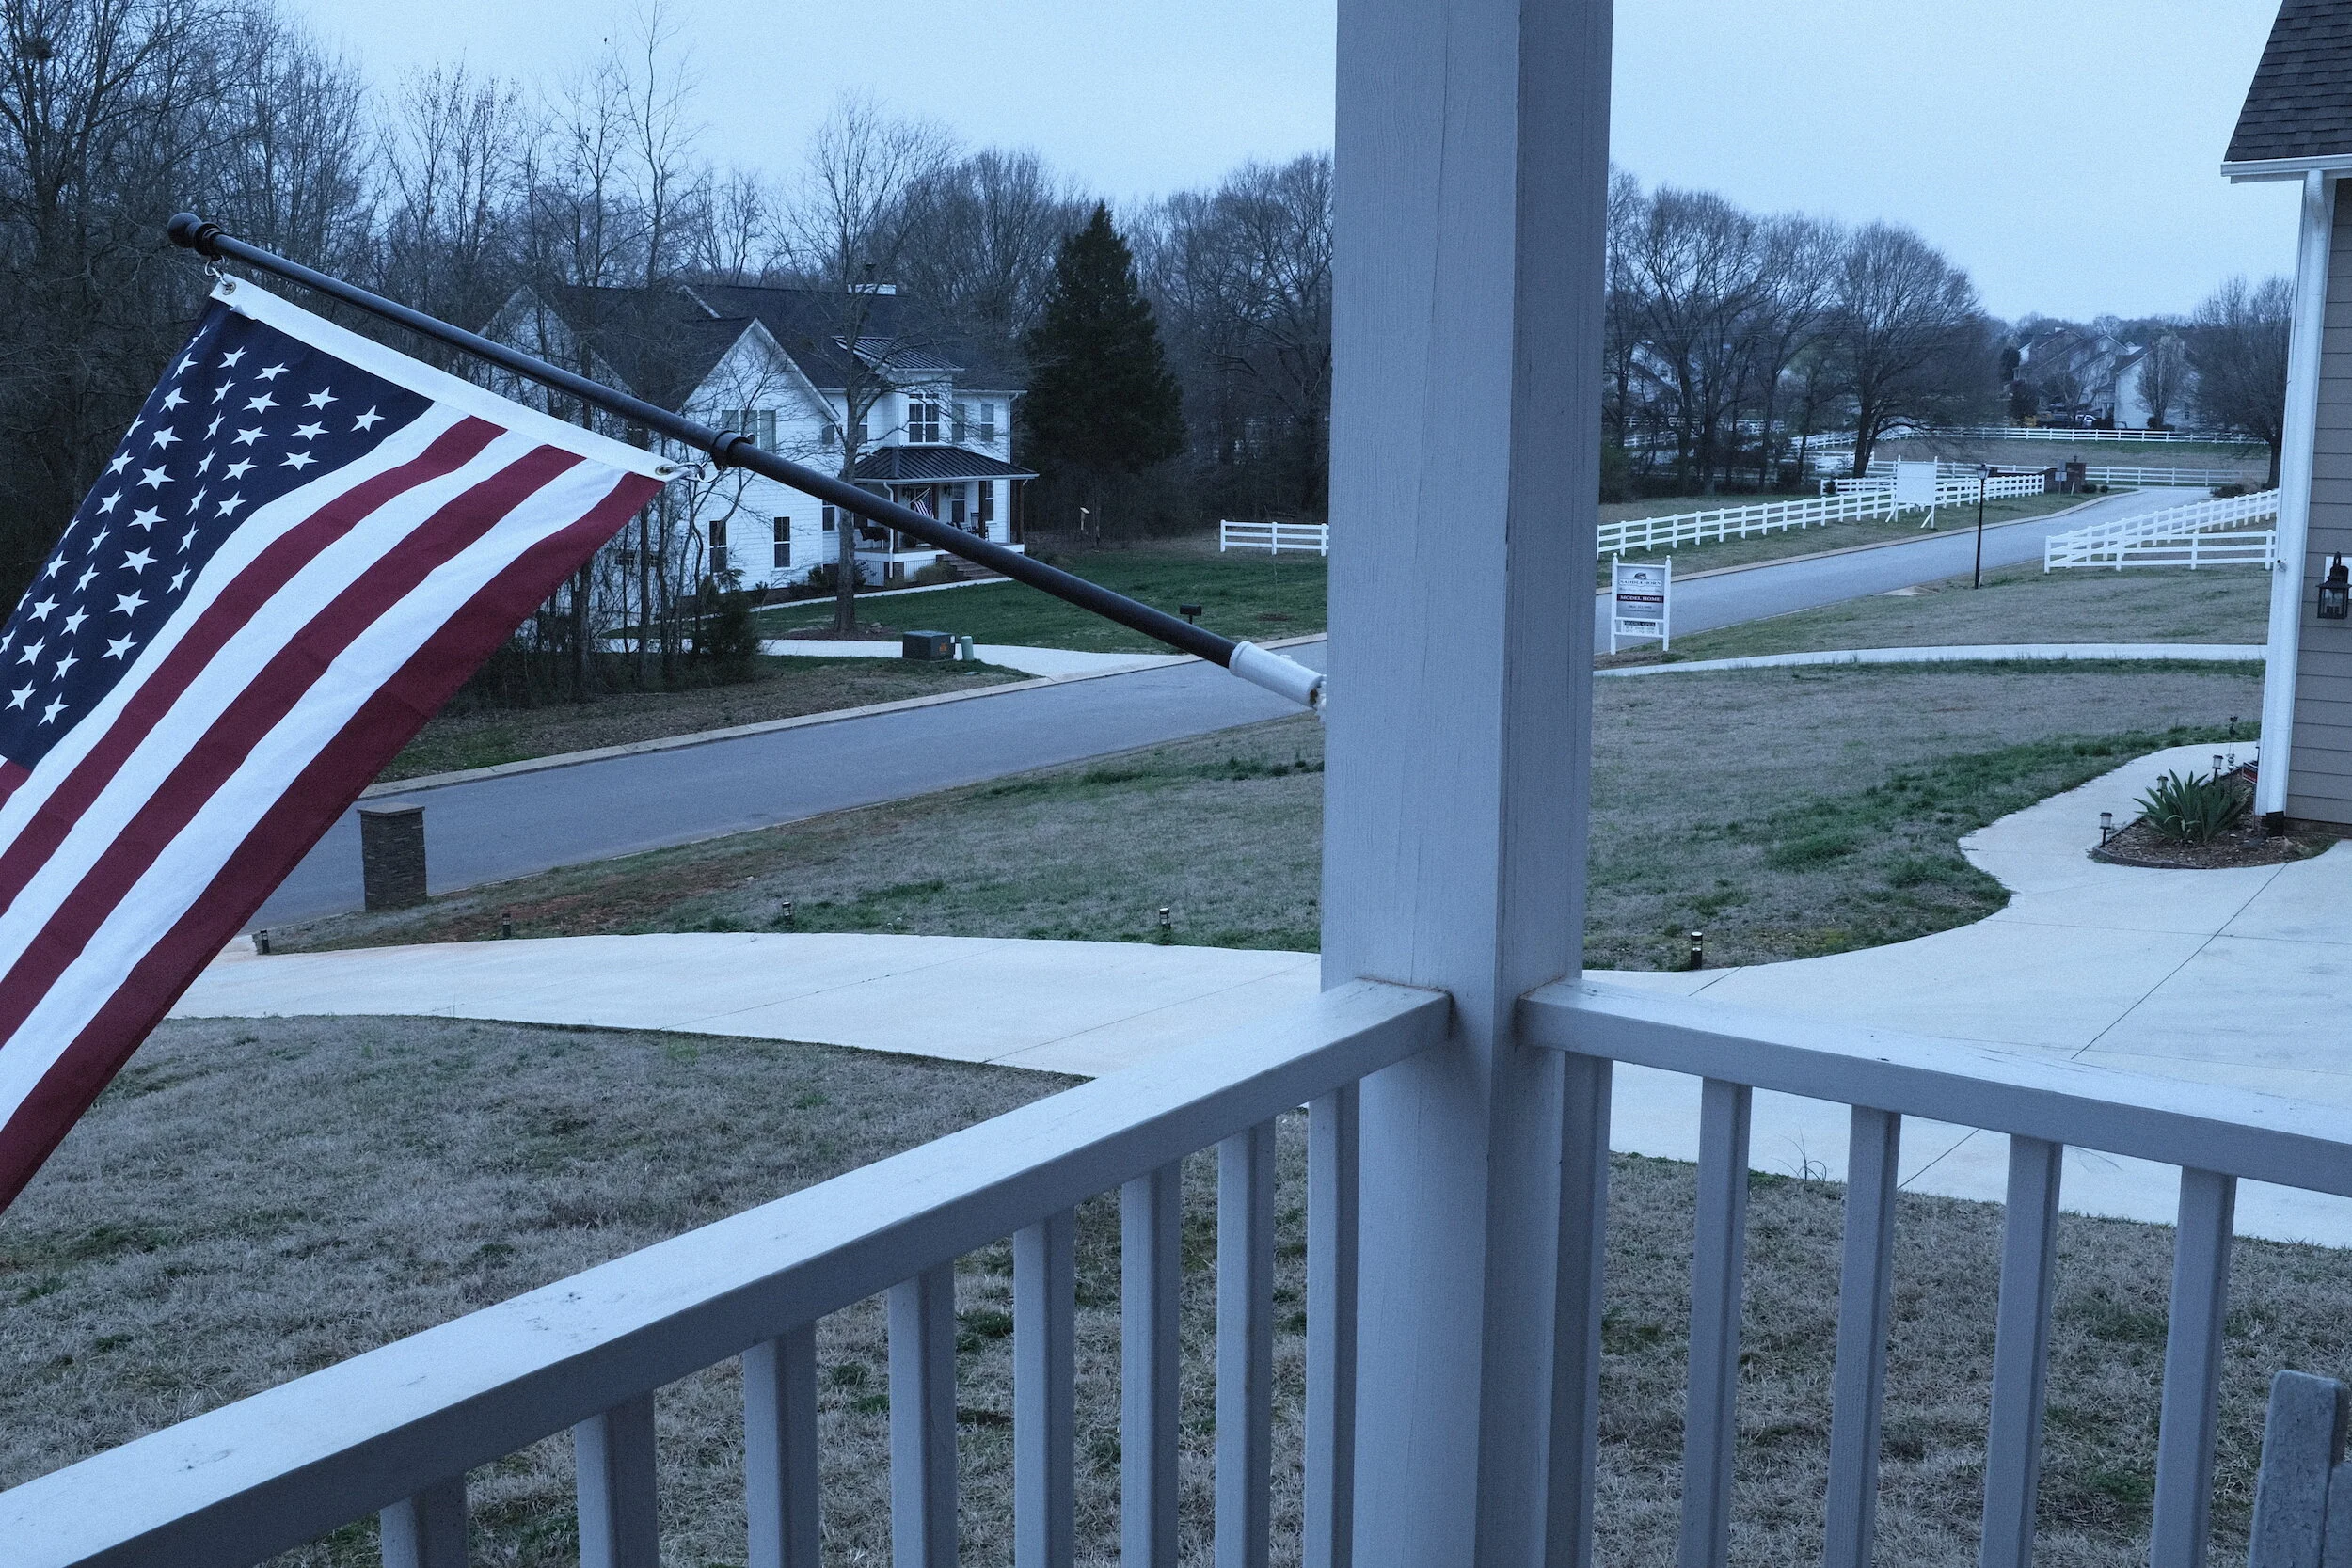
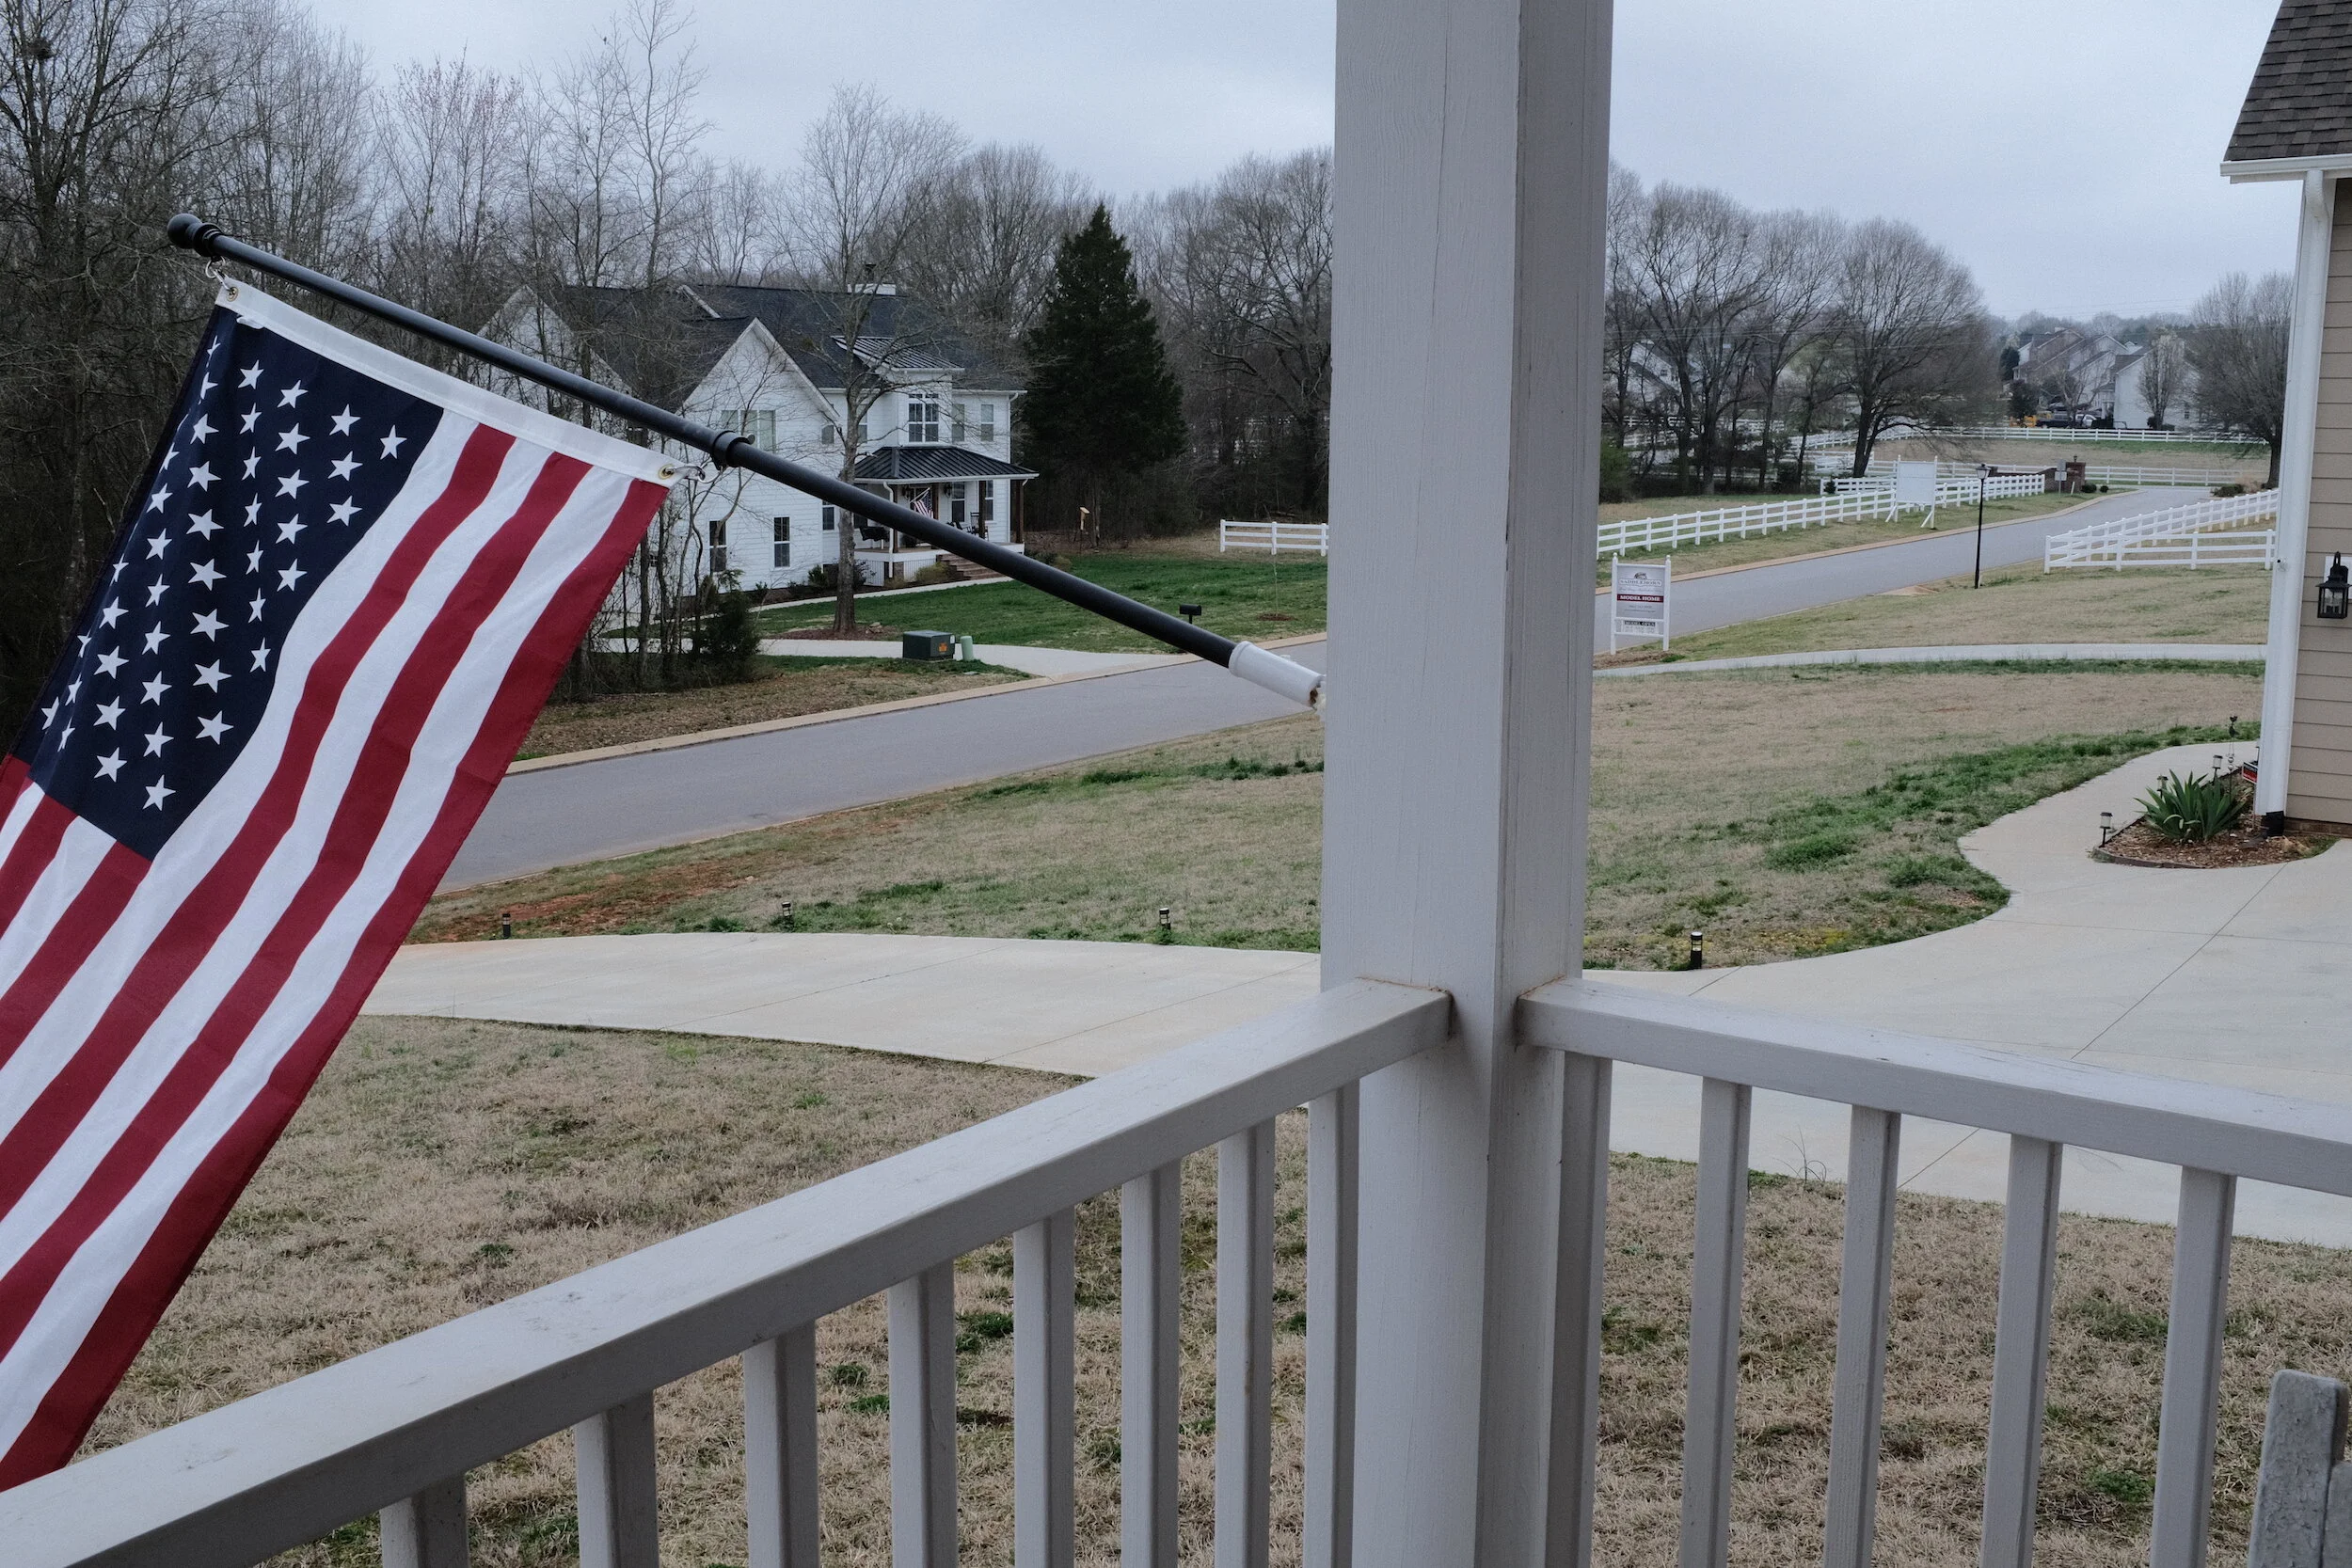
O Say Can You See, By The Dawn's Early Light
O say can you see, by the dawn's early light,
What so proudly we hailed at the twilight's last gleaming,…
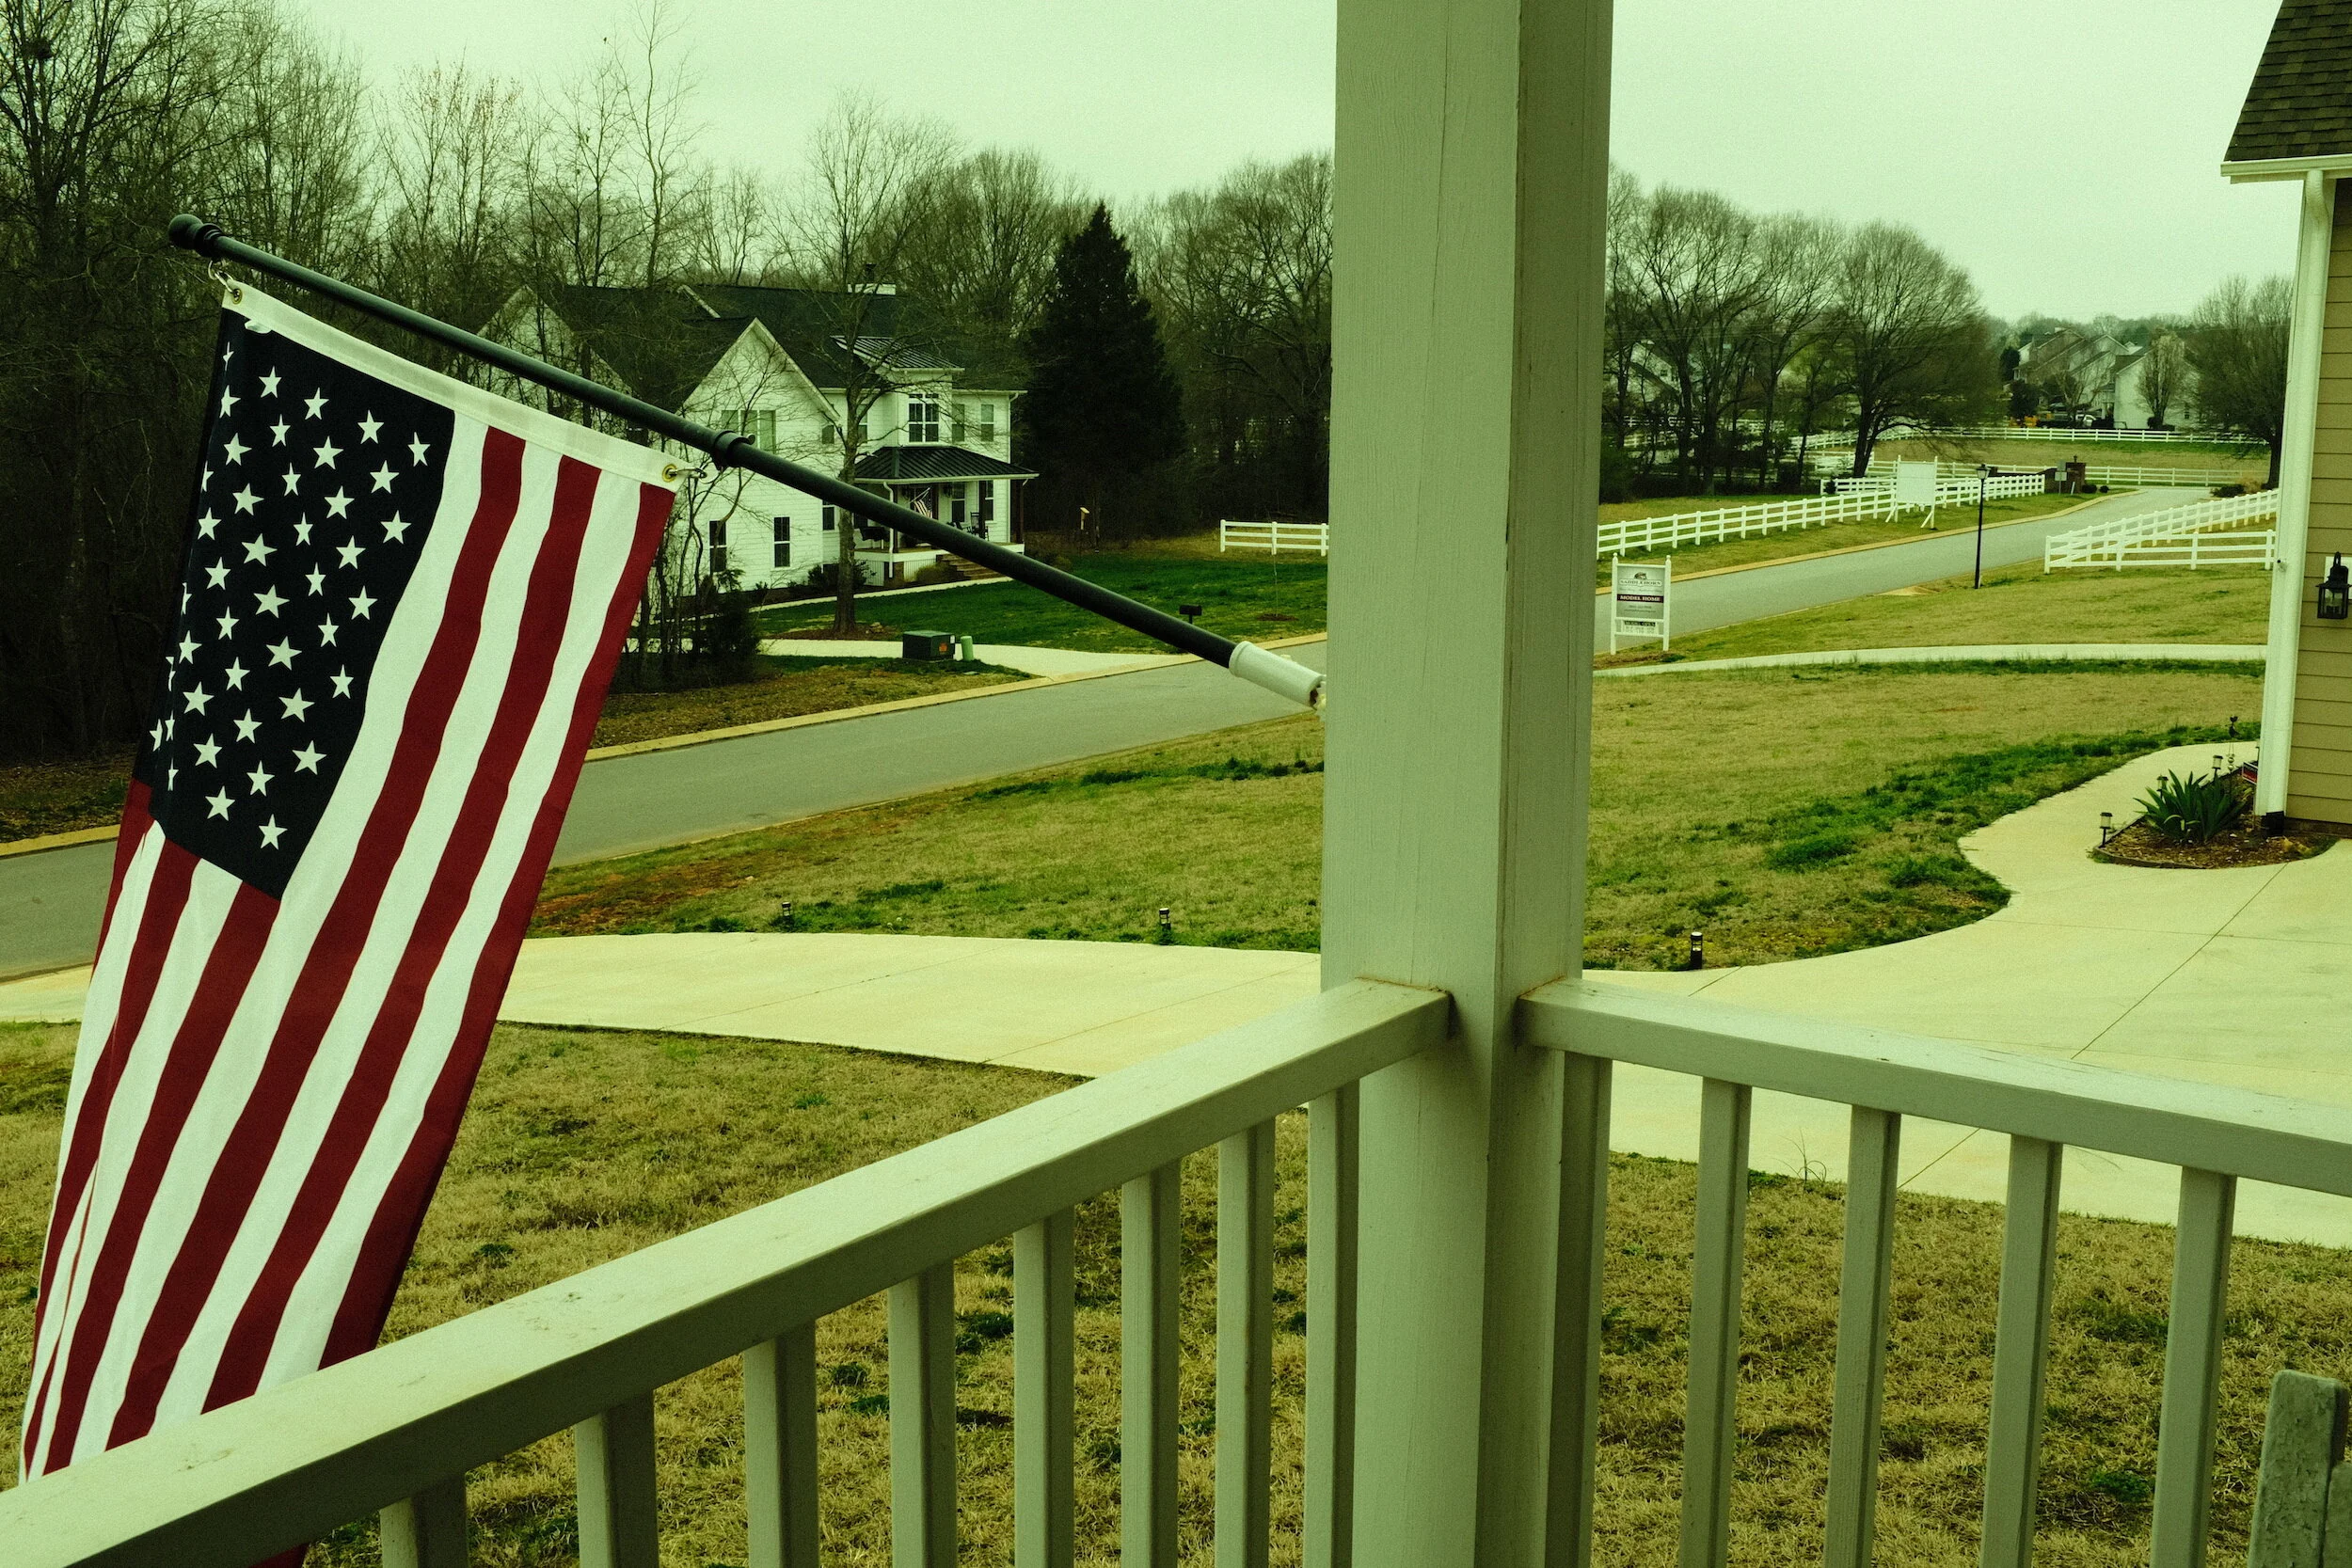
O say can you see, by the dawn's early light,
What so proudly we hailed at the twilight's last gleaming,
Whose broad stripes and bright stars through the perilous fight,
O'er the ramparts we watched, were so gallantly streaming?

And the rockets' red glare, the bombs bursting in air,
Gave proof through the night that our flag was still there;
O say does that star-spangled banner yet wave
O'er the land of the free and the home of the brave?

On the shore dimly seen through the mists of the deep,
Where the foe's haughty host in dread silence reposes,
What is that which the breeze, o'er the towering steep,
As it fitfully blows, half conceals, half discloses?
Now it catches the gleam of the morning's first beam,
In full glory reflected now shines in the stream:
'Tis the star-spangled banner, O long may it wave
O'er the land of the free and the home of the brave.

And where is that band who so vauntingly swore
That the havoc of war and the battle's confusion,
A home and a country, should leave us no more?
Their blood has washed out their foul footsteps' pollution.

No refuge could save the hireling and slave
From the terror of flight, or the gloom of the grave:
And the star-spangled banner in triumph doth wave,
O'er the land of the free and the home of the brave.
O thus be it ever, when freemen shall stand
Between their loved homes and the war's desolation.
Blest with vict'ry and peace, may the Heav'n rescued land
Praise the Power that hath made and preserved us a nation!
Then conquer we must, when our cause it is just,
And this be our motto: 'In God is our trust.'
And the star-spangled banner in triumph shall wave
O'er the land of the free and the home of the brave.

Happy Independence Day!!!

How To Zone-Focus With A Fujifilm X-Series Camera
Zone Focusing With The Fujifilm X100F
As I explained in several previous posts, the X100F is an amazing camera for street and documentary…
Zone Focusing With The Fujifilm X100F
As I explained in several previous posts, the X100F is an amazing camera for street and documentary photography. It is unobtrusively small and creates incredible images with and without in-camera film simulation presets. It also can be used in fully automatic mode, full manual mode, and aperture or shutter speed priority mode. And this all with automatic or manually set ISO levels. And focusing is quite quick.
But what if I need super-super-quick focusing? Focusing when I actually don't have the time to look through my viewfinder and focus before creating the image? Those are the situations when I use zone-focusing with my X100F.
In this post I will explain:
When and why I use zone-focusing;
How I zone-focus with the X100F;
Practical use of zone-focusing.
What is zone-focusing?
Zone-focusing definition:
“Zone-focusing is adjusting your lens to only have a particular zone in front of the lens in focus.”
This might sound more difficult than it is.
Imagine you are standing in a street with 20 lamp posts that are placed with equal distances of 10 feet (about 3 meters) in between, and you are standing at a distance of 6 feet (almost 2 meters) from the nearest lamp post. With zone focusing you now can decide whether, for example, the first and the second lamp post are in focus, or only the first one, or maybe the second one and the third.
Before I go into some more detail on the three things that impact zone-focusing, I want to briefly explain two other focusing terms that are very much related to zone-focusing:
Hyperfocal Distance Focusing
This basically is a way of zone-focusing whereby everything from a certain distance to infinity is in focus. For example when you adjust your lens to have everything in focus from 10 feet (3 meters) onwards.
Pre-focusing
With pre-focusing, you set your lens to the distance at which you expect to take the picture and then wait until the subject comes into focus. This can be considered a specific manner of zone-focusing where the 'focusing zone' is quite shallow.
Now back to zone-focusing. Defining focus this way is defined by three things:
The focal length of the lens you are using: the longer the focal length of the lens the shallower the focus area;
The aperture you set: the smaller your aperture number (this is: the larger the aperture opening!), the shallower the focus area;
The distance of the subject to the camera: the farther the subject is away, the shallower the focus area.
Some examples:
A 35mm lens set at f/5.6 will give a larger focus zone (more depth of field) than a 50mm lens at f/5.6;
A 35mm lens set at f/5.6 will give a smaller focus zone (less depth of field) than a 35mm lens set at f/22;
A 35mm lens set at f/5.6 with a subject distance of 3 feet will give a larger focus zone (more depth of field) than a 35mm lens set at f/5.6 with a subject distance of 60 feet.
For these reasons is zone-focusing actually only practical for lenses with a focal length up to 50mm. Lenses with a focal length of 28mm and 35mm are 'ideal' for this technique.
[note: the lens focal lengths I mention are all based on 'full-frame equivalents'. The X100F, for example, has a fixed 23mm lens, which is the equivalent of a 35mm lens full-frame]
When and why I use zone-focusing?
The examples above will help you understand that I use zone-focusing in street and documentary photography, where I use a small camera (the Fujifilm X100F), with a lens with a short focal length (35mm full-frame equivalent), and where I typically take images at a short subject distance.
So that explains the 'when' I use zone-focusing.
What about the why?
Two elements are key to create great street and documentary images: you need to be able to work unobtrusively (not to be confused with sneaky!) and you need to be quick.
While the X100F is a very quick camera, bringing the camera to your eye, looking through the viewfinder, autofocusing, and then pushing the shutter button takes time. Not a lot of time. But sometimes just enough time...to miss the shot.
Any second I can reduce the time needed to take the shot can be the difference between a nice image and a great image.
And that is where zone-focusing comes into play.
By zone-focusing the camera prior to looking for images, I can save the time I otherwise would need to focus. I just bring my camera to my eye and press the shutter release button. I would not even need to look through the viewfinder: from my experience with the camera, I know what will be in the frame by looking just over de camera or even shooting from the hip.
So the pro's of zone-focusing are: more speed and being even more unobtrusive.
How to zone-focus with the Fujifilm X100F
Now that we know what zone-focusing is and how it helps me with my street and documentary photography, let's have a look at how to do it with the X100F.
In an ideal situation for zone-focusing, you would have a lens that besides an aperture ring has a depth-of-field scale which actually indicates the distances in which objects will be in focus at a given aperture. That is why I like older lenses so much. Unfortunately, the fixed lens of the X100F does not have this. And, actually, most modern lenses for digital cameras don't have this.
[Note: some lenses, like the Nikkor DX lenses, don't even have an aperture ring anymore; but aperture can be set via de camera body]
But don't panic, here is how we can achieve zone focusing with the X100F (and basically most digital cameras):
First, set your camera to manual mode by pushing the small button on the left side of the camera all the way up to M.
Then go into the camera menu and ensure that the AEL/AFL button is programmed to set focus every time it is being pushed and then keep the achieved focus until you push the button again. In the menu, you choose "AE & AF ON/OFF SWITCH". The image below shows the AEL/AFL button at the top back of the camera, and the menu where you can program and change the setting for that button.
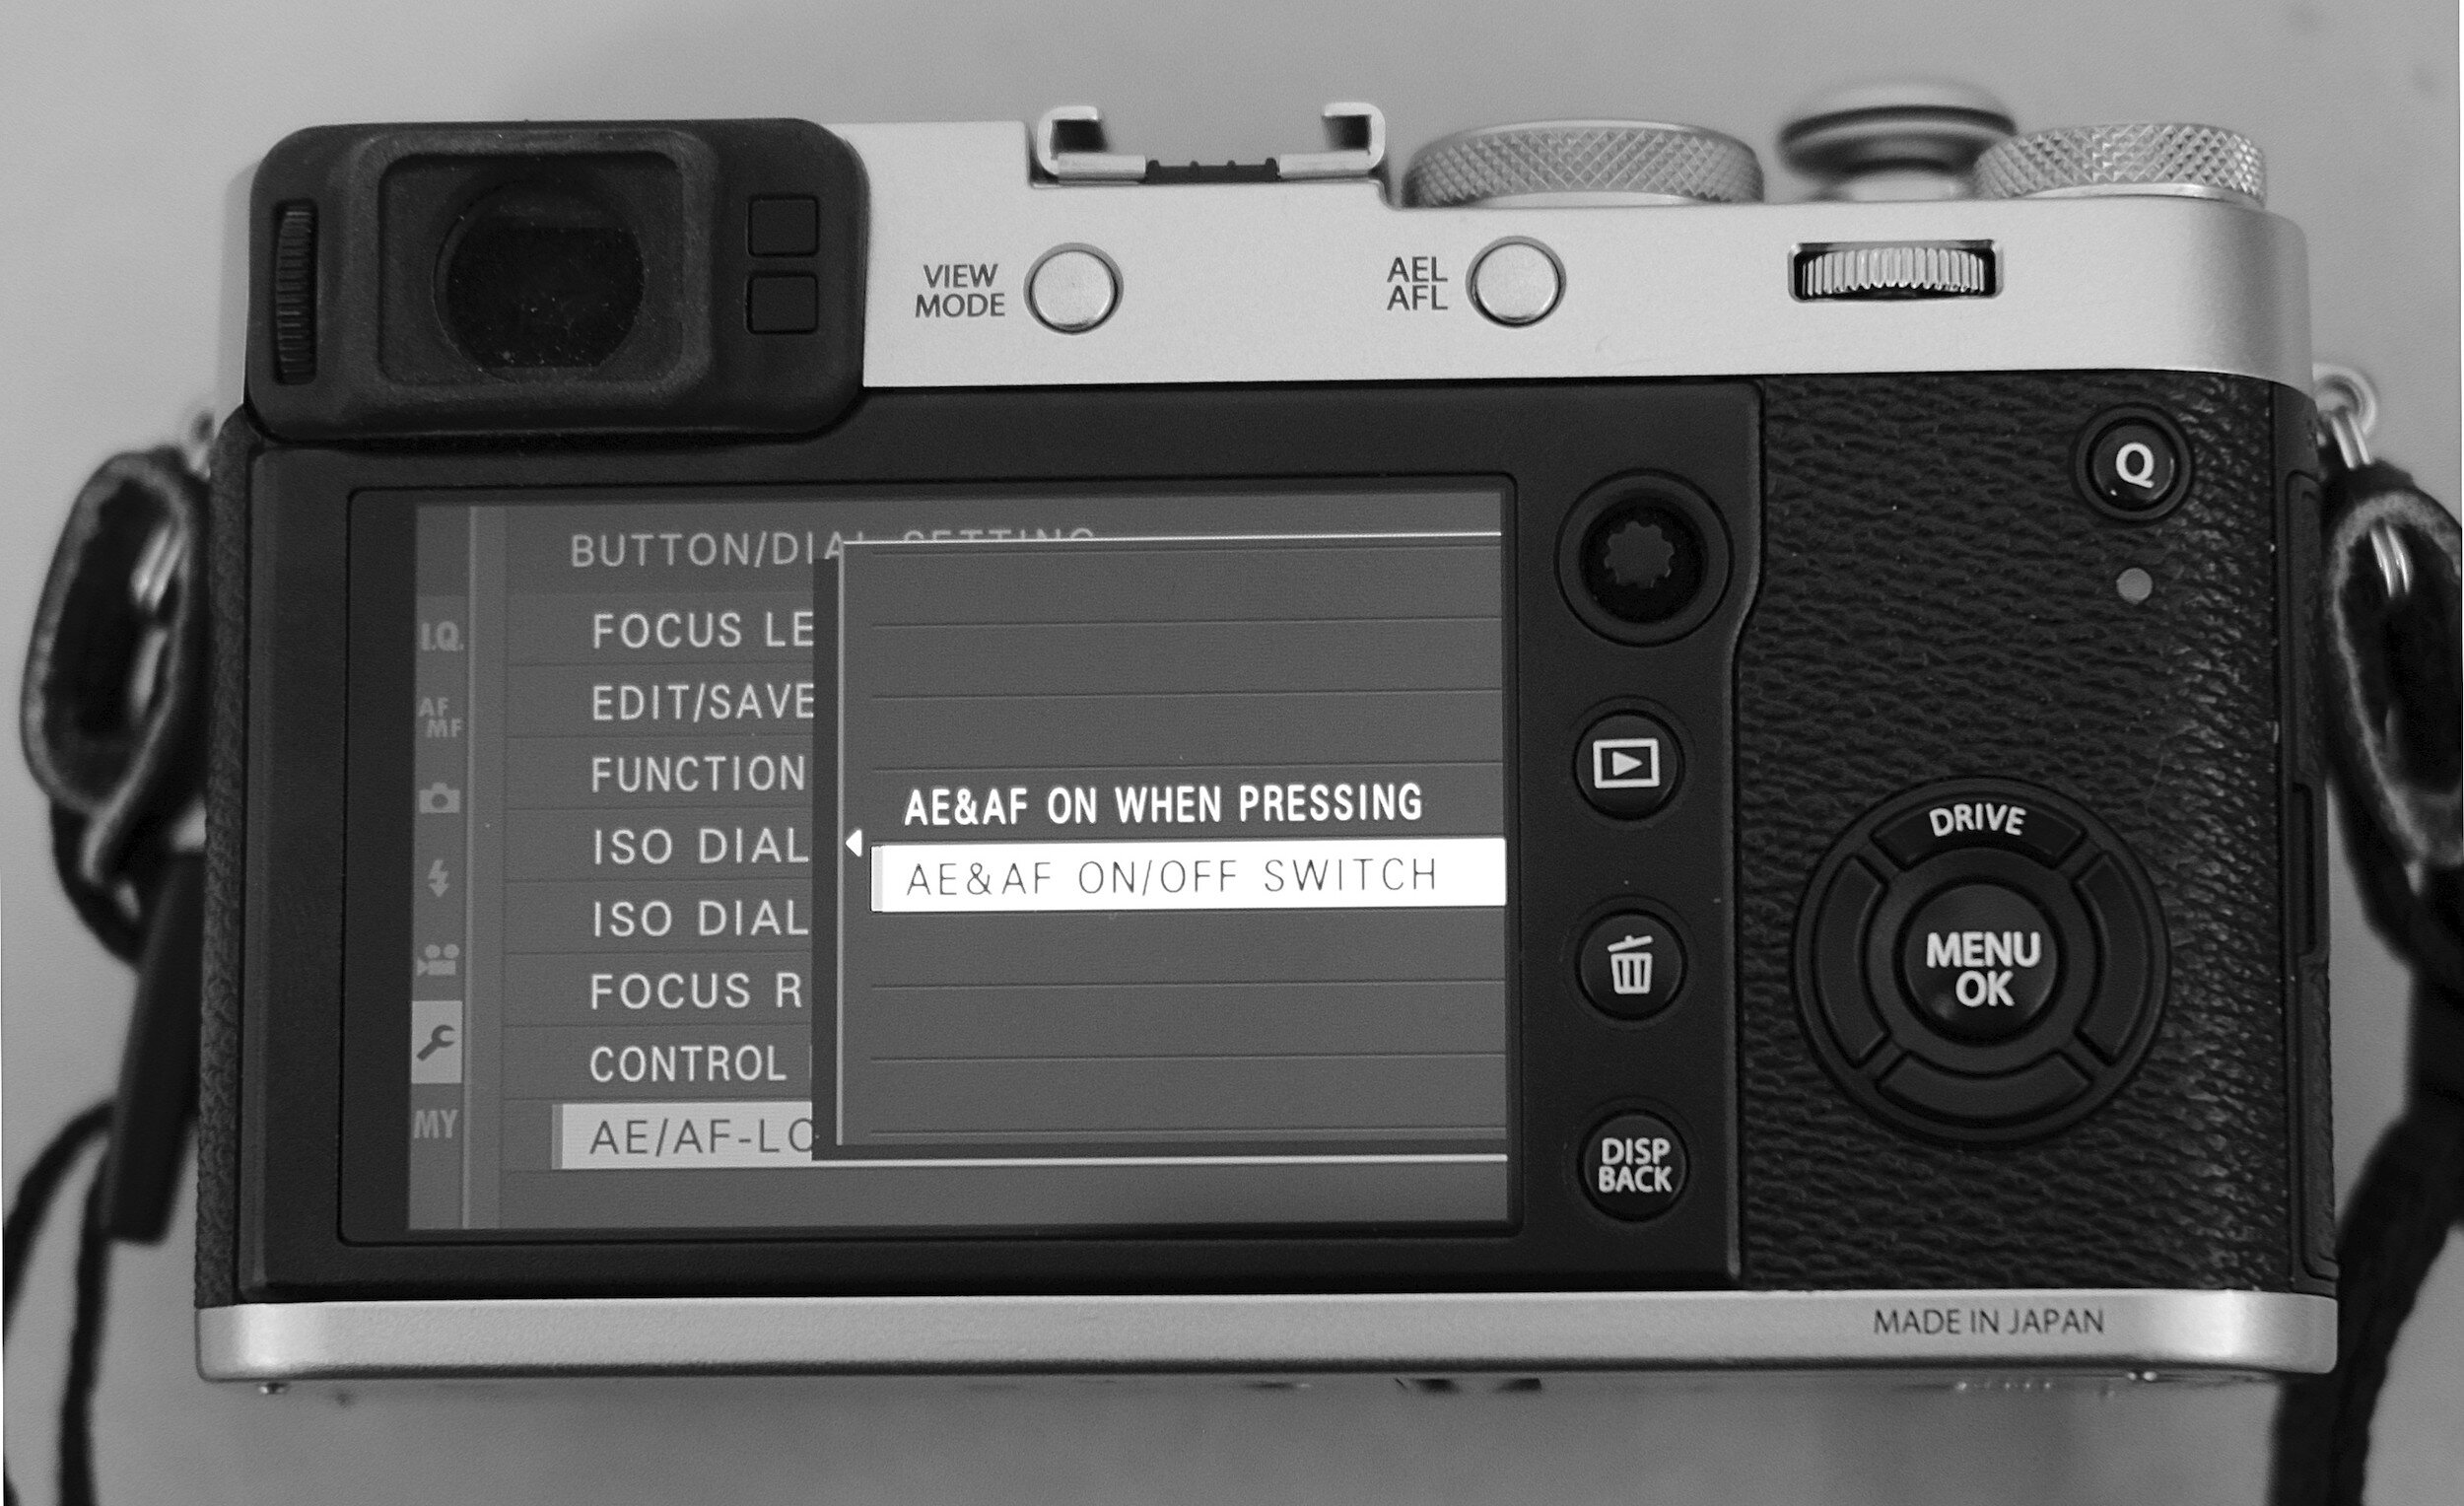
Next, set the camera in full manual, or aperture priority mode. Note that when in full manual you might need to change the shutter speed given the aperture you are selecting.
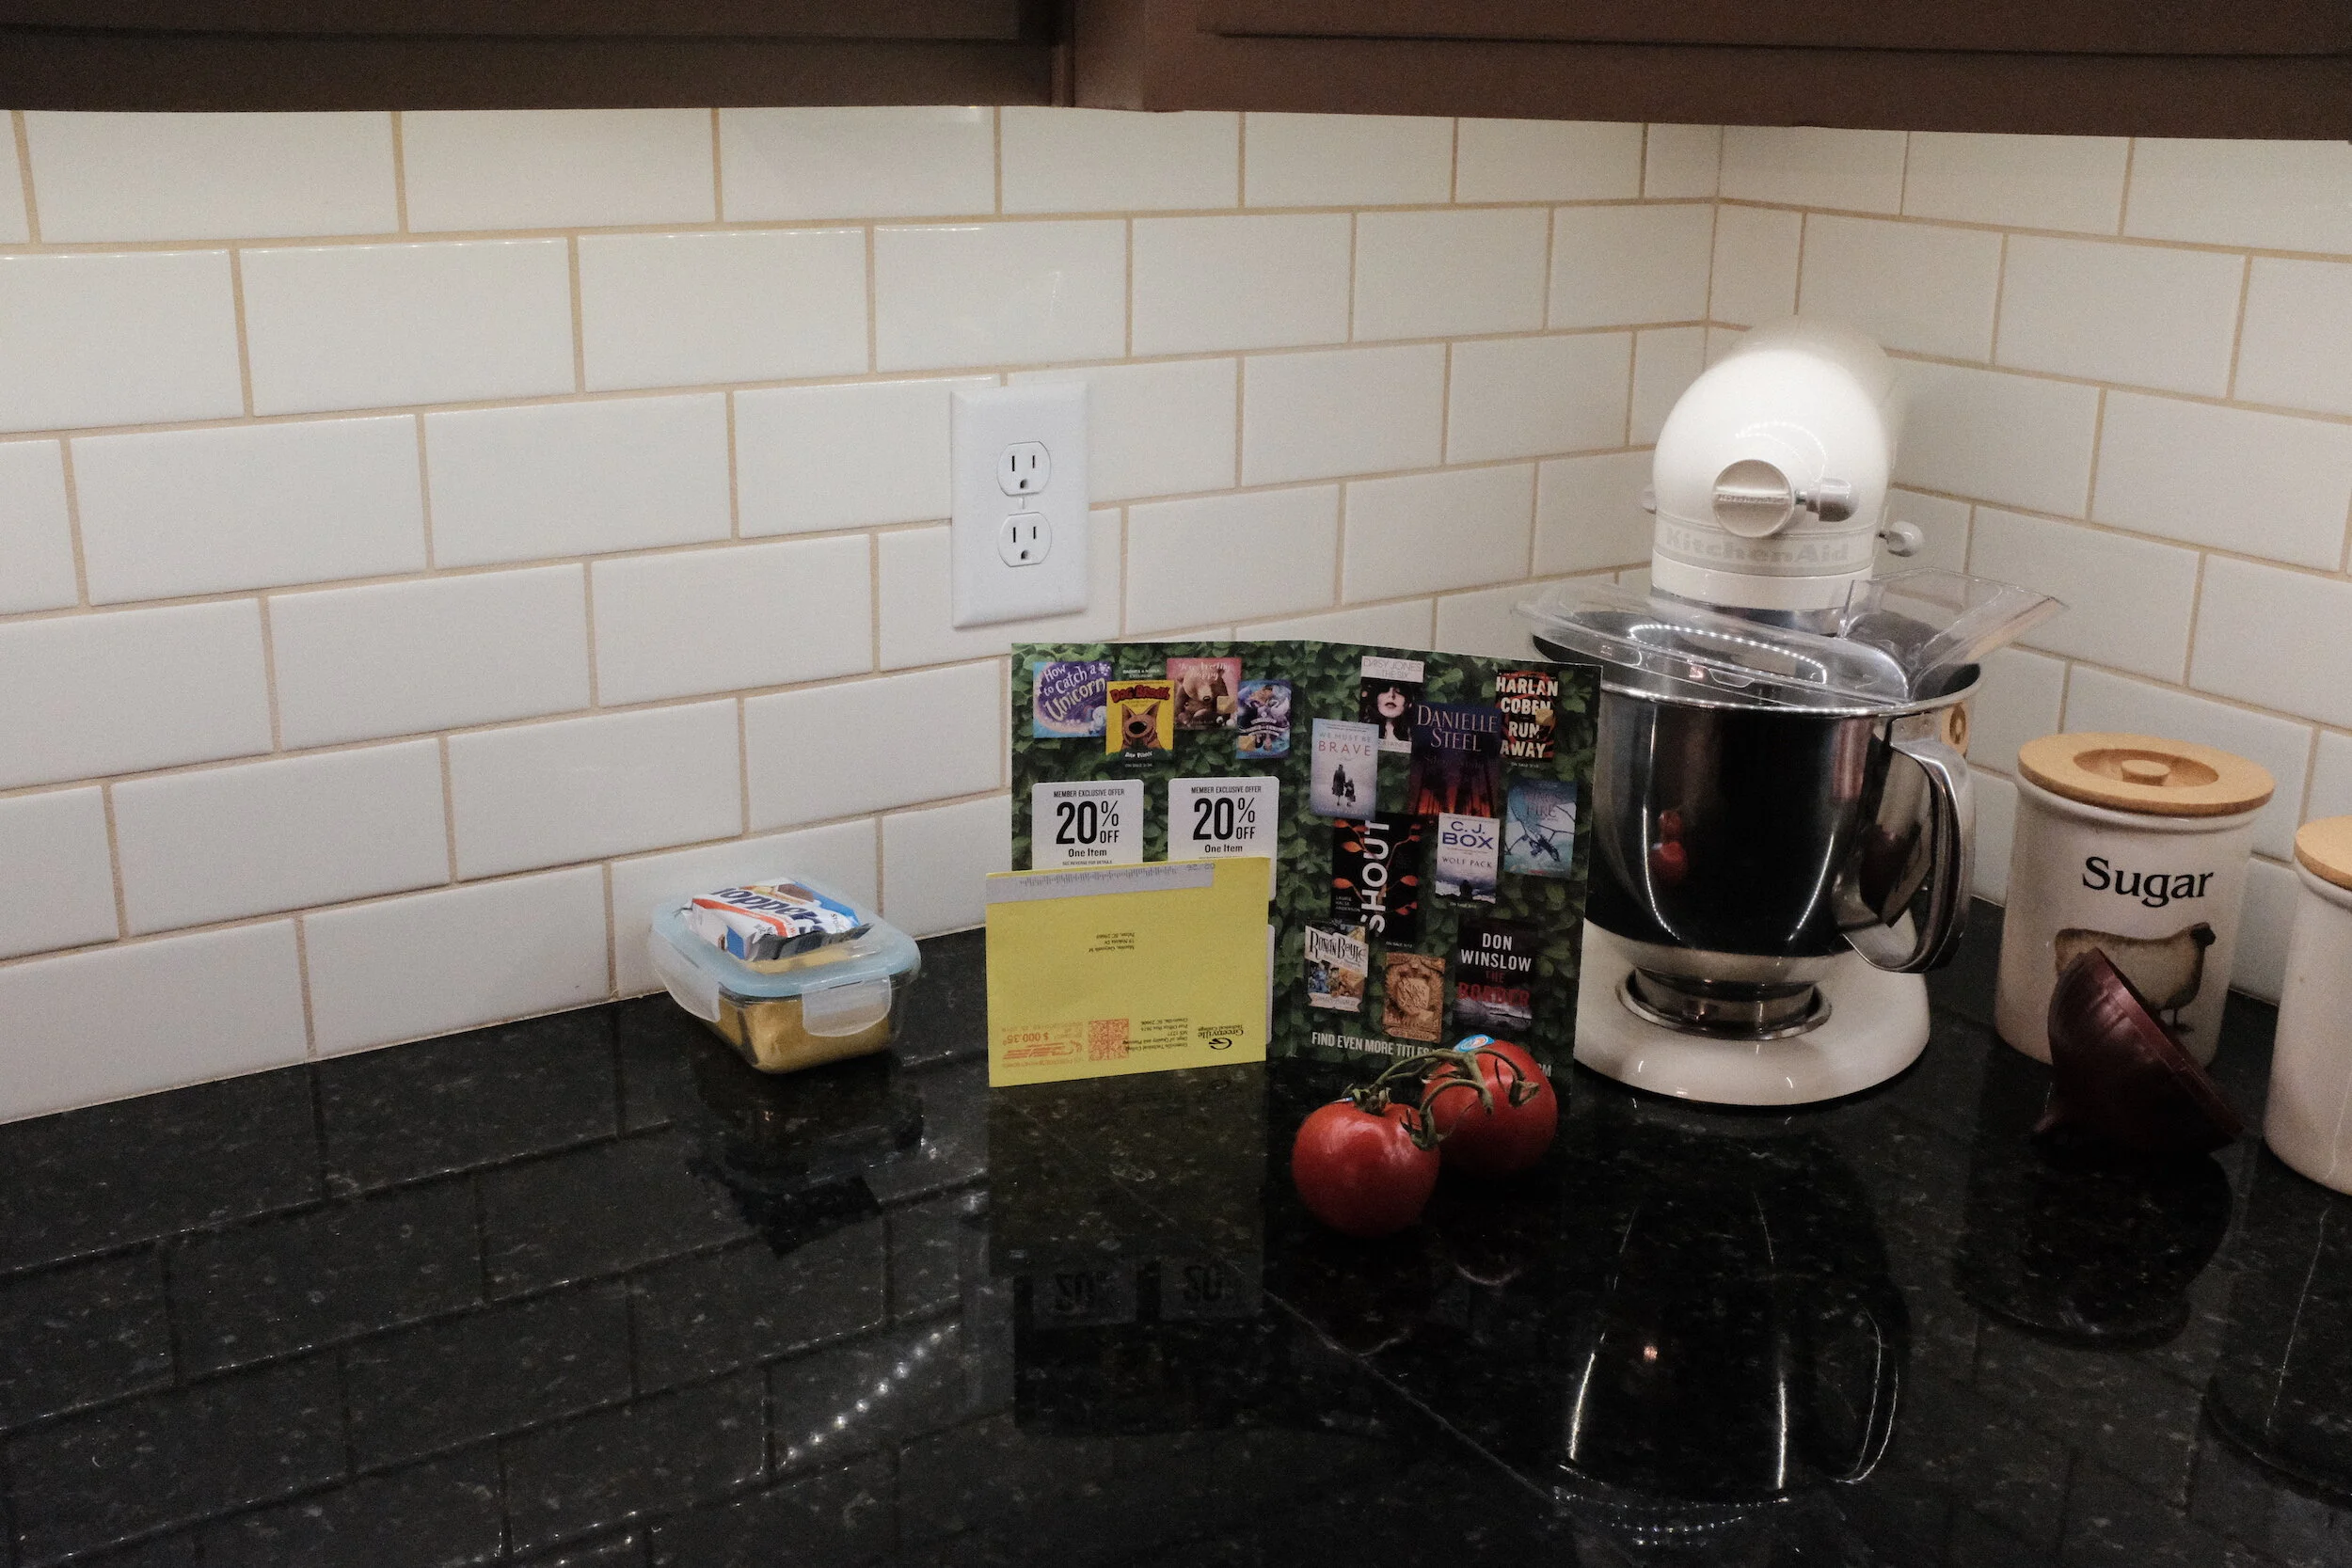
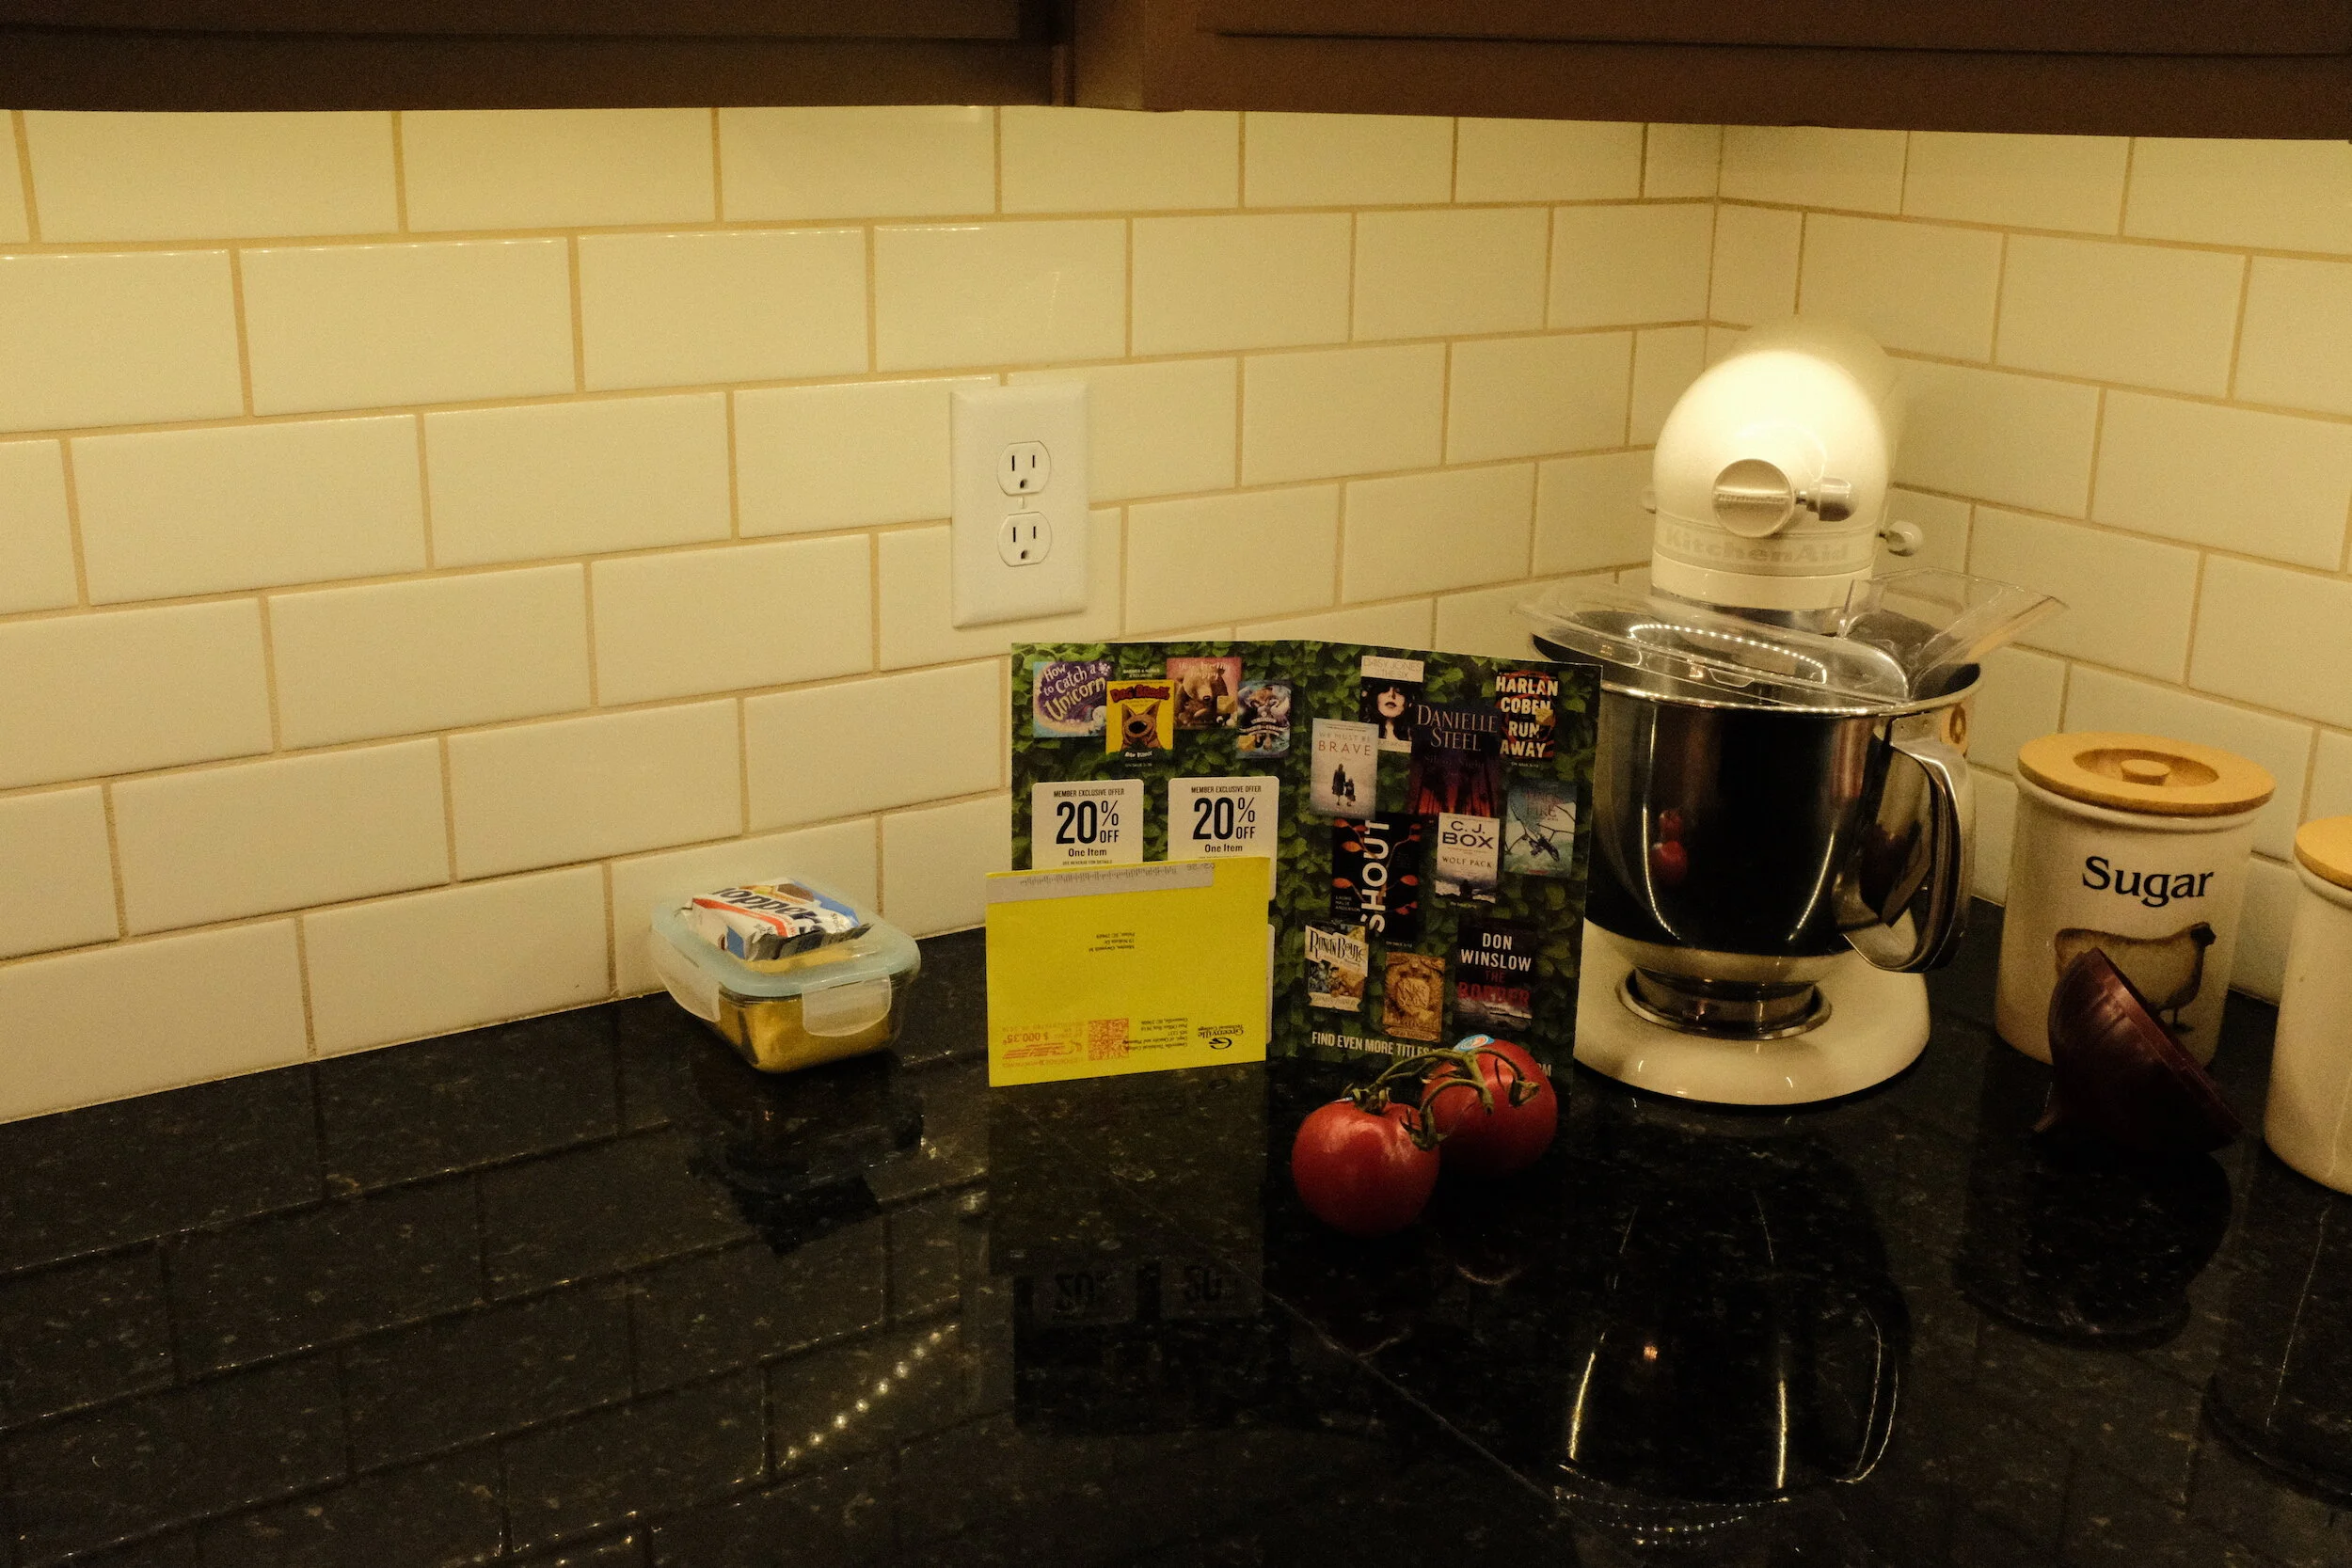
And now the main trick: focus on a subject, and by selecting a different aperture you can define the depth of field for the image you are going to take: you can define the zone within which everything will be in focus. The X100F very nicely indicates that depth of field in the preview. In the images below you can see the blue bar that indicates the depth of field zone.
In the first image with an aperture of f/11 and in the second image with an aperture of f/2.8.
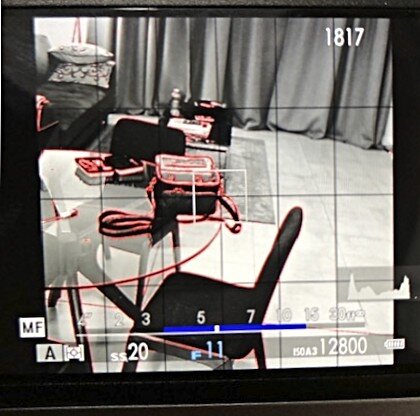
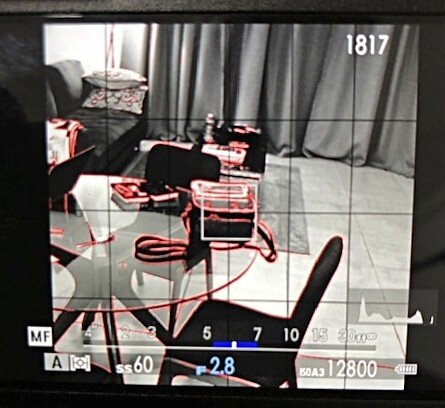
Do you notice the difference in depth of field zone, indicated by the blue bar? Without changing the focal length of the lens (the X100F has a fixed lens) or the subject distance (in both cases I focused from the same distance on the bag on the table) an aperture of f/11 provides a depth of field of about 11.7 feet (from 3.30 to 15 feet), while an aperture of f/2.8 results in a depth of field of about 2 feet (from 5 to 7 feet).
Now, you might ask, what is the practical use of this in street photography? Well, I was getting to that.
Practical Implementation
While on the street, assessing the environment I am in, and taking into consideration the type of images I want to create, I decide how much of a scene I want to have in focus; how large of a depth of field zone I want to have.
Having the camera set up as described above, I pick a point (the main focus point) at the distance I definitely want to have in focus. Next, using the AEL/AFL button, I focus on that point and by turning the aperture ring I choose the depth of field I have in mind. This way I create a zone within which everything will be in focus.
When anyone passes through that depth of field zone I just created, I only need to quickly raise my camera, ensure the subject is in the frame, and push the shutter button. And I will know that the subject will be in focus!
Picking the main focus point can be as easy as focusing on a wall, a lamppost, a car, anything that is at the same distance that you aim to be away from your subjects when taking images.
After having set your camera up and having defined your depth of field zone by setting the aperture ring and focusing on a fixed point, you can walk around and take images of anything that is within the set zone. One thing to remember, though, is to not push the AEL/AFL butting in-between because that will make the camera focus on whatever is in front of it and change your depth of field zone!
This is how I set up and use the Fujifilm X100F in the field when I want to be unobtrusive and even quicker than the camera's autofocus can be.

Photography Project Planning
How I Plan My Long Term Photography Projects
As mentioned in last week’s post, I am going to use my time in South Africa, amongst other things, to plan…
How I Plan My Long Term Photography Projects
As mentioned in last week’s post, I am going to use my time in South Africa, amongst other things, to plan for a couple of photography projects I want to execute when back in the USA.
Writing my Haiku and PicTales is most of the time done in a whim: I see an image I created, the basis for a story pops into my head, and with one or two writing sessions the job is usually completed. Also, these stories are in most cases based on existing images and not planned upfront.
Similarly, the short Essays I have published have been created with the words emerging after seeing how the images came together.
The projects I have in mind for future execution, however, are of a different nature. Starting from a clearly defined concept I want to create specific images that convey a story, communicate a message.
To achieve this requires planning.
What is the story I want to share or message I want to communicate? What is the best medium to achieve my goals? How to share?
In my day job, I am very process driven, using checklists to achieve consistency in the execution of my projects. And I apply the same approach to my photography projects.
I, therefore, developed a photo project planning document that I use to define the scope and execution elements of each project.

You can download this checklist for free (really free; I don’t even ask for your email address, but I, of course, will appreciate if you subscribe to the blog!)
The sections of this checklist are:
Project:
The project name (can be a working title)
Vision / Purpose of this project:
What do I want to achieve and communicate with this project? What is it about? What is the message I want to share with my viewers? Is it about something I want to create awareness of, or is it something specific I want the viewer to see?
How does this project fit into my general photographic vision?
Every project needs to fit into my general vision: The role of a photographer is not to show what we all can see, but what we are unable to see. This question helps me to understand how this project fits and helps to build a consistent portfolio.
How am I going to share/publish this project?
In this section, I can indicate how I want to publish this project. Only on the web site, or also in print. And if in print how: as a zine, a high-quality book, gallery prints? If in print, I can indicate details about size, paper quality, and book specifics (e.g. hardcover or softcover).
Research
In this part of the checklist, I am becoming more specific about the execution of the project. Will I work with digital images, film images, or maybe both; locations for taking pictures; checking if I need permission to take pictures in those locations; how to get there; what camera and/or film to use?
This section also helps me to define what type of pictures will best achieve the vision and convey the message I want to communicate with this project. This is really the "deep thinking" part of the project plan.
Plan
The next section of the checklist focuses on practical planning, necessary to get to execution. Do I have everything in place and arranged that I need to for actually being able to create the images I defined in the previous sections? Where the Research section helps me to define what is needed, the Plan section ensures I have everything covered.
Execute
This part of the checklist provides a status overview of the activities needed to complete the project. From having the pictures taken to selecting the final images. It is a simple action tracker to ensure no stage has been skipped.
Share
The final section of the checklist is also a tracker to ensure that I am taking care of all the actions I defined for this project with regard to sharing the images.
This really helps me to focus on what I want to accomplish and how to accomplish this.
Every plan, of course, is only effective when executed, or as the old saying goes “plan your work, and work your plan”. While I can use the upcoming months to prepare and refine plans for several photo projects, the real work will start with execution.

When Taking Photos Is Being Restricted
What To Do When Not Allowed To Take Photos?
I am just over two and a half months in South Africa now and during the first weeks, I have been taking…
What To Do When Not Allowed To Take Photos?
I am just over two and a half months in South Africa now and during the first weeks, I have been taking photos in some of the most popular areas for people to meet up here in the Johannesburg area. Unfortunately, last week I was approached by a security guard who informed me that using a camera, other than one from a smartphone, was not allowed.
Bummer...

I really like taking photos in these public places: a lot is going on, and they are very safe. So what to do now? Although South Africa is not as unsafe and dangerous as some news outlets want us to believe, I yet don't feel comfortable walking the streets taking pictures. Especially now, when it is going towards winter time here and it gets dark quite early.
While there still are opportunities for taking pictures, for example in my apartment and around the estate where I live, I have to think about other opportunities to work on and improve my photography.
So, what can I do?

Learning and Planning
Not being able to photograph, should not prevent me from learning:
what images I can create without being 'on the street'
about photography (technique)
about other photographers (their work, vision, and technique)
my cameras (settings, how to operate fully manual)
image post-processing (ON1 and maybe film developing)
about my own vision, and how I want to grow as a photographer
how to promote and sell my images
And not going out to shoot, will provide me plenty of time for planning:
what and how to print
projects I want to work on back at home
blog posts and how to share these on Instagram, Facebook, and Twitter.
Although I definitely will continue to produce new work while here in South Africa, being restricted in my opportunities will mean that I also will post more general interest and background information on the blog.
So watch this space (subscribe!) and see what will be coming!

Something Strange Happened On My Way To ON1
Is Changing My Photo Editing Program Taking Me Back To Color?
Last year, when I became a member of SEC4P (the Southeast Center for Photography) I was the lucky…
Is Changing My Photo Editing Program Taking Me Back To Color?
Last year, when I became a member of SEC4P (the Southeast Center for Photography) I was the lucky winner of a prize draw the gallery did for new members. The treasure to take home was a copy of the photo editing program ON1.
I played a bit with it, imported some photos, made some changes, but since I have a subscription to the Adobe suite I found changing to ON1 too cumbersome. And I did not want to invest the time to learn a new software package.
Since then, however, a couple of things have changed:
ON1 just released a new version of their program, ON1 Photo Raw 2019.5, with quite some improvements in user interface and functionality;
I also realized that from the Adobe suite I actually only use Lightroom, and not Photoshop or any of the other tools included in the package;
There are quite substantial rumors that Adobe is going to increase the monthly subscription cost for the suite;
Even without an increase in pricing, the Adobe suite costs about $120 annually. And since I didn't have to pay for my 2018 version of ON1, the only cost I had was for the upgrade.
So, I made the plunge.
First I culled all my pictures in Lightroom (discovering I had more duplicates than I cared for), and then imported everything into ON1. This was quite a smooth process, with just some minor challenges that were easy to overcome. This also learned that ON1's customer service is very responsive, providing answers and solutions.
Since I was busy migrating anyhow, I also took the time to rename all my image folders and images to ensure that going forward I had easy and consistent naming conventions in place.
And then was when it happened...
Going through all these images made me appreciate color again. Especially film color images.

If you are a regular visitor of this blog and my website, you will have noticed that over the last couple of months I gradually changed all my portfolio pages to contain black and white images only. And while I kept the color images in older blog posts, new posts only contain black and white images.
I just love black and white: it provides a different feeling to images and helps to focus more on the actual subject and on forms and structures without distracting colorful elements.
But then I looked at the film color images I rediscovered while culling and renaming my photos. They have a certain quality and feel to them that really adds a different dimension.
Do I, after all, like color images?
Do I like them!
Seeing, and liking, these colorful impressions of the world again created some anxiety: what am I going to do with my website; what am I going to do with my blog; should I bring all my color images 'back'?
To see if I really, really like color, I went to one of my trusted sources of information: YouTube. I watched a couple of photography documentaries, and two photographers and their work really stood out for me: Saul Leiter and Joel Meyerowitz. Seeing their work and the quality of their color images really made me fall in love again with color photography.
But not all color photography.
Back I went, into my own collection on my laptop. And I realized that it is the film color images that I really like. I compared several color film images with color digital images. And there is a difference. Even when applying some very good in-camera film simulations when using the Fujifilm X100F, the feel of those images does not match the feel, the 'quality' of film.
Just look at the examples in this article.

I do not know what it is. Maybe the quality of the grain, maybe the quality of the colors. Both probably impacted by the older lenses I have on my film cameras.
I wonder if others experience this same difference in feeling about digital color versus film color.
Whatever the case; I really like my film color images.

This conclusion has not decreased my anxiety. On the contrary: now I am even more unsure what to actually do on the blog and portfolio pages. I really need to think this through, before making changes that I might regret later. The regret most likely coming from the fact that I then would have to redesign parts of this website (again).
On an interesting side note: for some reason, I do not experience a similar big difference between film images and digital images when working in black and white. Although there definitely is a difference, it somehow doesn't seem that big, or maybe it doesn't seem to matter that much for me as with color images. The 'why' of which I might need to explore in the future.
Now, of course, I would like to first explore that color 'feeling' a bit more. This will be a challenge since I do not have any of my film photo cameras with me here in South Africa (but wait, maybe that would be a reason... Oh no, no more GAS please...).
So what to do now? Adding color, or not adding color?
Yes, something strange happened on my way to ON1. Something that possibly will have a big impact, not only for this site but for my journey in photography as a whole.

Picture This, Ms. Sontag
Did Susan Sontag Use Predictive Analytics in the 1970s?
Having heard a lot about her writings, I recently bought a Kindle copy of Susan Sontag's essay collection…
Did Susan Sontag Use Predictive Analytics in the 1970s?
Having heard a lot about her writings, I recently bought a Kindle copy of Susan Sontag's essay collection 'About Photography'.
Reading through these essays is hard work and I have to admit that I need to re-read some of the paragraphs more than one time, trying to grasp what she actually is saying.
In her first essay, 'In Plato's Cave' [1], Sontag paints a quite critical picture of what photography is, or at least according to her had become in the 1970s. Which, on a side note, makes it remarkable to me that someone with her point of view on photography later ended up in a relationship with one of the most prolific portrait photographers of this era [2].
Although I disagree with a lot of her observations and conclusions about photography, I need to admit that some of these interestingly still are valid after 40 years. It even makes me wonder if Ms. Sontag was using some secret predictive analytics tool that helped her to make observations in the early 1970s which still hold truth for the current state of photography.
Let's have a look at some of her observations (quotes from the book in the gray boxes), and how they relate to today's photography.
“from its start, photography implied the capture of the largest possible number of subjects”
Remember, this is an observation made in the early 1970's when there was only film photography, which was limiting the number of images people took on a daily basis: 135 film usually has 24 or 36 images on a roll and, depending on the camera used, 120 and other medium format film could produce as less as 8 images per roll.
Today we not only have digital cameras with high capacity memory cards, but we also have phones that are capable of taking high-quality images. And we are using them: an indication of the number of images currently taken can be that more than 100 million photos and videos are taken and posted on a daily basis on Instagram only! [source: Omnicore]
And we not only capture enormous amounts of images, the same phones that enable us to capture on the go can also store all these images to be carried around and viewed at a later time. Or, in Sontag's words (and remember, written about 1970 when we only had prints to carry around):
“The most grandiose result of the photographic enterprise is to give us the sense that we can hold the whole world in our heads - as an anthology of images.
with still photographs the image is also an object, light-weight, cheap to produce, easy to carry about, accumulate, store.”
Susan Sontag not only had 'prophetic' views about capturing and keeping images. She also had some remarkably modern observations about the impact of photography.
“a promise inherent in photography from its very beginning: to democratize all experiences by translating them into images”
With today's capabilities to capture and share images, Sontag's observation seems to still make a lot of sense. Sharing images is now far easier than 40 years ago when the only means to show your images were in printed or slide format.
We snap images on the go and within seconds they are available for viewing globally. I can share my experience with the whole world, and the whole world can immediately enjoy and take part in my experience. From a 'sharing' perspective everyone's experiences have become more democratic indeed: nobody can complain that they don't know how it looks standing on the outer rim of a cliff, or on the middle of a railroad, or on the ledge of a bridge.

The question is valid, however, whether this actually is democratization of the experiences. The most viewed and shared, and re-shared, images are those from individuals called 'influencers'. They create, and sometimes actually make a living of sharing remarkable images that make people want to have the same experience. Most of us, however, can not take the same image or actually have the same experience. So is the experience actually democratized, or is it on the contrary made more elitair? In other words, are images being shared to provide an experience to the audience, or just to show off and make our audience 'following' us?
This immediately ties into another passage from Sontag's essay:
“Photographs alter and enlarge our notions of what is worth looking at and what we have a right to observe.”
What we see most, what is published by the most renowned influencers, what we repeatedly see on a daily (hourly?) basis on Instagram and other social media is influencing what we should look at. It seems that we have created and are stuck in this endless sequence where images from people with the most followers are seen most, and as a consequence we are looking for images from people with a lot of followers, which leads to many more people following, which triggers people specifically looking at images from these 'influencers'. Are you still with me?
And, like Sontag, I think correctly, observed, it is not only influencing what is worth looking at, it also influences what we have a right to observe. It is the other side of the same coin: where influencers share their remarkable experiences, their audience is becoming entitled to be included in all these experiences. The image now becomes the experience.
This raises for me the question of whether we actually still care about what we create images of?
Yes, fortunately we still have photographers who create images with integrity: because they want to share a vision, or document in an honest manner what is happening in the world. Looking, however, at what we find on Instagram, Twitter, Facebook, etcetera, raises the question: do people take images because they care about something, or are most of the images only taken to show that we can take them; to be seen, irrespective of subject matte or quality; to get 'followers'?
As mentioned above, reading through Sontag's essay is hard work, and it sometimes seems that I am not the only one who has a hard time to find the direction her prose is leading us. Sometimes even the author herself seems to be lost and changing direction.
Compare for example this passage:
“what is written about a person or an event is frankly an interpretation, as are handmade visual statements, like paintings and drawings. Photographed images do not seem to be statements about the world so much as pieces of it, miniatures of reality that anyone can make or acquire.”
With this one:
“although there is a sense in which the camera does indeed capture reality, not just interpret it, photographs are as much an interpretation of the world as painting and drawings are.”
I am fully aligned with Sontag on the second of these two statements.
Yes, photographs in principle capture what is reality during a sliver of time. But it is not the capturing that defines the final image, it is what the photographer does with the captured image in post-production.
Today the term 'post-production' immediately creates associations with Lightroom, Photoshop, ON1, Capture One, and similare image processing tools. But we should not forget that already in Sontag's lifetime, already since the beginning of photography, photo manipulation was possible and done. Even in a traditional darkroom, techniques like cropping, dodging, burning, and removing parts of an image were possible. Take as an example one of the most iconic images ever, Ansel Adams' "Moonrise, Hernandez", which was printed and reprinted multiple times by its creator untill Adams finally achieved a print he thought came nearest to his original vision.
And this is only using the image as an interpretation of the world by adding, deleting, resizing, and other darkroom techniques. In addition, the photographer can use images as interpretations of the world around her by adding titles, narratives and stories, guiding the viewer to her interpretation of the scene.
Returning to Sontag's observations from the 1970s and how they relate to today's world where most images are being viewed and shared online, I want to end with what for me is one of the most remarkable passages from her essay 'In Plato's Cave':
“Photography becomes a rite of family life just when...the very institution of the family starts undergoing radical surgery.”
”As...the nuclear family, was being carved out of a much larger family aggregate, photography came along to memorialize, to restate symbolically, the imperiled continuity and vanishing extendedness of family life.”
”A family’s photograph album is generally about the extended family - and, often, is all that remains of it.”
For better or worse, our traditional family setup is even more dramatically changing than it was in Sontag's time. Traditional family patterns are changing and being replaced with new ones, some of which probably were unthinkable of 40 years ago.
And this triggers the question of whether this could be the real reason for the popularity of Facebook, Instagram, and other social media. Are we (and here I use 'we' in a very broad sense) looking for family connections that we no longer have in the real world? Are we in our fast-paced culture not connecting enough with our real family, and are we looking for substitutes? Are we replacing our traditional families and family albums with our Facebook, Instagram, and Twitter families and albums?

Sontag triggers a lot of thoughts, and irrespective of whether I agree or not agree with Sontag's observations, reading this first essay in Sontag's 'In Plato's Cave' collection left me with very mixed feelings.
I can't agree with her world view and the over-critical approach to photography she displays in this essay, but I have to admire her for her capability to capture and pinpoint some core observations about photography that are still valid after all these years.
Notes:
1. Although the original story is by Plato, it was actually was a lesson from Socrates [back to paragraph]
2. Annie Leibovitz [back to paragraph]

Who Are You?
Getting To The Essence Of My Photography
Last week I started reviewing and rearranging my portfolio. This was partly because I wanted to make the…
Getting To The Essence Of My Photography
Last week I started reviewing and rearranging my portfolio. This was partly because I wanted to make the website experience better and to provide easier access to images that viewers might want to buy, and partly because I just had too many images on the site. Some culling was dearly needed.
Doing this forced me to have a close look at each image, asking "why" I would keep it.
Some images I eventually decided to keep just because they are great to print and display on your wall. Those in the Wildlife and Still Life & Abstract sections for example.

With regard to the other images that made it through the selection process, I, however, realized that there was another, and more important reason I want to keep and share these: they directly or indirectly tell the stories of people.
From the time I was a kid, I always wondered: "who built this church or castle", "who lived here", "who used this tool"? Of course, I was (and still am) awed and impressed by grand architecture and cities, and I am very much interested in history in general.

My questions, however, were and are more related to common and unknown people. Not about the architect who designed a whole city or a grand cathedral, but about the bricklayer or carpenter who actually made the grand design happen. You might find this weird, but walking by an old church and looking at the brickwork I often wonder who actually put a certain brick in that wall. Who was this person? What kind of life had he?
This curiosity is not restricted to buildings. Take for example my images of WW2 Military Aircraft: it is not only about the beauty of the aircraft design. I am interested in the men who flew these machines and the ordeals they went through during and after the war.
Buildings, aircraft, cars, objects: they all have tangible connections to people. Makers, builders, operators, users.
And then, of course, there are the images that actually show people. Alone, or interacting with each other. There always are the questions: what are they doing, what are they thinking?
Reading back what I wrote above, I recognize that this connection with people, and trying to know and understand how they lived, also is the reason why I write my Haiku and Pic Tales. I try to imagine what people think and how and why they act in relation to the world around them. Maybe a Walter Mitty effect?
Having realized that the actual subjects of my photography (visible or implicated) are people and becoming increasingly confident of actually photographing people, I can see my work moving away from fine art / abstract images towards more people-focused documentary and essay-style work. Two examples of this approach are the projects After The Soul Is Gone, and A Morning At The Market.
To reflect this shift in focus in my web site setup, I now present my images in three distinct groups: Fine Art Prints, Stories, and Projects.
The first group contains my traditional portfolio of cities and architecture, landscapes, still lives and abstracts, street scenes, cars, trains, and aircraft;
The Stories group links to the Pic Tales, Haiku, and Essays published in blog posts;
The third section contains projects that specifically focus on people and human nature.
This renewed focus for my work will provide additional challenges for the next two years. I don't have the feeling and confidence yet that in South Africa I can wander around with my camera and take pictures on the street. I, therefore, need to discover how I can realize my newfound (or maybe: better formulated) creative vision within the restrictions and restraints of living here.
So the question in the title of today's blog post now actually leads toward two answers.
Who are you: who is it that I try to find in my images. Who are the people who built, used, operated, or are visible in the frame? What are they doing, what did they think?
Who are you: who am I as a photographer, what do the images I capture say about me? Why am I asking these questions: is it my interest in history, my interest in other human beings, my urge to challenge the viewer and ask questions? Or a mixture of all of the above?
It will be an interesting journey going forward.
Thanks for reading.
Eric

At The Market
A Morning At The Market
Last weekend I went to Bryanston Organic and Natural Market. Besides getting some bread, veggies, and…
A Morning At The Market
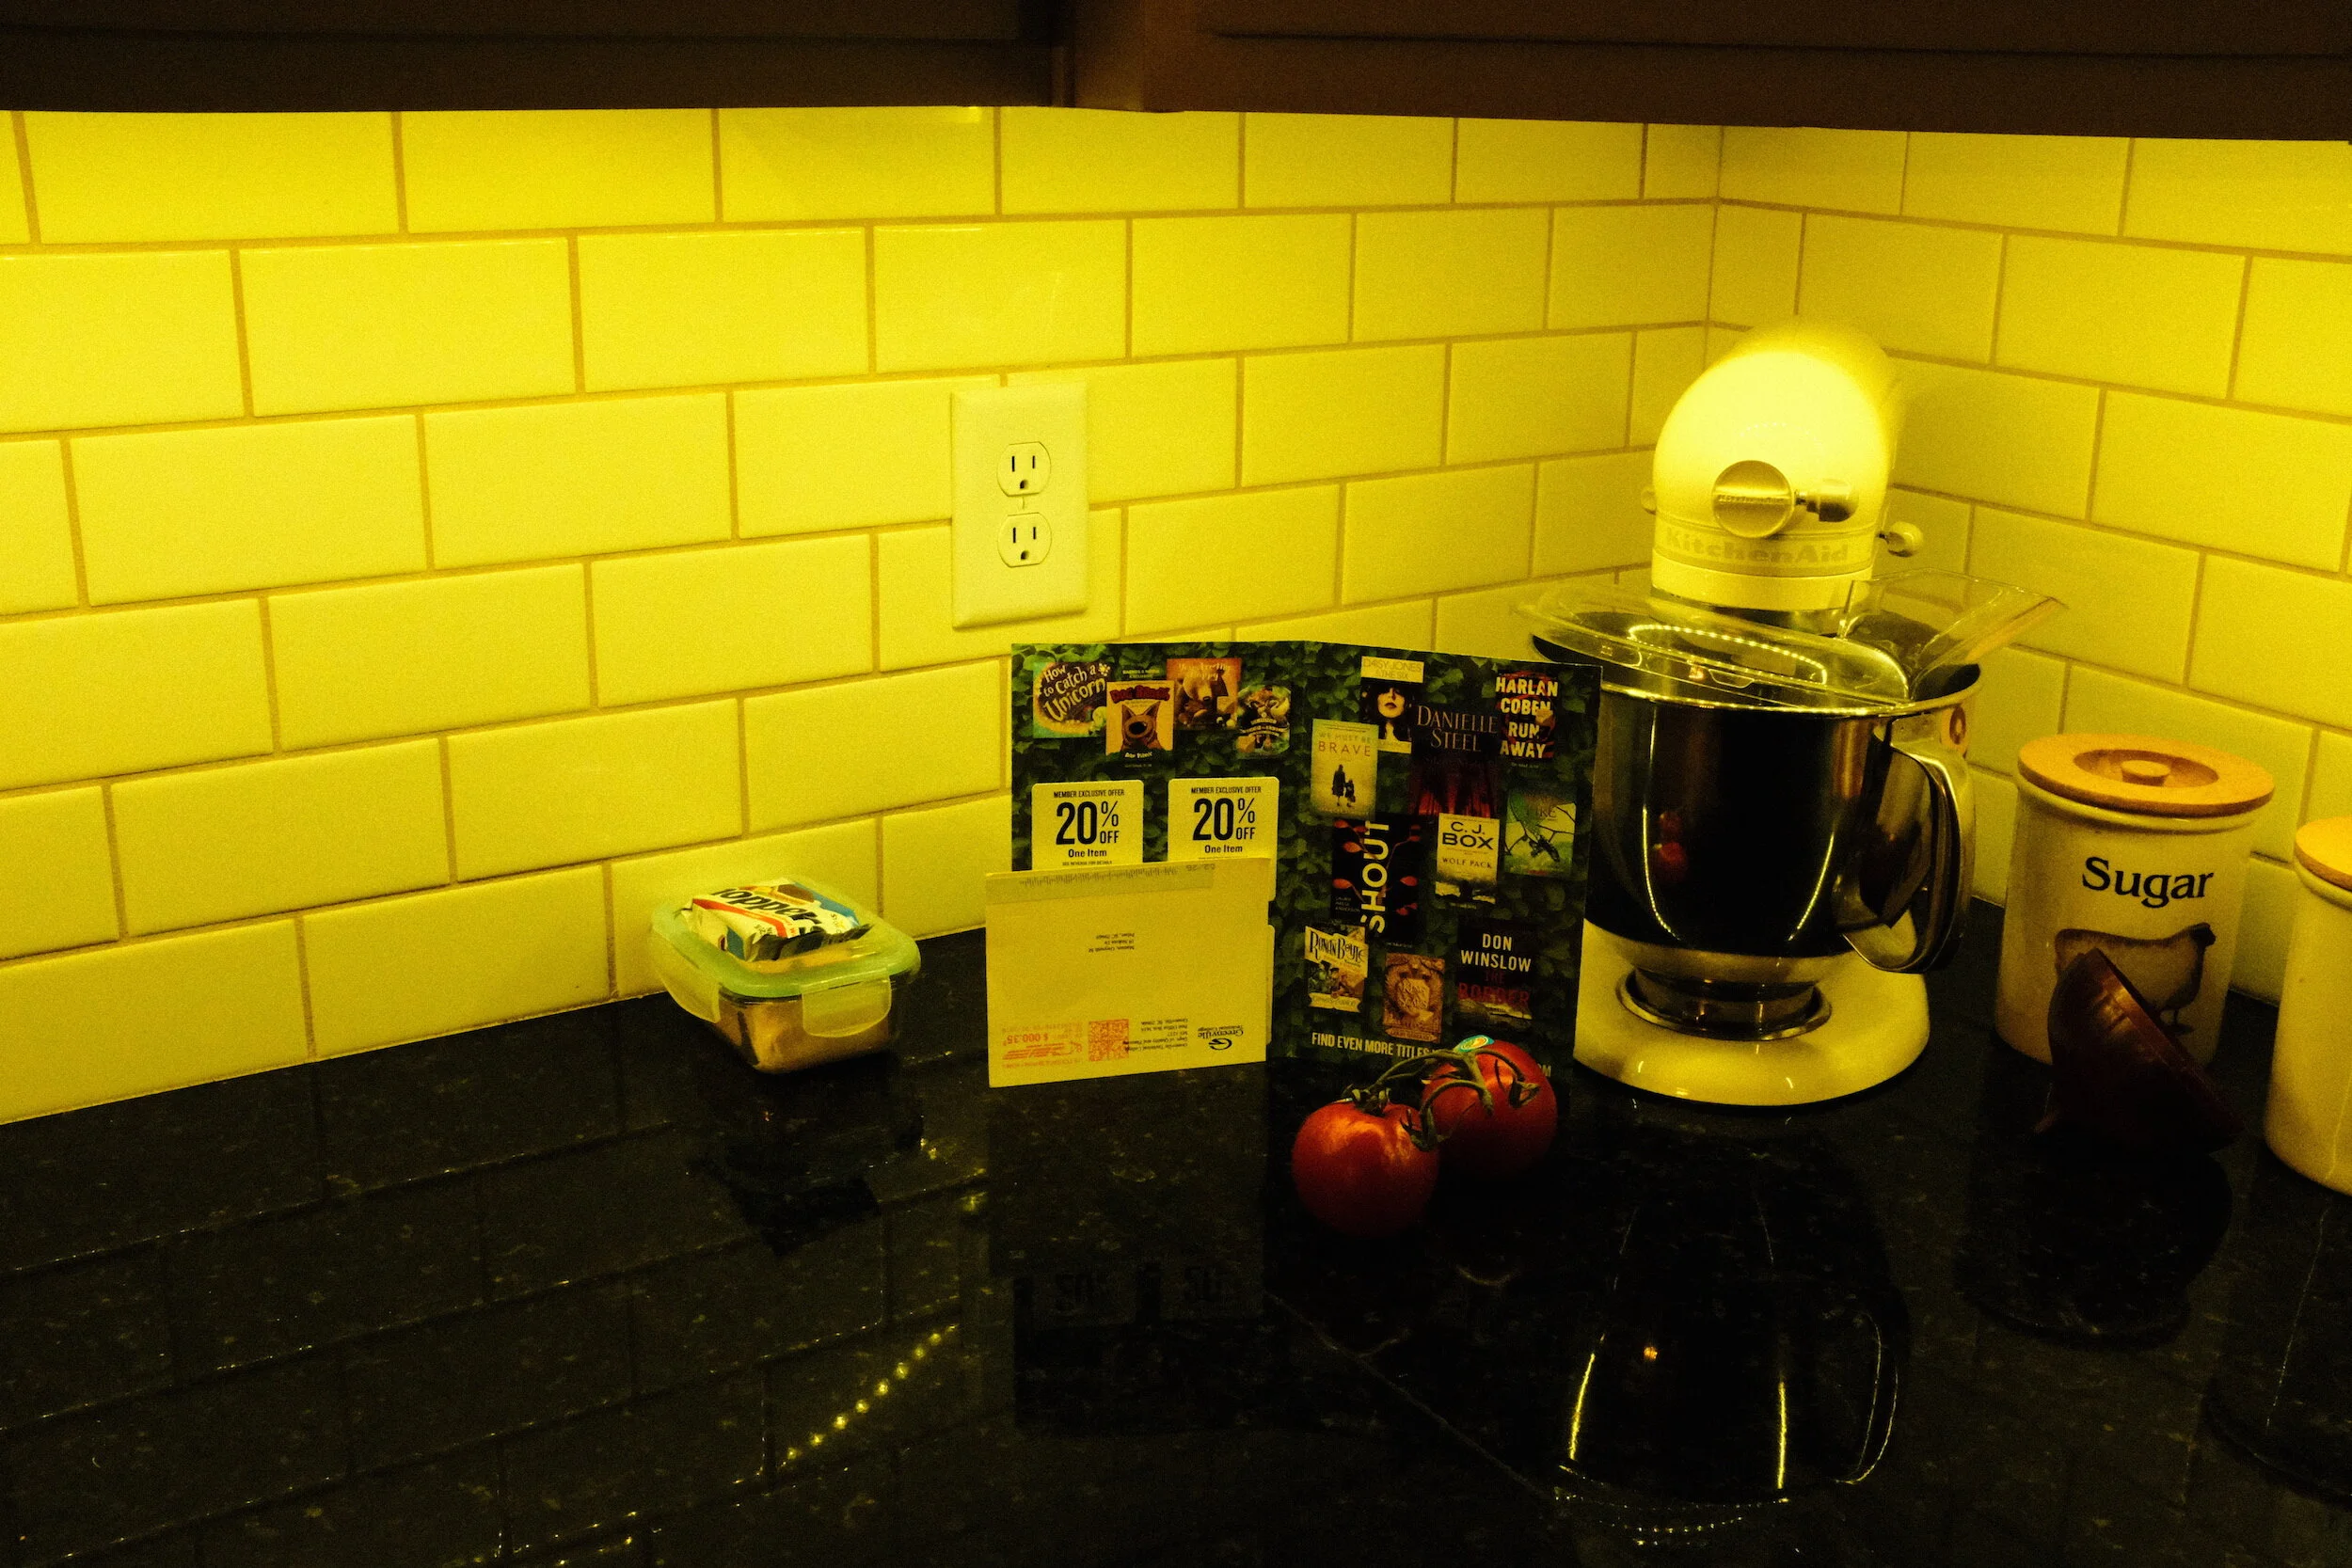
Last weekend I went to Bryanston Organic and Natural Market. Besides getting some bread, veggies, and locally made Gouda cheese with cumin, I enjoyed wandering around and observing people. A market is a place where people gather to buy things. And also to meet each other, catch up on things, share stories, share meals. And sometimes there are moments of solitude, reflection, and maybe even loneliness while being within a crowd.

A day at the market can be long. People walk by; some buy, some don’t. And sometimes nobody walks by at all. How to kill the time between moments of chitchat with possible buyers? Selling is important, but when nothing goes there’s always the escape into another world.
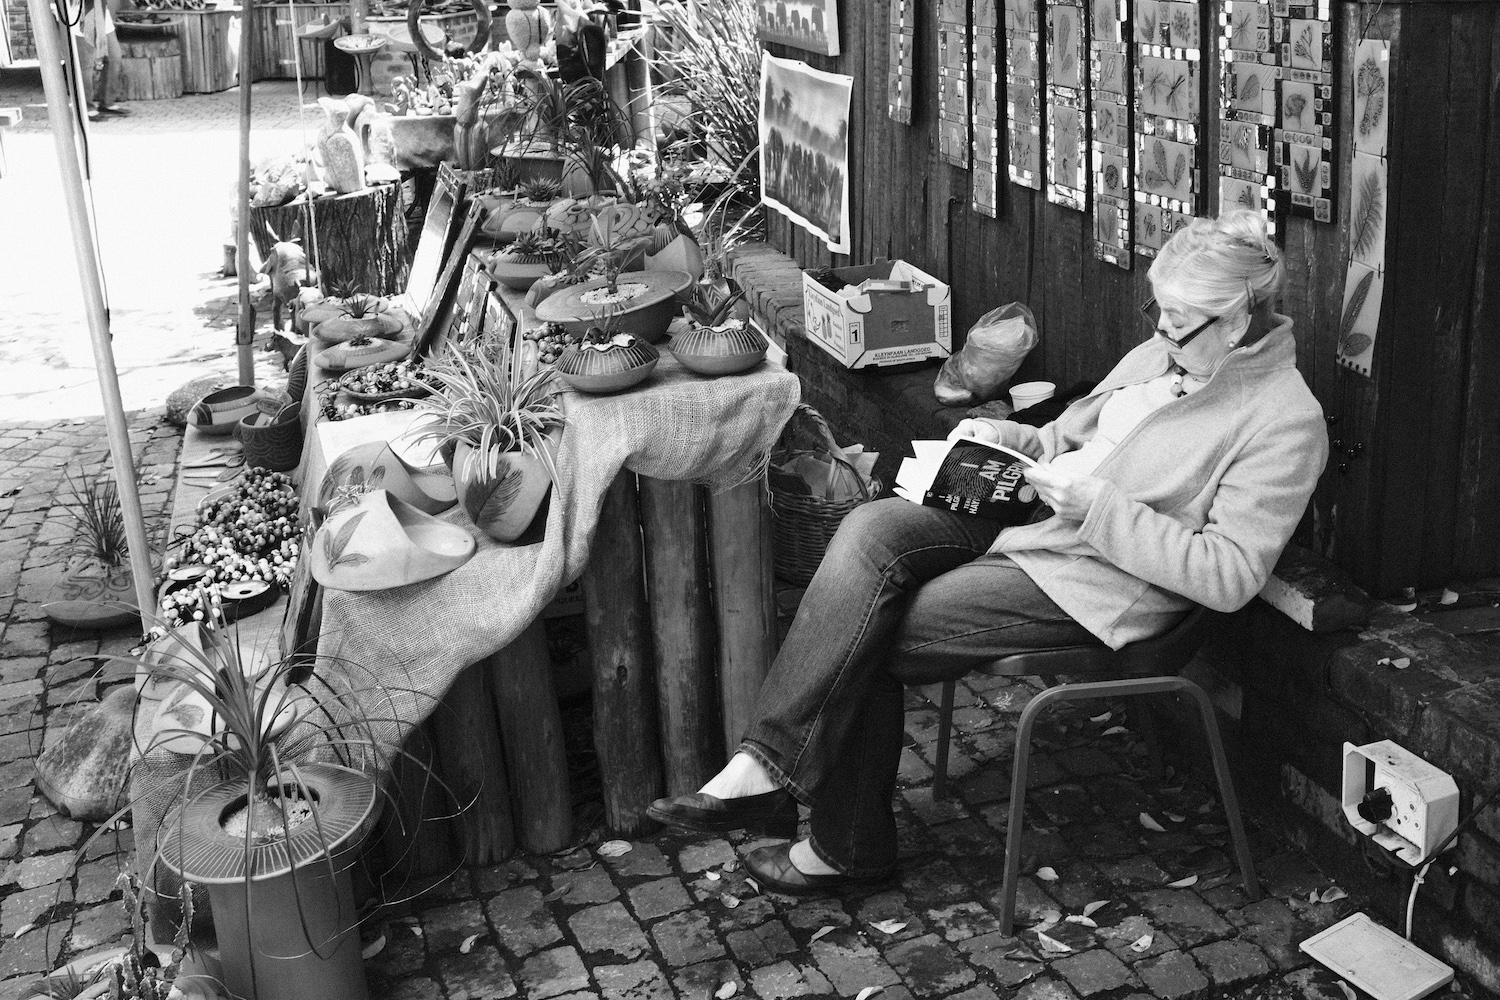
So what do you do when you want to shop at leisure, have a coffee, and some time for just the two of you? Make sure the kids are entertained by a great storyteller. Kids love a good story. Especially when some adventure is involved. Although little Nils Holgersson is not impressed yet.

Socializing, catching up, entertaining prospective buyers, at the end of a long day at the market there’s only one thing that really matters: did we make enough money to carry on?
Not everyone who comes to South Africa goes on a safari. Not everyone who goes on a safari has a camera with big lenses. I met this photographer who has, and he provides great images of wildlife to those who don’t. Books, prints, framed, and unframed. The unframed ones are easy to take with you. But it’s hard to make money selling photos. People use their phones and don’t care for good close-ups. A day at the market can be long; so they go together: love makes for great company.

Whether it is catching up with old friends, making new friends, or just chatting with your family. There is always something to share, to show, to explain. The latest family gossip, new found items, maybe a recipe. And of course, we posted it on Instagram too!

Isn't it great when you just can sit down and relax with some good friends?! Nothing to worry about. Maybe just for an hour. But that is time enough to refresh the mind, reload the batteries, and re-energize to live through another week.

Some things are a hard sell on a twice-weekly market. Pictures, baskets, handpainted porcelain, earrings, clothes, vegetables, bread, even cheese are readily bought by tourists and locals alike. But carpets and rugs? They don't really meet the average cabin luggage regulations, and anyhow, how many carpets can one have at home? It's hard to stay optimistic about selling this merchandise. But there's always a sunny spot to discover. If he only would turn around to see it.

Sitting down for a good cup of coffee and some straight talk. Some people just need to get told how the world turns. Yeah, you can scratch your head. But wait until you're older, then you'll understand (and you should not be eavesdropping).

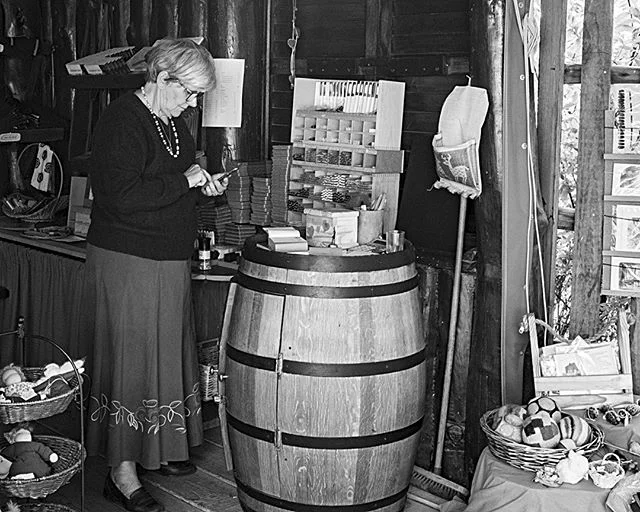
Waiting, waiting, waiting. Sometimes a whole day can go by and no customer is interested. Hm, there seems to be a good interest at number 85. Why is it that earrings attract more customers than pens? Are people more interested in looking good than being practical? And you can be practical and good looking at the same time with a nice crafted pen. Hm, let's see if they walk over here.

Men waiting seems to be a recurring theme at a market. Whether for customers or for the missus being done shopping. I wonder what he is thinking. Maybe about all the nice things he could have done with the old stuff in his shed at home, instead of going to the market to look at things he doesn't need.

I saw this lady sitting quietly at a coffee bar. She was looking into the distance. Contemplating. I wondered what she was thinking. She didn't look happy, maybe a bit disturbed. I also sat down and ordered coffee and a plum cake. She looked and ordered the same. I hope the cake made her happy again.

A day at the market is fun, exciting, invigorating, and also tiring. And in the end, when all shopping is done, when all catching up is completed, when we met all our old friends when all stories have been shared... we just all want to go home...


Fujifilm X100F Presets Experimentation: It's A Wrap
What I Learned From Using Film Simulations And In-camera Presets With The Fujifilm X100F
To discover what the Fujifilm X100F is capable of, and to experiment with its settings, I played for a
What I Learned From Using Film Simulations And In-camera Presets With The Fujifilm X100F
To discover what the Fujifilm X100F is capable of, and to experiment with its settings, I played for a couple of weeks with film simulation and factory provided presets.
It was not only a fun thing to do, I also learned a lot from it.
Film simulations
Advanced Filters (factory presets)
How to use them properly
Which did I use
What I learned from using presets
How am I going to use presets going forward
Conclusions and recommendations
Film simulations
One of the blogs I discovered conducting my pre-purchase search for reviews of the X100F was FujiXWeekly, written by Ritchie Roesch.
This blog not only provides a great and very helpful review of the camera, but it also contains several articles on in-camera film simulation recipes based on the standard built-in film simulations. By tweaking the standard presets, Roesch has been able to create presets that result in very accurate simulations of great film emulsions. Some examples are: Acros push processed, Ektachrome, Kodachrome, and CineStill800T.
As mentioned in a previous post, I had a lot of fun using some of these recipes, and they helped me understand how to tweak the built-in presets to get specific results.
Advanced Filters
While the film simulation presets can be programmed in detail in the Custom Settings menu, the X100F also has several pre-programmed in-camera presets that simulate specific other cameras, techniques, and photography techniques. These Advanced Filters can be accessed by hitting the Drive button of the multi-selector and then scrolling almost all the way down to the second Adv. selection.
The presets available in the Advanced Filters menu are:
Toy Camera (create shaded borders as taken by toy cameras);
Miniature (create a top and bottom blur for diorama effect);
Pop Color (emphasize contrast and color saturation);
High-Key (enhance brightness and reduce contrast for lightening tone reproduction);
Low-Key (create uniformly dark tones with few areas of emphasized highlights);
Dynamic Tone (create fantasy effect by dynamically-modulated tone reproduction);
Soft Focus (create a look that is evenly soft throughout the whole image);
And five Partial Color filters [Red, Orange, Yellow, Green, Blue, and Purple] (retain selected original color and other areas change to monochrome).
The information between brackets ( ) above is the text that is being displayed when selecting any of the Advanced Filters.
During the remainder of this article, I will refer to both film simulation recipes and the Advanced Filters as “presets"
How to use them properly
As you might be aware from previous posts, I am not a fan of ‘just’ using presets that have been developed by others.
It is great to use these presets as a basis and, most importantly, learn how they work, how they change the image, and how you can use them to create images in your personal style. Whether by tweaking existing presets, or building your own from scratch.
When looking at the images created with the presets you use, learn and understand how the original image has been altered. A great way to do this is to compare the altered image with the raw file. This is one of the main reasons I always shoot in RAW+JPEG with my cameras. The quality and size (4000x6000 pixels) of the JPEGs from the X100F is such that I easily can use these directly for printing. Having the RAW file, however, to compare with the JPEG output helps me to understand how the camera settings I selected impacted the original file. This also helps me to decide what changes possibly to make to these settings.
Which did I use
There are a lot of film simulation recipes on FujiXWeekly. After some experimenting, I decided that the Acros, CineStill800T, and ClassicChrome settings are the ones I like best. Below, however, an overview of all seven film simulations I used.
Acros
Classic black and white at its best.
To be honest, I already liked Fujifilm’s Acros simulation a lot. Especially how the Fujifilm engineers have accomplished that grain increases in a natural, very film-like manner with higher ISOs. And with the additional changes to it that can be set in the menu of the X100F, I like it even more. Ideal for creating that little black dress.


CineStill800T
Let's go to the cinema!
This is a great film simulation for evening images, producing very natural colors. The origins of the film as a cinematic emulsion are clearly visible.
The last image of the series below actually emphasizes the need to 'think about what you are doing'. While I was enthusiastically taking test shots with this setting I totally forgot that CineStill800T has been developed to capture images lighted by Tungsten light (hence the "T" in the name). To adjust for the warm color of 3200K incandescent light, the film (and the simulation settings in the X100F) add a blue-ish shine to the image. Ideal for interior and exterior images that are being lighted with this type of light, not so much for daylight images.


ClassicChrome
Classy naturals.
Also a setting that produces very natural colors. Without becoming too 'warm' for incandescent light photography.


Agfa Color
Some old fashioned German color engineering.
Agfa produces a very warm color with incandescent light. Surprisingly the colors with daylight outside turned out to be cooler than the image taken with the Classic Chrome setting. The results with the Agfa setting are very much as I remember them: my very first camera was an Agfa Iso Rapid Ic, which only used Agfa Color film in specific spool cans.

Kodachrome
"Mama, don't take my Kodachrome away"?
Maybe not. This film simulation created very warm images under incandescent light. Outside it was more to my liking.


Velvia
Velvia! Who does not love Velvia?!
I like how this film simulation produces strong and bold colors in the primary colors and greens while creating quite a natural look for the backgrounds, like the walls and the tiles in the interior images and the wood and street in the exterior image. Don't you like how the red in the flag pops?!


Cross Process
Okay, I had to try it.
Not really my cup of tea, but if you are looking for this kind effect it actually produces a very good cross-process simulation.

What I learned from using presets
To be honest: I did not really use the built-in Advanced Filters.
Although they are fun to use they do not provide me with the photographic style I want to create. Having said this, however, I think they are well developed and probably are very helpful tools for photographers who are aiming at the special effects these filters can achieve.
Using the film simulation presets in the X100F, on the other hand, made me appreciate what can be done in-camera, and re-discovering the merits of color film simulation.
I maintain that you should not just use presets without knowing how they actually change the image. To start with, therefore, I used the built-in film simulation presents the Fujifilm X100F provides. But I did not use them as provided by Fuji. I used the tweaked versions developed by Ritchie Roesch. And even before using these versions, I studied what he did, what the effect on the image is, if this is the effect I want. And eventually I tweaked his tweaks a bit more to get specific results I like.
My experiments with the CineStill800T simulation also drove home again that you always need to think and consider what you are doing. This might be considered a subset of not just using presets without knowing what they do, but I think is worthwhile mentioning separately.
In summary, the main things I learned from using film simulation settings were:
Understanding how these settings impact the RAW file and produce the straight out of camera JPEGs
Understanding how other camera settings (e.g. the use of exposure compensation) impact these film simulation settings and the final JPEGs
Understanding how to tweak or built my own film simulation settings
Film Simulations - Lightbulb Moment!
I am not a big fan of pre-set film simulations or any other presets for that matter. But looking at the SOOC jpegs from the Fujifilm X100F made me suddenly realize that any rendering of a digital image is, in fact, a simulation of a film image.
To look at a digital image - whether on a screen or printed (digital images also definitely need to be printed!) - the digital information needs to be converted from its digital existence into something the human eye can actually see. For us to see the images made by digital cameras, electronic information needs to be converted into pixels (pixels per inch, or ppi) and/or dots (dots per inch, or dpi).
To be able do this, the software that reads and translates the electronic image will have to be “told” how to make that translation. All photo software has this information already built-in. So basically we already start looking at the image using the specific software’s preset. Irrespective of whether we make any other changes to the image by using additional presets, or by making specific changes using the software: we always start looking at an image using a preset.
Each software has its own proprietary set of development presets. That is why some photographers only want to use Adobe software, while others only want to use non-Adobe software like ON1, Capture One, or Silkypix. Each of these programs renders the initial image just a bit different, based on the parameters programmed into the software.
Now consider for a moment the reference framework that the software programmers use when developing these parameters? How did they know how a photo should look like? What else could there be than existing film emulsions and analog printed photographs?
This struck me like a lightning bolt.
Are not then all digital images that are prepared for screen or printing... simulations of film?
The question then is justified why using additional presets or changes would be ‘wrong’…
The main message, therefore, continuous to be: using presets is great, but don’t just blindly use them; know what you are doing
How am I going to use presets going forward
I don't think I will use any of the built-in Advanced Filters as part of my regular workflow.
I definitely will continue to use some of the Film Simulations; Especially the Acros, CineStill800T, ClassicChrome, and Kodachrome simulations as mentioned above.
The quality and size of the JPEGs are great: they have the same 6000 x 4000 size as the compressed RAW files. I, therefore, will continue to use the SOOC JPEGs, for publication on this website, and even printing.
During my experimentation with the film simulations, I have learned that pre-envisioning how the final image should look is even more important than I thought. The question "what do I want to achieve with this image" needs to be answered prior to selecting a specific film simulation (or post-processing actions).
I fell in love with the Acros simulation, and going forward it will probably be my standard-go-to-setting.
Conclusions and recommendations
Film simulations and in-camera presets are great tools for achieving the look and feel you want to create with your images.
But even more important, they are great starting points to learn from: prior to just use in-camera presets or film simulation presets developed by others, I recommend to study the effects of these presets and learn and understand what these actually do to the original RAW file. This will not only help you to better achieve your creative goals, but it also will help you to tweak existing presets or develop your own.
This basically is similar to what I recommend regarding Lightroom (or other image tools) presets.
Once you get a good understanding of how presets work and what they do to your images, they are great tools to use and also will add a lot of fun to your photography.

Taking The Fujifilm X100F To New York
New York City and the X100F With Film Simulation Settings
Earlier this week I needed to go to New York City to submit my paperwork for my South African visa…
New York City and the X100F With Film Simulation Settings
Earlier this week I needed to go to New York City to submit my paperwork for my South African visa. Although I took the first flight out of Greenville-Spartanburg airport I was not sure if I would make it to the South African Consulate on time (they are only open for applications until noon), so I arranged for a two-day stay.
As it turned out, I managed to conduct my business the first day, which left me with plenty of time to explore the city and put my Fujifilm X100F to work. This was a great opportunity to use some of the film simulation presets I discussed in my previous article: Acros Push Processed, CineStill800T, Velvia, and Agfacolor.
In a follow-up post, I will share what I learned with experimenting with the in-camera film simulation settings for the X100F.
Below are some of the images created, all Straight Out Of Camera. Can you tell which film simulation is which?
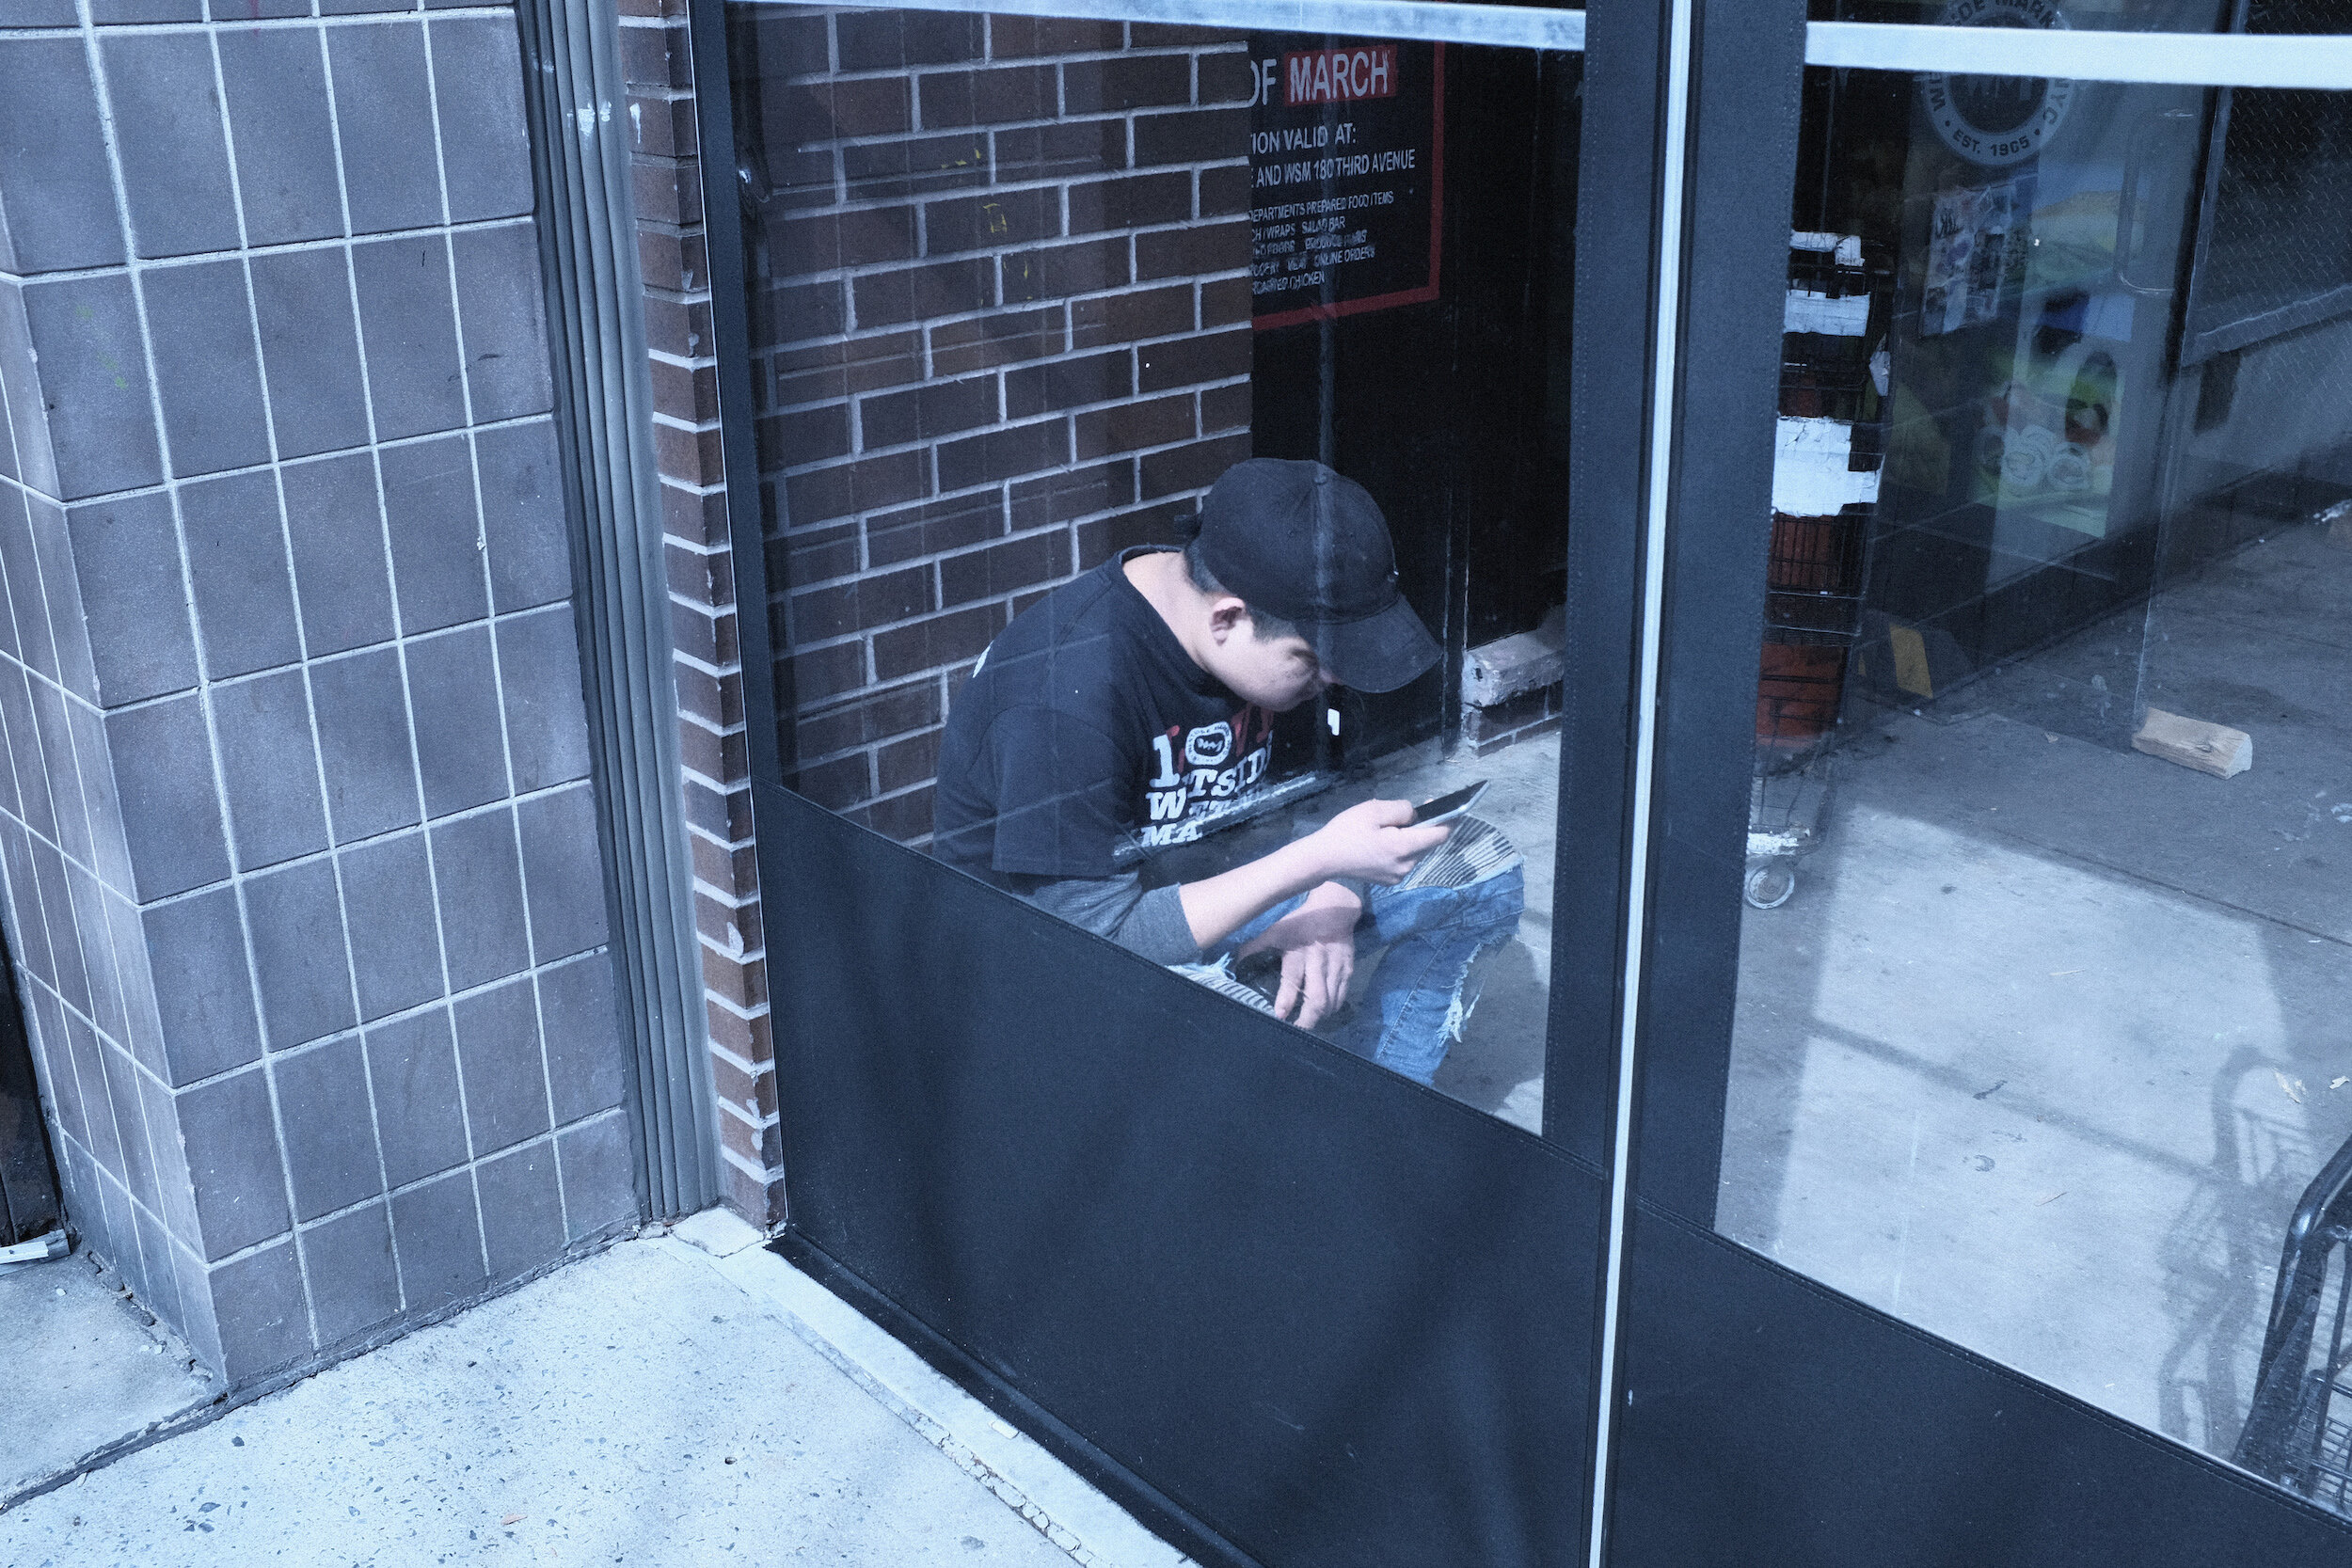


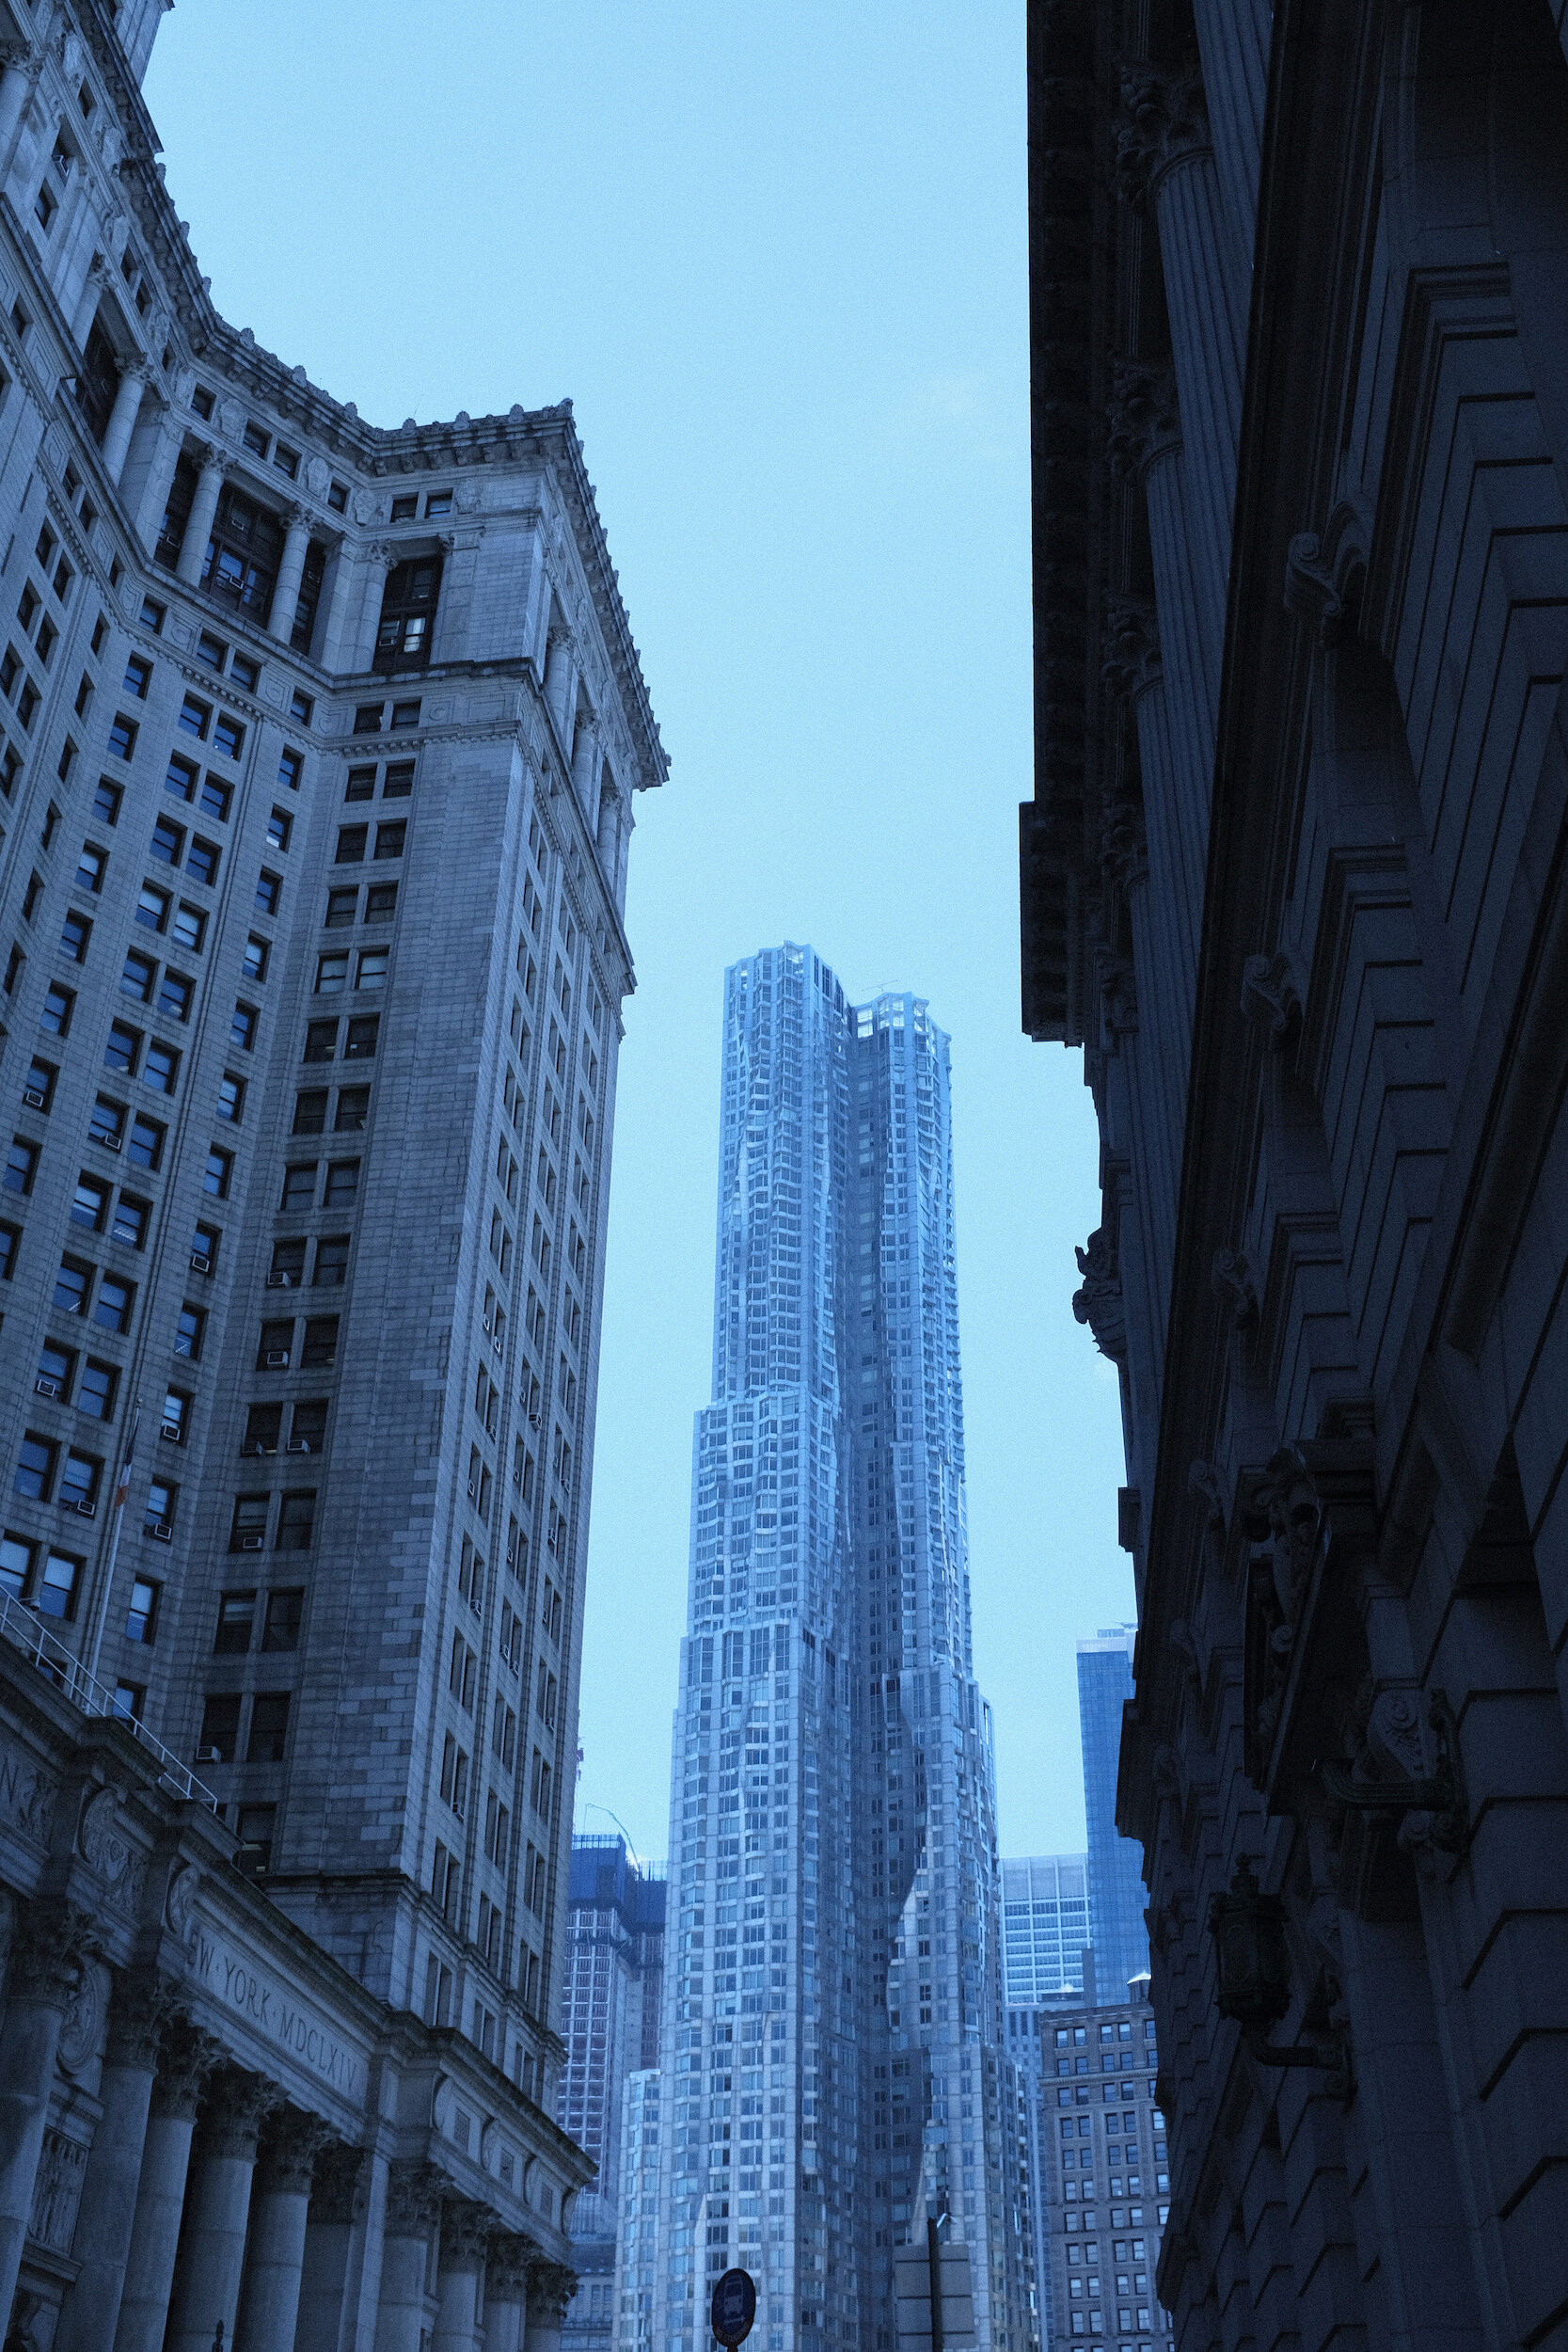
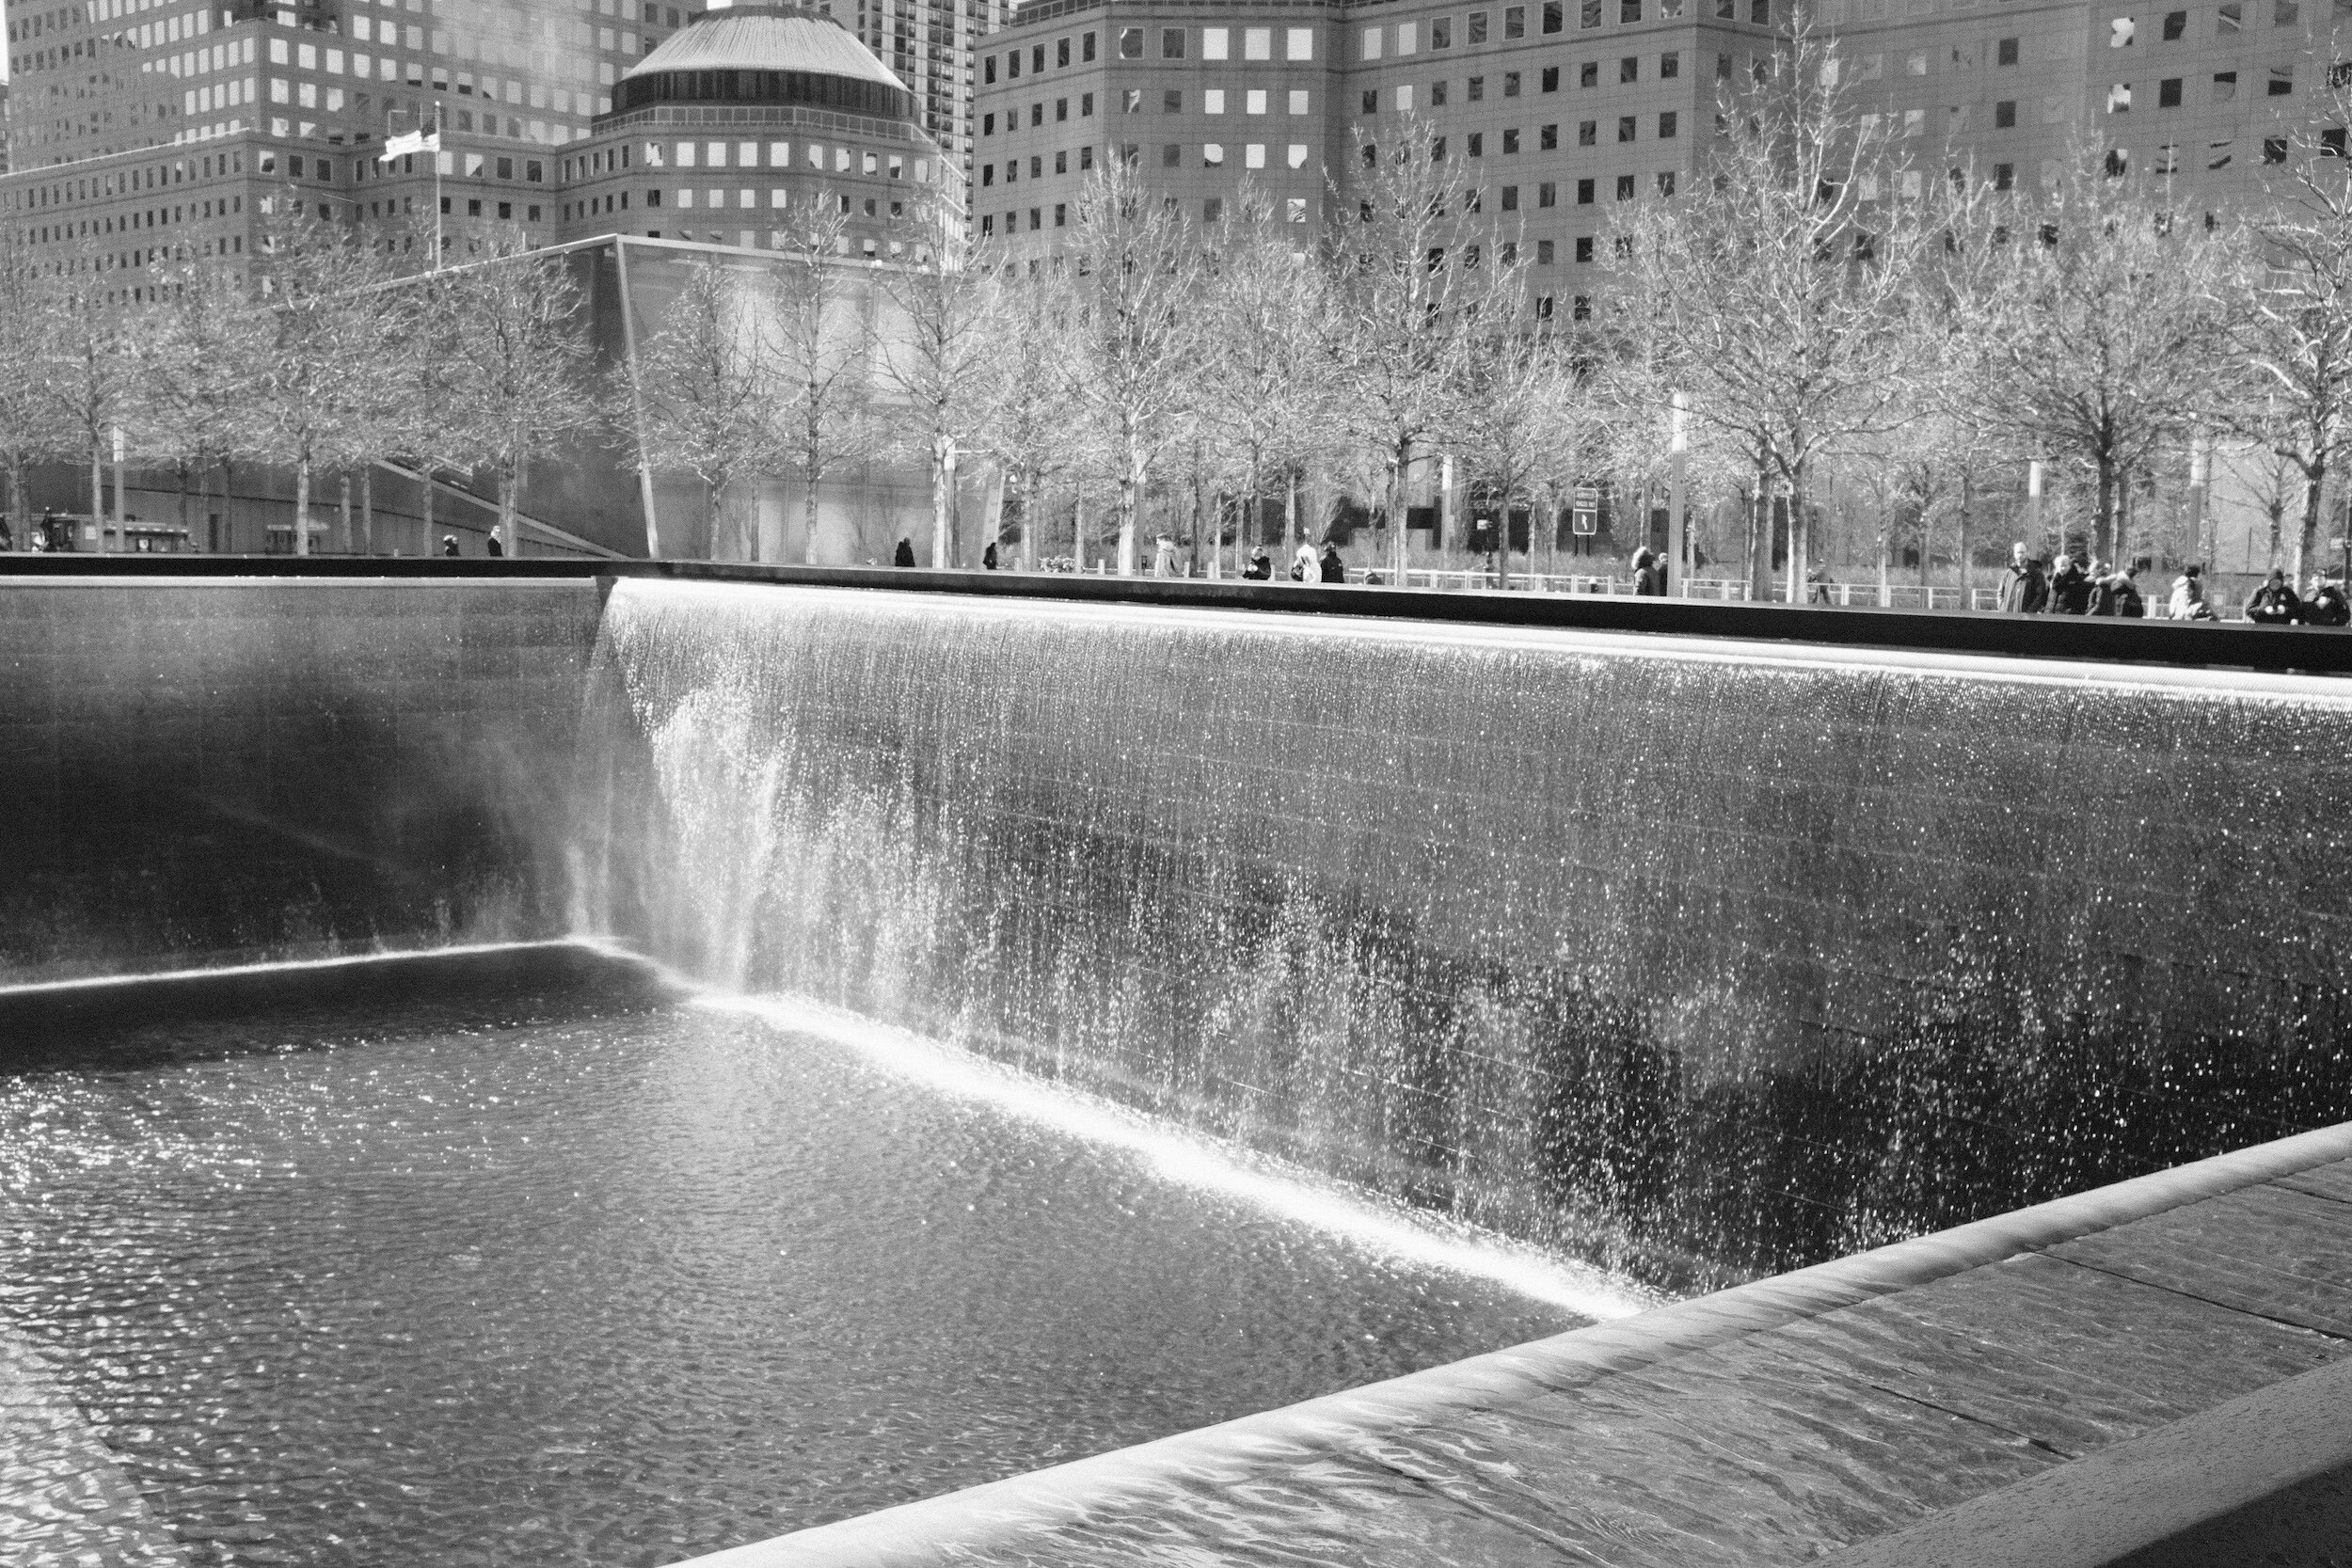
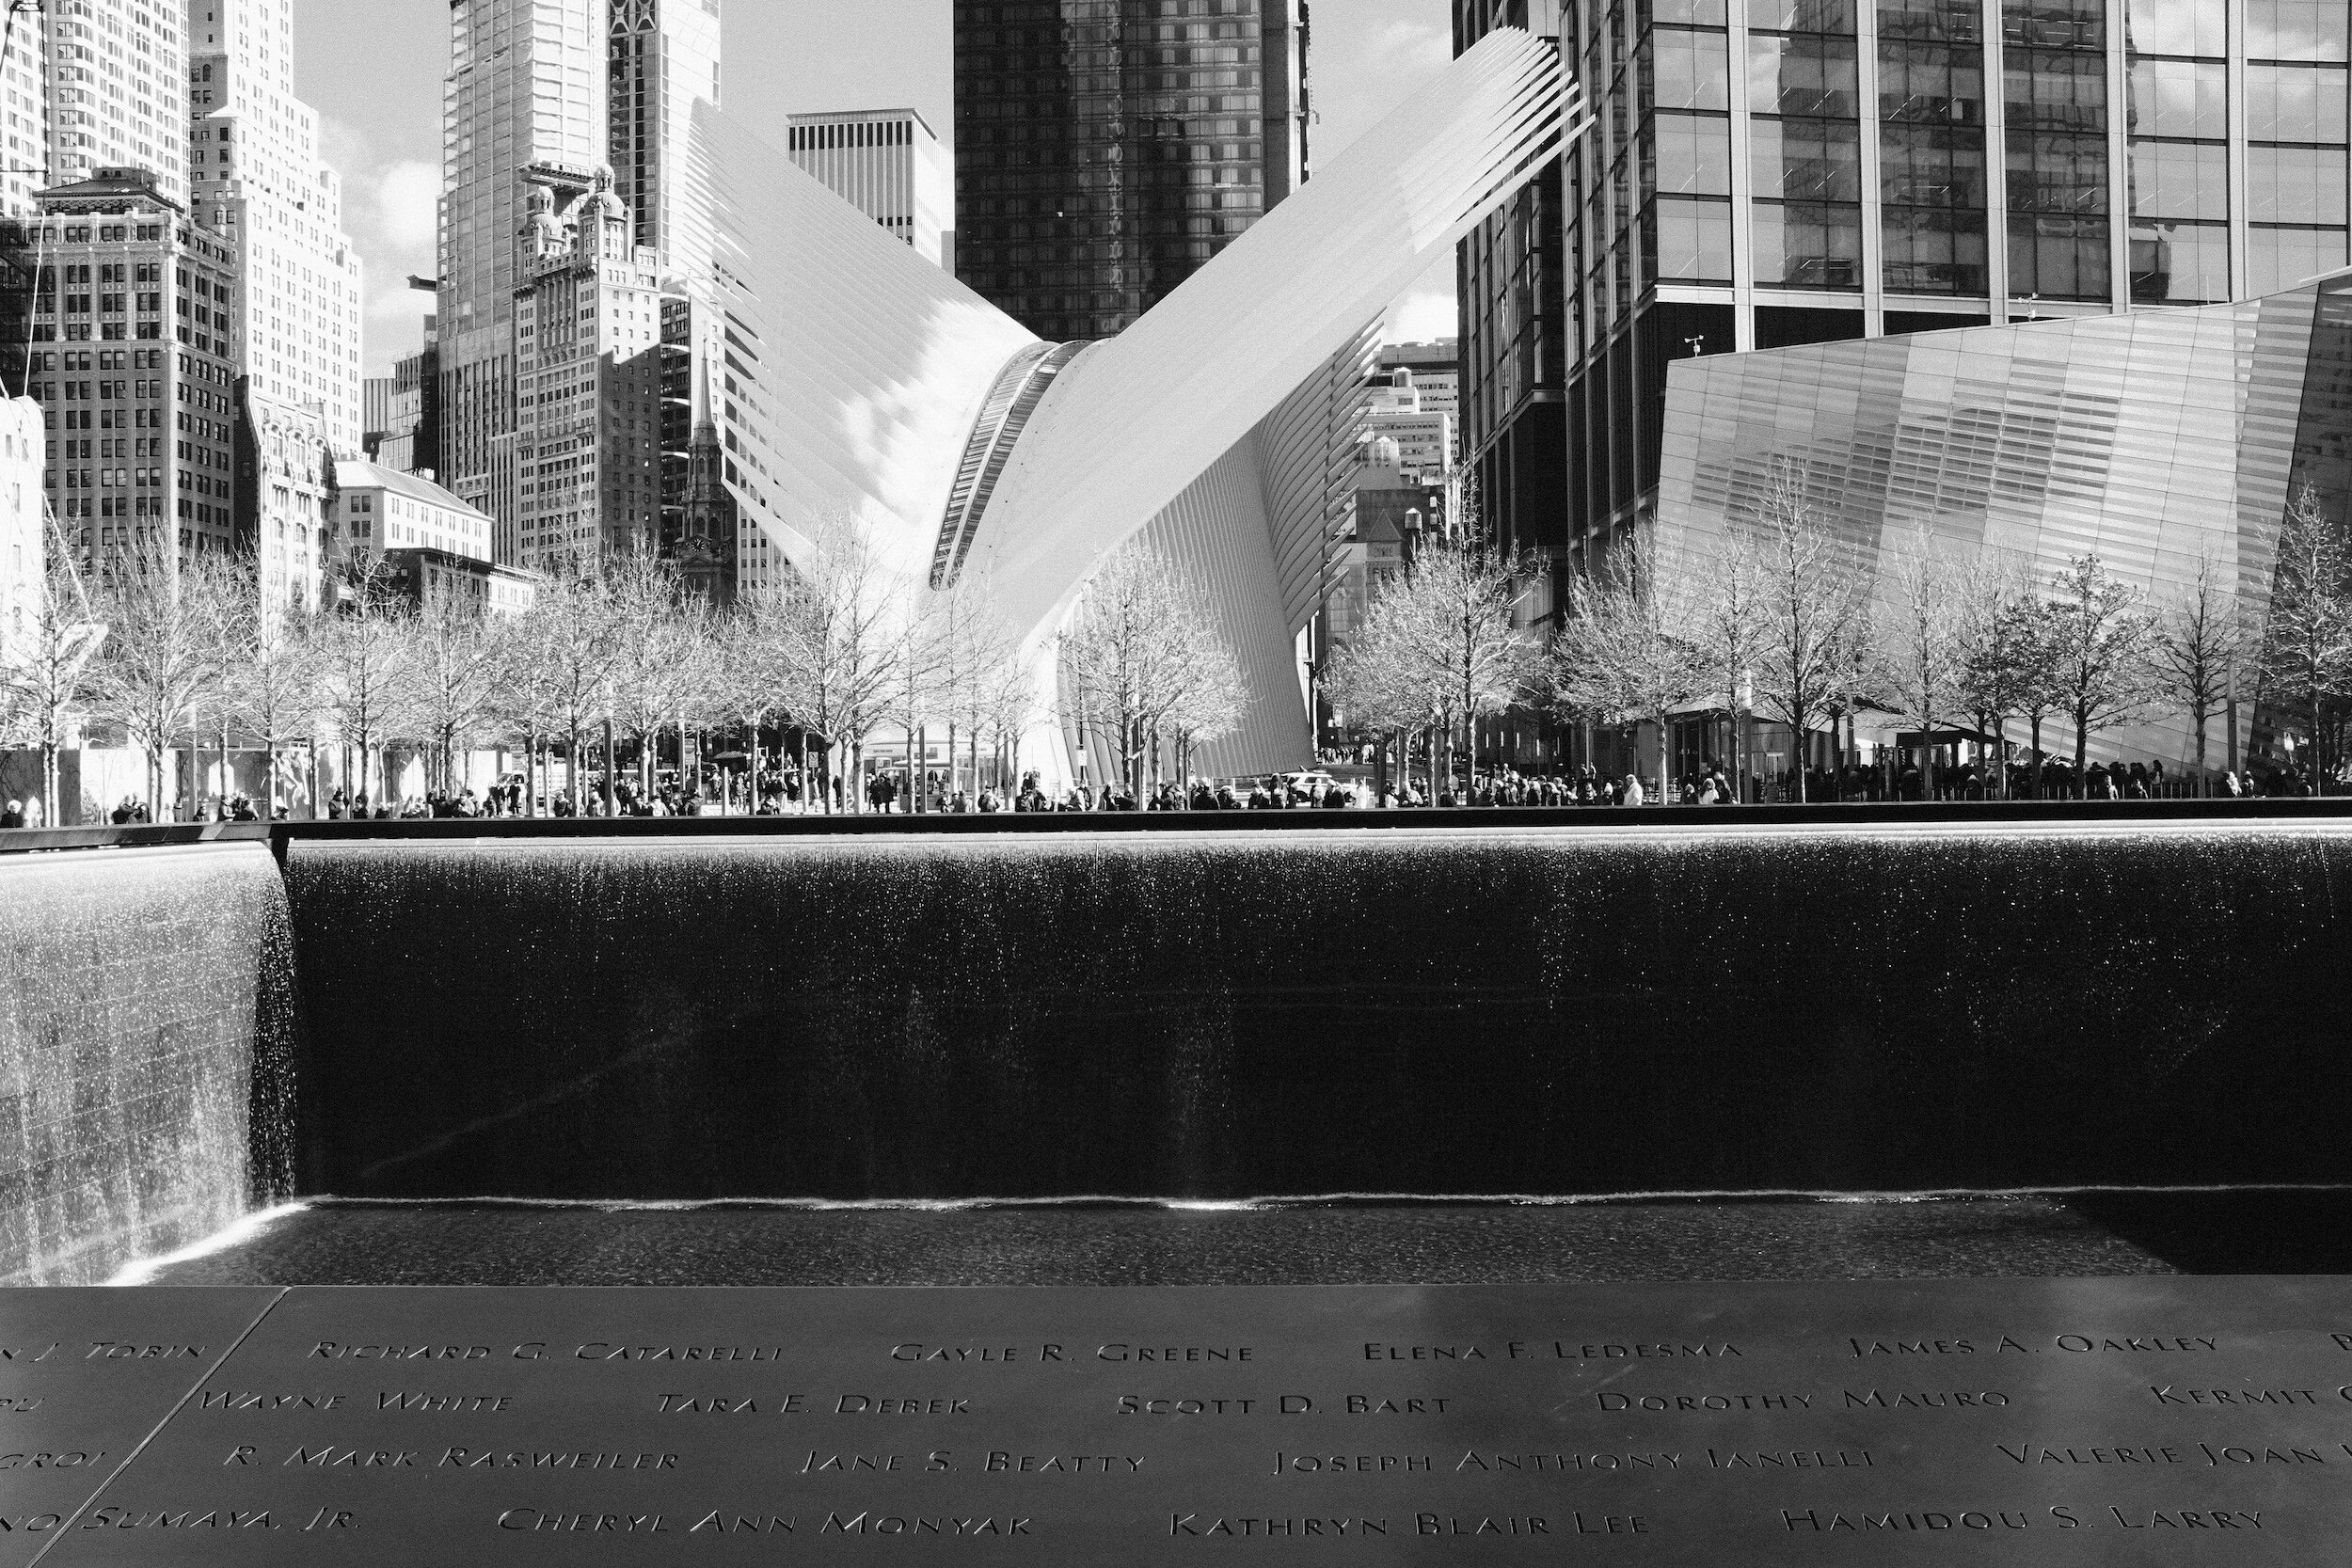
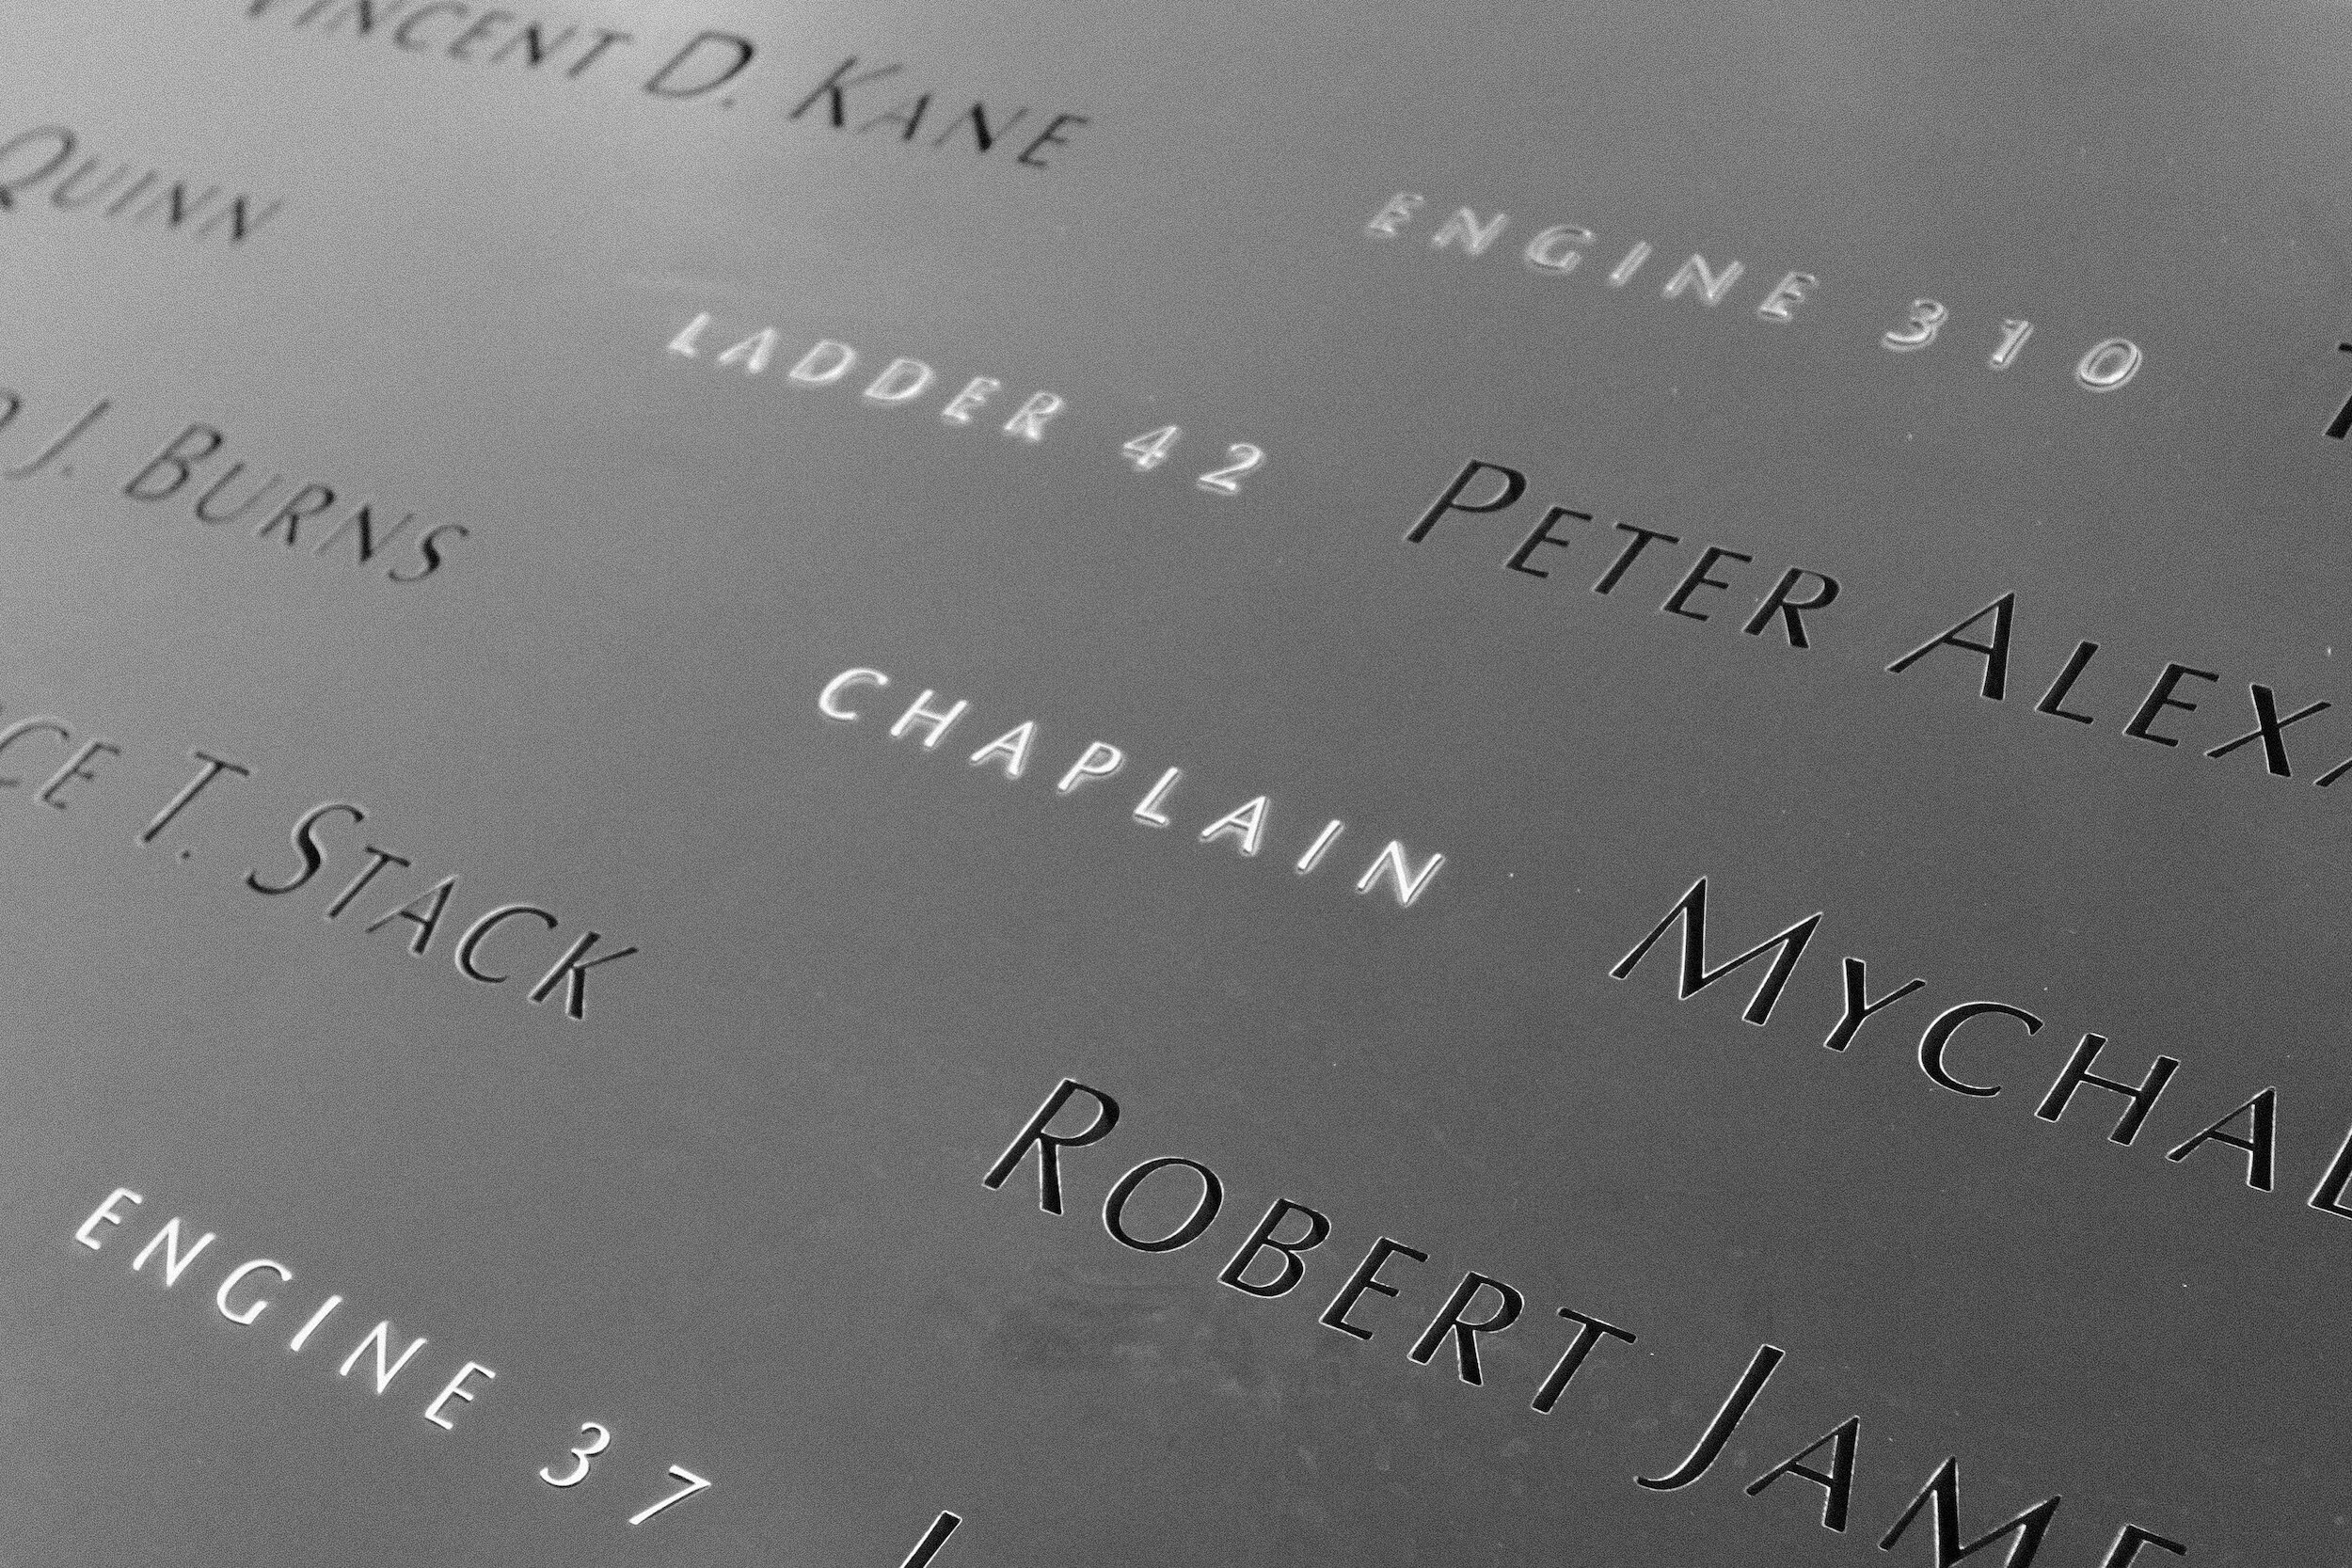
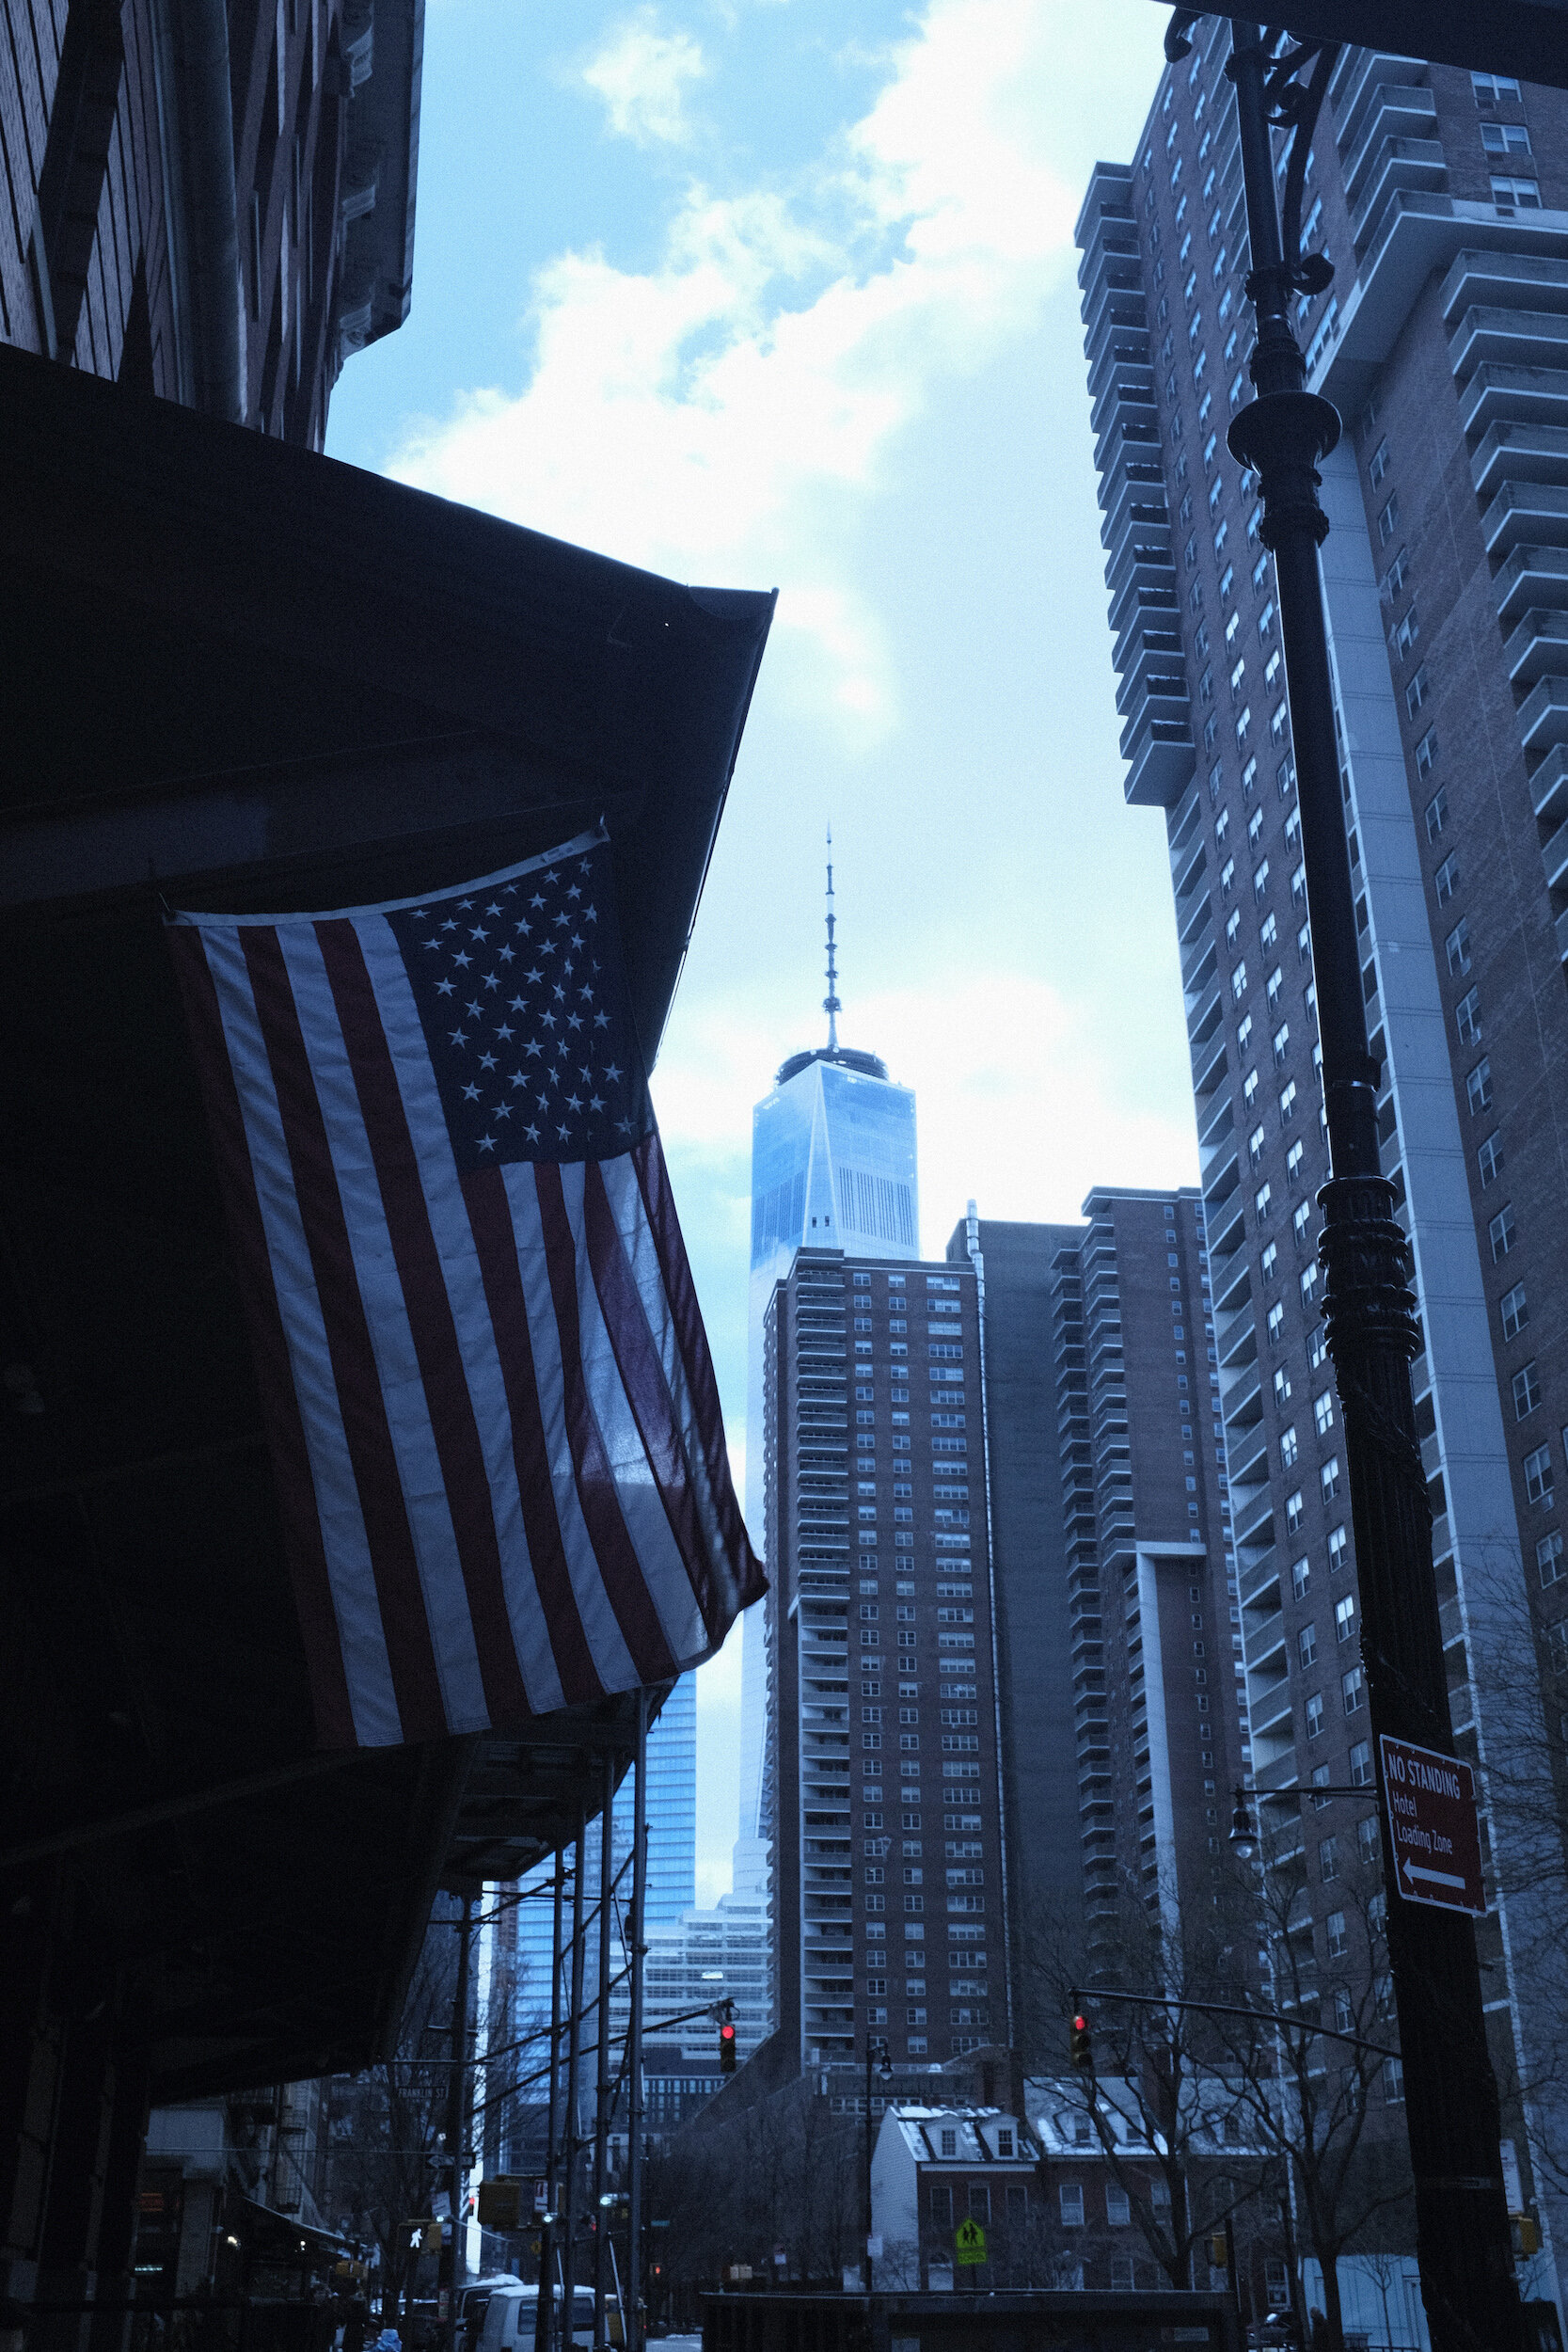

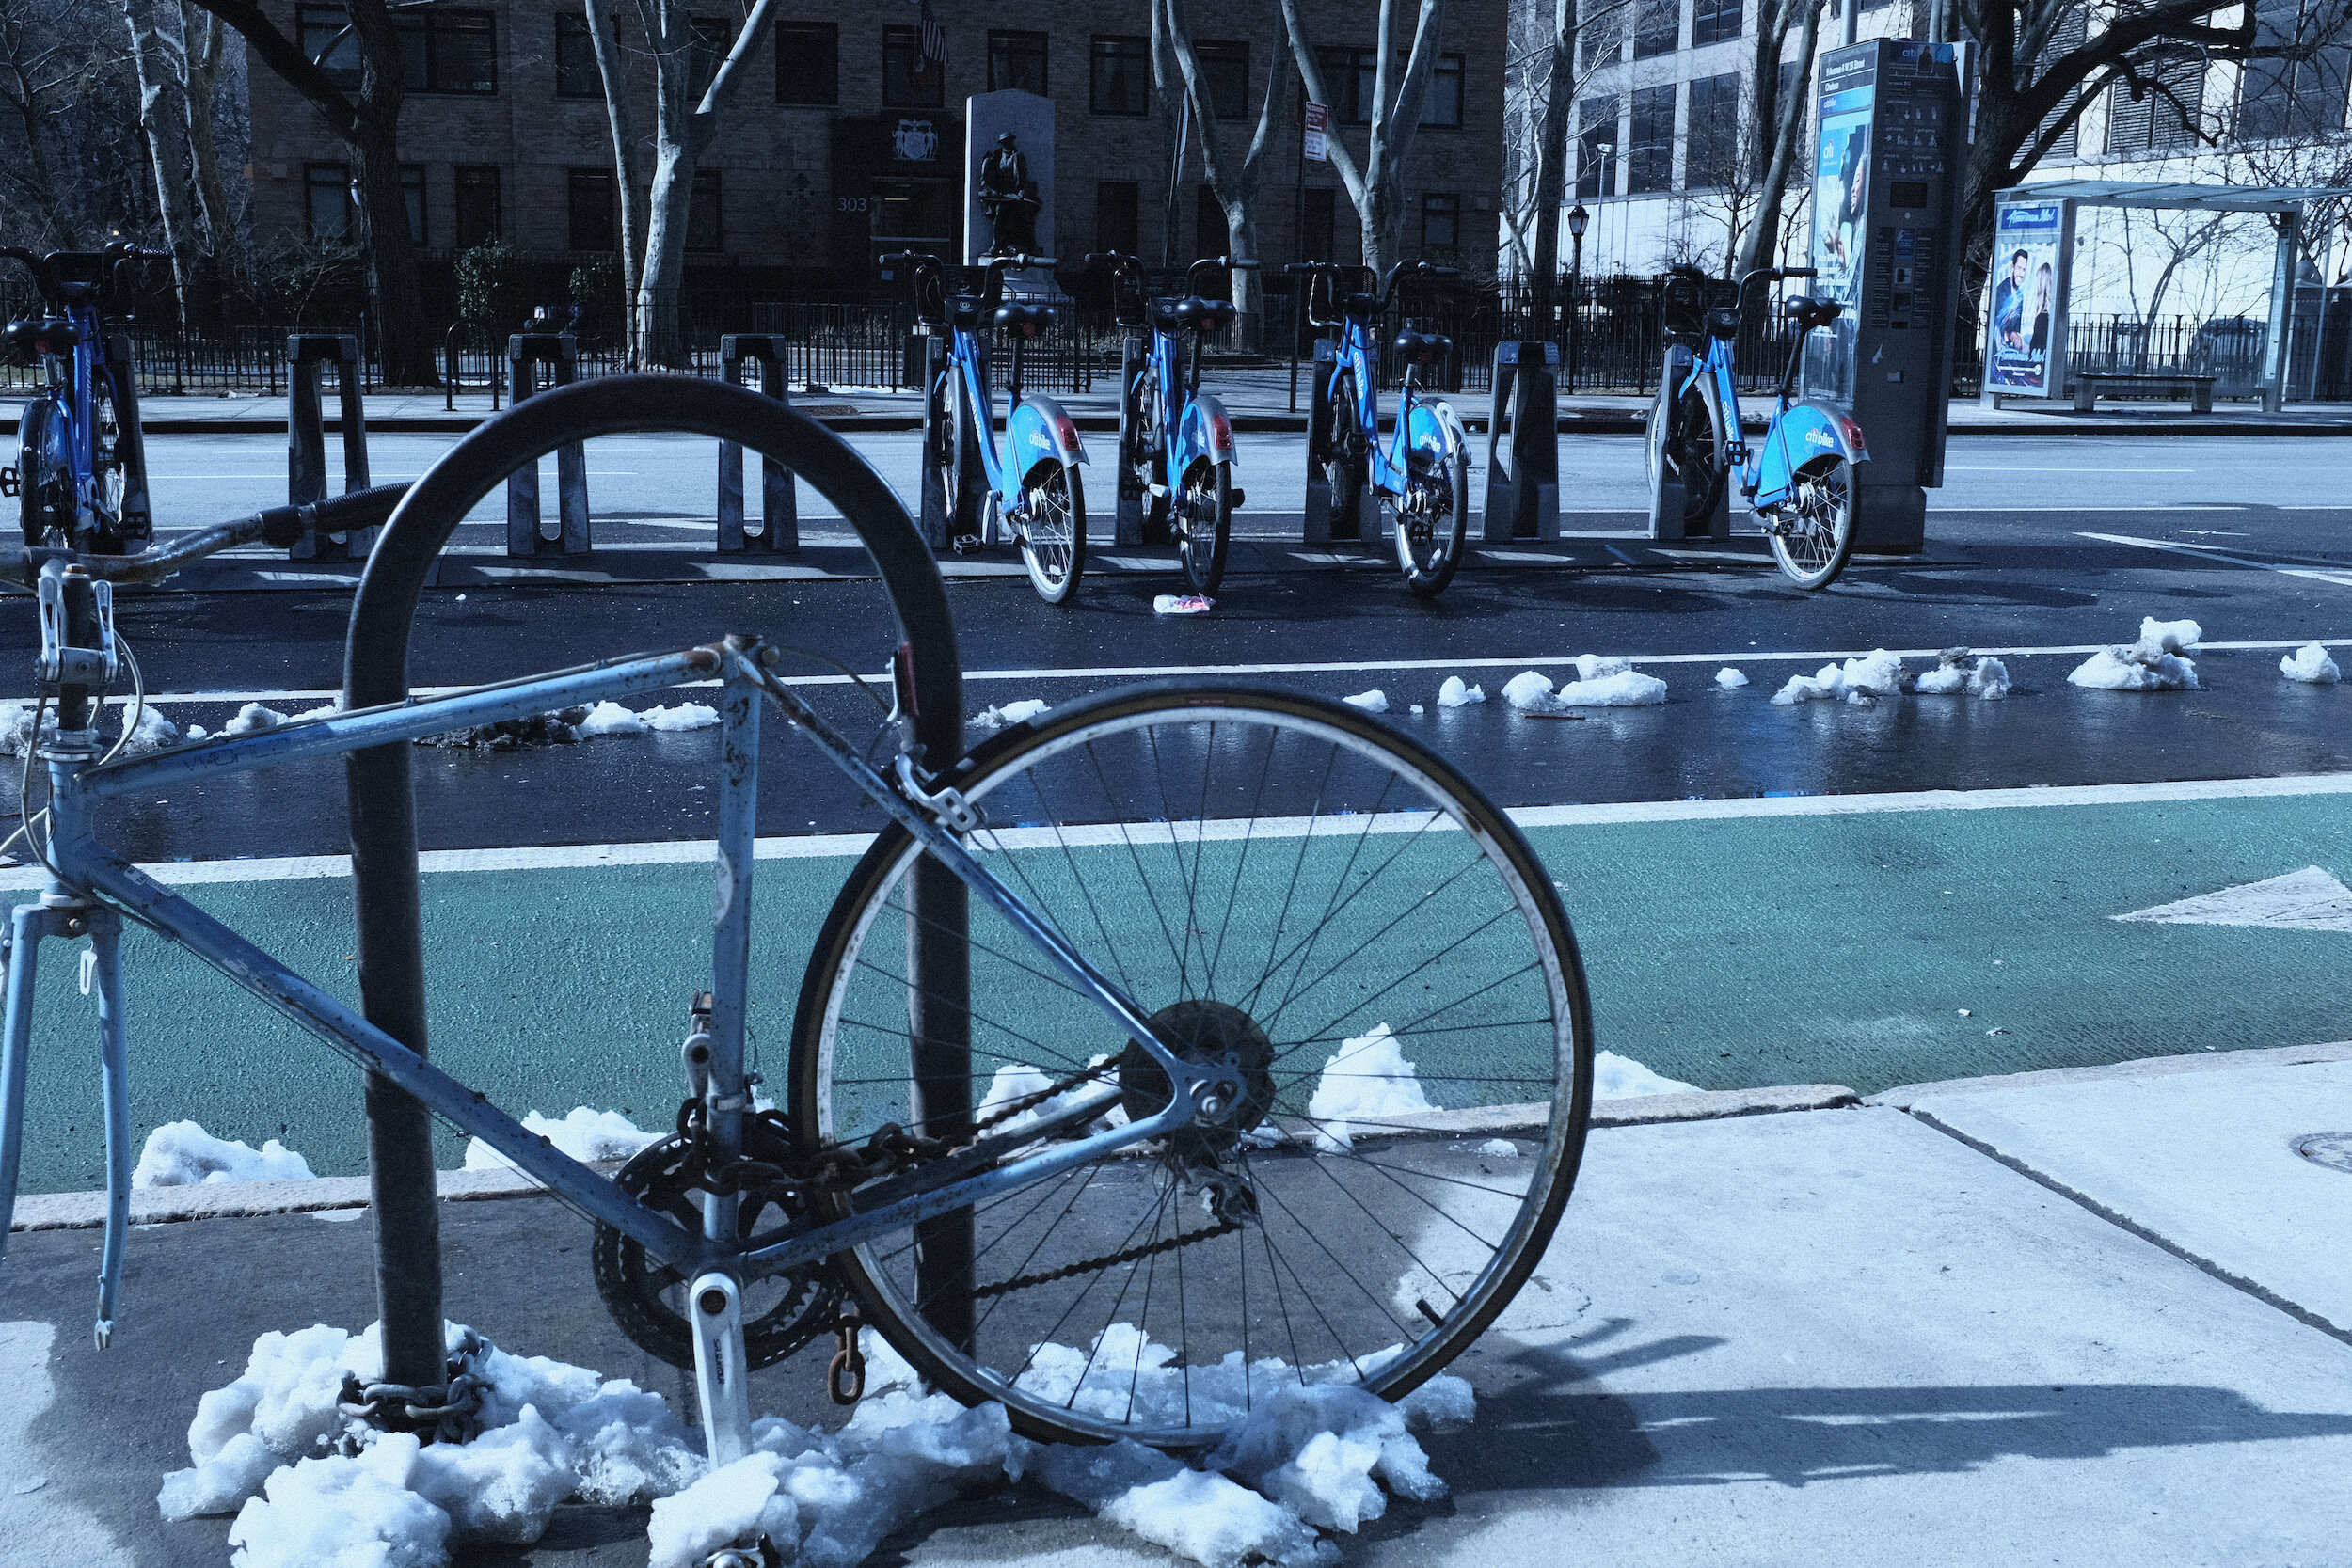

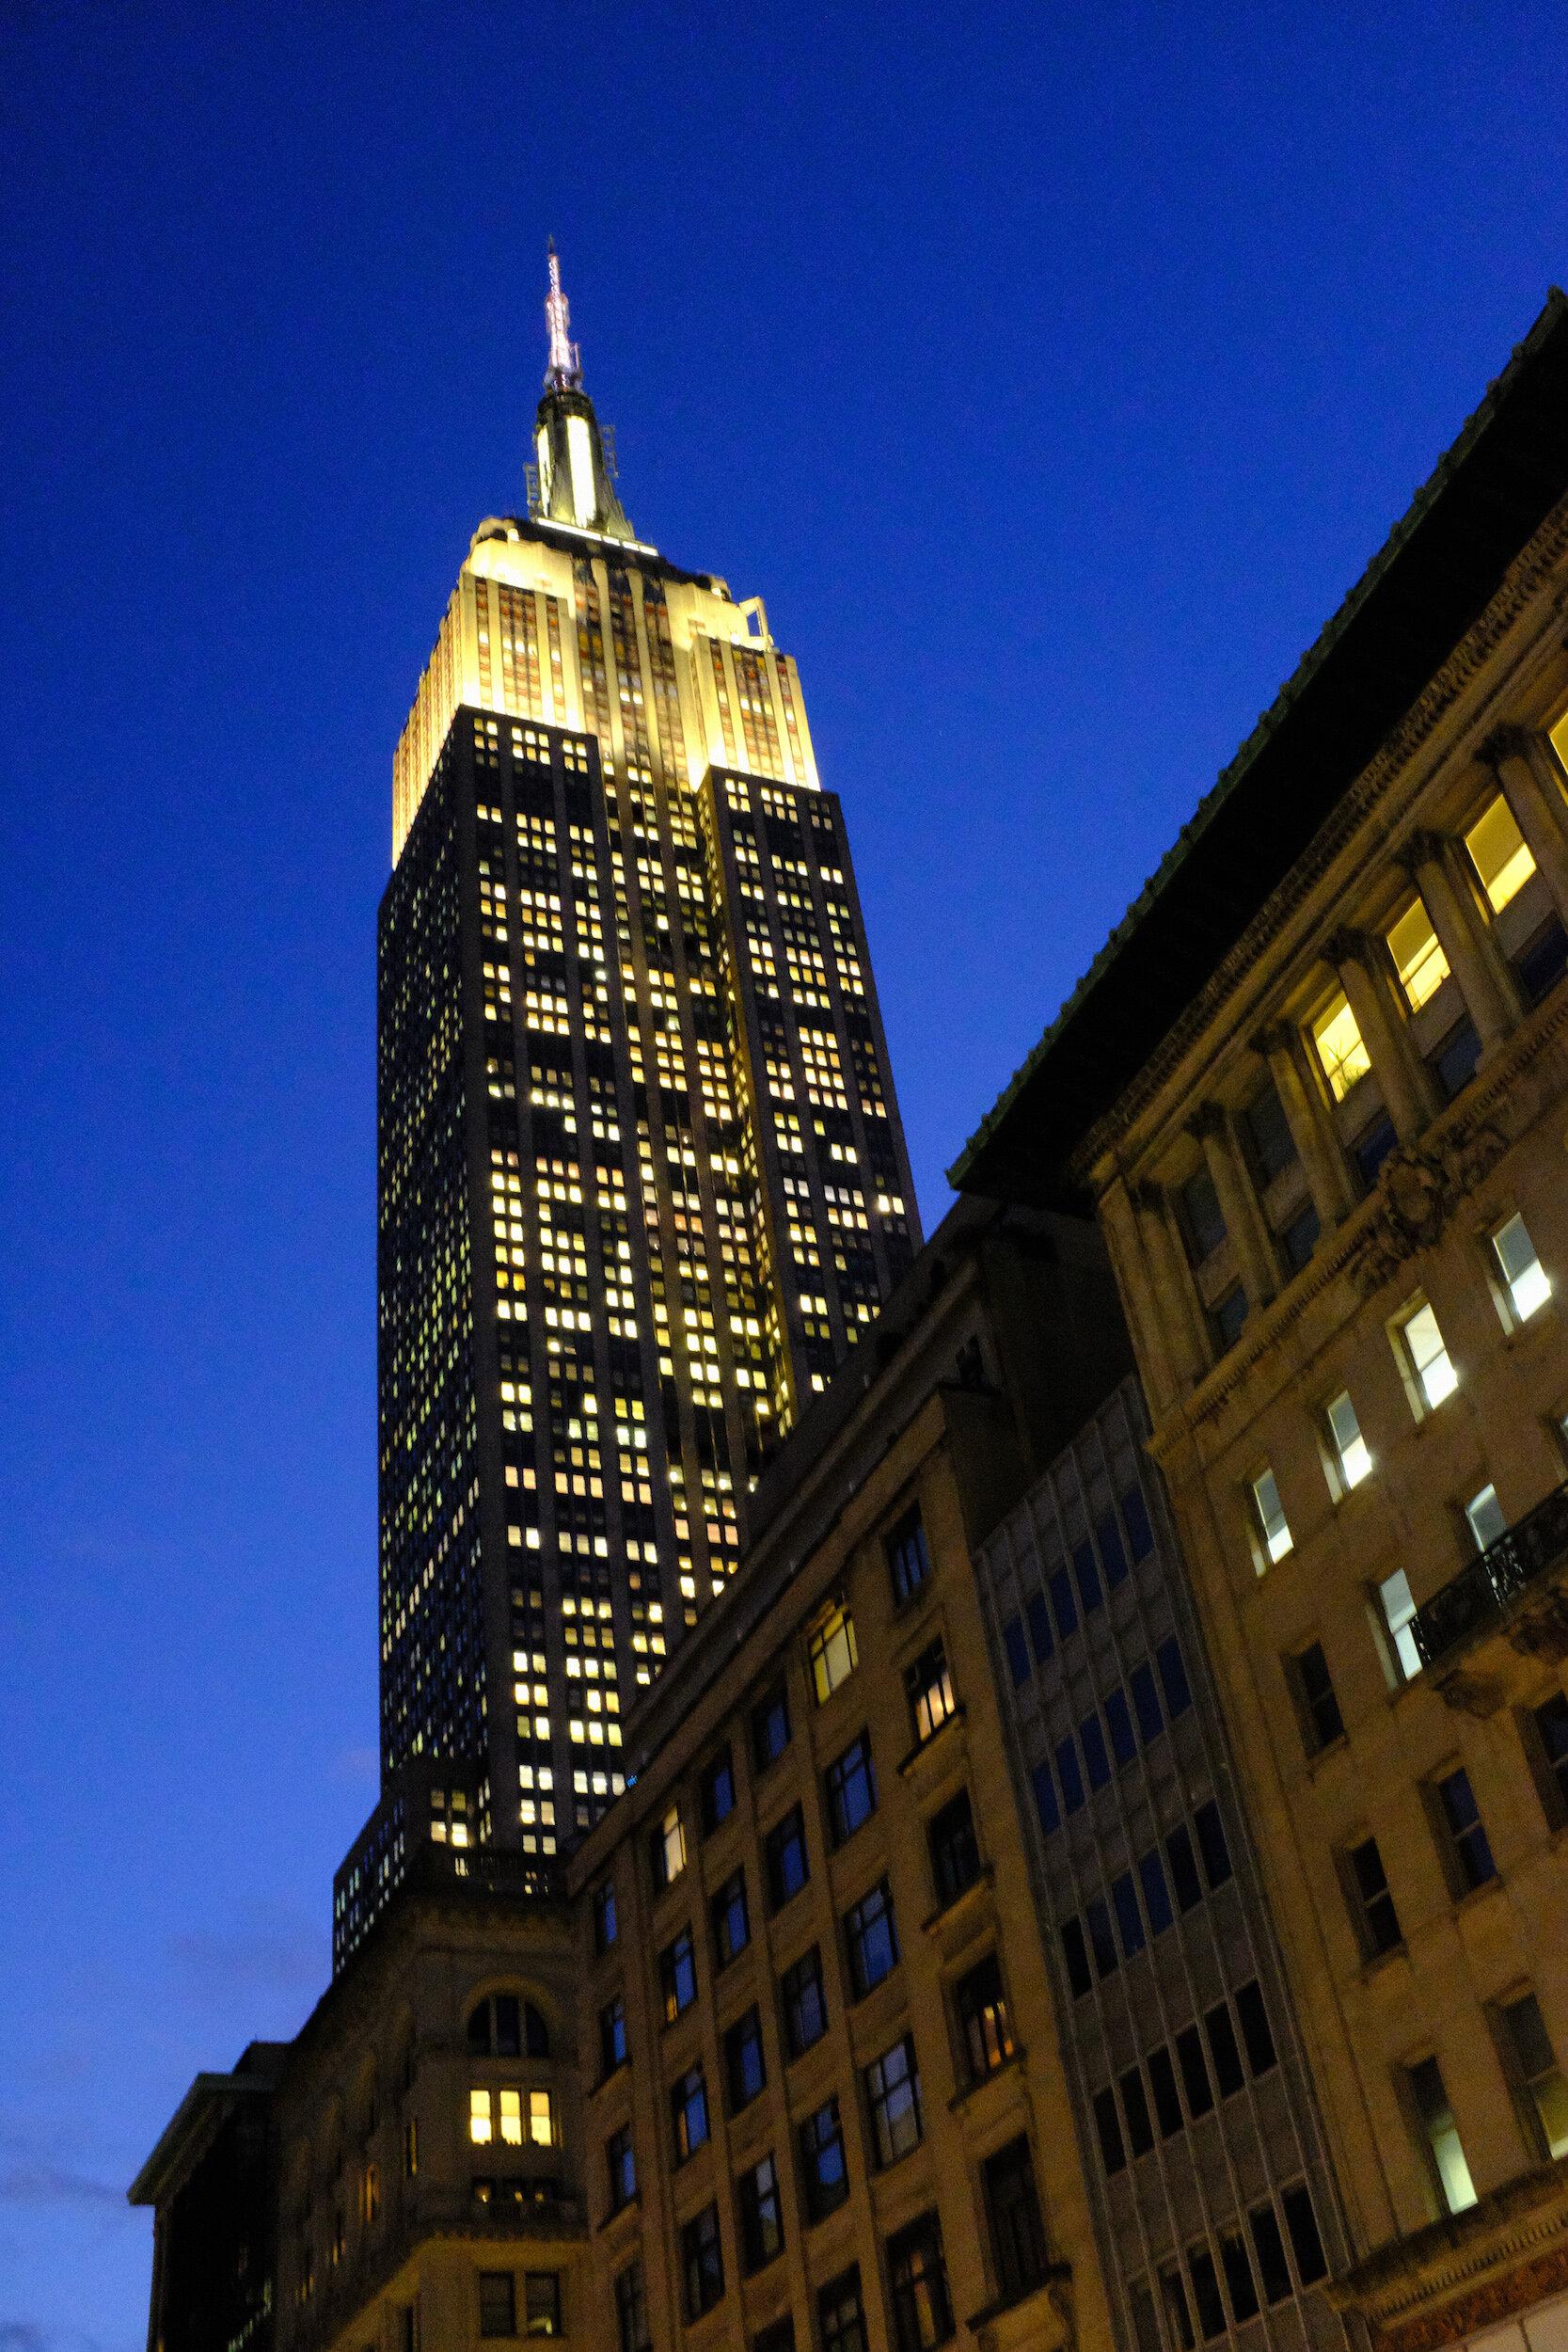
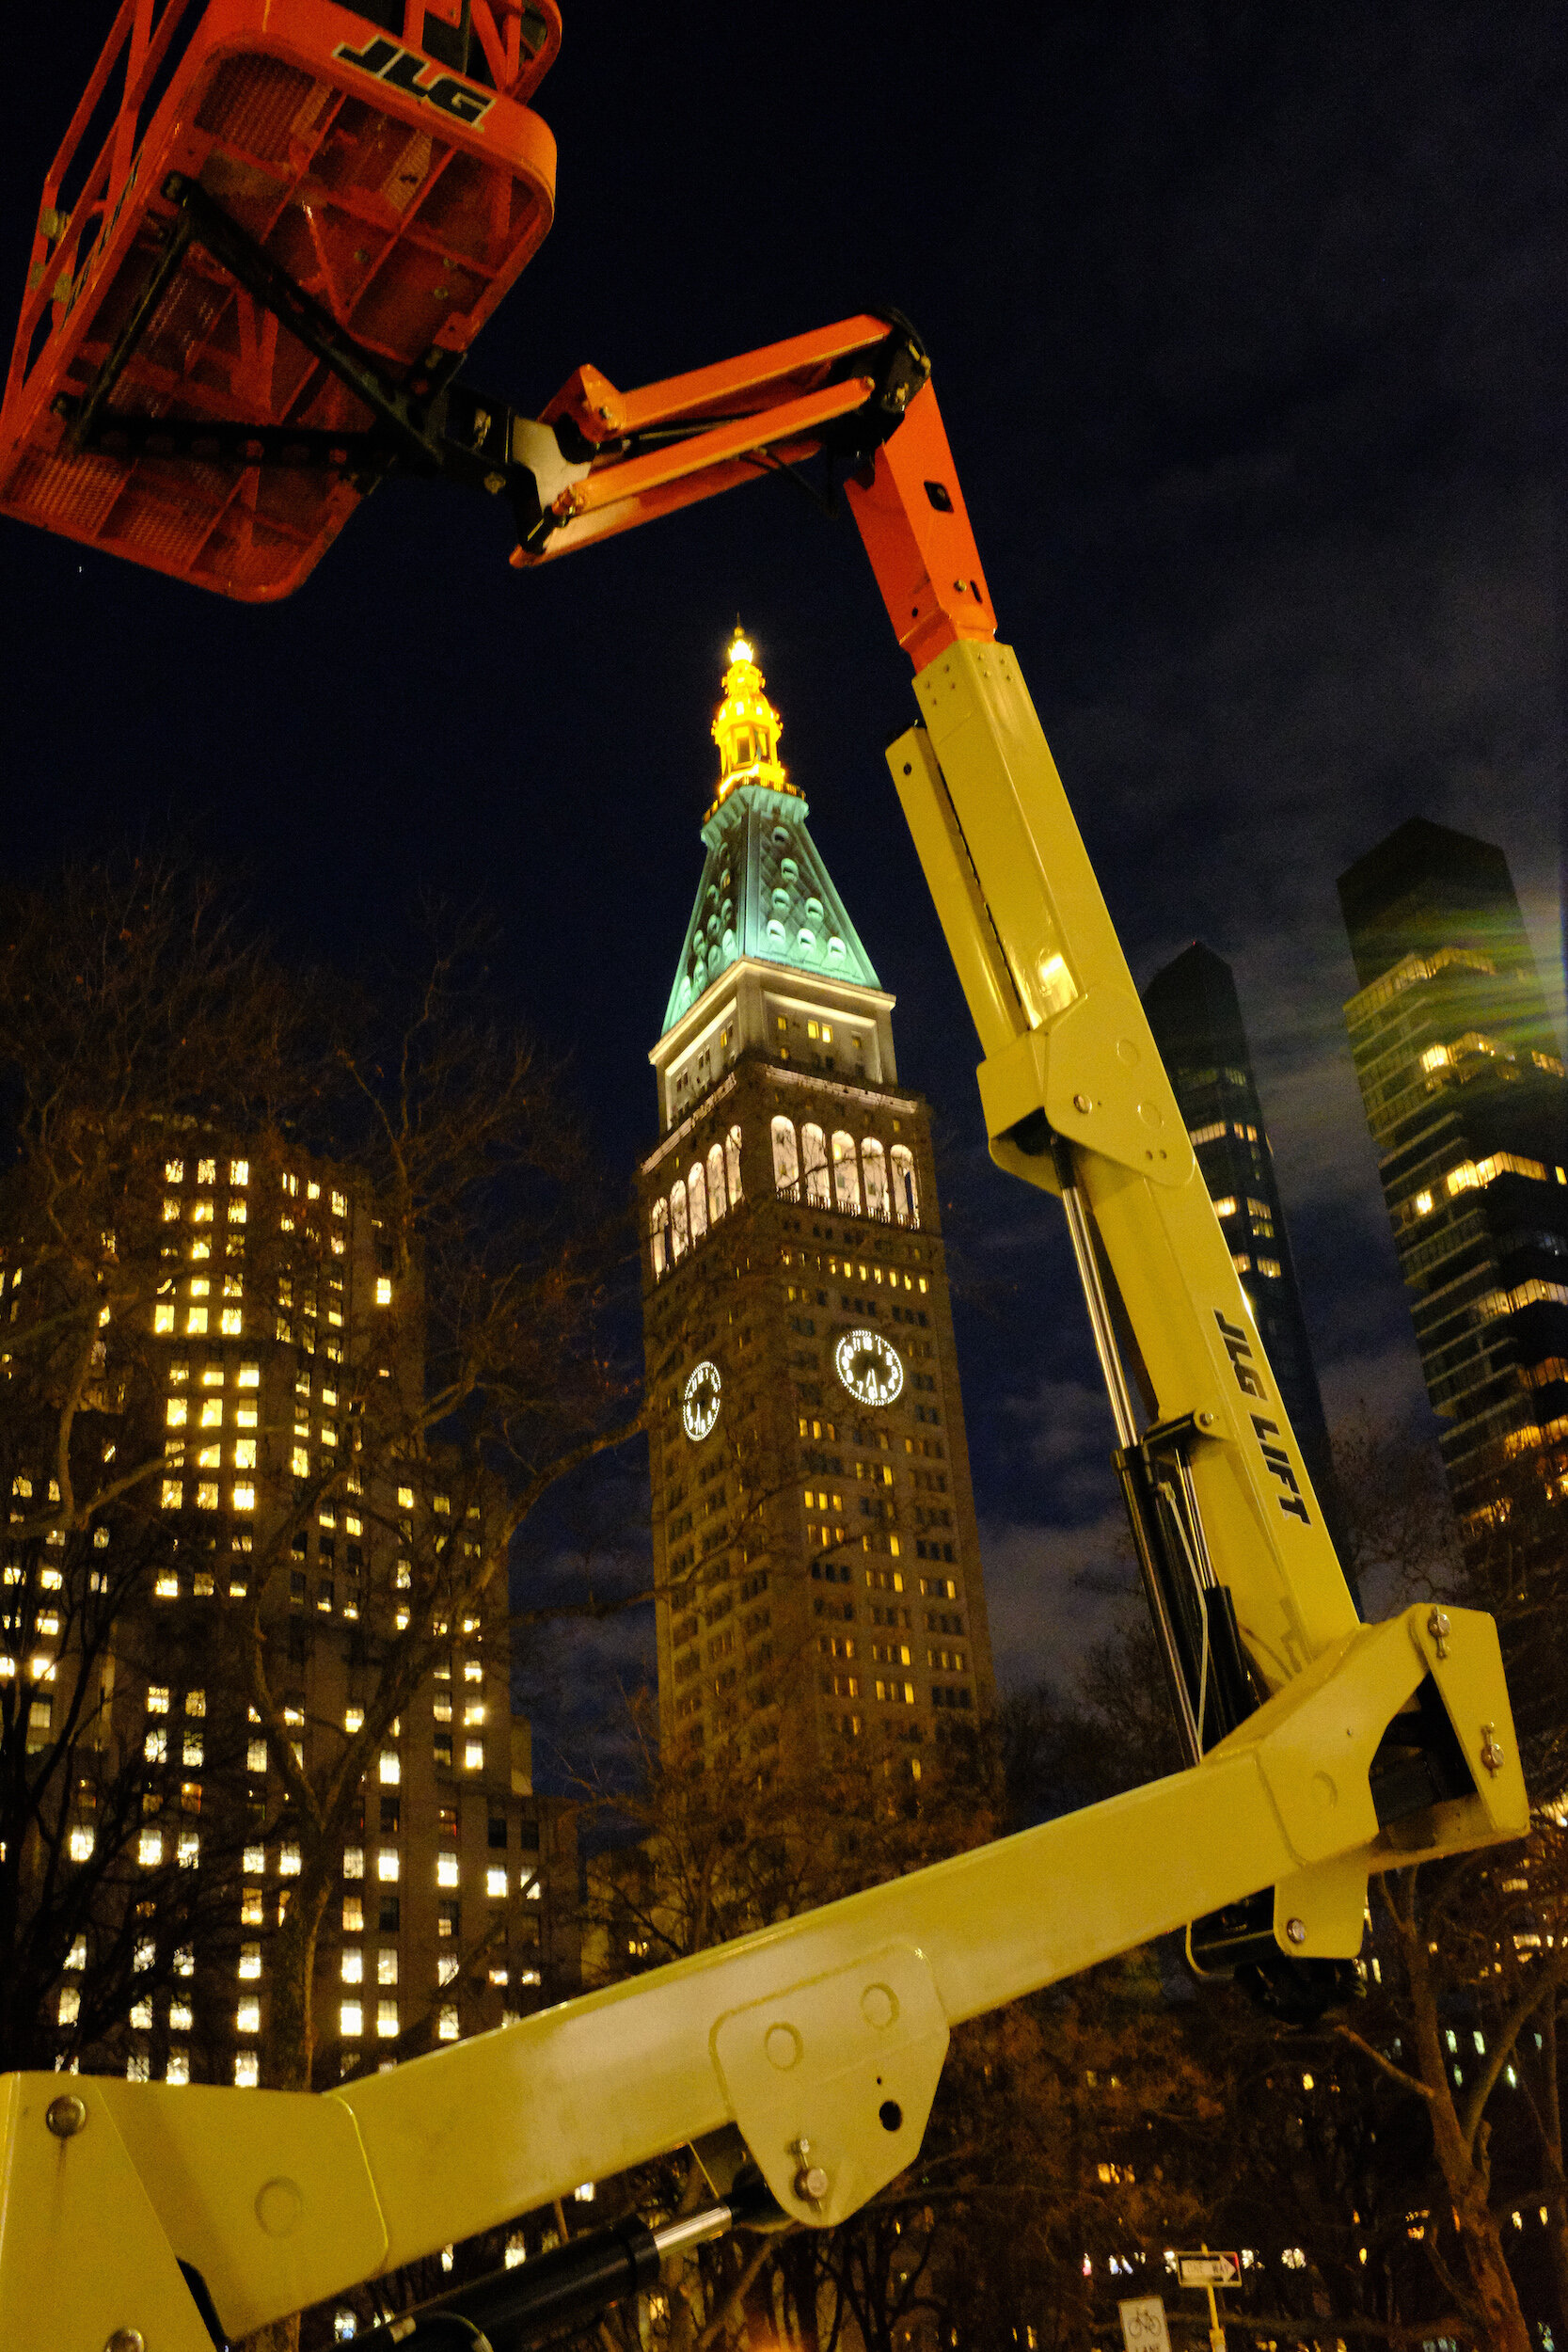
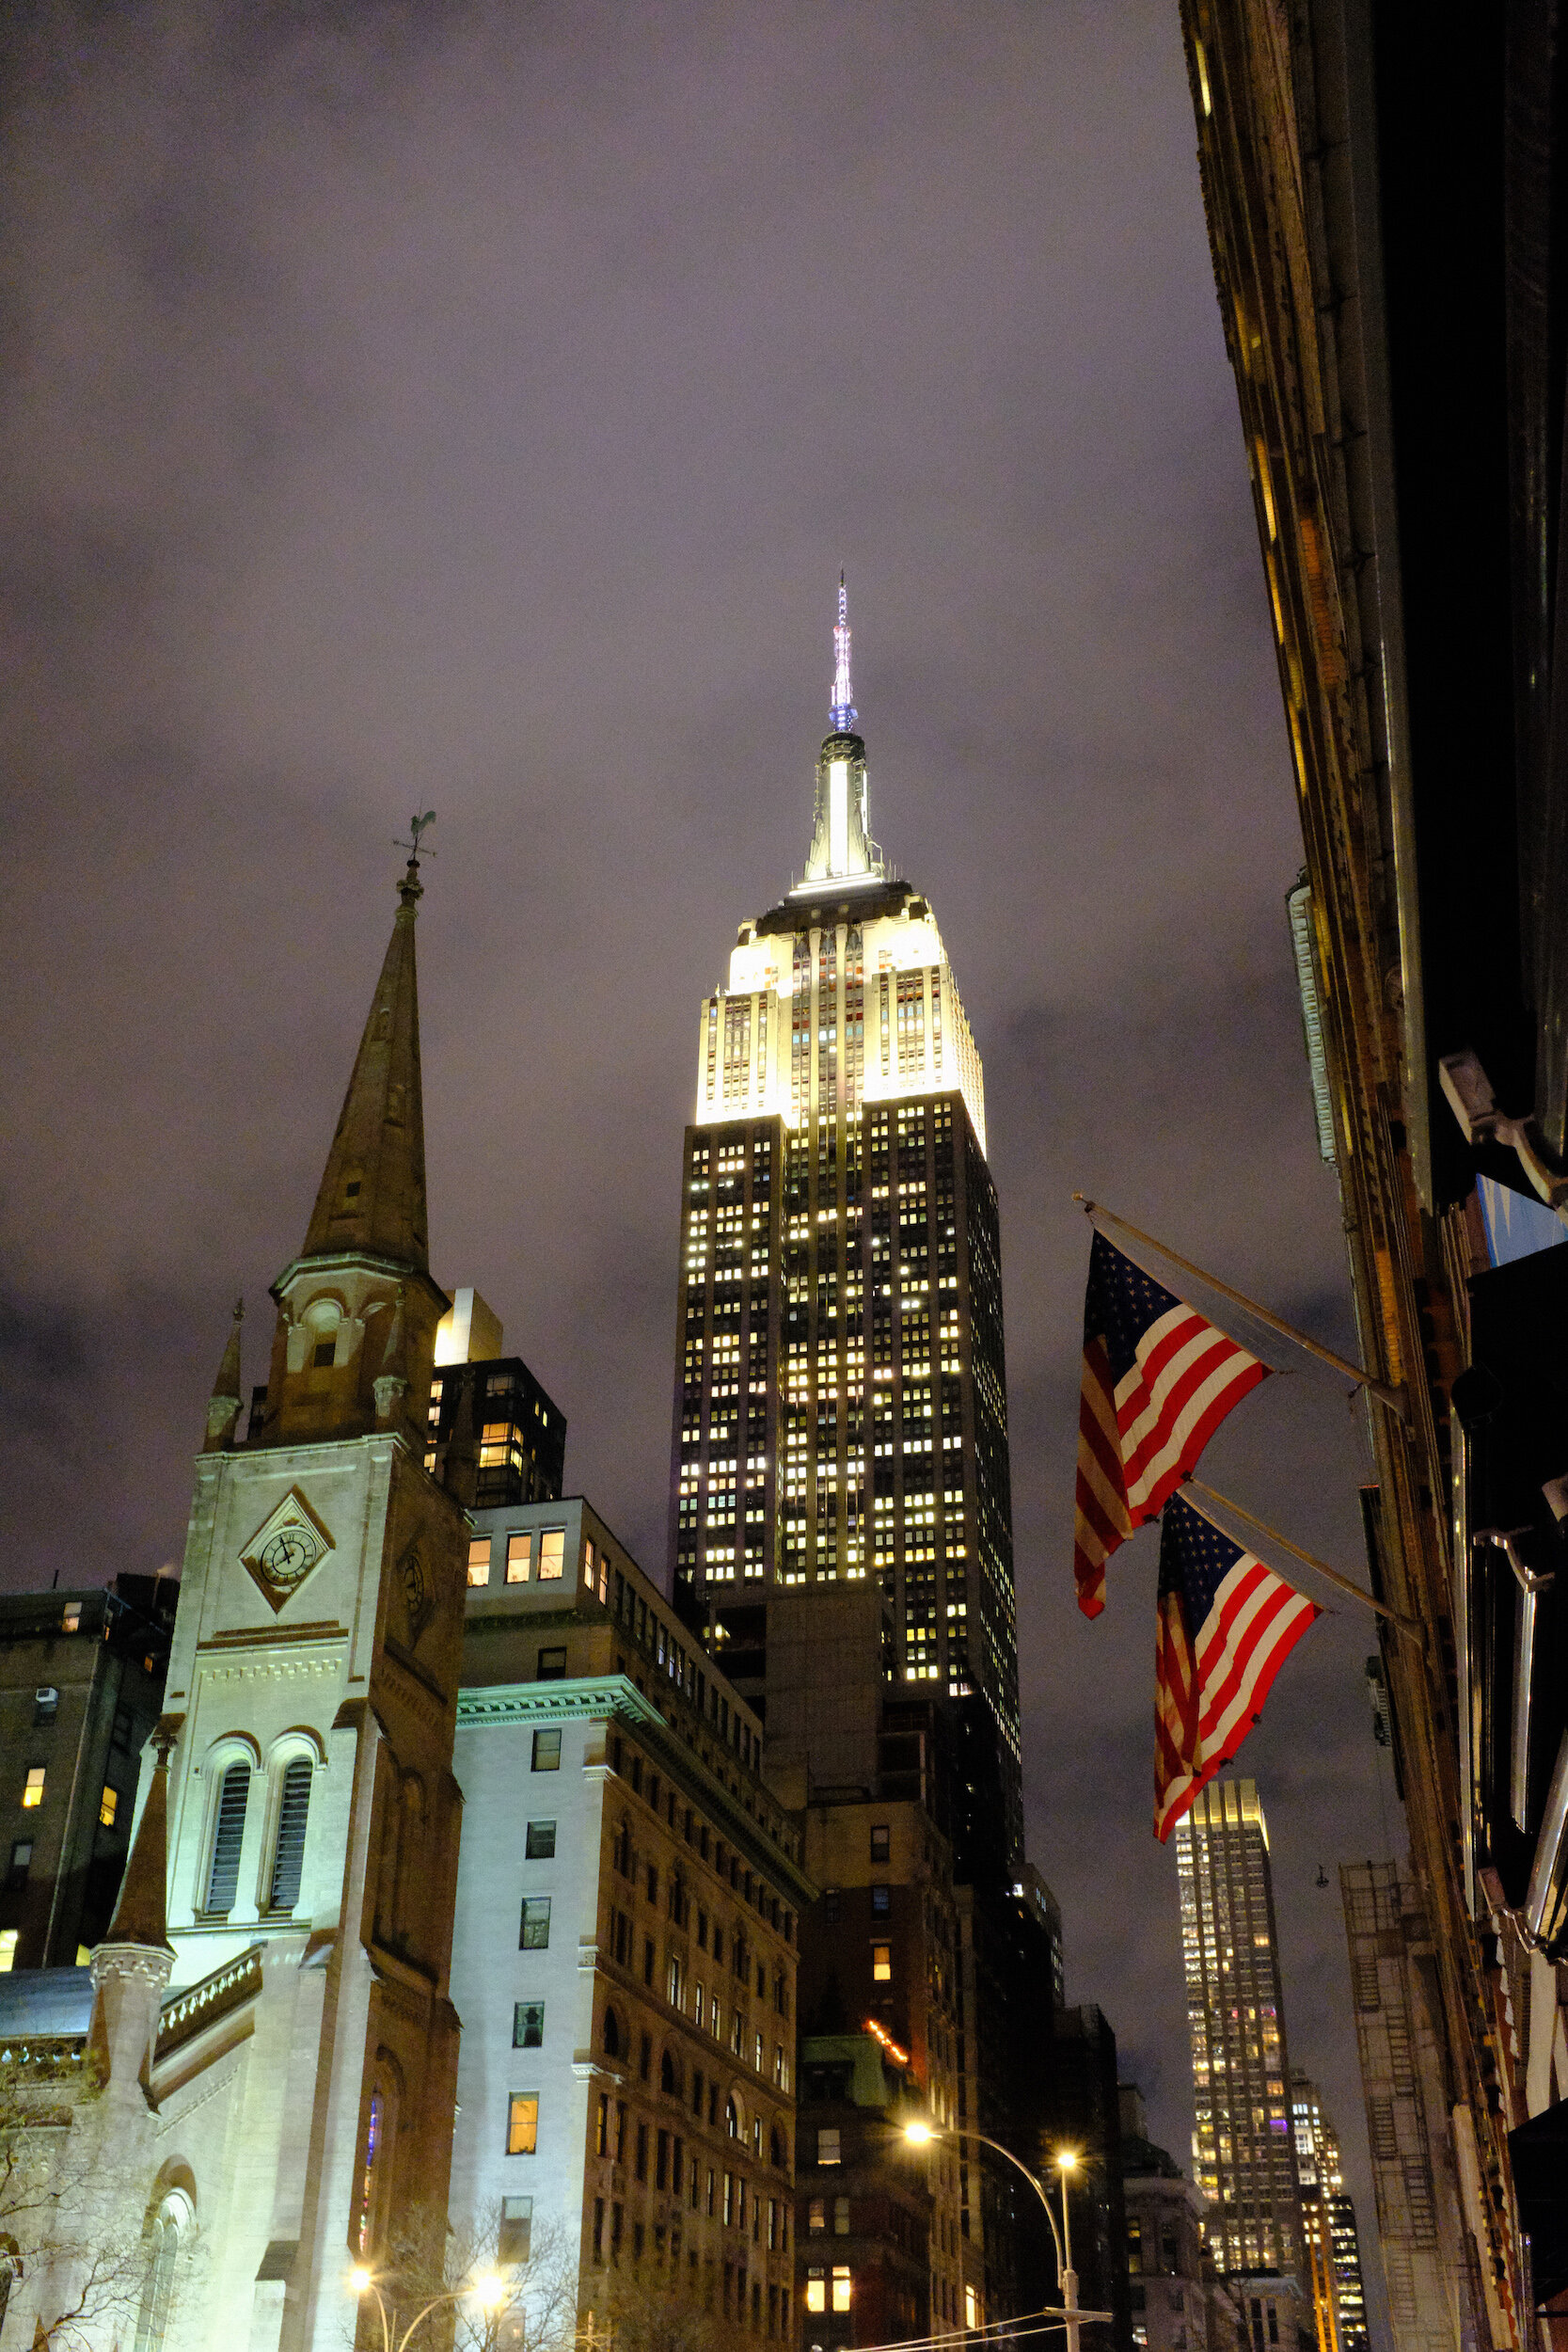
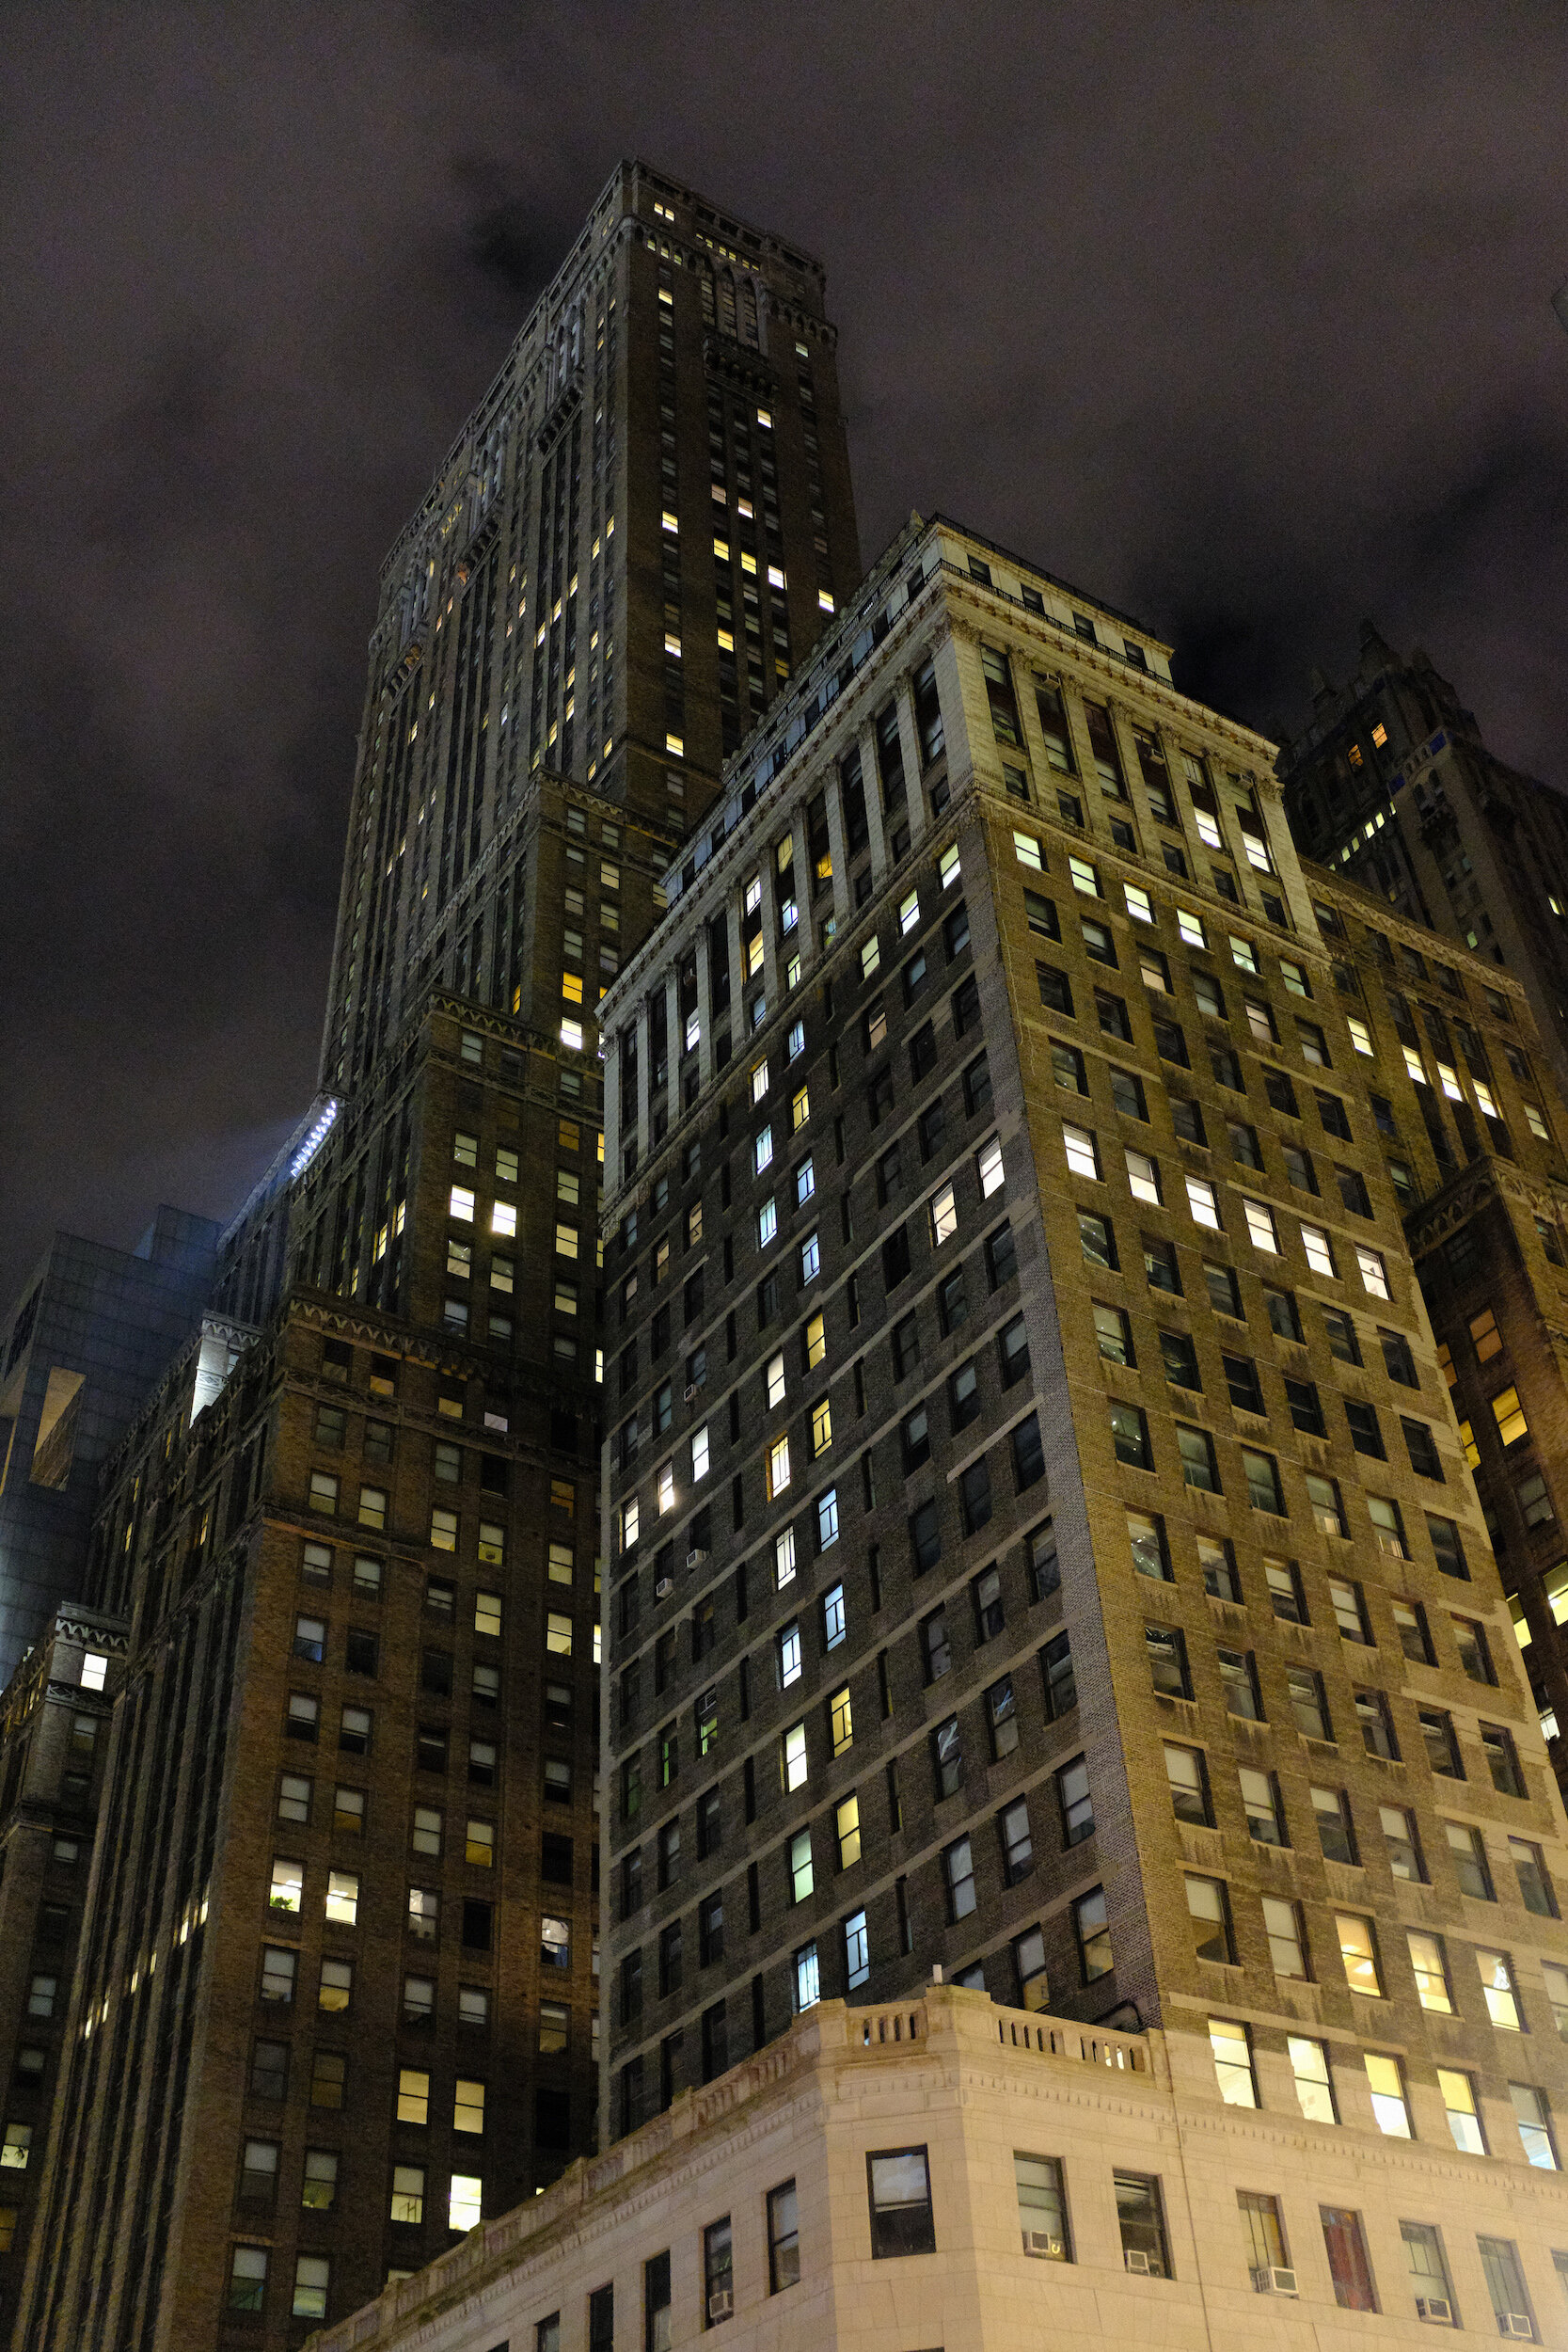

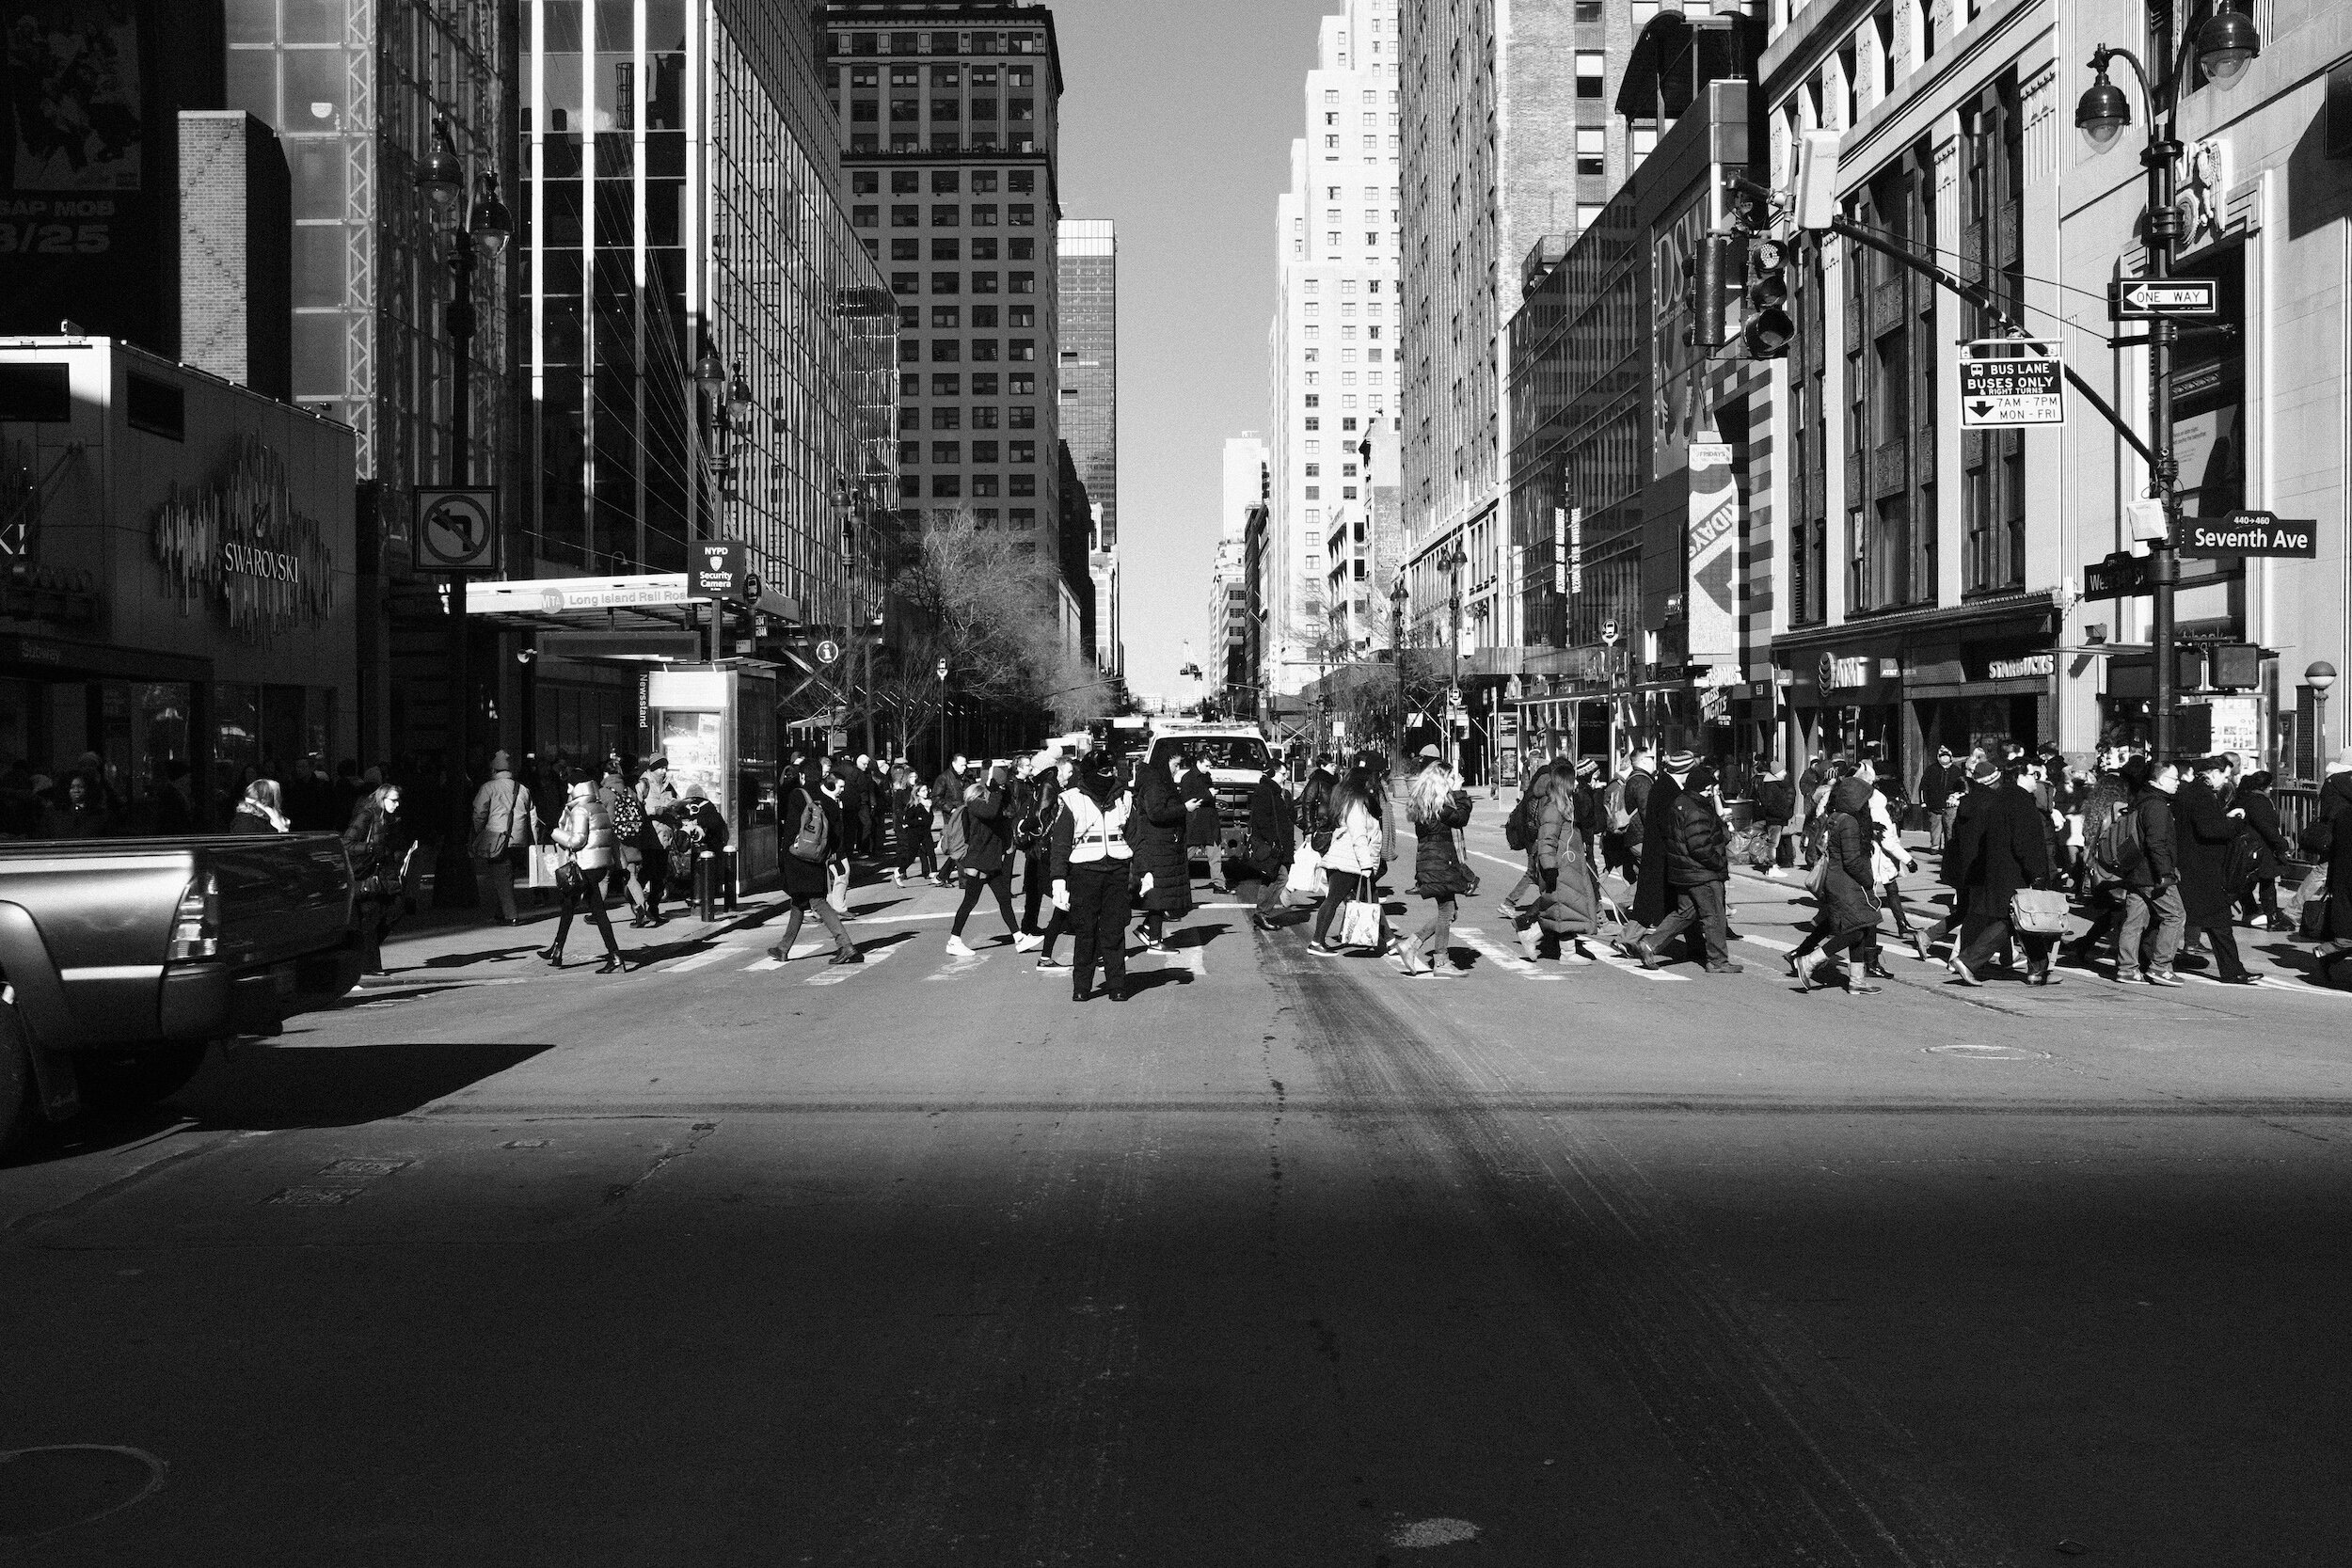
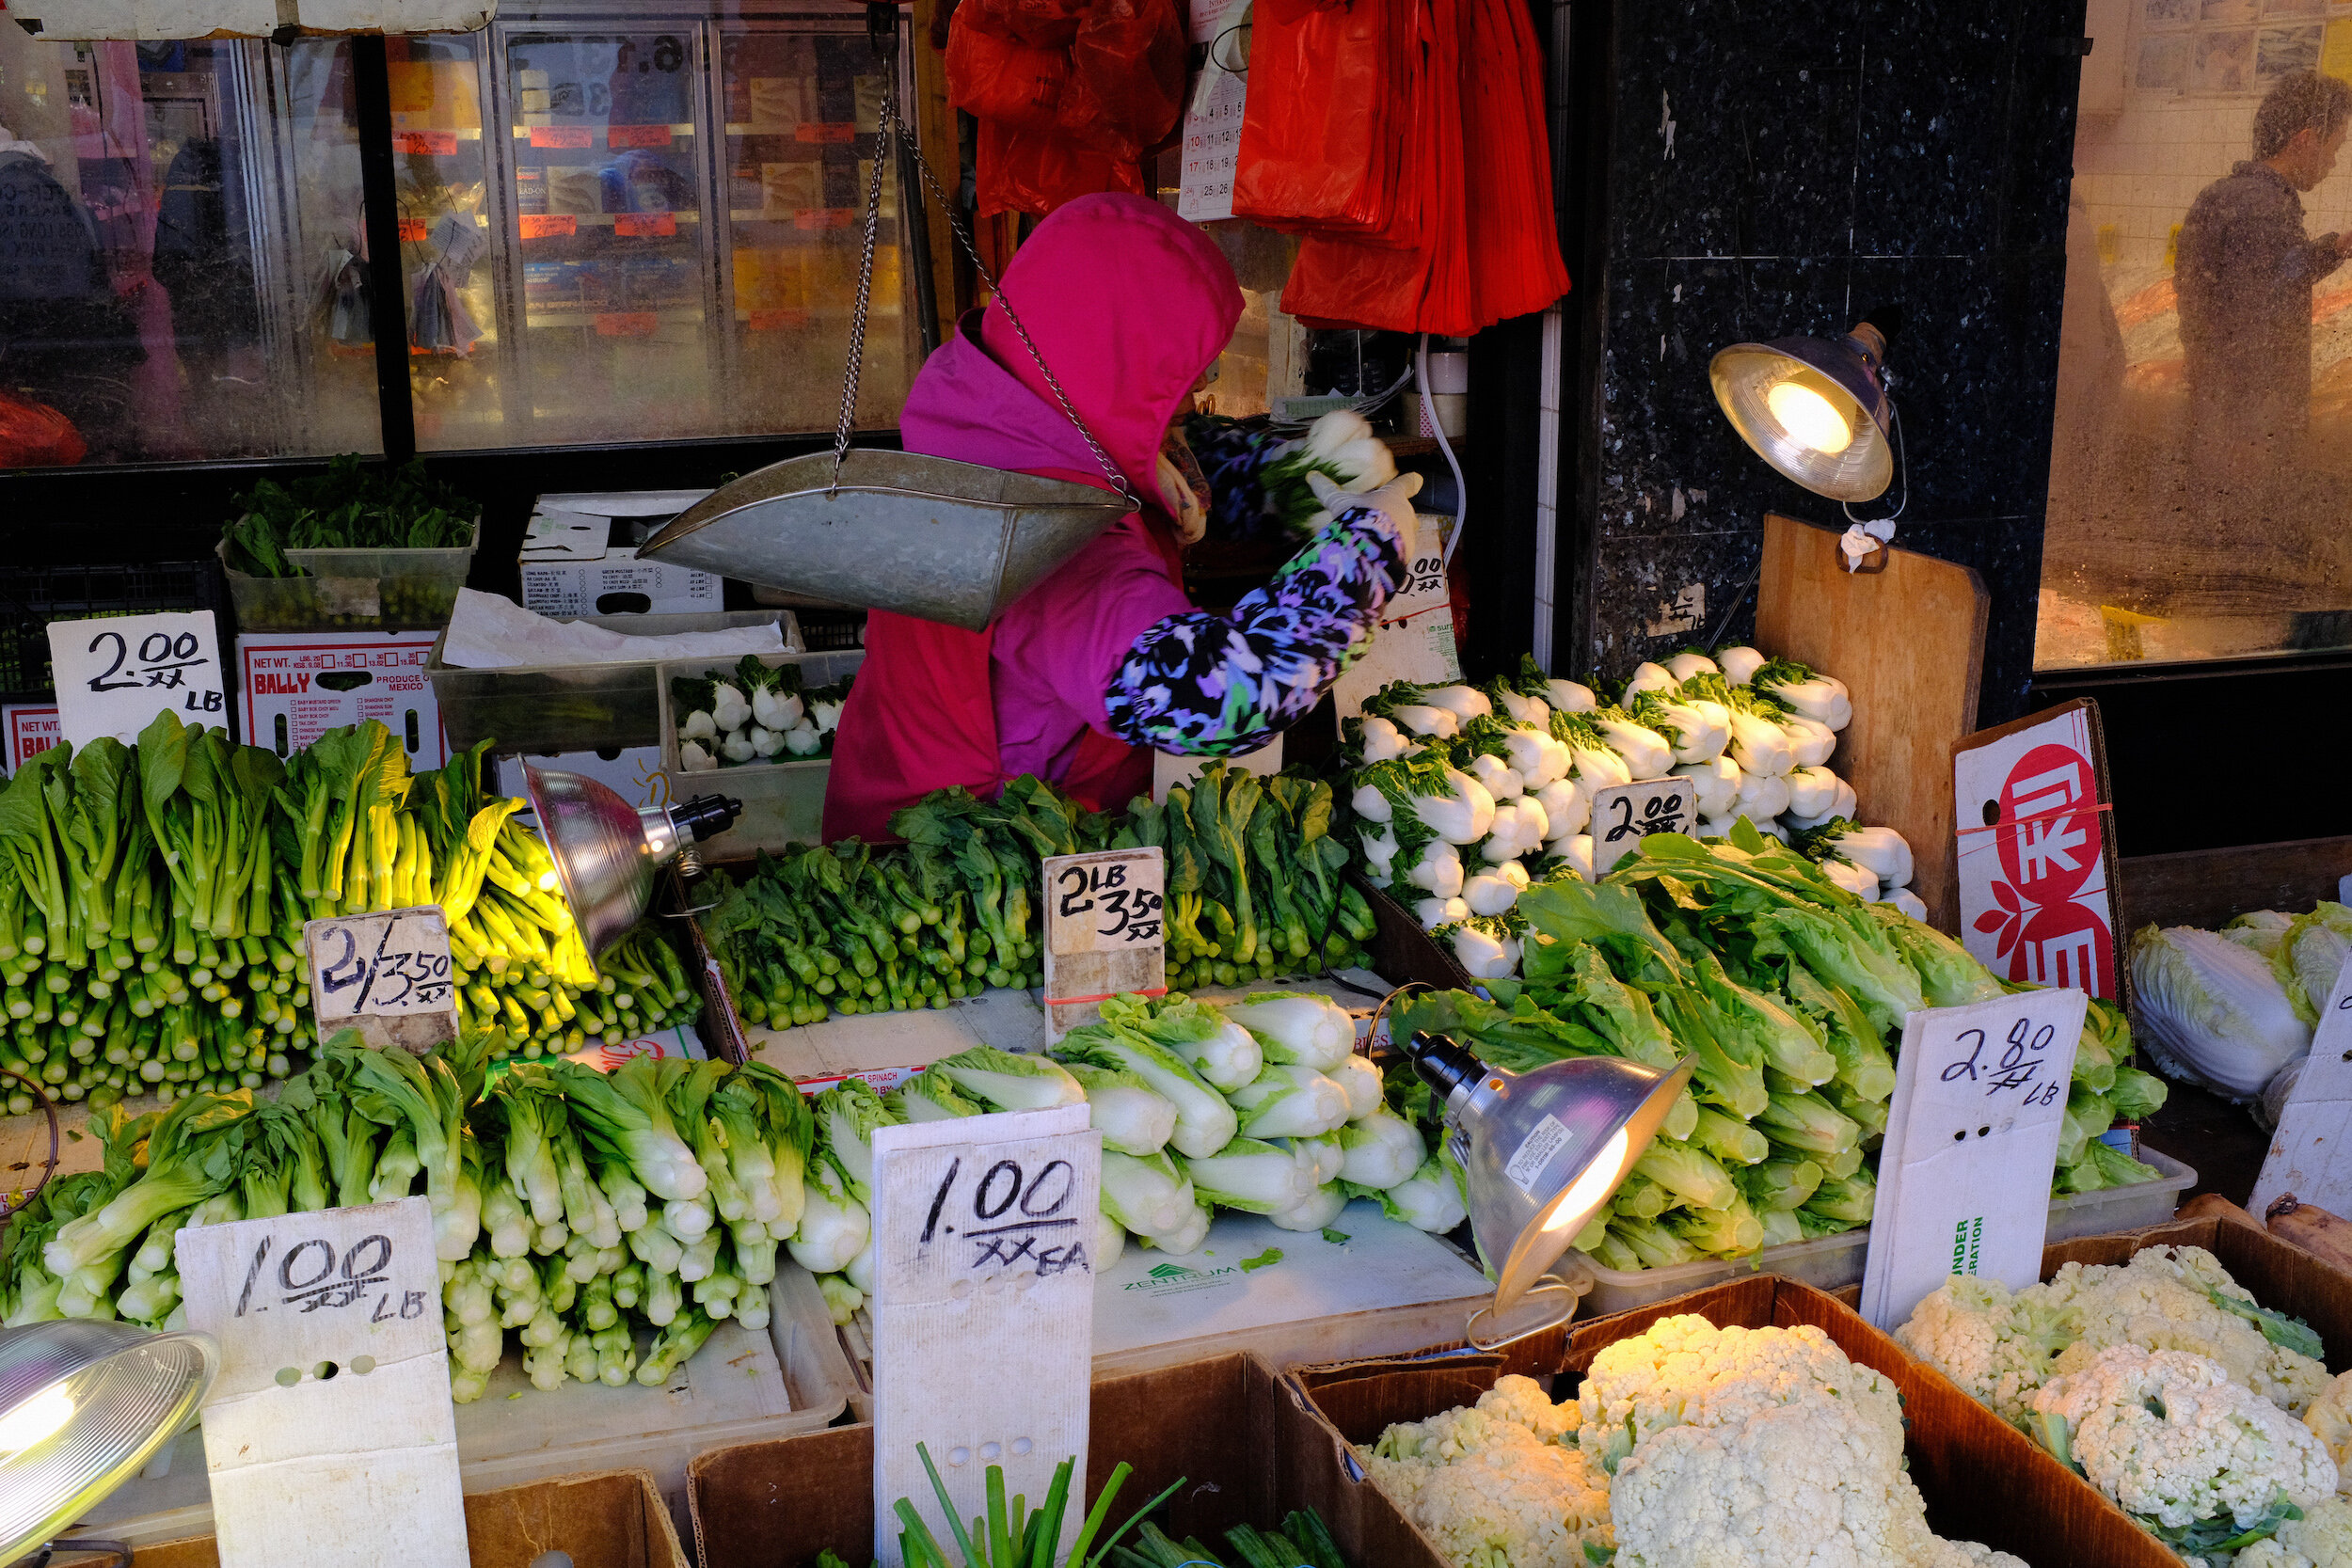
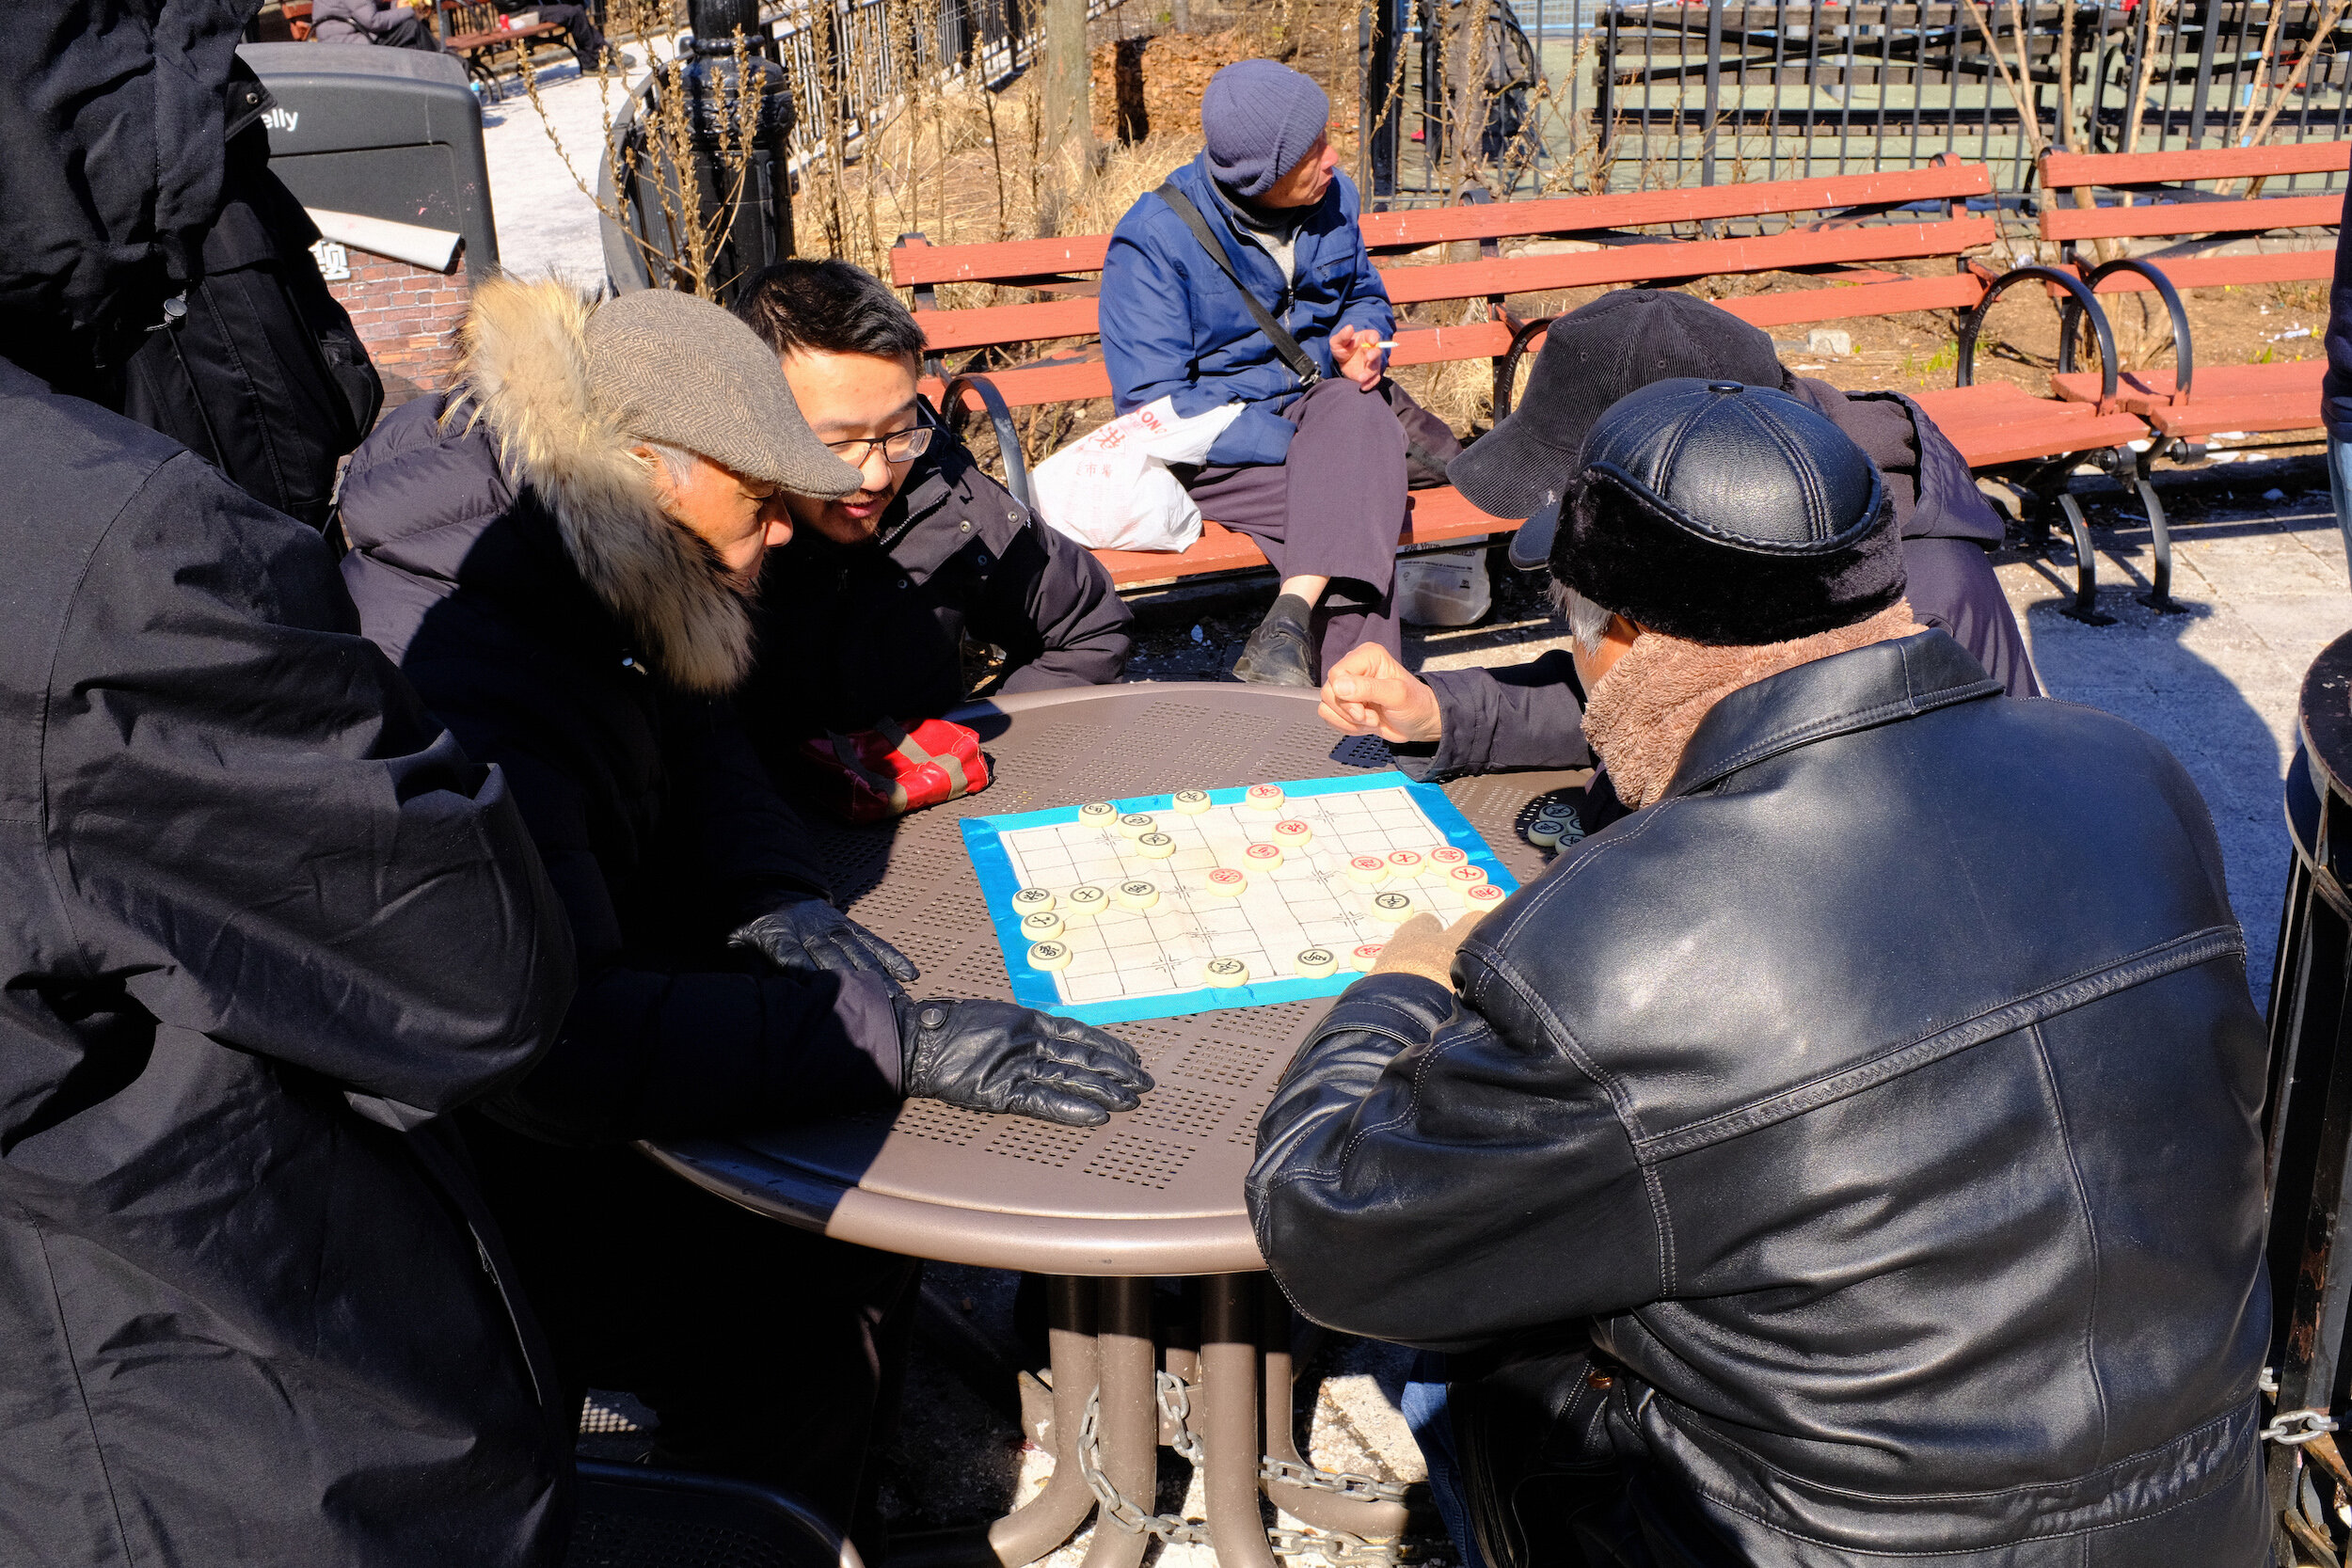

Further Exploring The Fujifilm X100F
Exploring The Film Simulation Modes Of The X100F
As I mentioned a couple of weeks ago, I purchased a Fujifilm X100F while on a business trip to South…
Exploring The Film Simulation Modes Of The X100F
As I mentioned a couple of weeks ago, I purchased a Fujifilm X100F while on business trip to South Africa. And based on the numerous reviews available, and my own first impressions with this camera, I am convinced that this is the perfect tool for street photography.
The process of obtaining my visa and work permit for South Africa is unfortunately taking longer than expected, and I am still here in the USA. So last week I took the X100F out for a walk downtown Greenville, SC.
Besides working on my street photography skills, I wanted to explore some of the built-in film simulation modes this camera has.
Build-In Film Simulation Presets
Developing Film Simulation Presets
Acros
Cross Process Film
Conclusion
Build-In Film Simulation Presets
The Fujifilm X100F comes with several film simulation modes, based on Fujifilm's film emulsions, which can be used right 'out of the box':
Provia (the standard-setting)
Velvia (for more vibrant colors)
Astia (softer colors and contrast)
Classic Chrome (probably Fuji's simulation for Ektachrome)
PRO Negative High (for slightly enhanced contrast)
PRO Negative Standard (for soft gradations and skin tones)
Acros (based on the famous Acros film emulsion; and to be combined with Yellow, Red, or Green filter effects)
Monochrome (Fujifilm's standard black and white simulation; also to be combined with Yellow, Red, or Green filter effects)
Sepia (for those who want this: shooting in sepia tone)
The real fun, however, starts when using any of these presets as the basis for your own film simulations.
Developing Film Simulation Presets
While doing some research on Fujifilm's film simulations, I read about the specific settings Ritchie Roesch uses for his film simulation presets. Based on the available standard presets as mentioned above, he has developed settings that simulate specific film emulsions and I recommend you read about those on his site.
While I am not a proponent of just copy-pasting other people's presets, I was quite curious about these settings and the results that can be obtained.
I specifically wanted to try the Acros and Vintage Kodachrome settings.
Acros
Since I have a preference for black and white images, the first emulsion setting I wanted to give a try was the Acros simulation. Guided by Roesch, my settings are as follows:
Film Simulation: Acros
Grain Effect: off
Dynamic Range:200
White Balance: auto
Highlight Tone: +2
Shadow Tone: +2
Sharpness: +2
Noise Reduction: -2
These settings create a nice contrasty image, which I like far better than the standard black and white or the standard Acros setting. My favorite black and white image from that day is Gothic Fairies (see below).

The two images below provide great examples of what this camera, with this specific setting, is capable of.
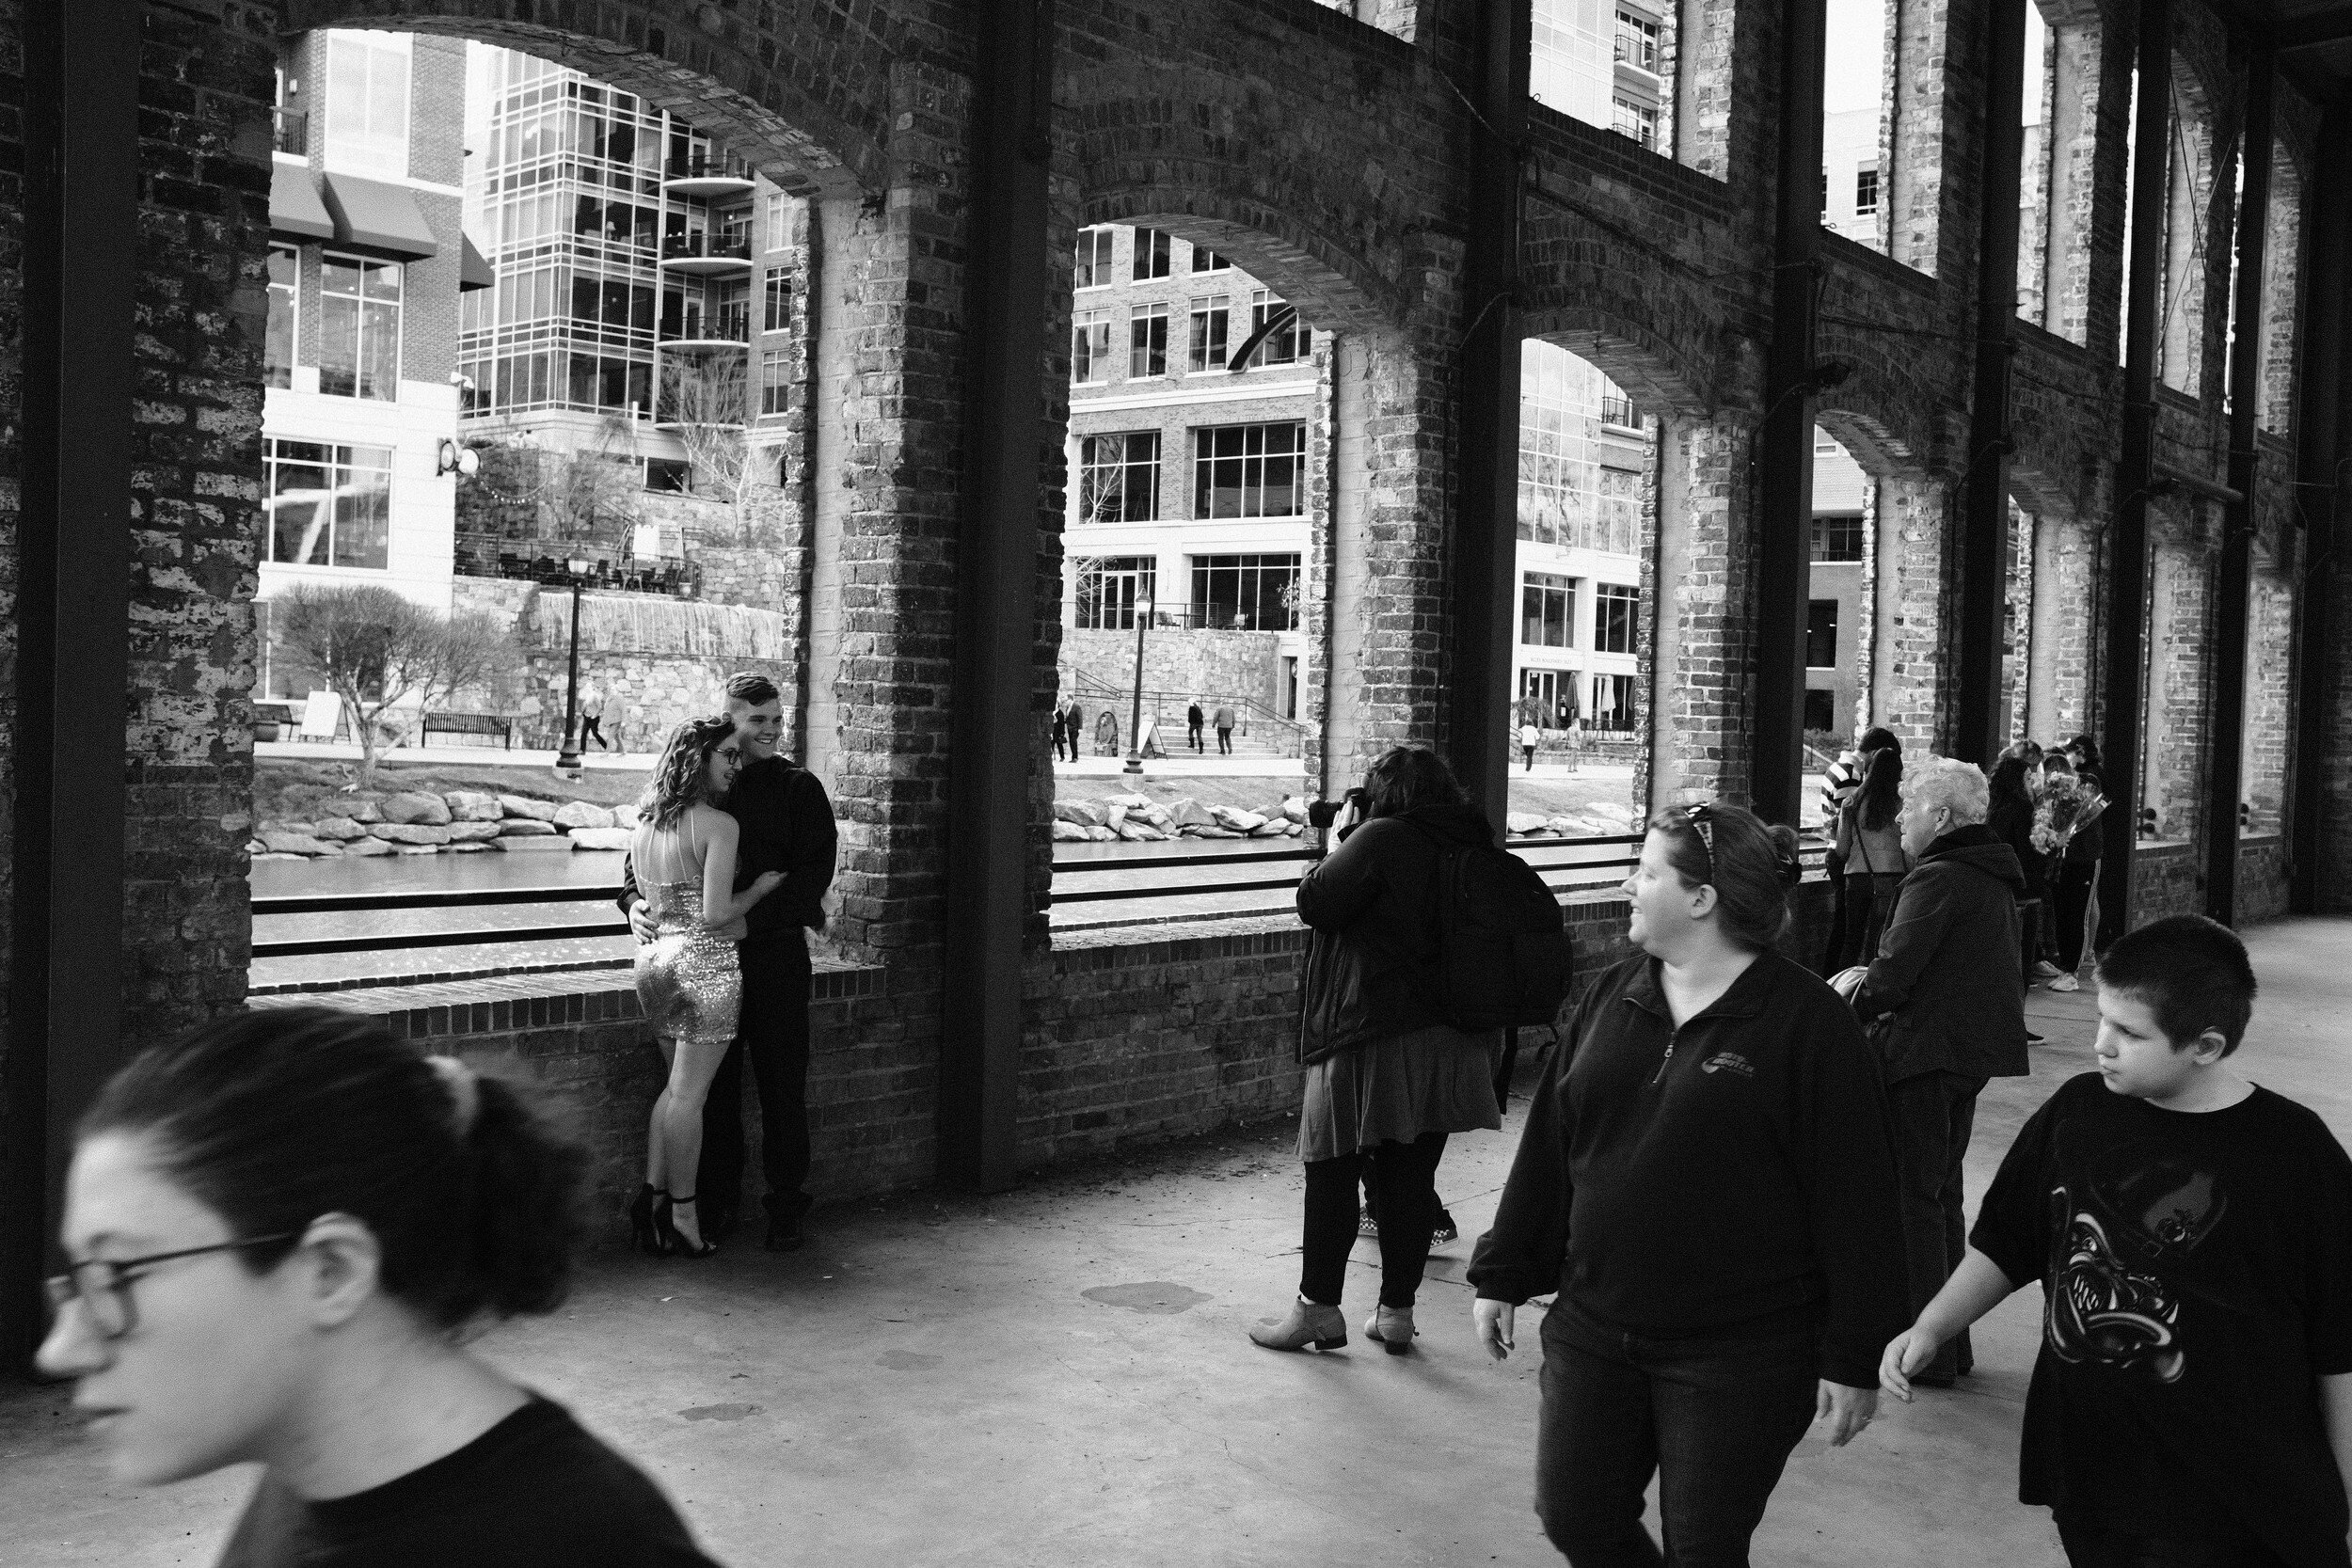
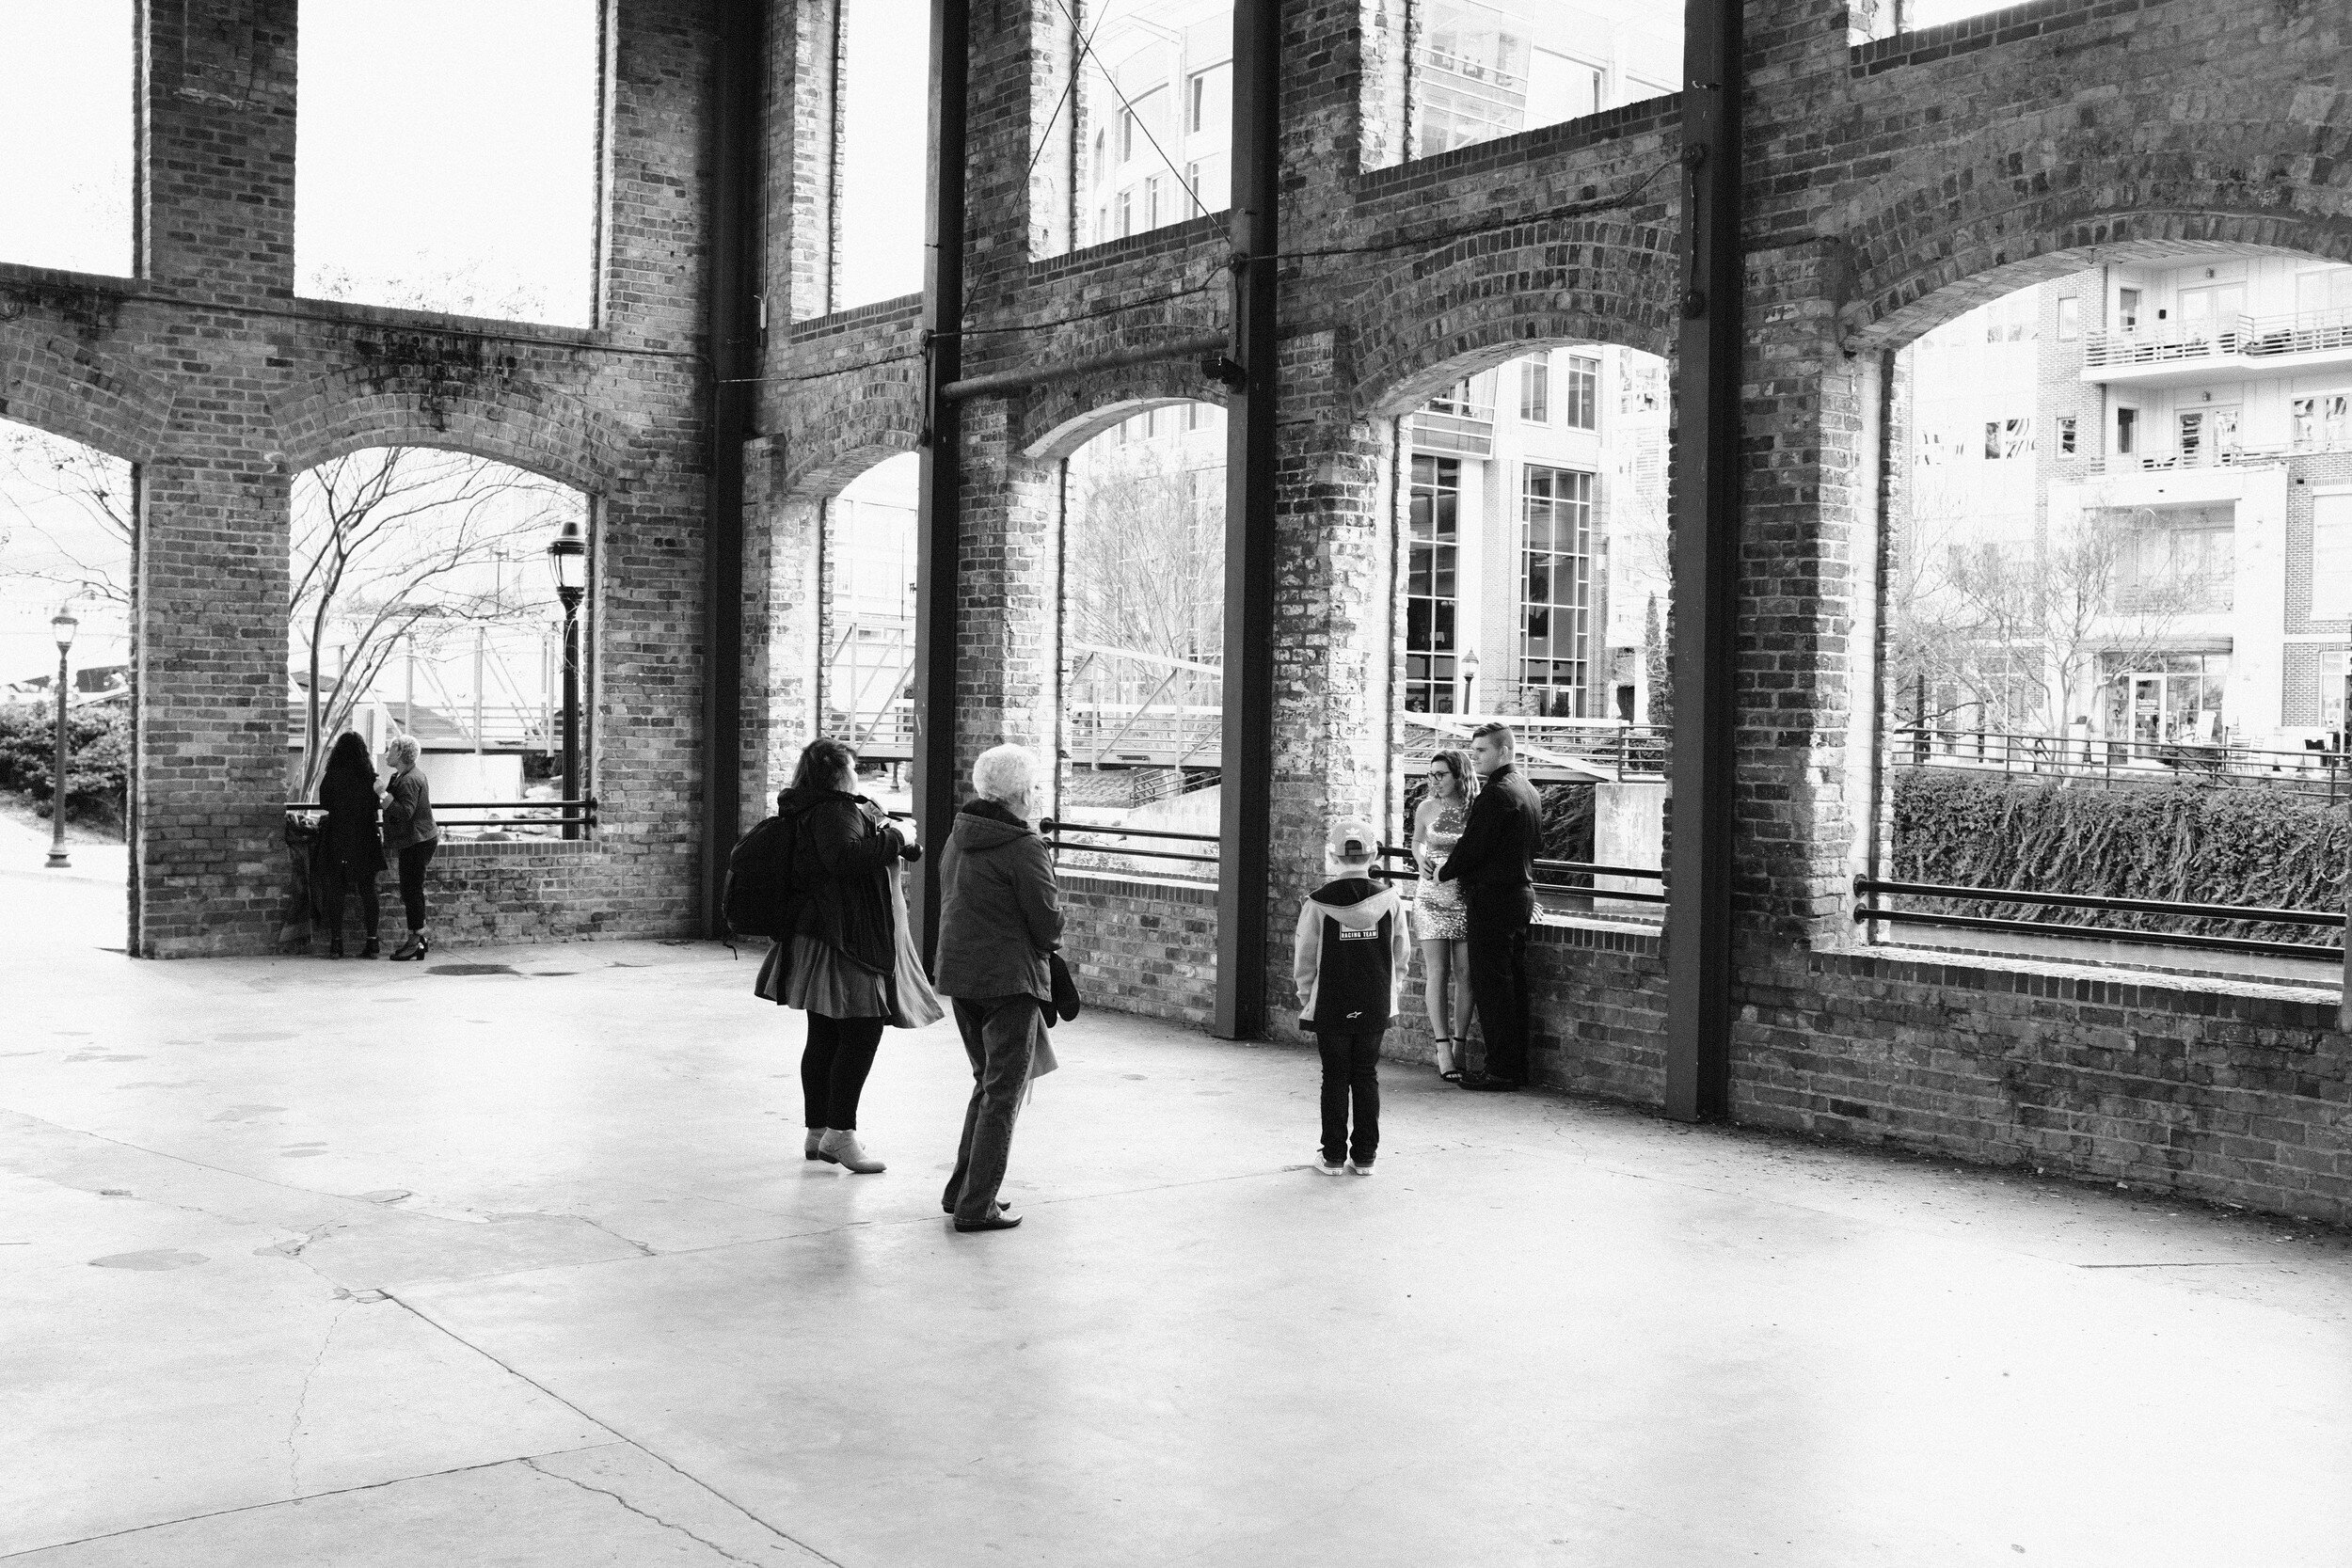
When using these settings, it is still possible to create images with quite different moods. This can be done for example by using the Exposure Compensation dial on the top plate of the camera.
And this is actually one of the reasons I love this little tool: while using menu presets, it is very easy to change the look and feeling of images by using the manual aperture, shutterspeed, ISO, and Exposure Compensation dials.
The next two images below are literally taken seconds apart and from almost exactly the same viewpoint.
The first one has the people in the image as nice black silhouettes against the light background.

The second one, by pumping exposure compensation up, resulted in a high-key image with more detail in the people…
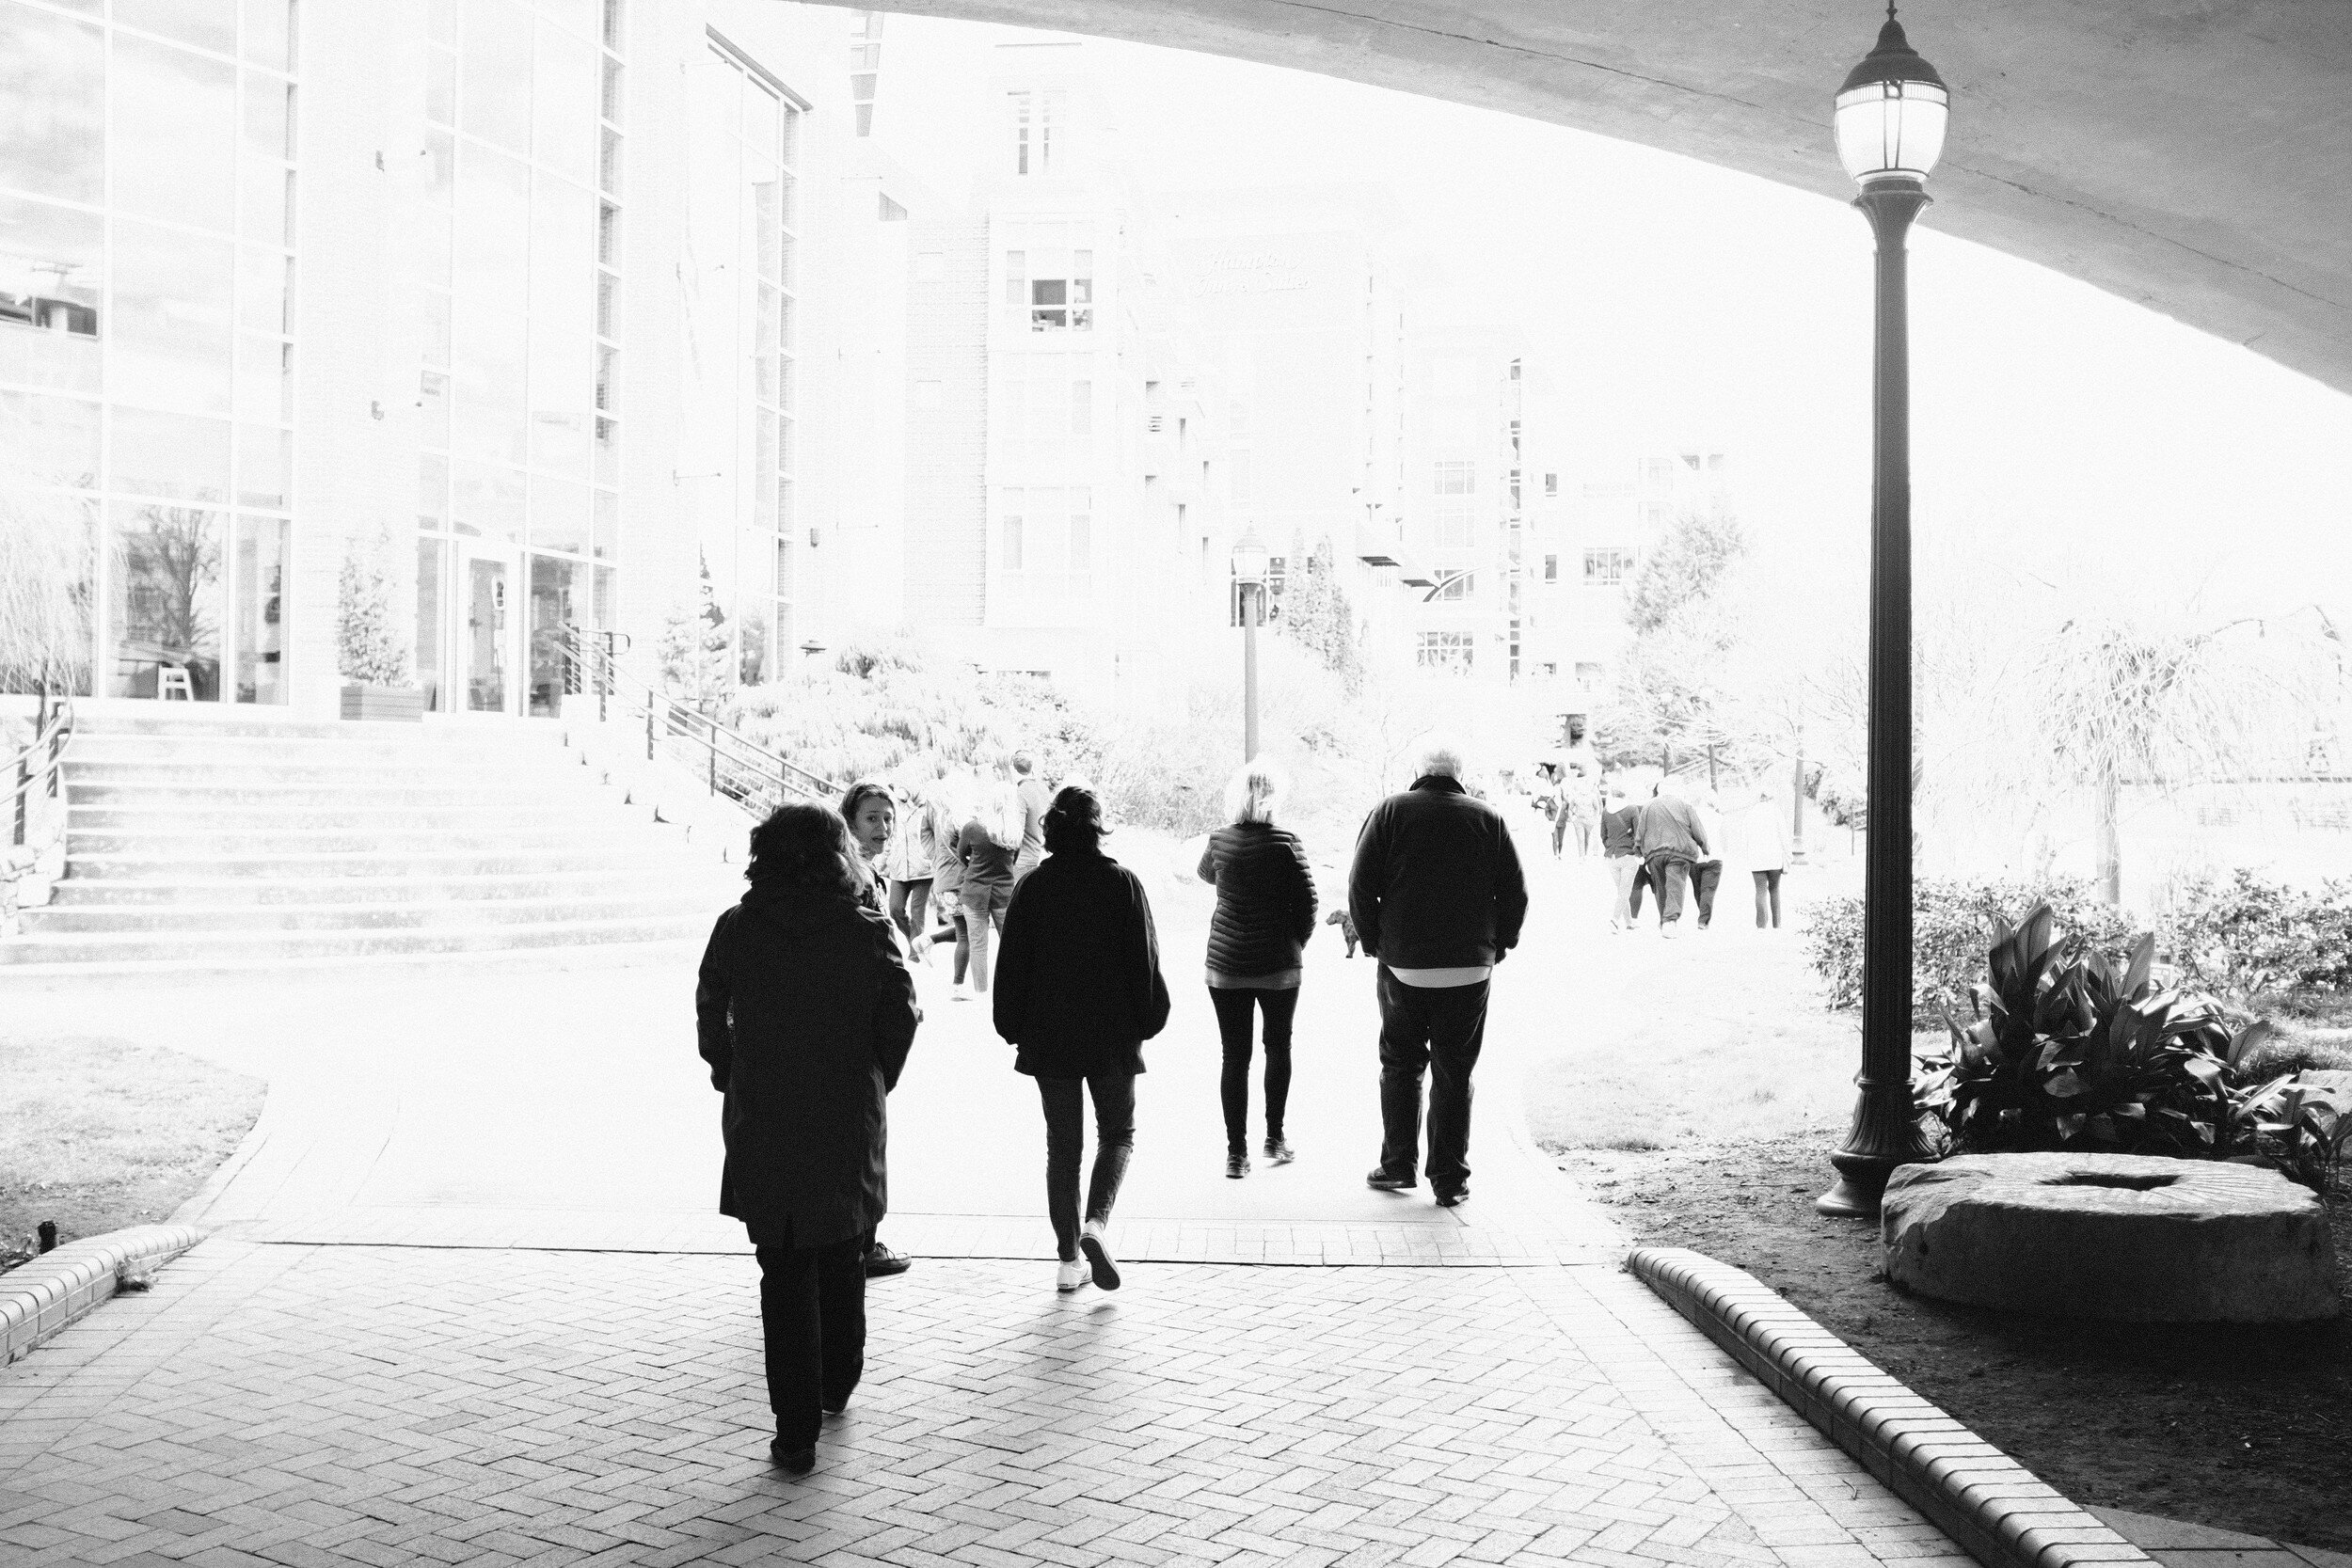
Cross Process Film
Next to try was one of the color film simulations: Cross Process Film Simulation, using one of Ritchie Roesch's recipes as the basis.
Film Simulation: Classic Chrome
Grain Effect: weak
Dynamic Range: 200
White Balance: auto; R:-3 B:-8
Highlight Tone: +1
Shadow Tone: +2
Color: -1
Sharpness: +1
Noise Reduction: -3
These settings result in an 'old fashioned' film effect.
Although I in the first instance was quite skeptic about this setting, I like the results very much. Even to the level that I wonder if I should create more images using this particular color setting.


The next two images provide some insights into the performance of the X100F and the results with this film simulation setting inside, in a rather dark environment.
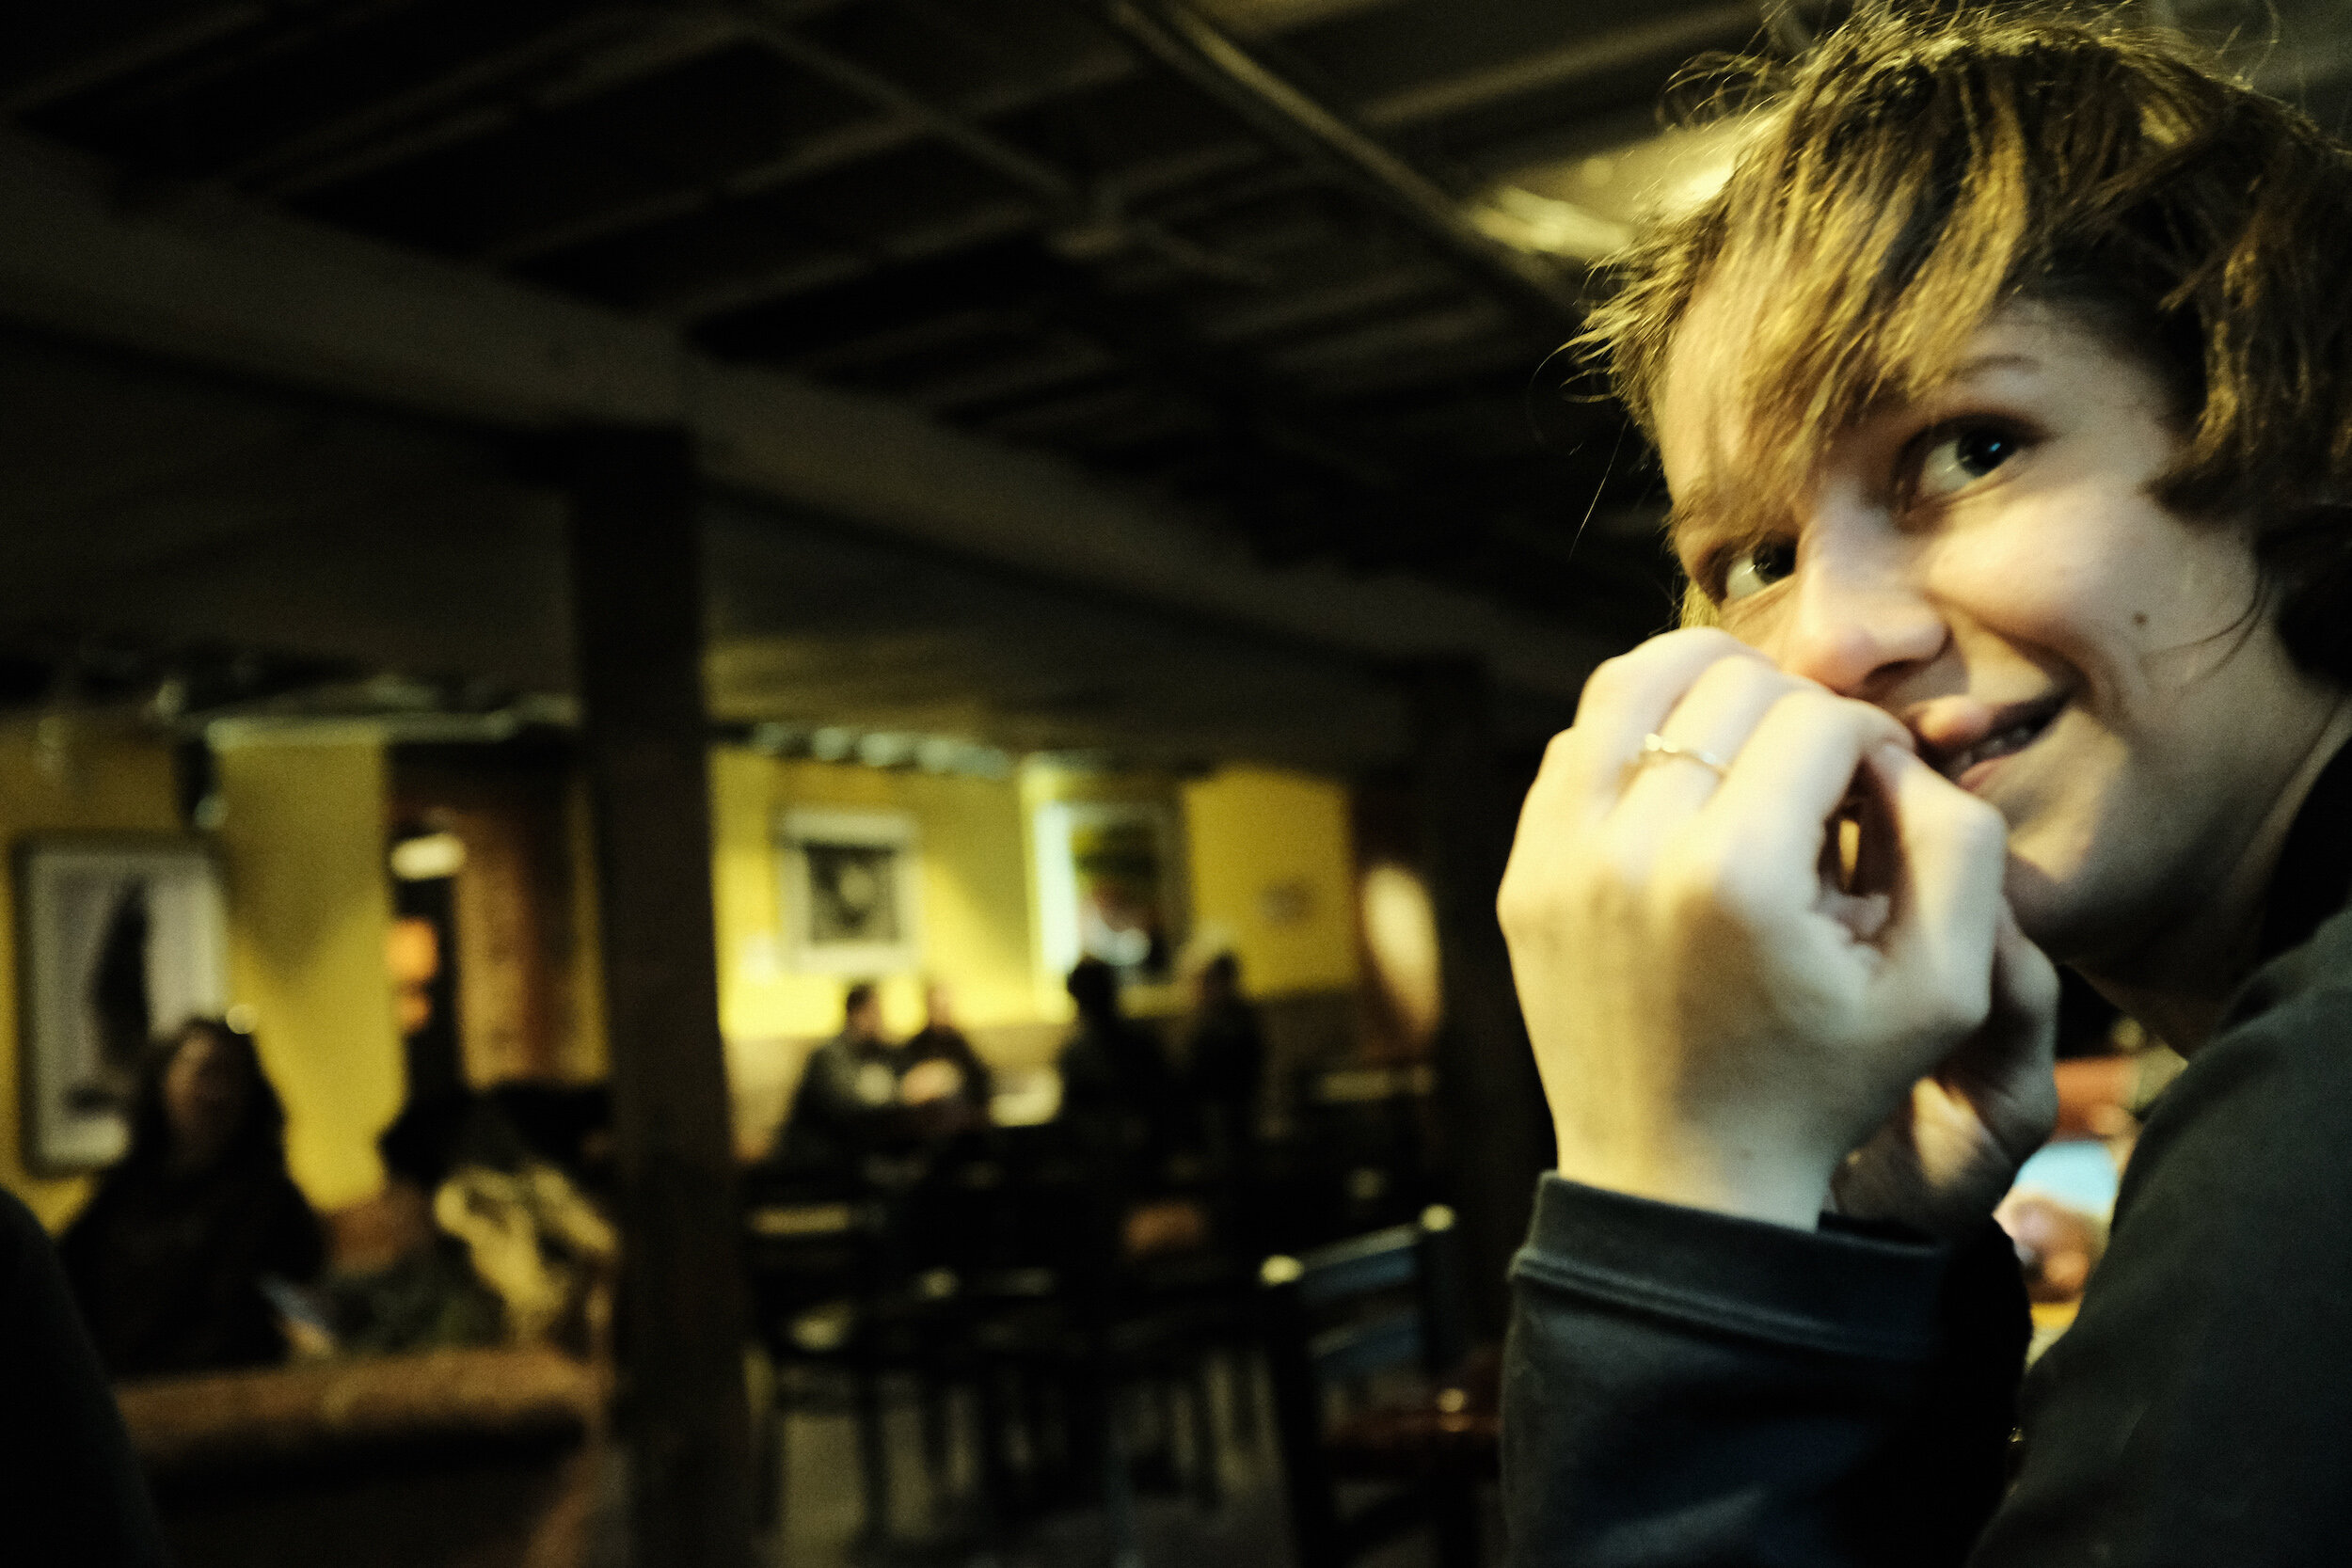
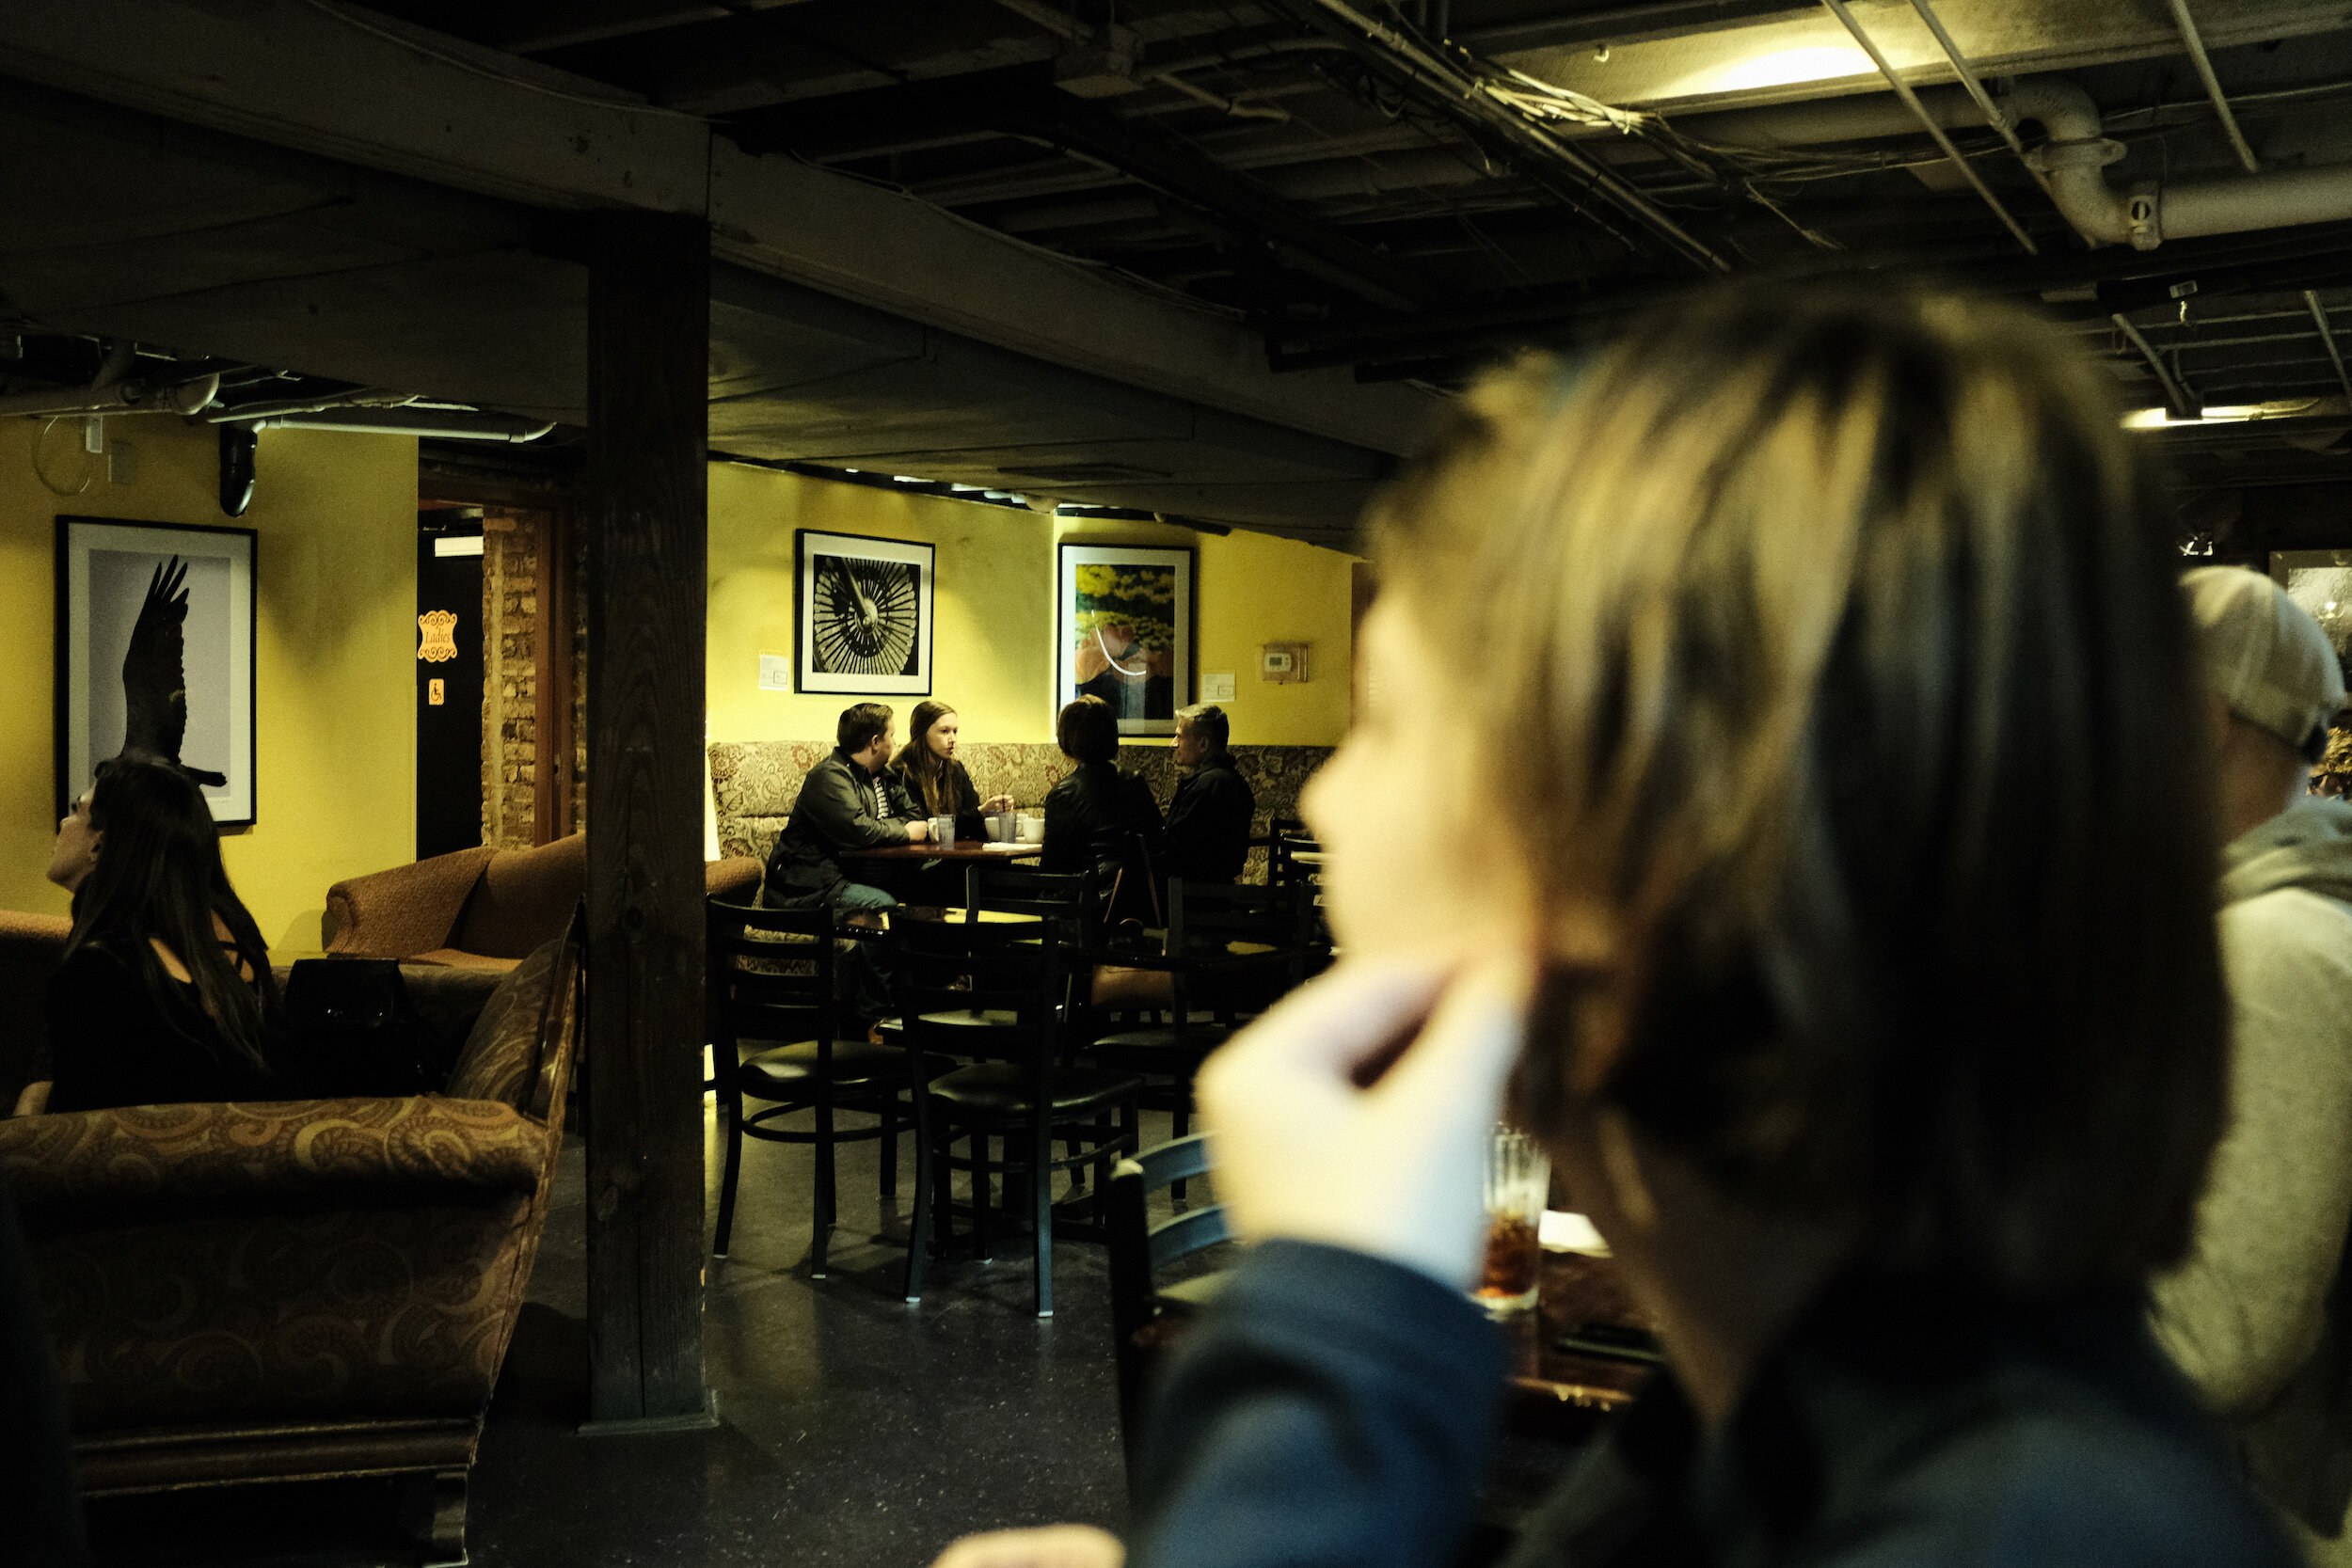
Taking pictures with the same setting outside, after dark, gave the same stunning results.
Note that all the images in this post are Straight Out Of Camera JPEGs!
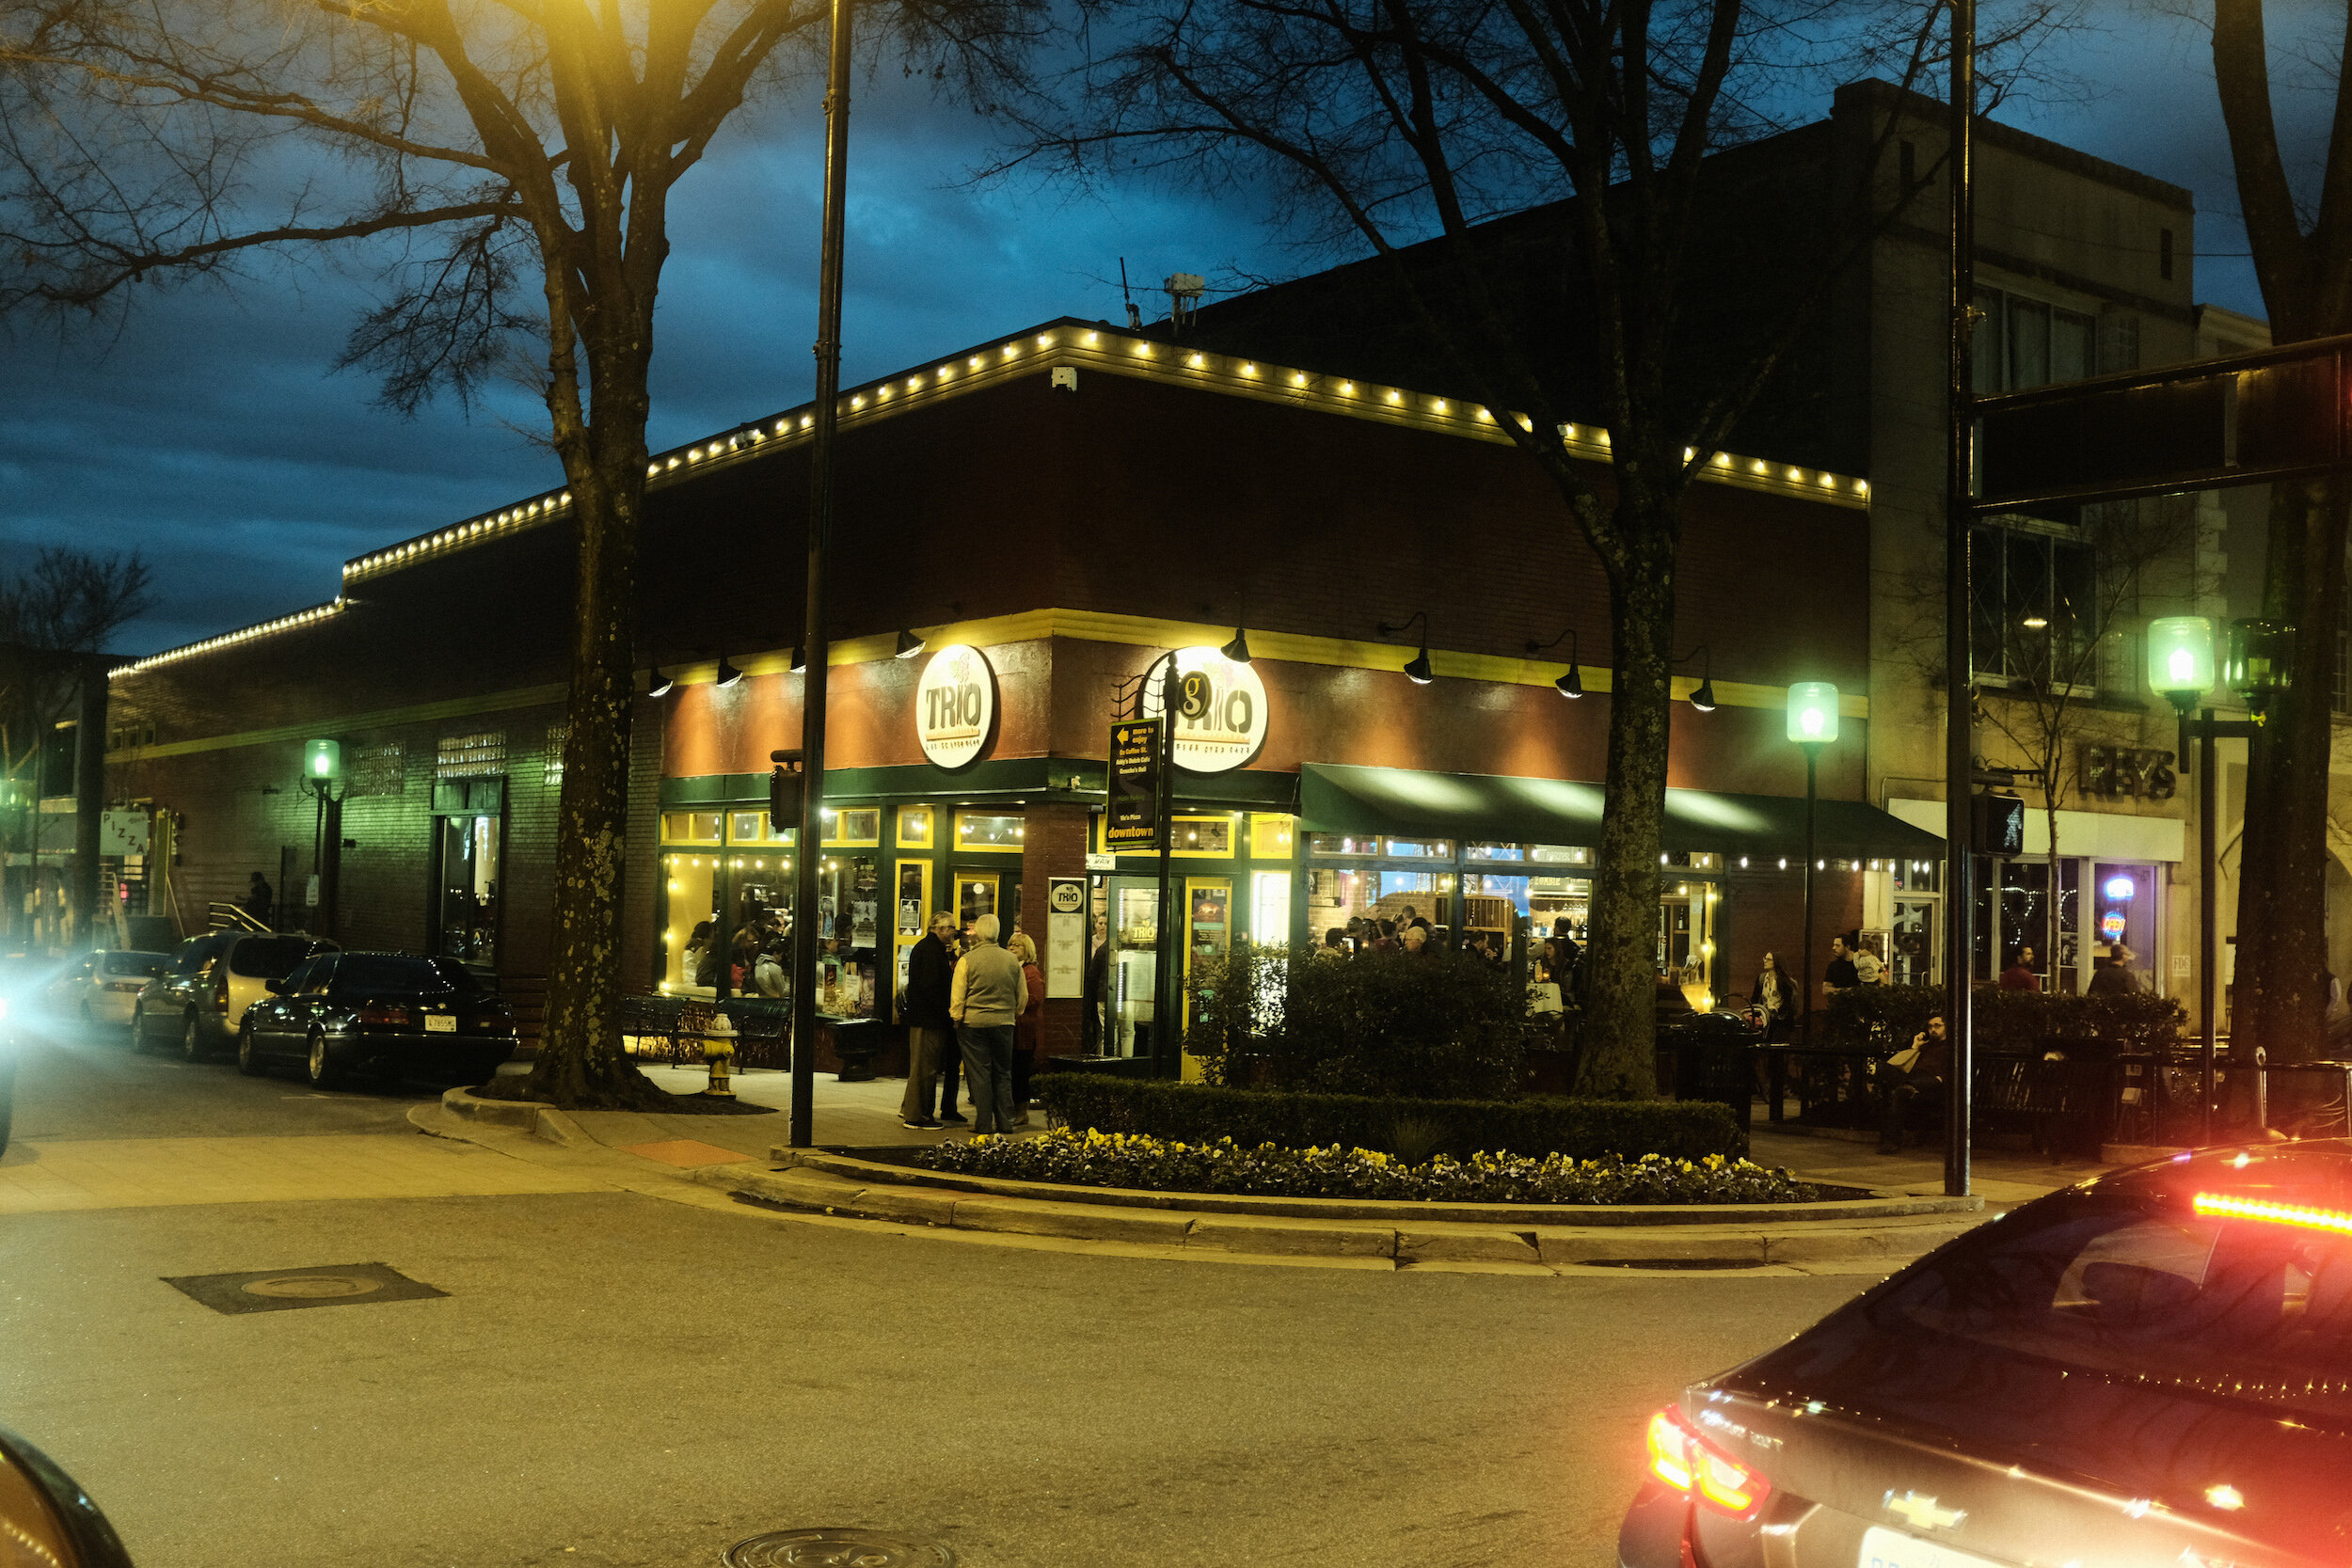
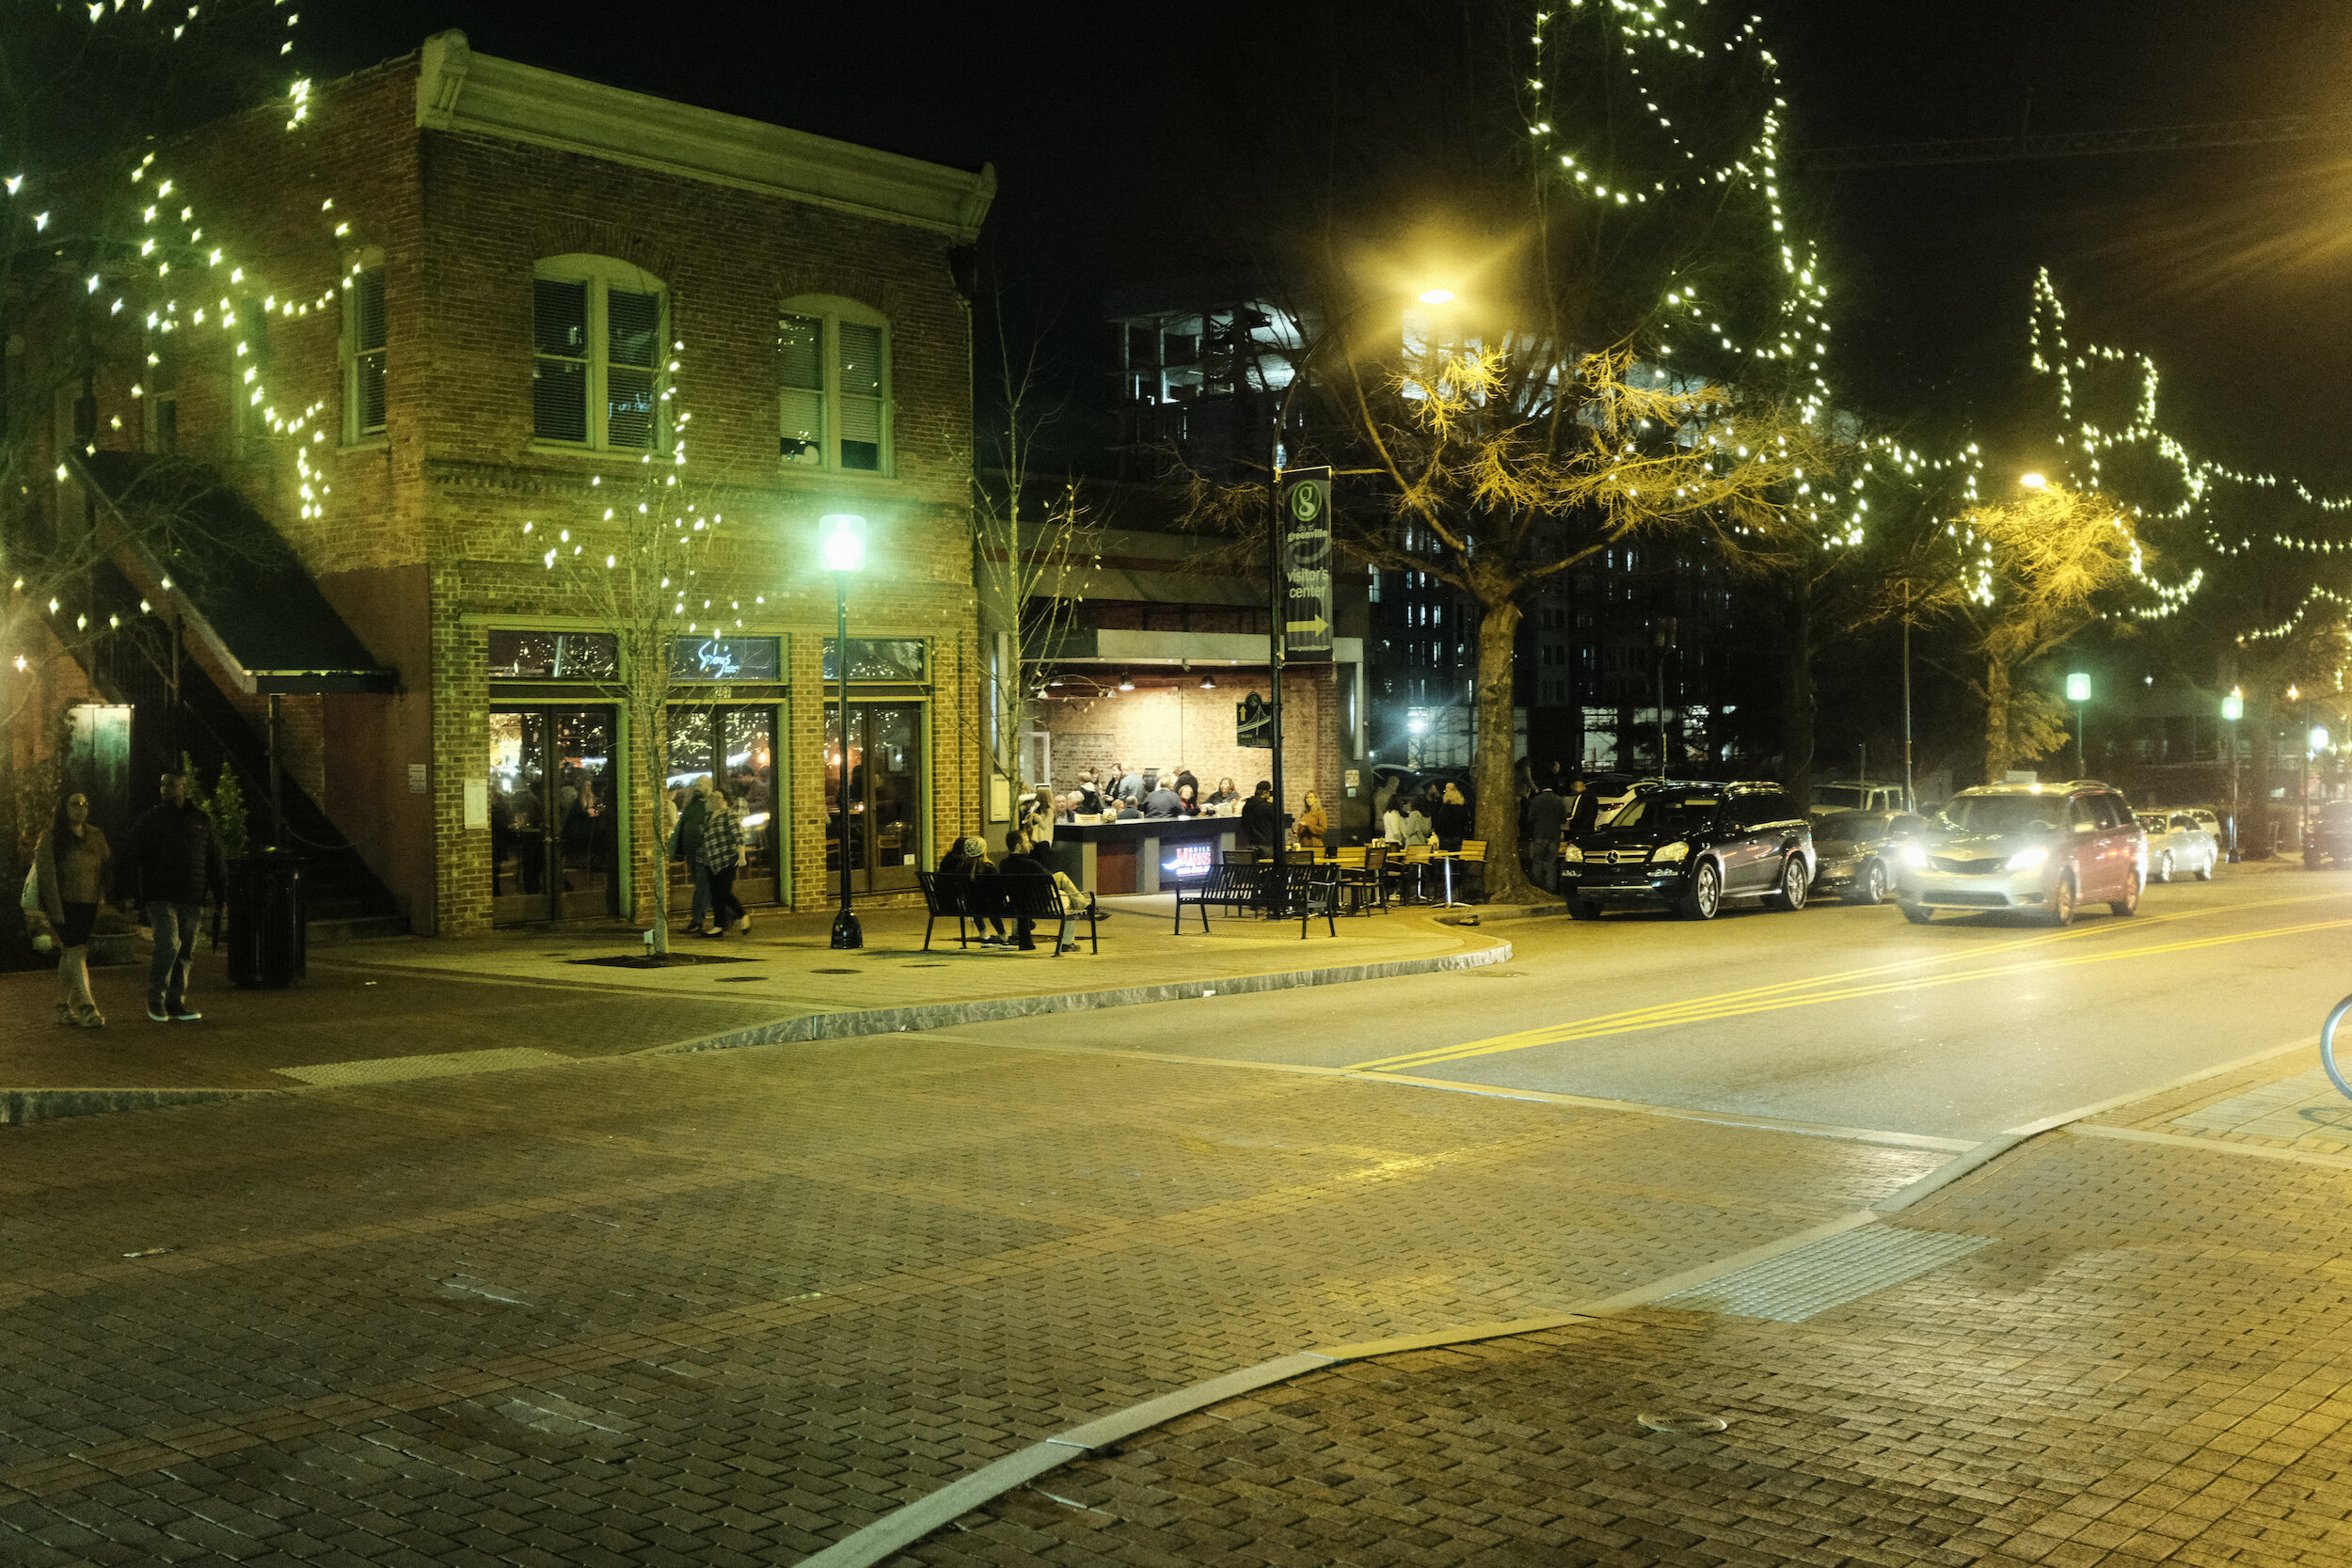
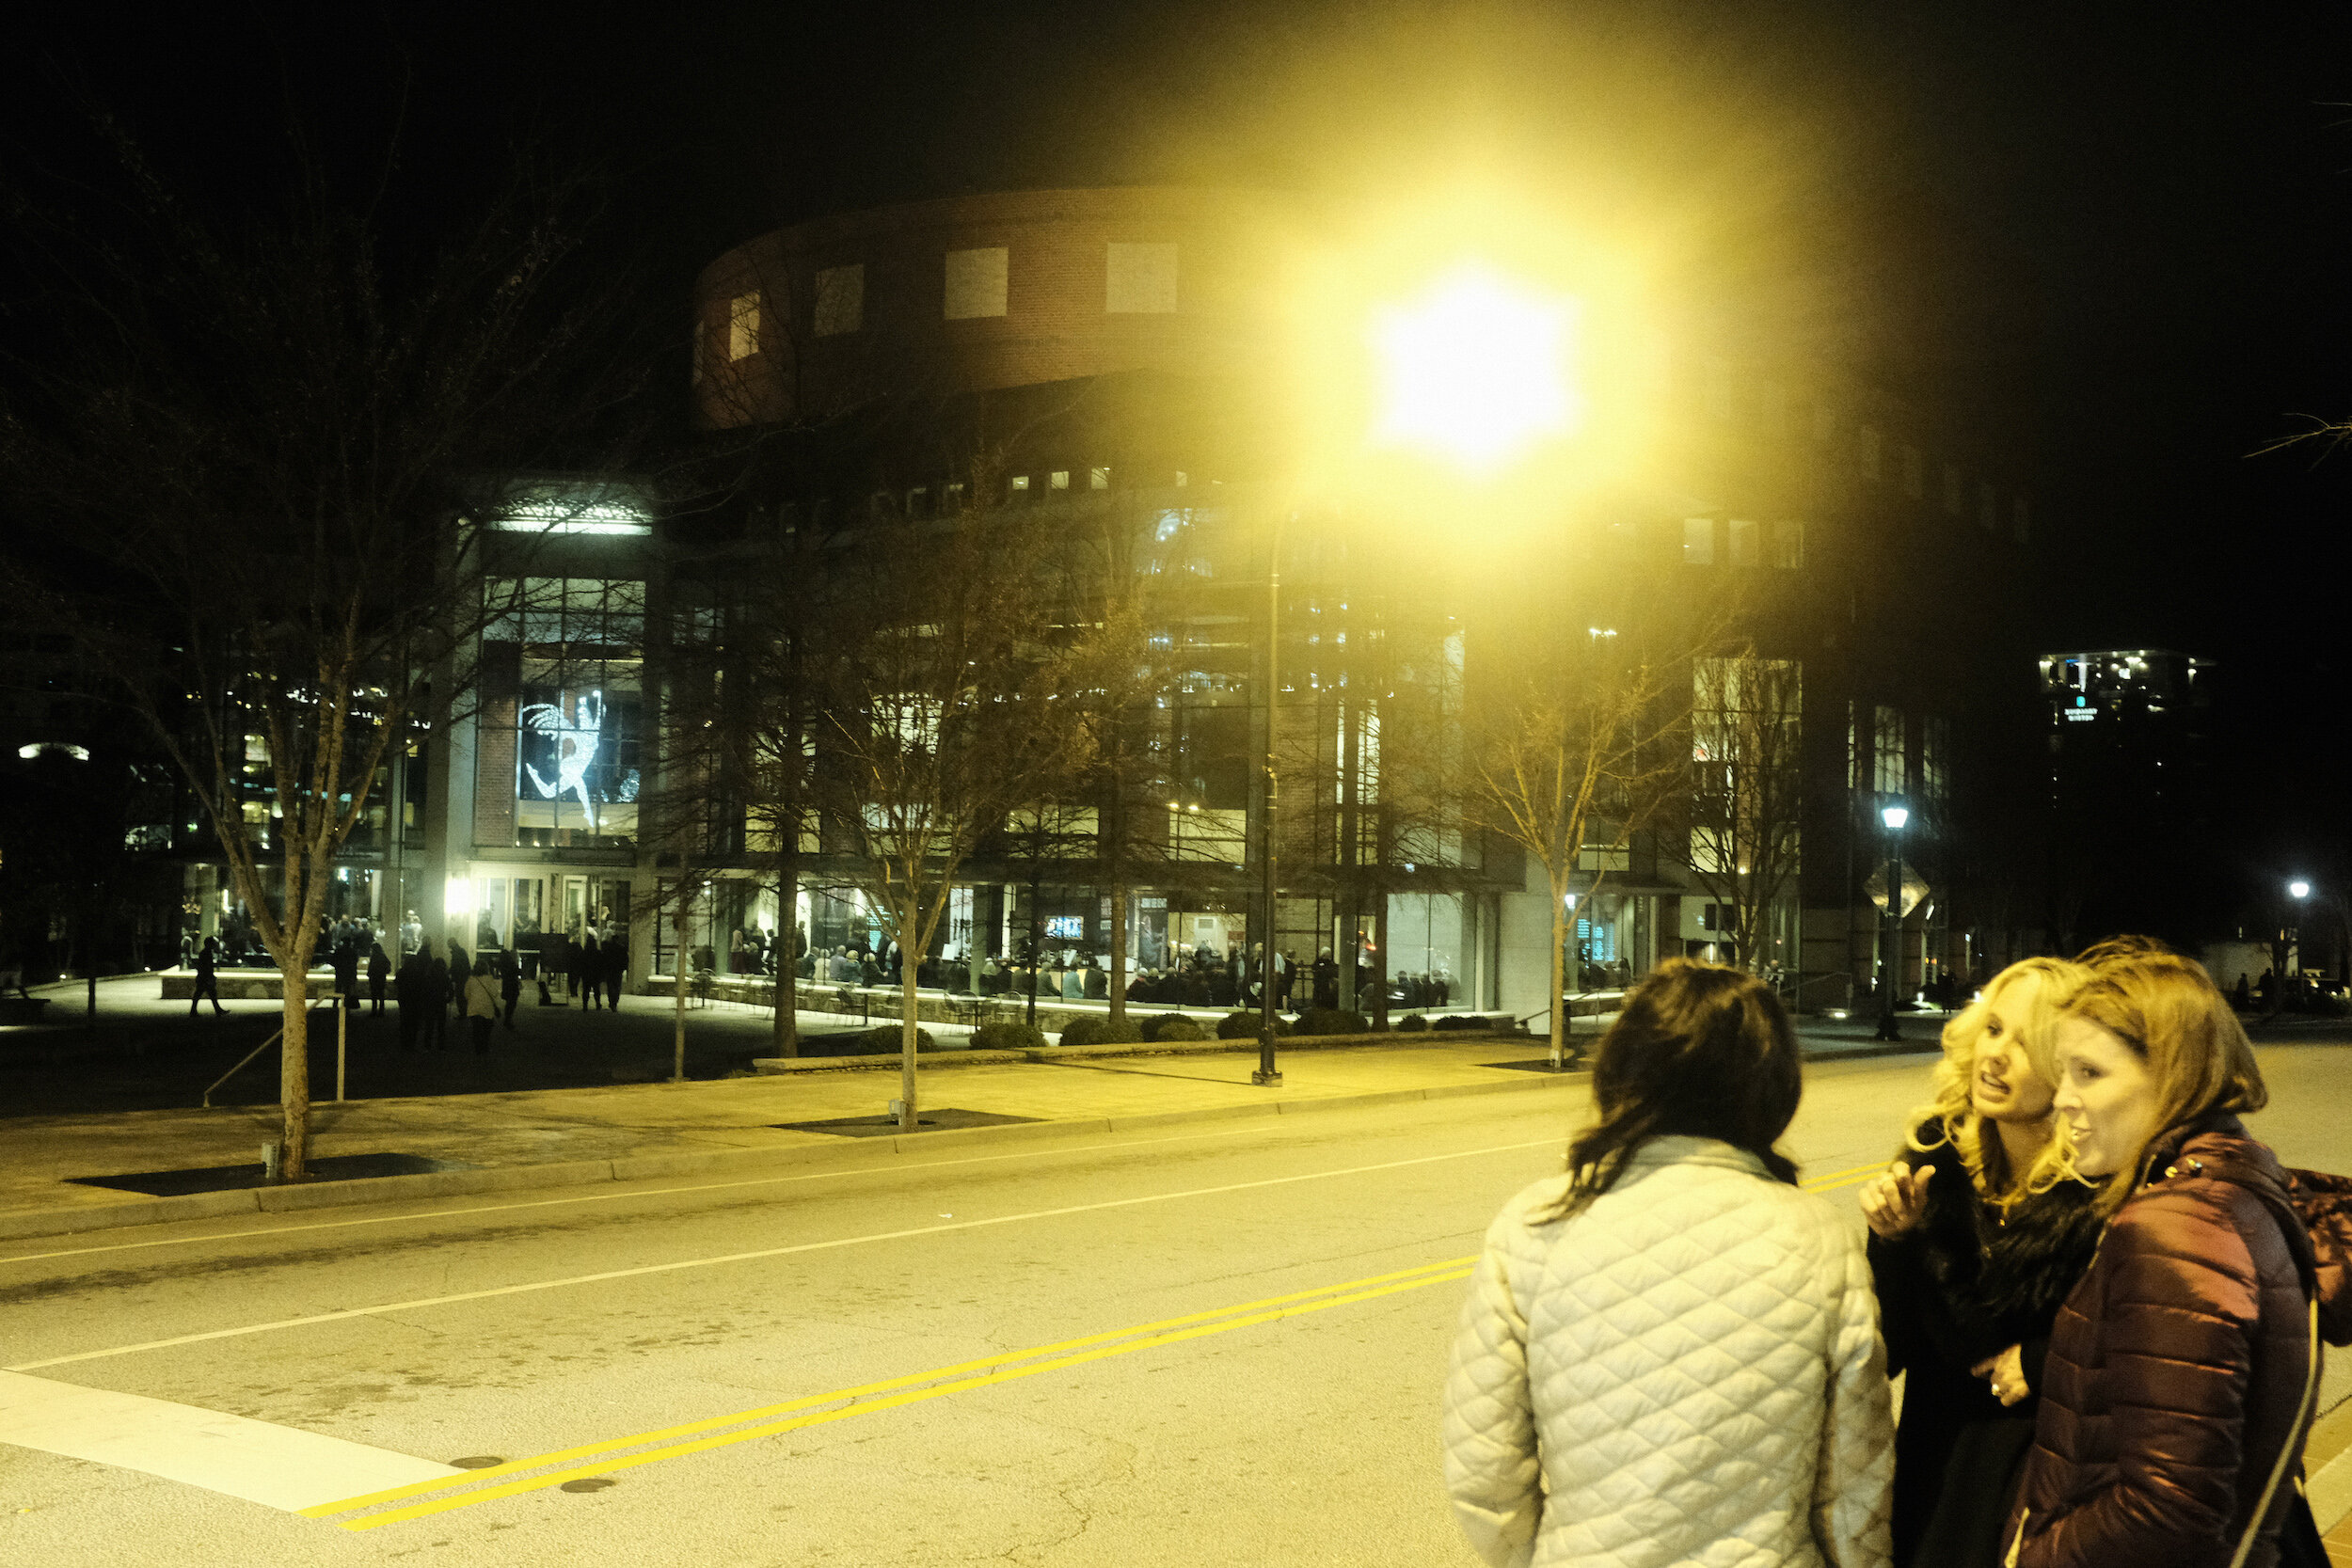
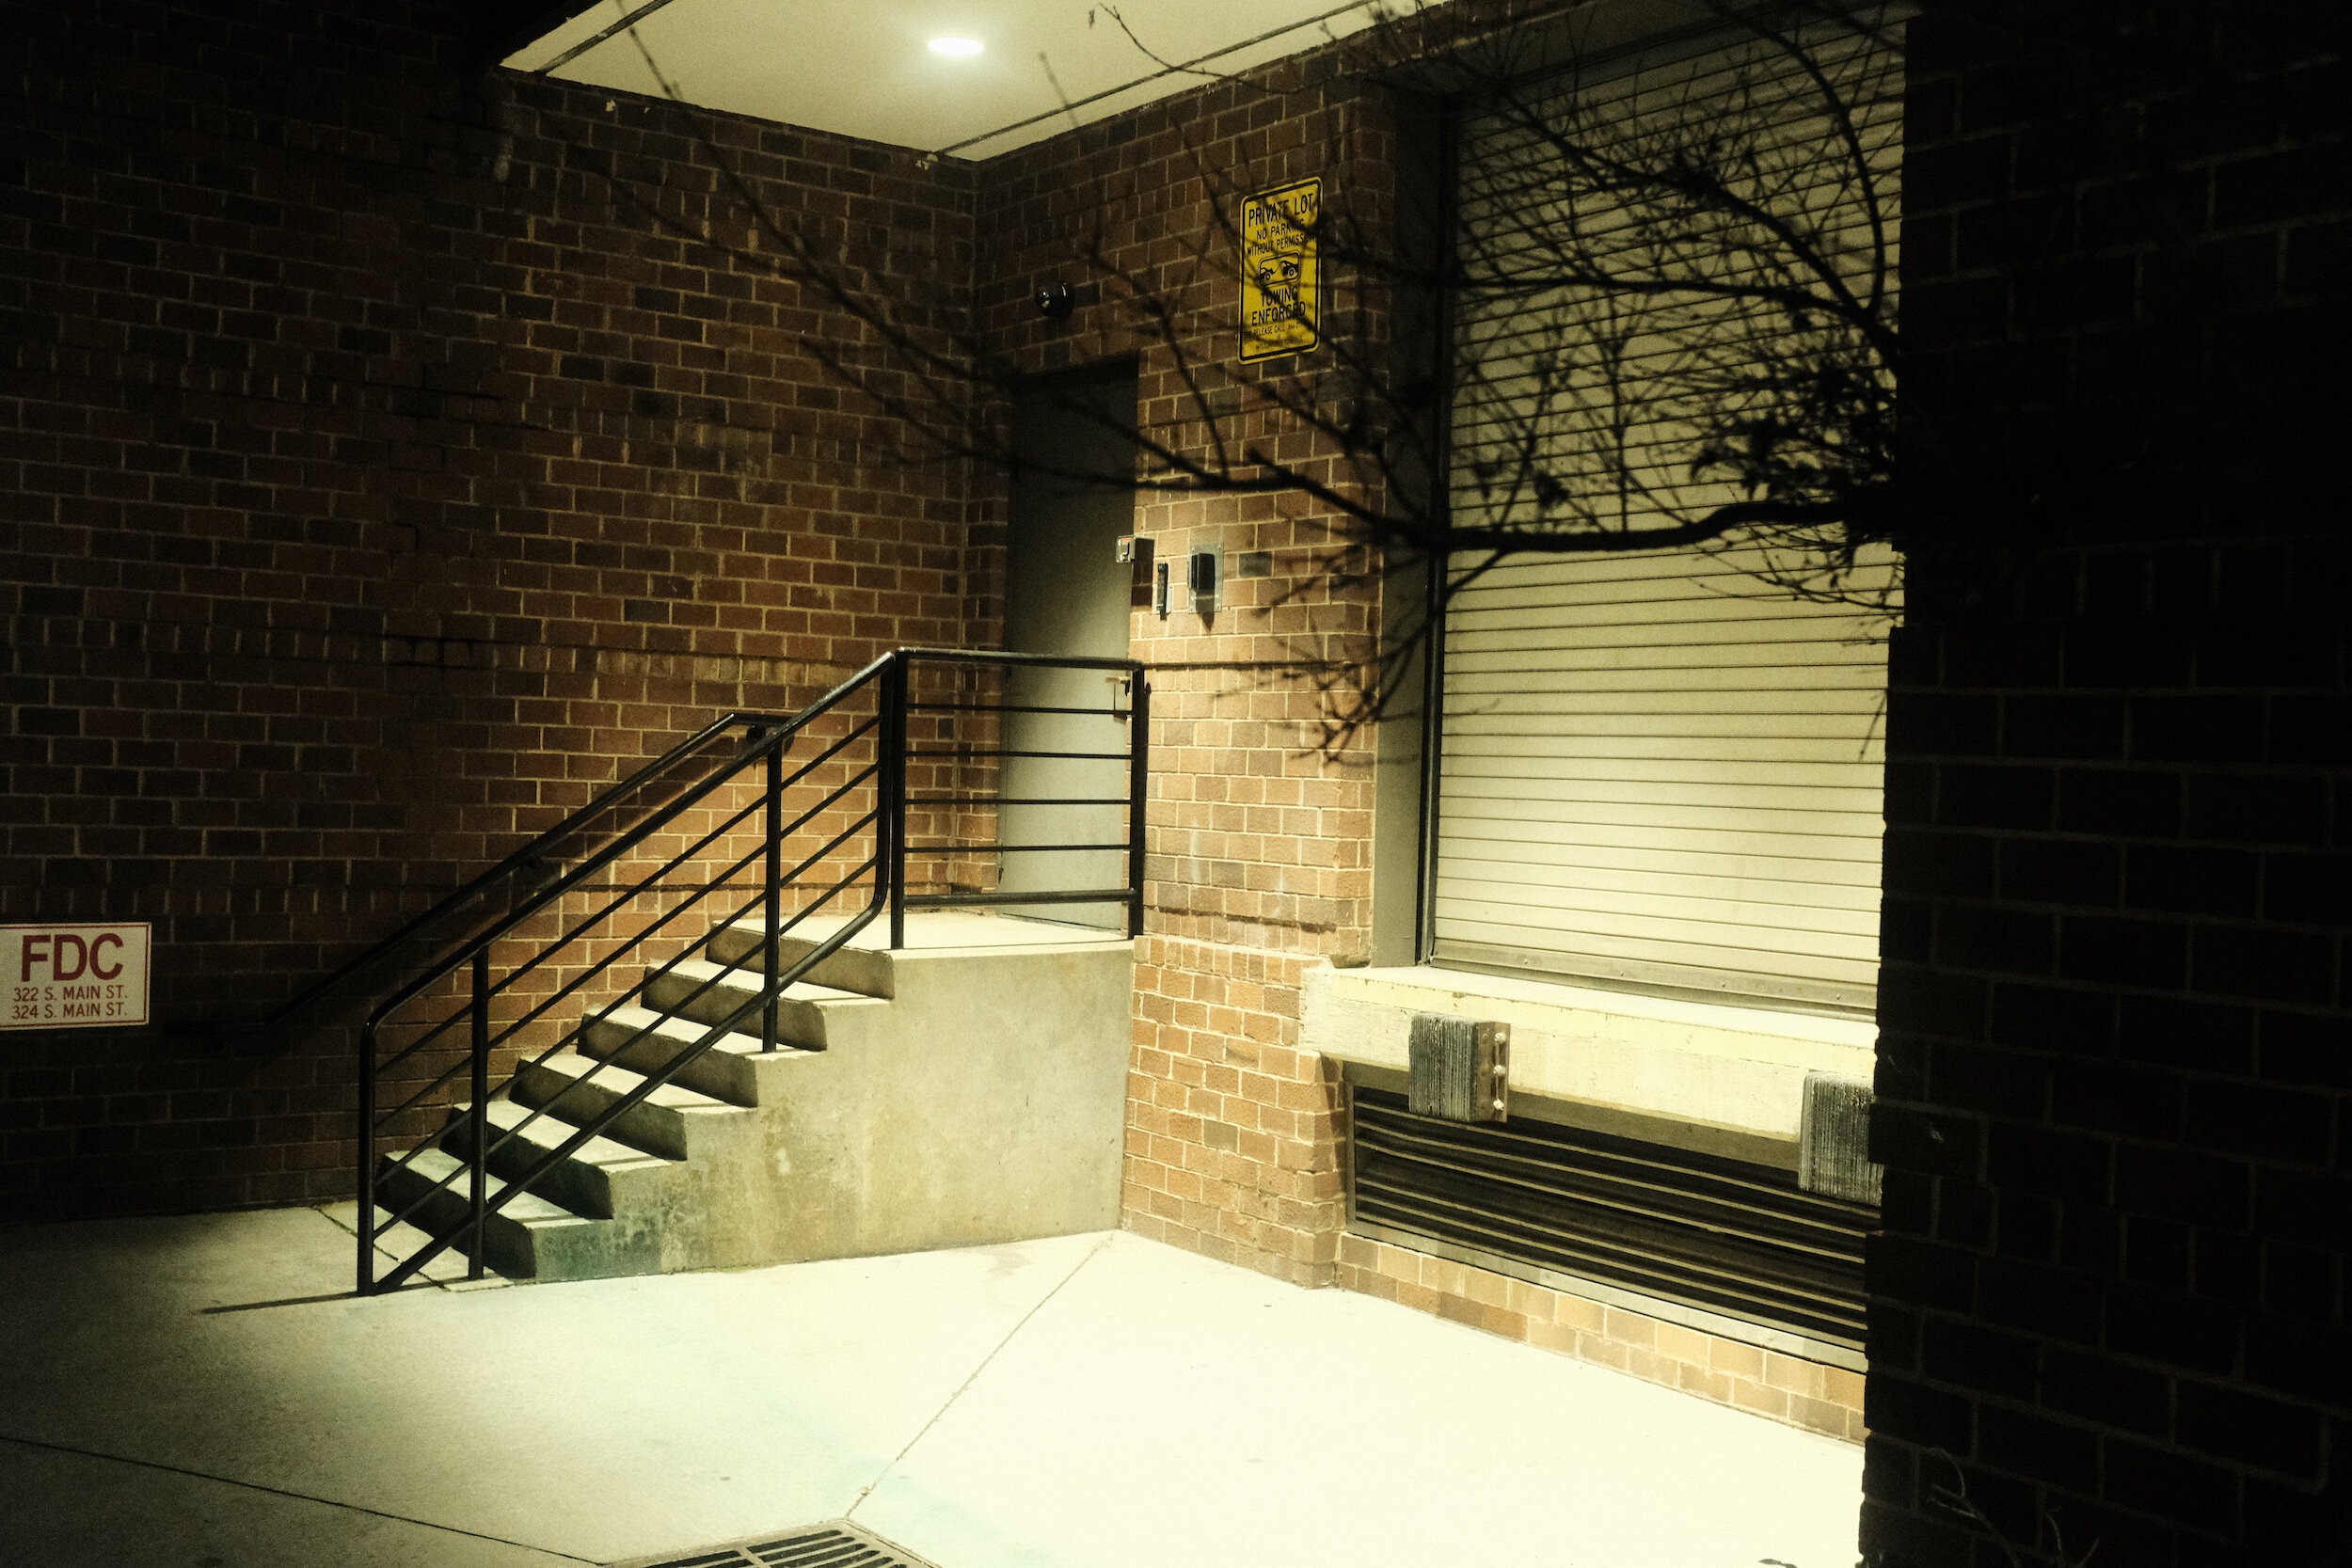
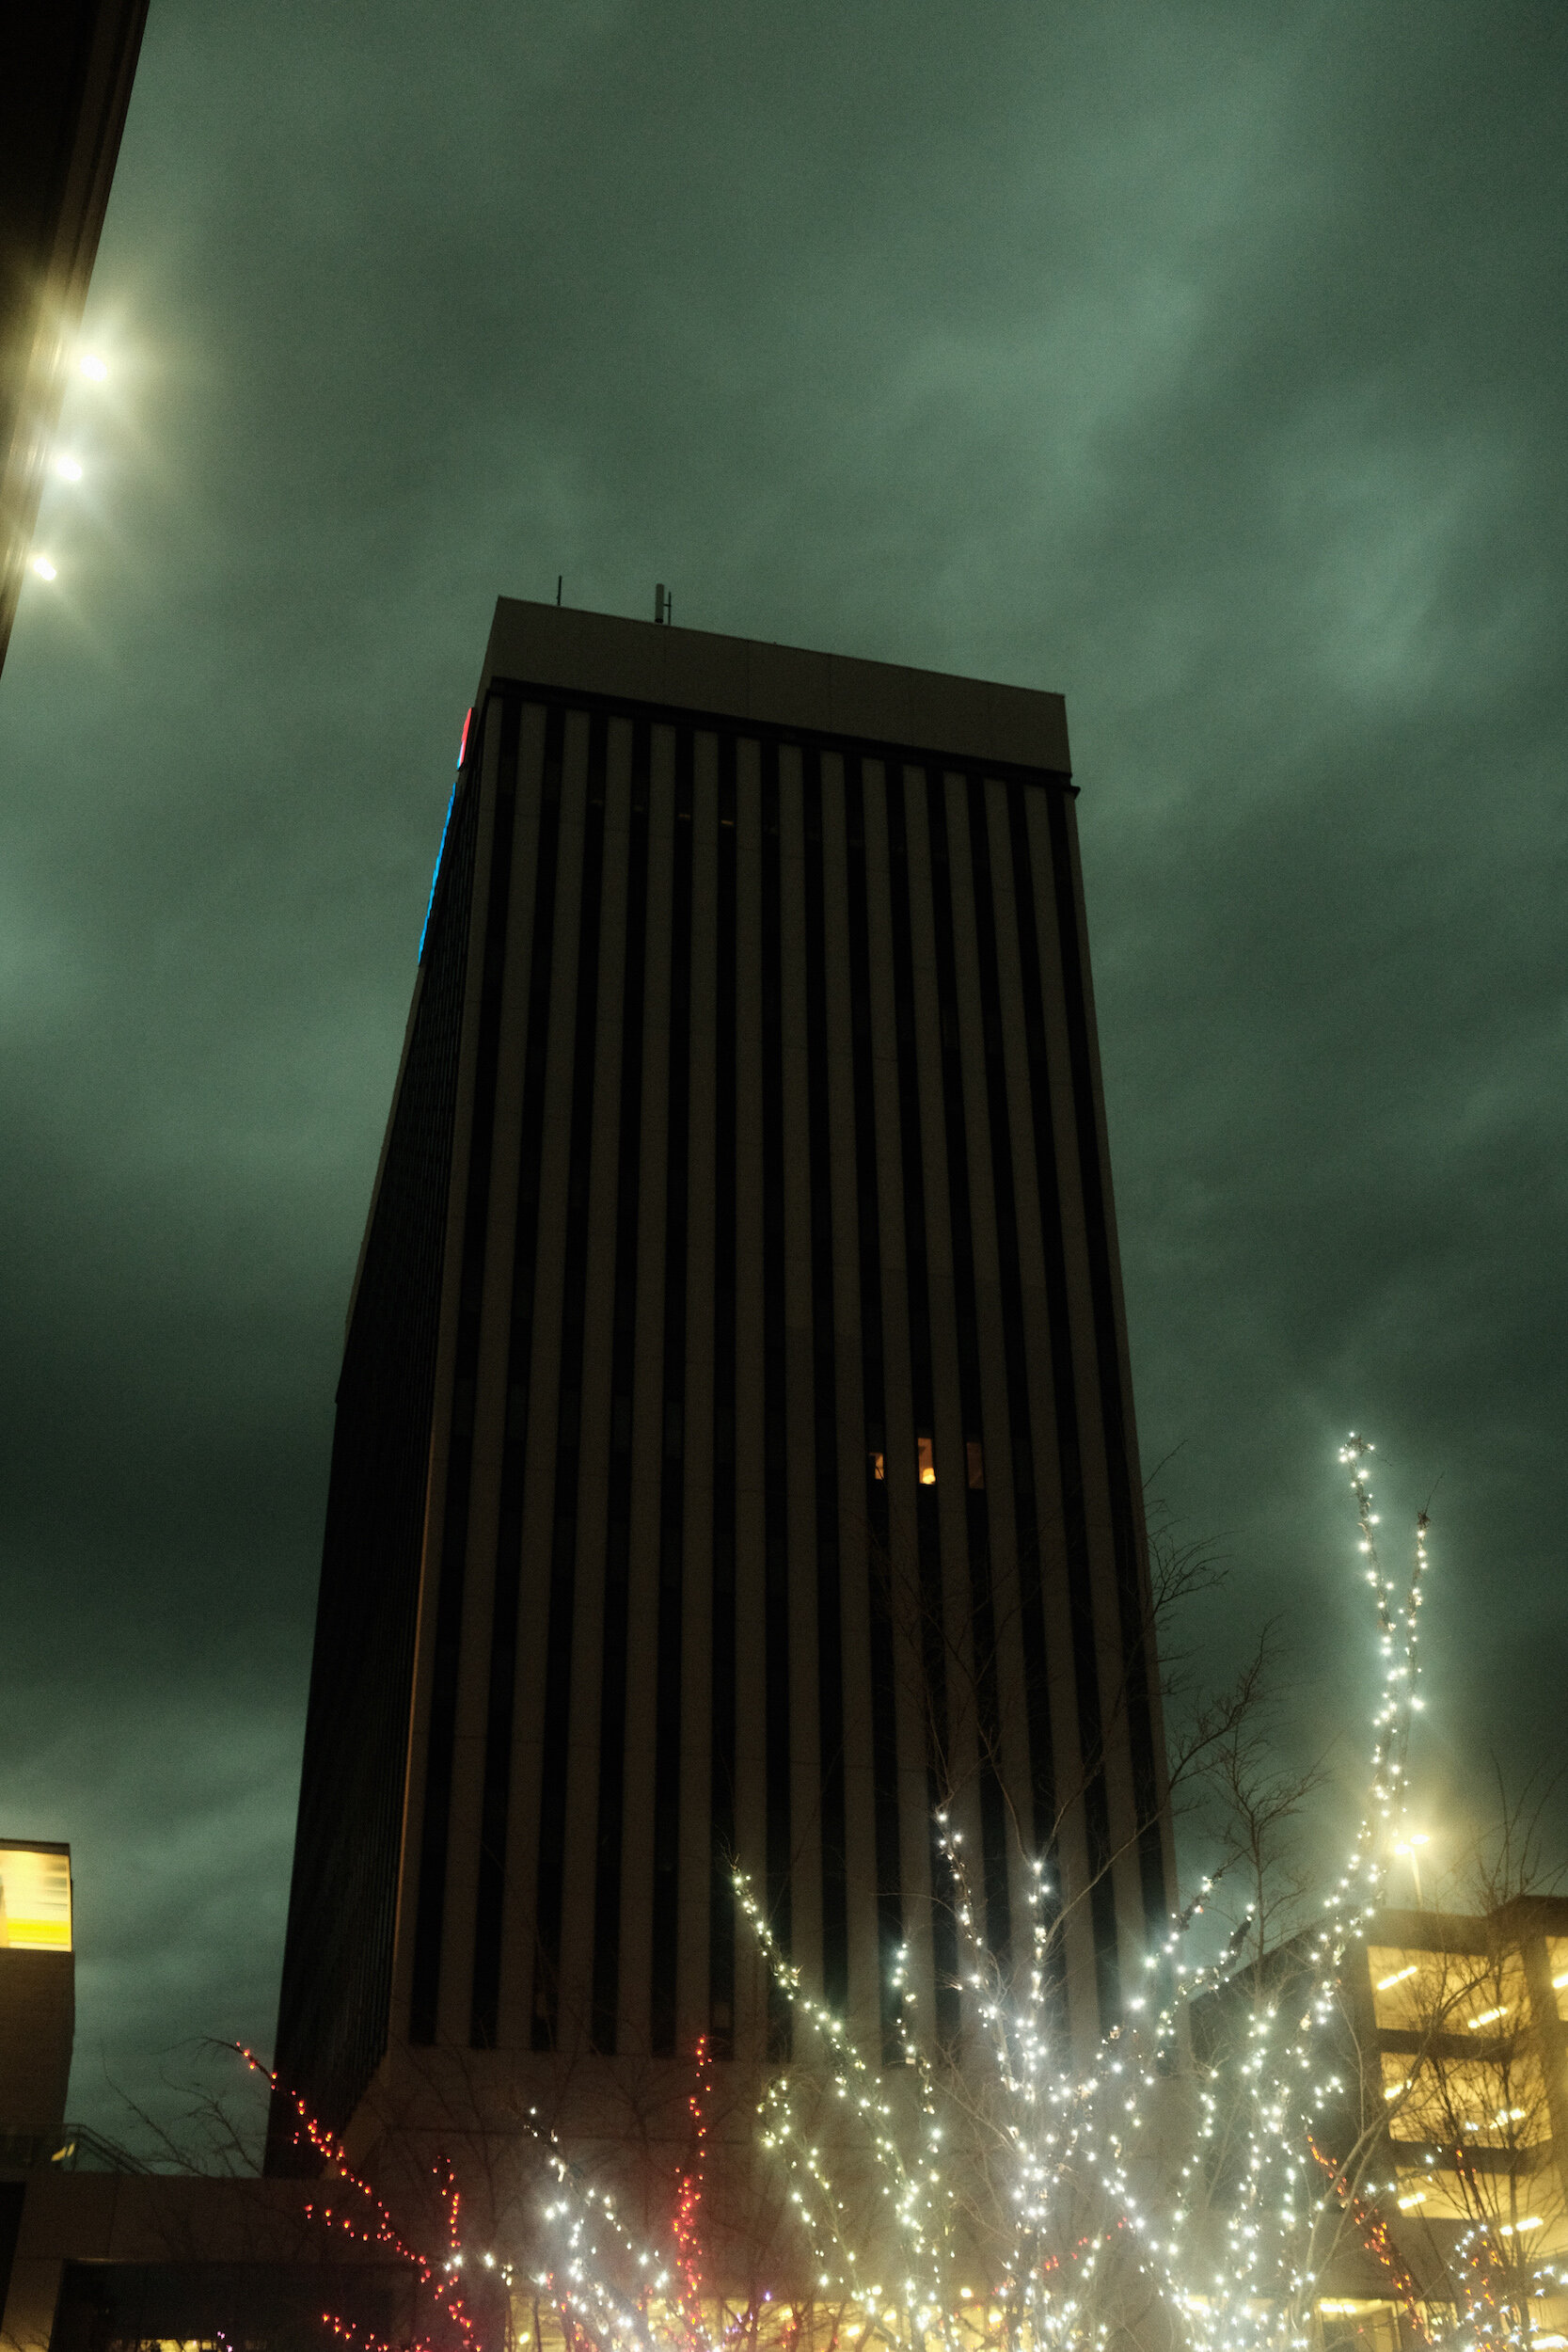
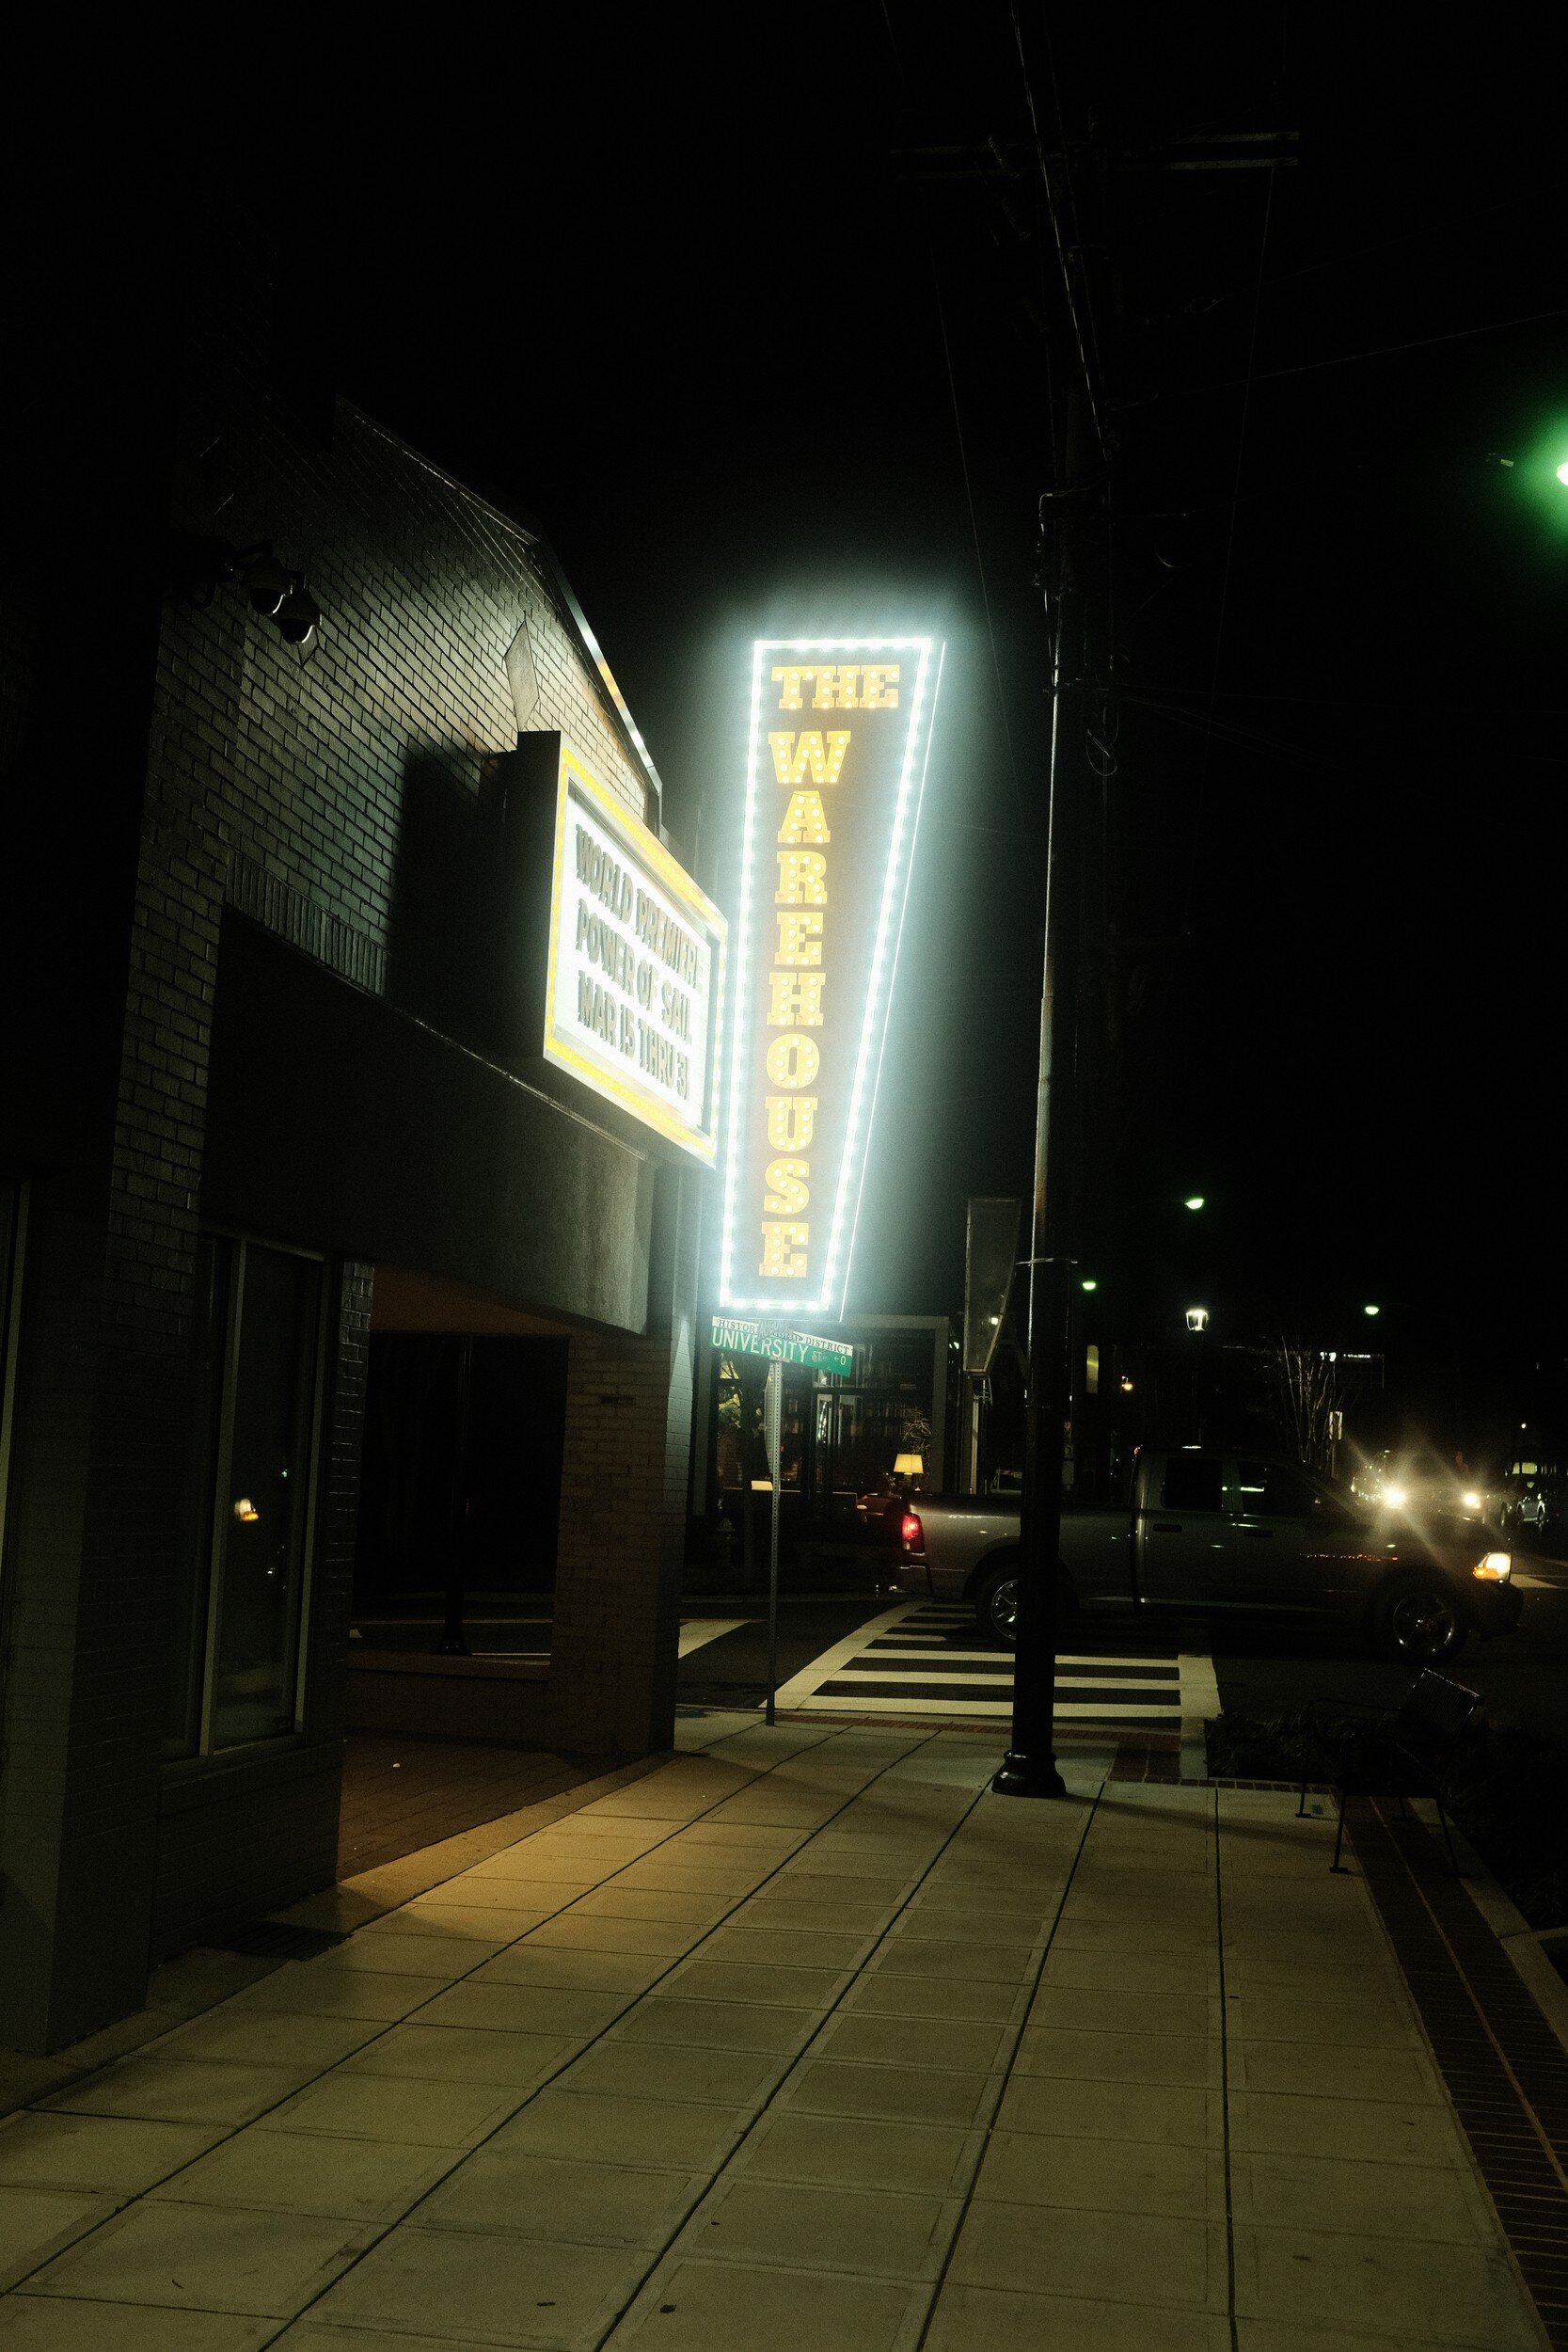
Conclusion
As mentioned: I am not a proponent of just copy-pasting presets. Whether for in-camera film simulation or post-processing. The results from the presets as developed by Ritchie Roesch, however, definitely have me wanting to experiment more with presets. Maybe tweaking them a bit more, maybe experimenting with some other film simulations.
Another rather interesting observation I have is that looking at these images, I like the 3:2 aspect ratio.
As you might remember from a post quite some time ago, I have a preference for the 5:4 aspect ratio of medium format film. Reviewing the results above however, I find the aspect ratios of these images rather pleasing. I don't know if this is because they look so much like the old 135 film images I used to make in the past?
Maybe another change going forward? Not sure yet, but what these color images and aspect ratios have learned me is that photography is a continuous learning process, that never ends.