
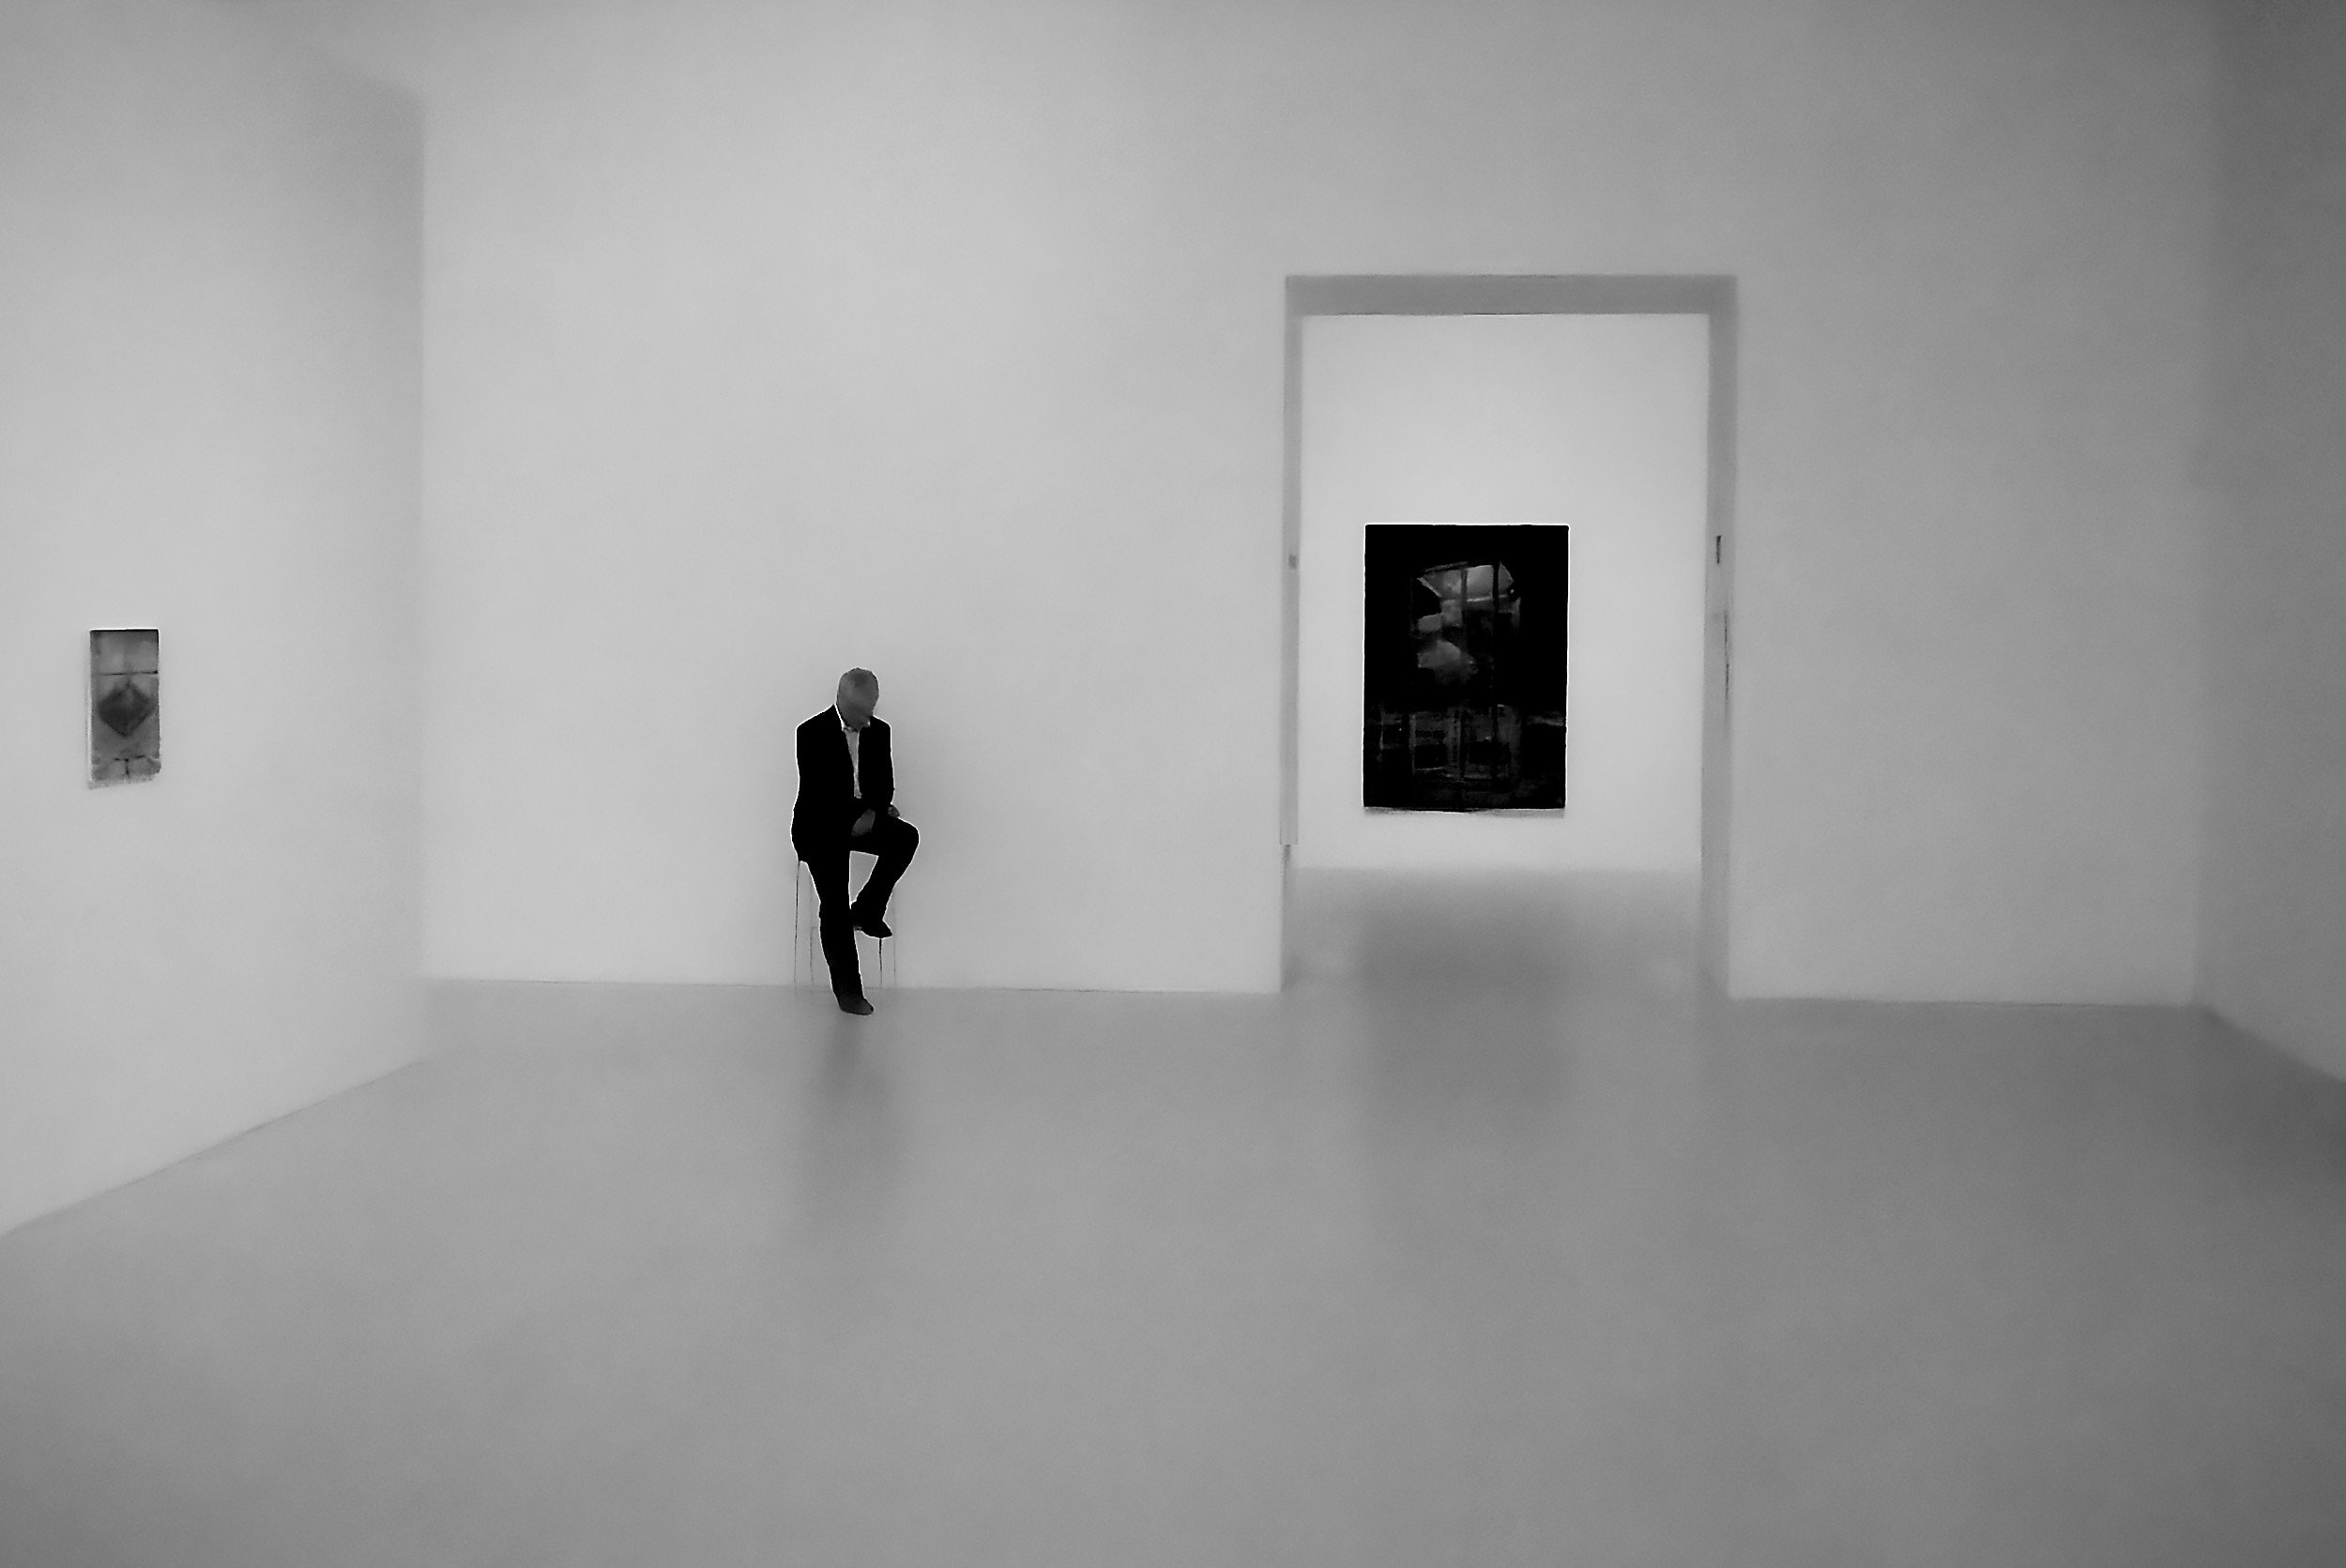
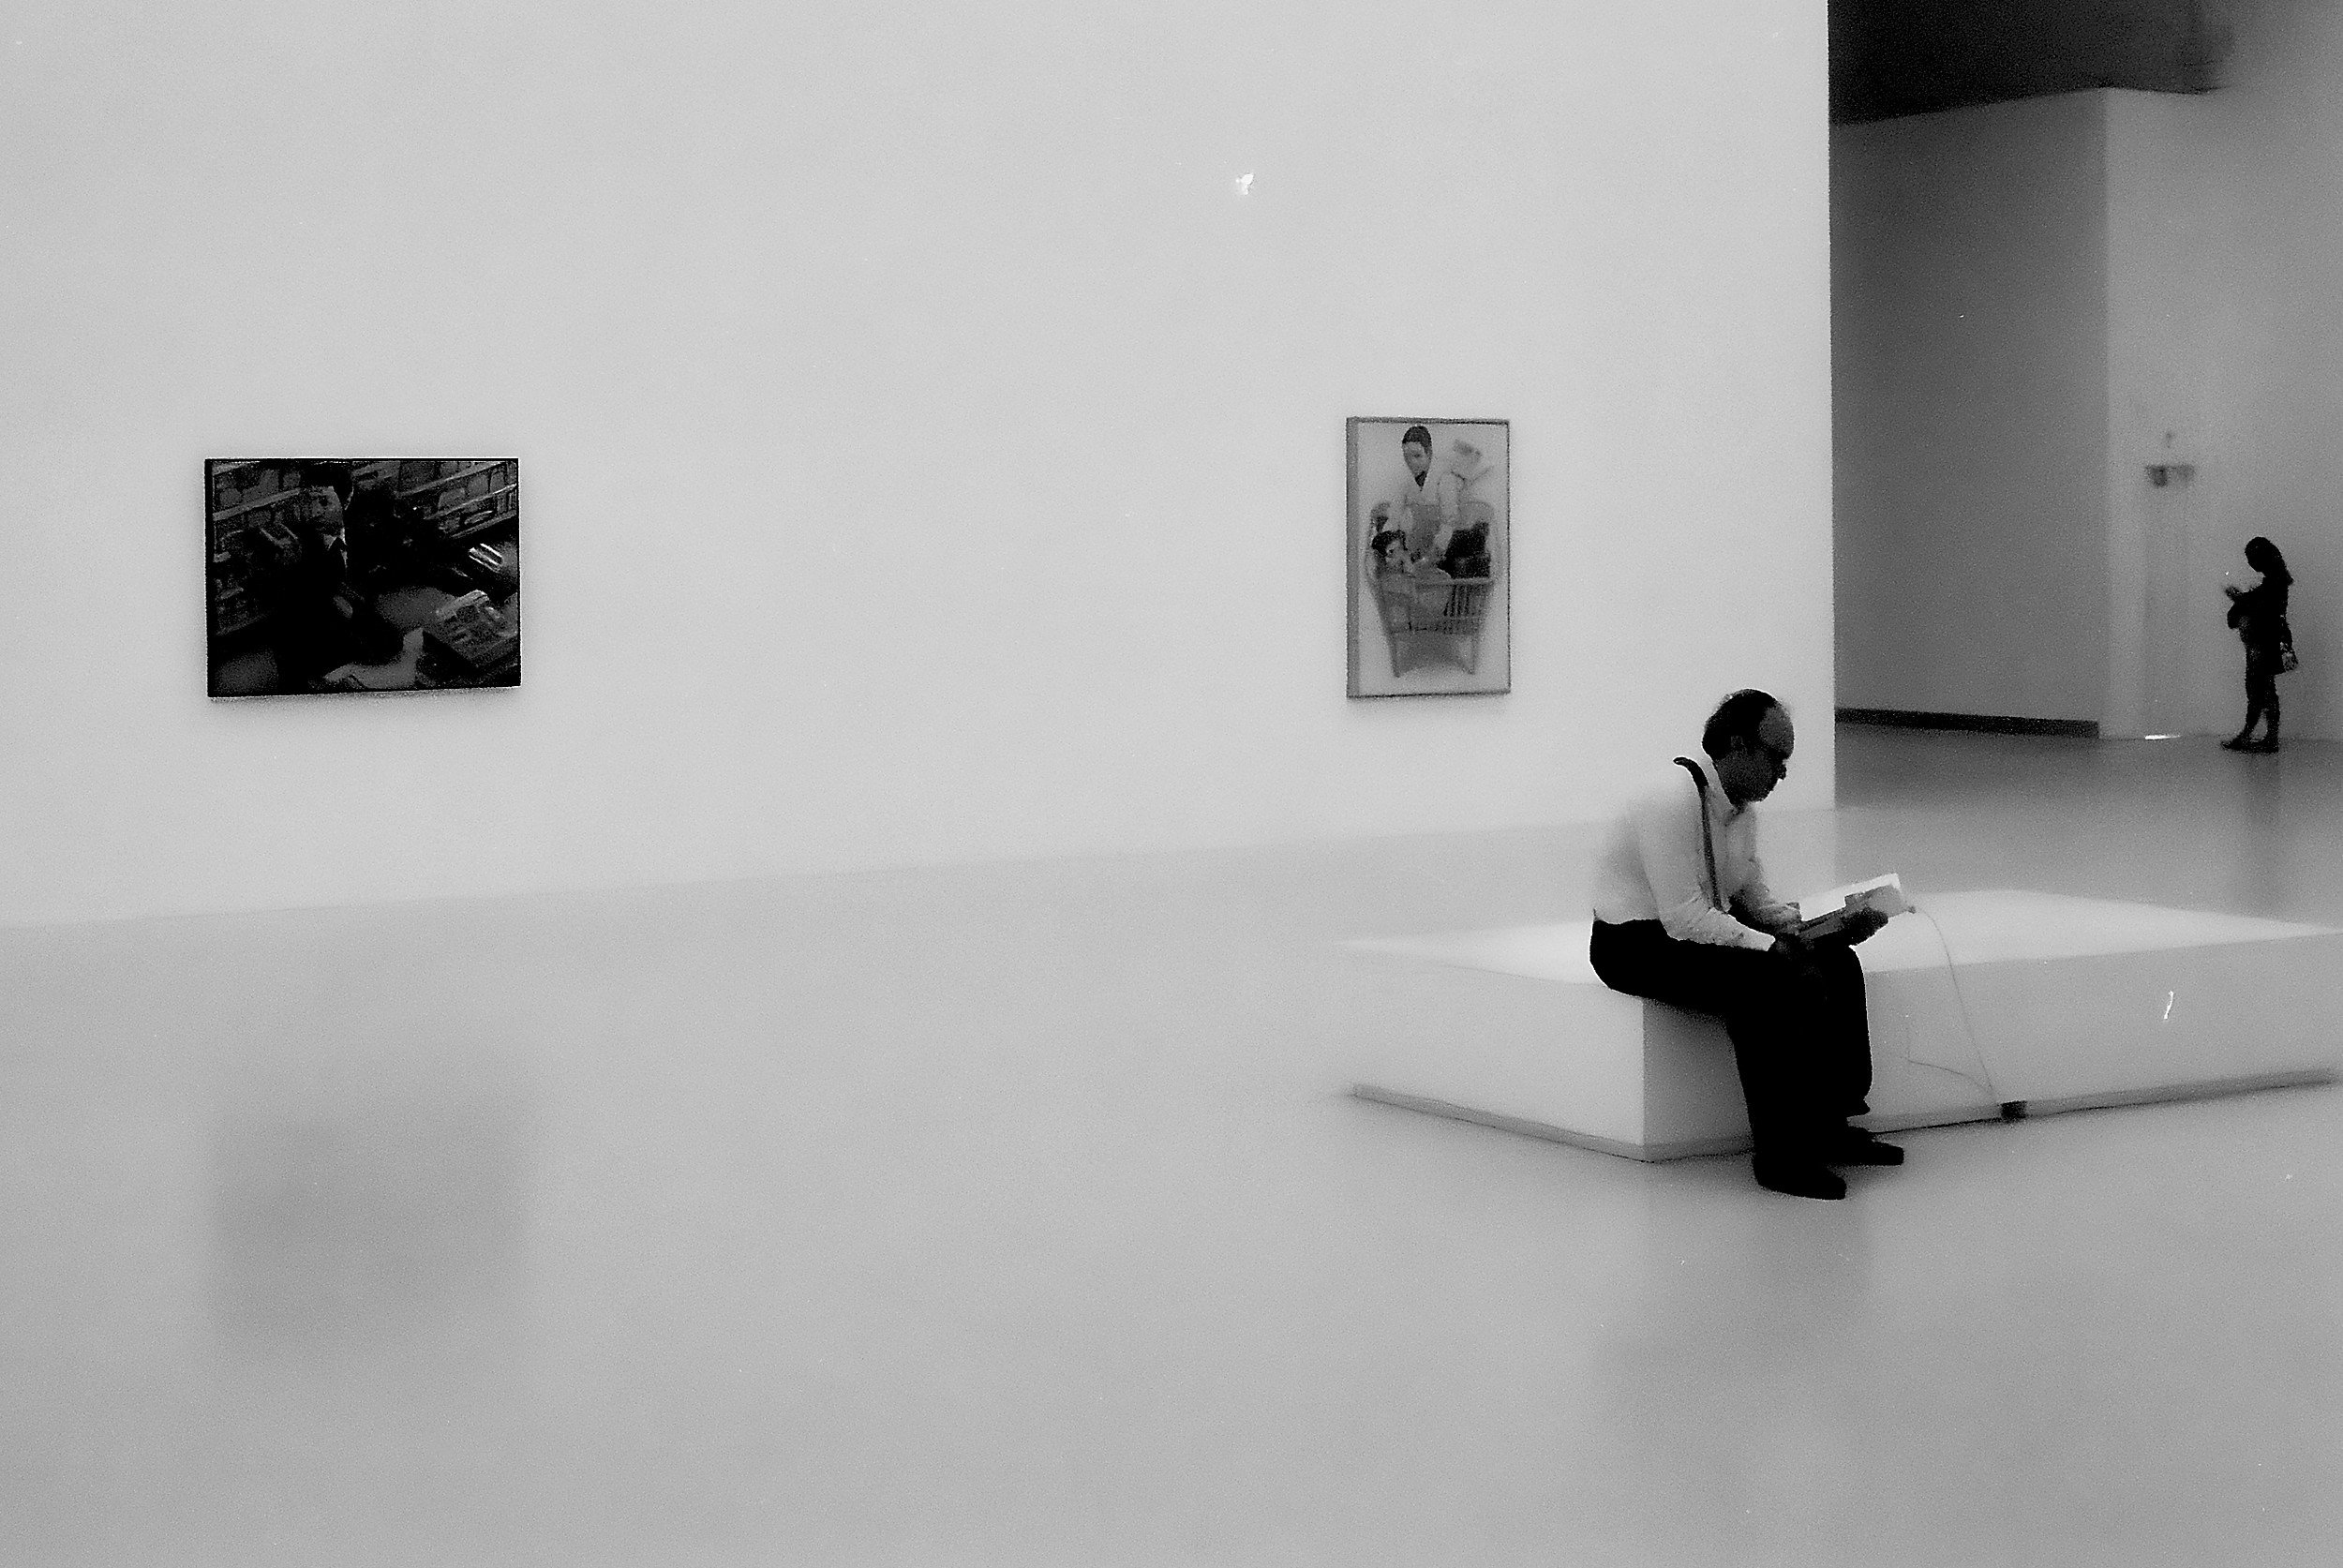
Did I Save These Images?
Saving Or Ruining Film Images In Post Processing
While visiting the Palacio de Cristal in Retiro Park in Madrid, Spain, in 2019 I made several images with my Leica M4 and Delta 400 film.

Saving Or Ruining film Images In Post Processing
While visiting the Palacio de Cristal in Retiro Park in Madrid, Spain, in 2019 I made several images with my Leica M4 and Delta 400 film.
The Leica at that moment was quite new to me - I purchased it just a month before in South Africa - and working with an external light meter or guessing my exposure settings with the sunny-16 rule was not something I was very much used to yet.
As a consequence, several images turned out to be quite under-exposed. Resulting in thin and grainy negatives, which showed clearly in the scans I got back from the lab.
I played around with the digital versions of these images, first in Lightroom and later in the 2019 version of ON1 I, but never really to my satisfaction.
We are in 2024 now, and ON1 got some major and interesting upgrades, including Brilliance AI and an updated version of their NoNoiseAI and TackSharpAI tools.
This encouraged me to revisit these images and put them through the ON1 works.
And to be honest: I like the results. While I admit they absolutely have a very processed look to them now, to my opinion this has created a look that pleases my eye: very clean, very slick, almost graphic.
I wonder what you think of this: did I manage to save these images, or did I only make a bad (underexposed and grainy) photo worse in another way?
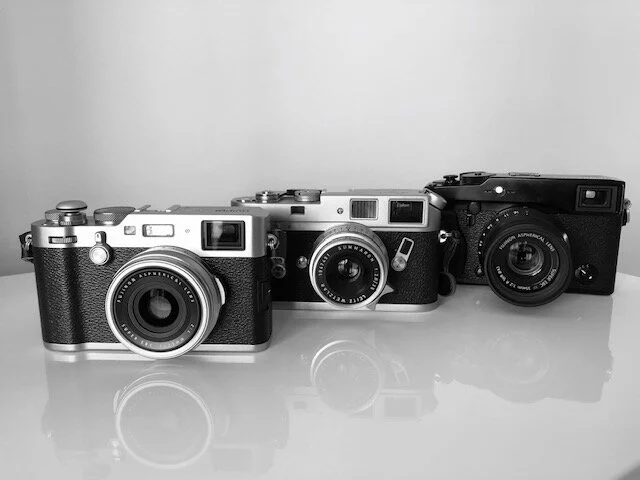
The Trinity Is No More
One Camera Is Gone, And It Is Probably Not The One You Would Expect
In 2019, I was fortunate to obtain two new cameras that were an excellent accompaniment to my Fujifilm X-Pro 1 and supplemented each other: a new Fujifilm X100F and a used Leica M4.
As I wrote, these three cameras became my Trinity.
The X-Pro 1 was going to be my exchangeable-lens camera for when I wanted to create images with wide-angle (broader than 35mm full-frame equivalent) or longer lenses.
The X100F (with its 35mm full-frame equivalent lens) and the Leica M4 (with its 35mm Summaron) would be my daily go-to cameras, depending on whether I wanted to shoot digital or analogue.
This setup worked well; I created many street and social documentary-style images and essays with these three tools.
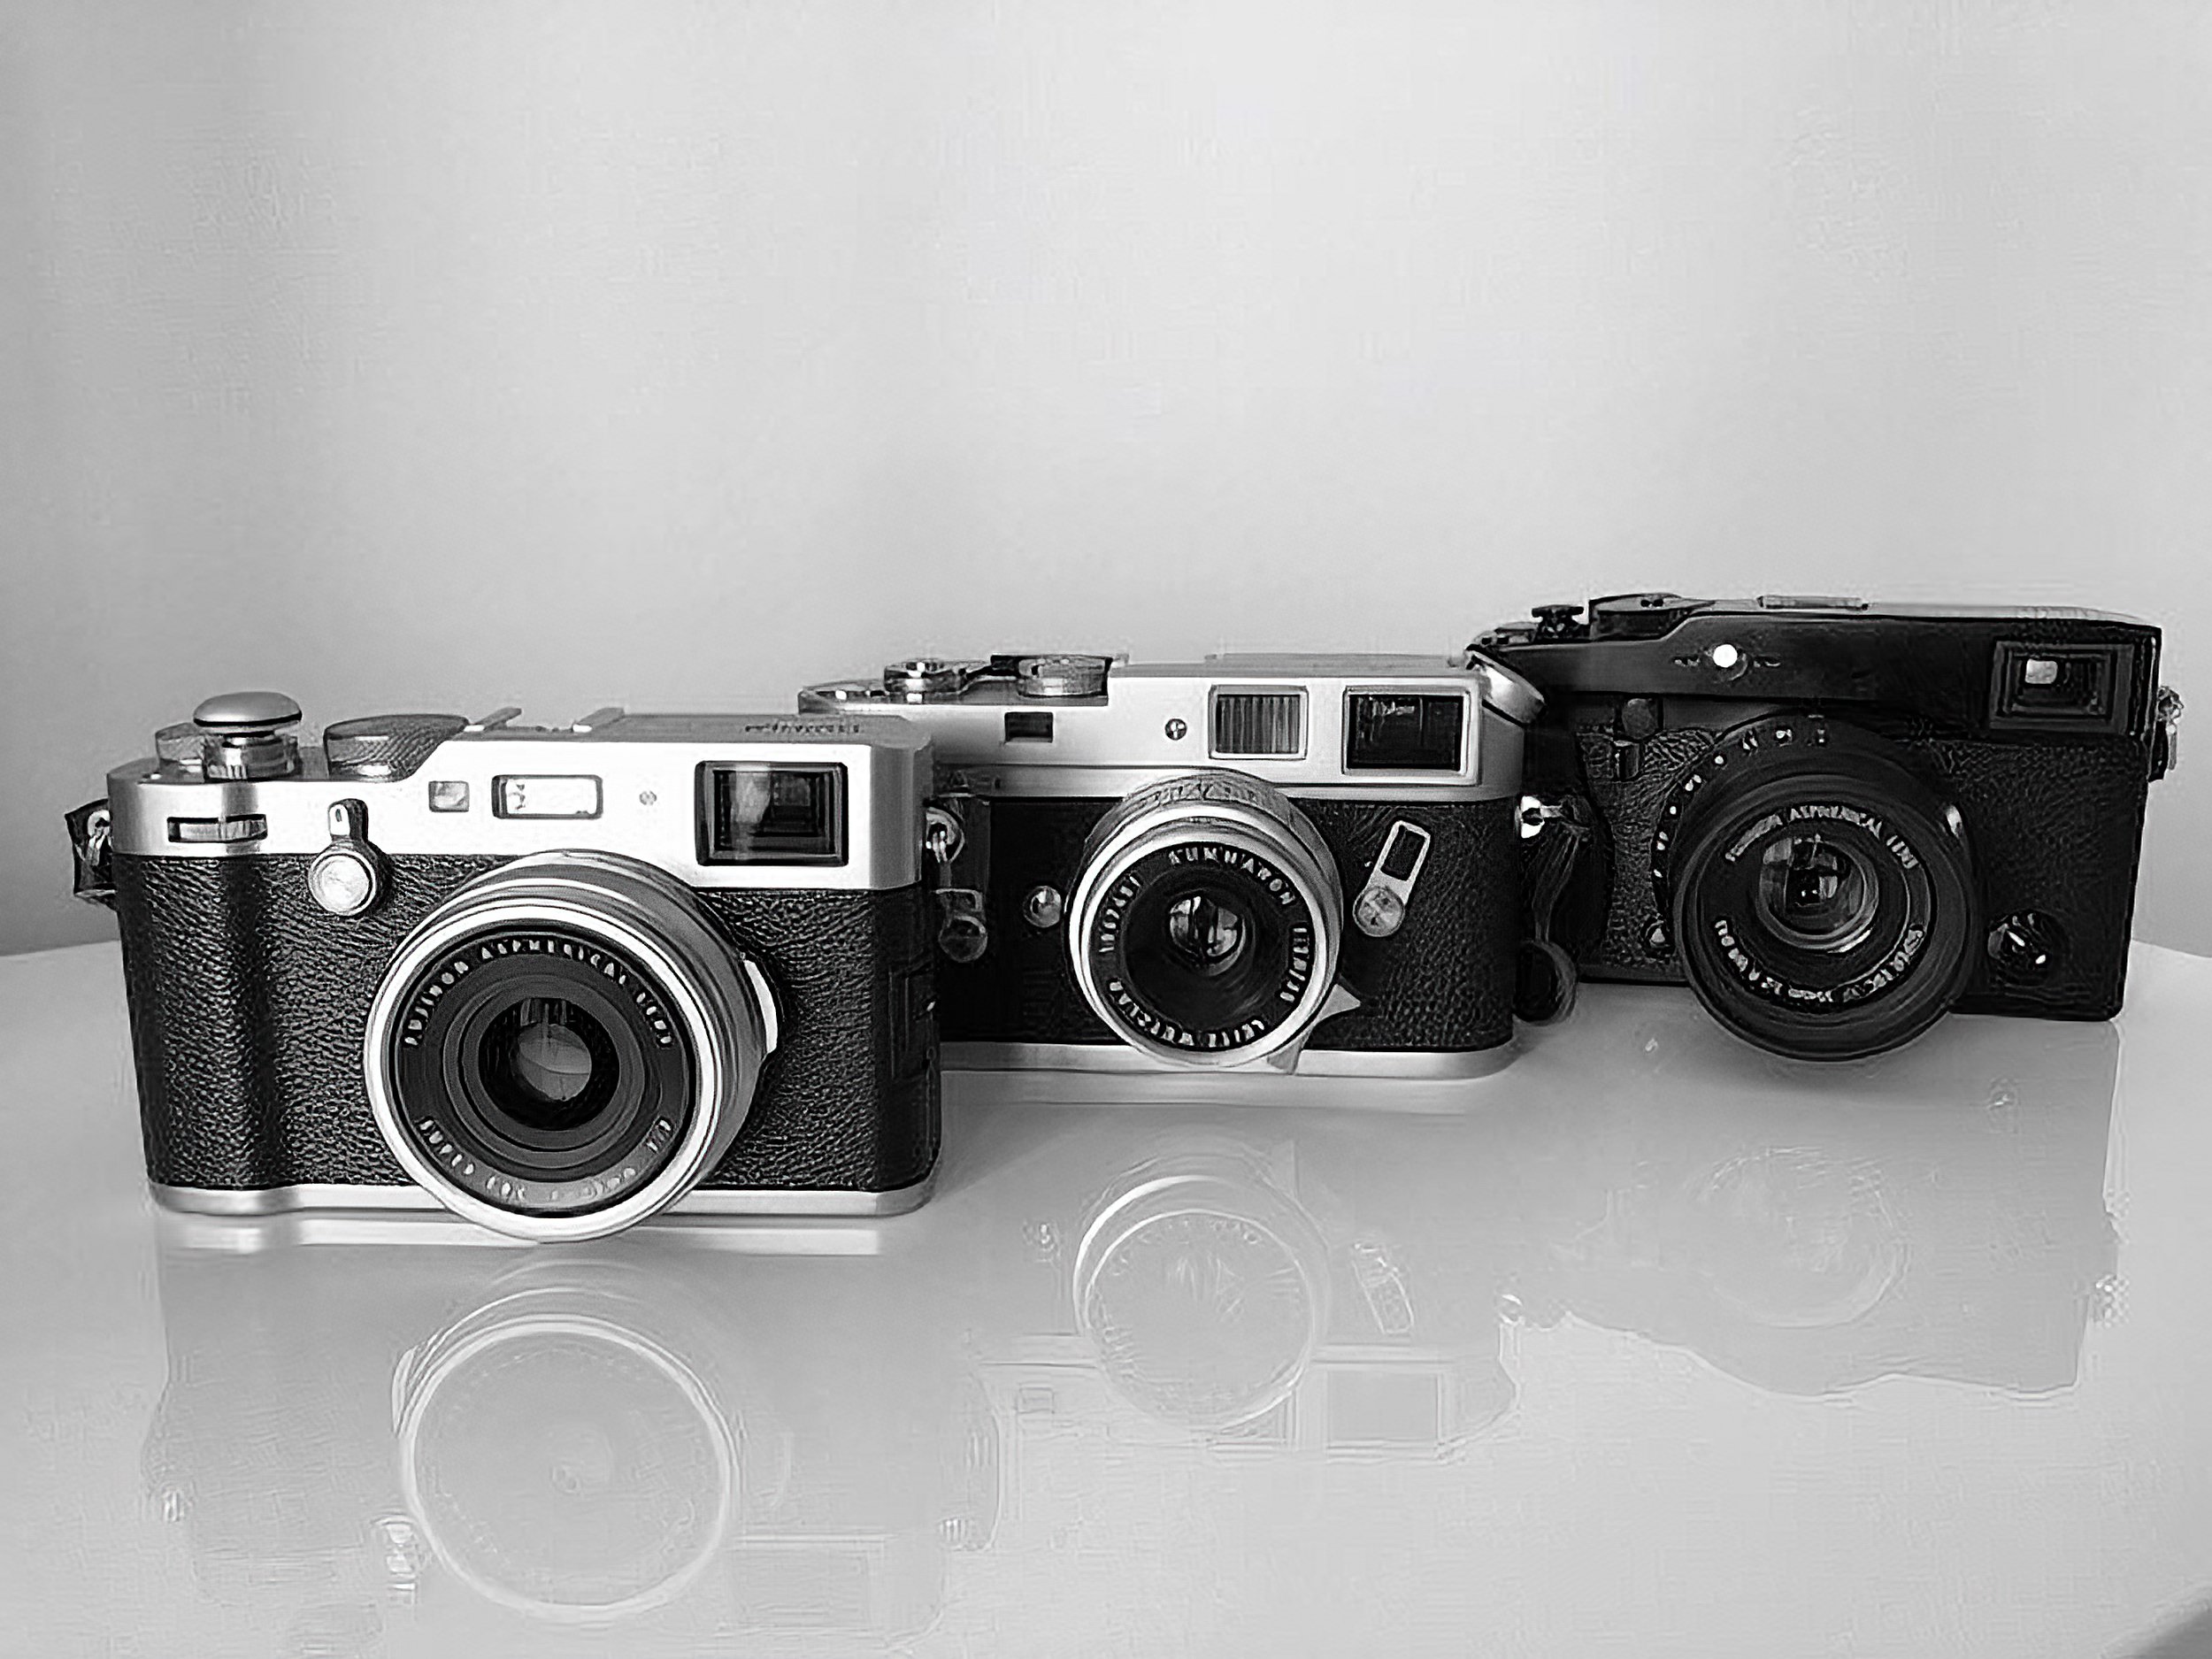
And now I broke the Trinity up.
What happened?
Did one of the cameras break? Did I not like any of them anymore?
Fortunately, none of those.
One of my daughters went to study abroad in September of this year and wanted to take a real camera with her. Although she has the ubiquitous iPhone, she wanted a real camera (insert dad doing a happy dance).
After researching several alternatives and the cost involved, I decided that I was going to give her the X100F.
Yup, I parted with this lovely camera to give my daughter an excellent tool and a fantastic shooting experience.
It is easy to set the Fujifilm X100F up as a 'point and shoot camera, and if she wants to go manual, that is still a possibility.
So there you have it: the X100F is no longer part of my daily toolkit.
While my daughter was thrilled with this decision - and she is making great memories with the X100F in Bonny Scotland - it gave me a challenge and an opportunity.
Without the X100F and its 23mm lens (35mm full-frame equivalent), I no longer had a direct digital match to the 35mm Summaron on the Leica M4. Because the only lenses I had for the X-Pro 1 were a Fujinon 18mm/1.2, a Fujinon 35mm/1.4, a Fujinon 35mm/1.2 XF, and a TTArtisan 50mm/1.2.
All great lenses, which I still use today, but none of them are a direct match to the 35mm angle of the Summaron.
Enter the TTArtisan 23mm/1.4
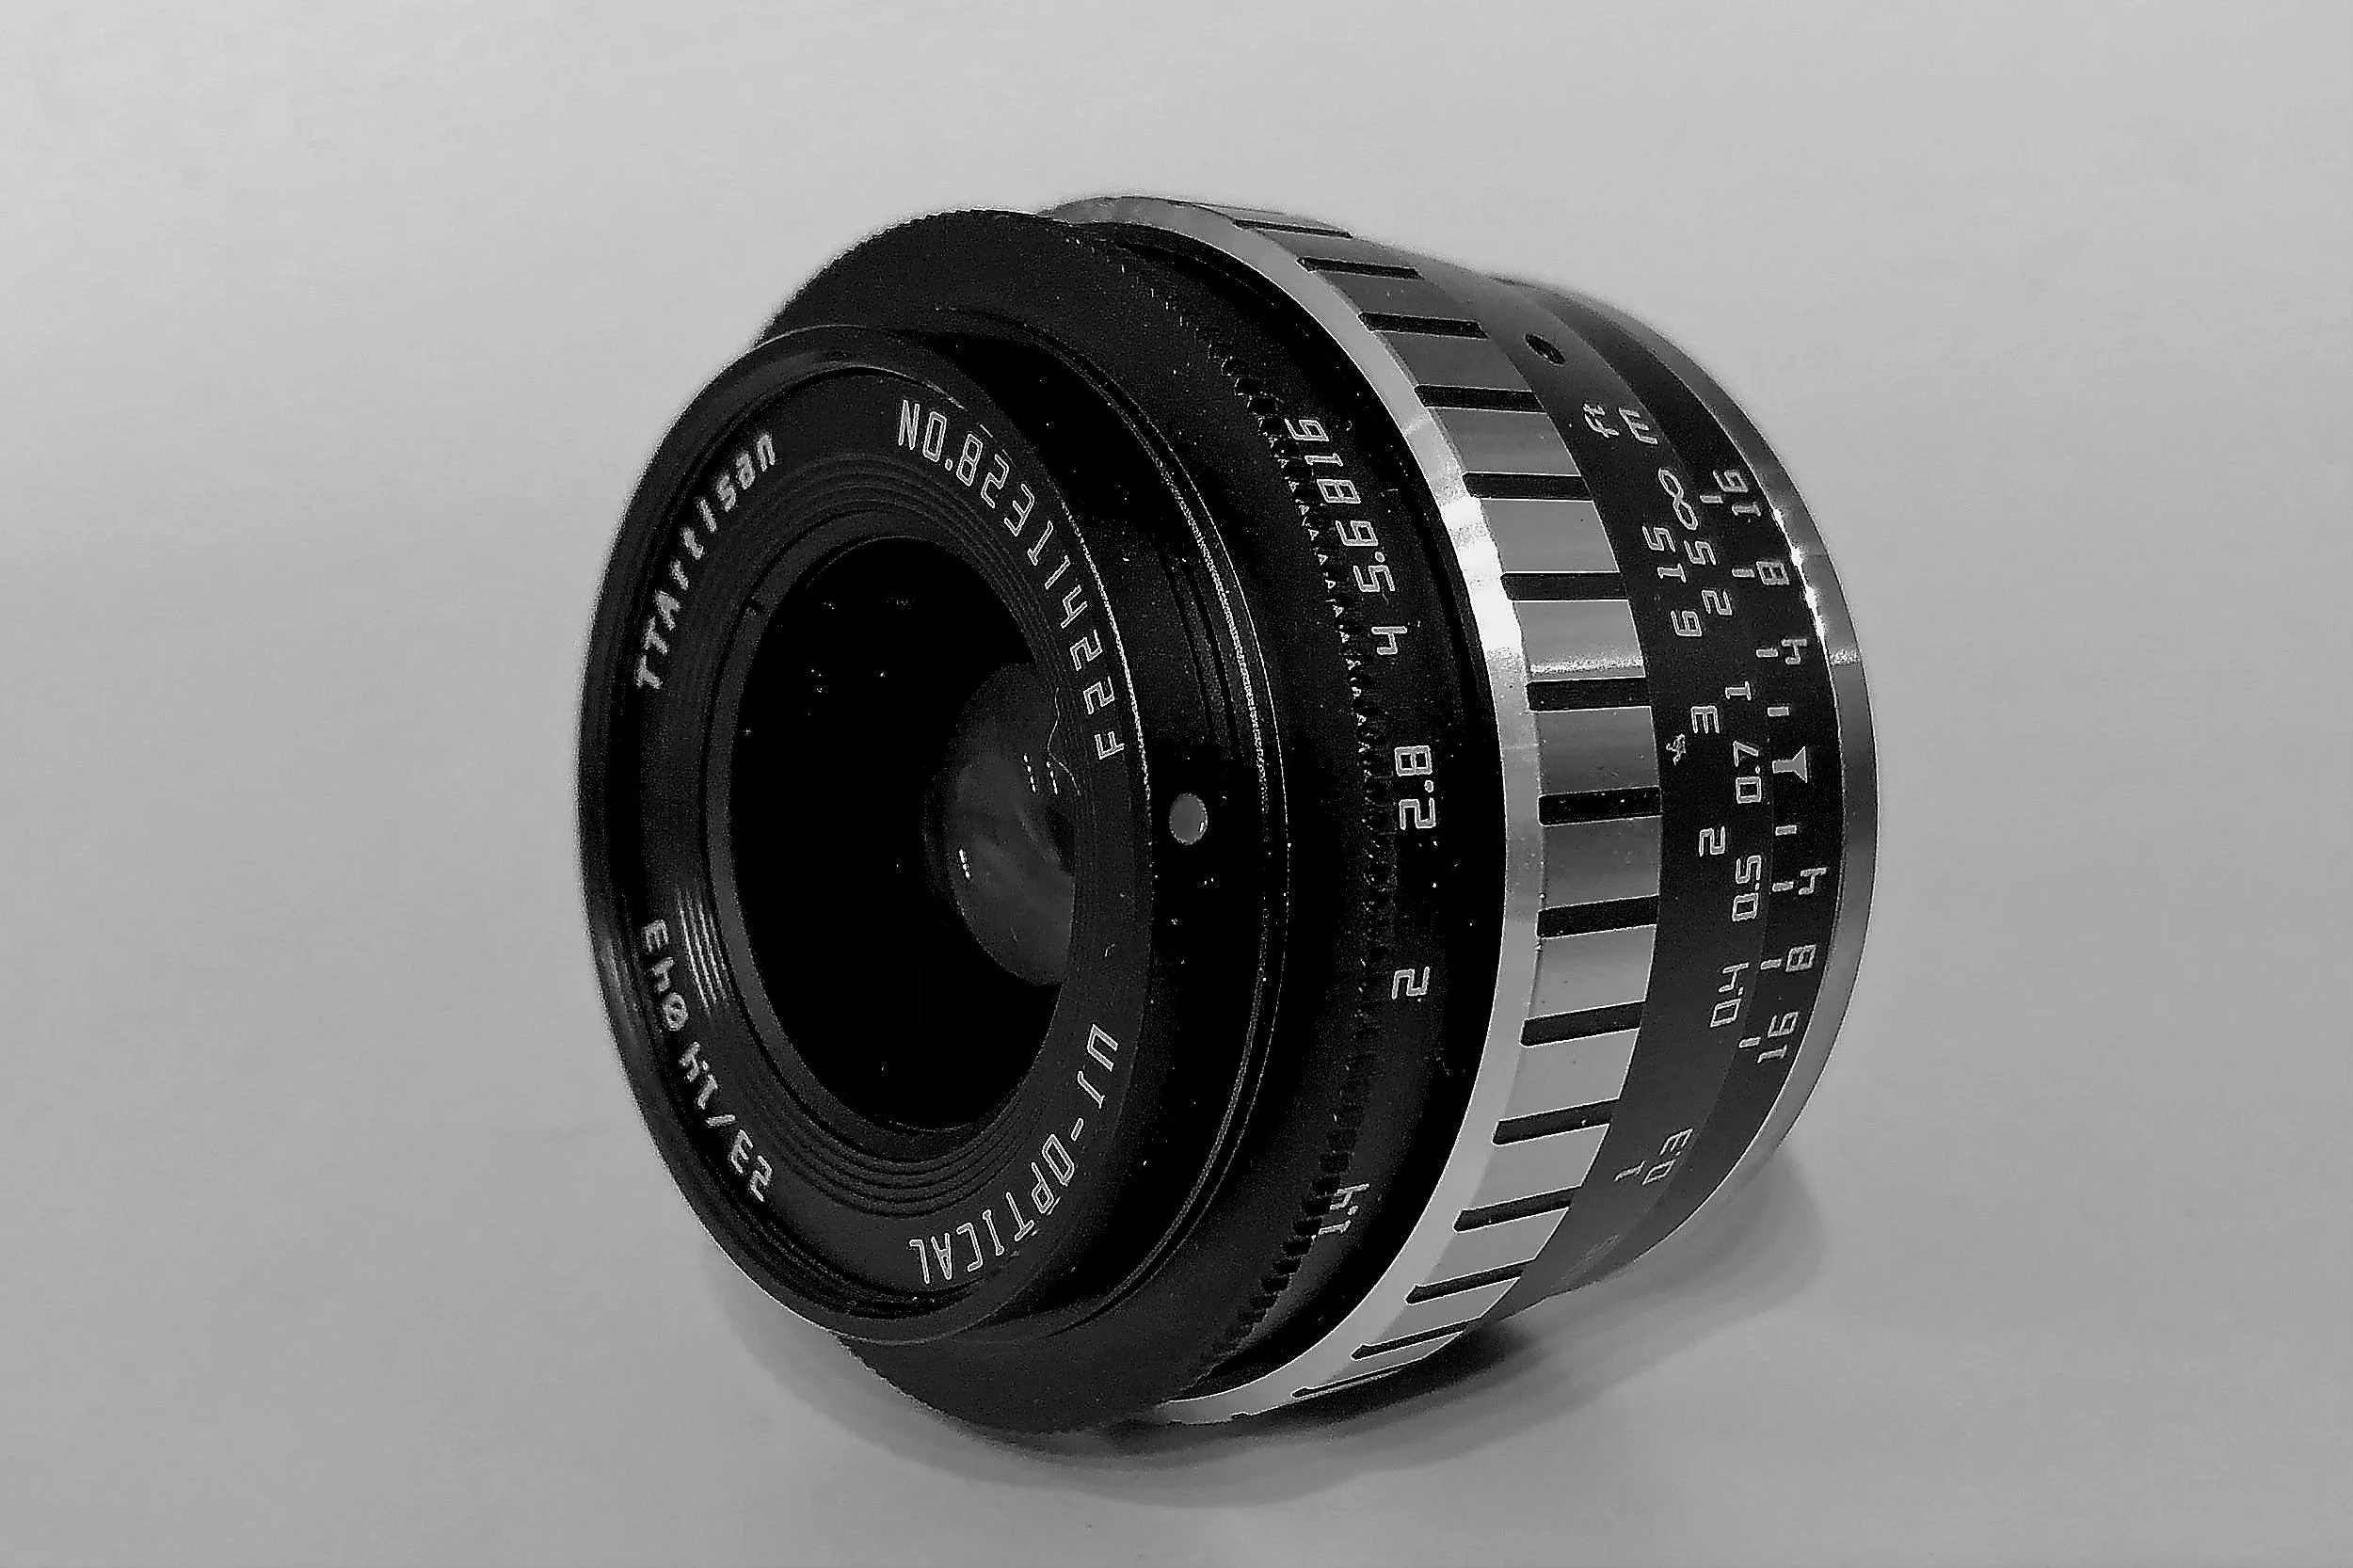
After some deliberation and research, I decided on this lens for several reasons.
It is extremely reasonably priced.
It is small.
It has a nice, solid feel to it.
It balances nicely on the X-Pro 1.
It looks cool.
And most importantly, it delivers excellent image results.
Considering this, I couldn't find a lens with a better price/quality ratio.
And there is another spec to this lens, which for me is essential: it has a distance/aperture scale which allows for zone and hyperfocal focusing! Unfortunately, the only Fujinon 23mm lens with this feature (the 23mm/1.4 R) is just over seven times more expensive.
[note: I have no affiliation with TTArtisan or Pergear, and I purchased this lens myself]
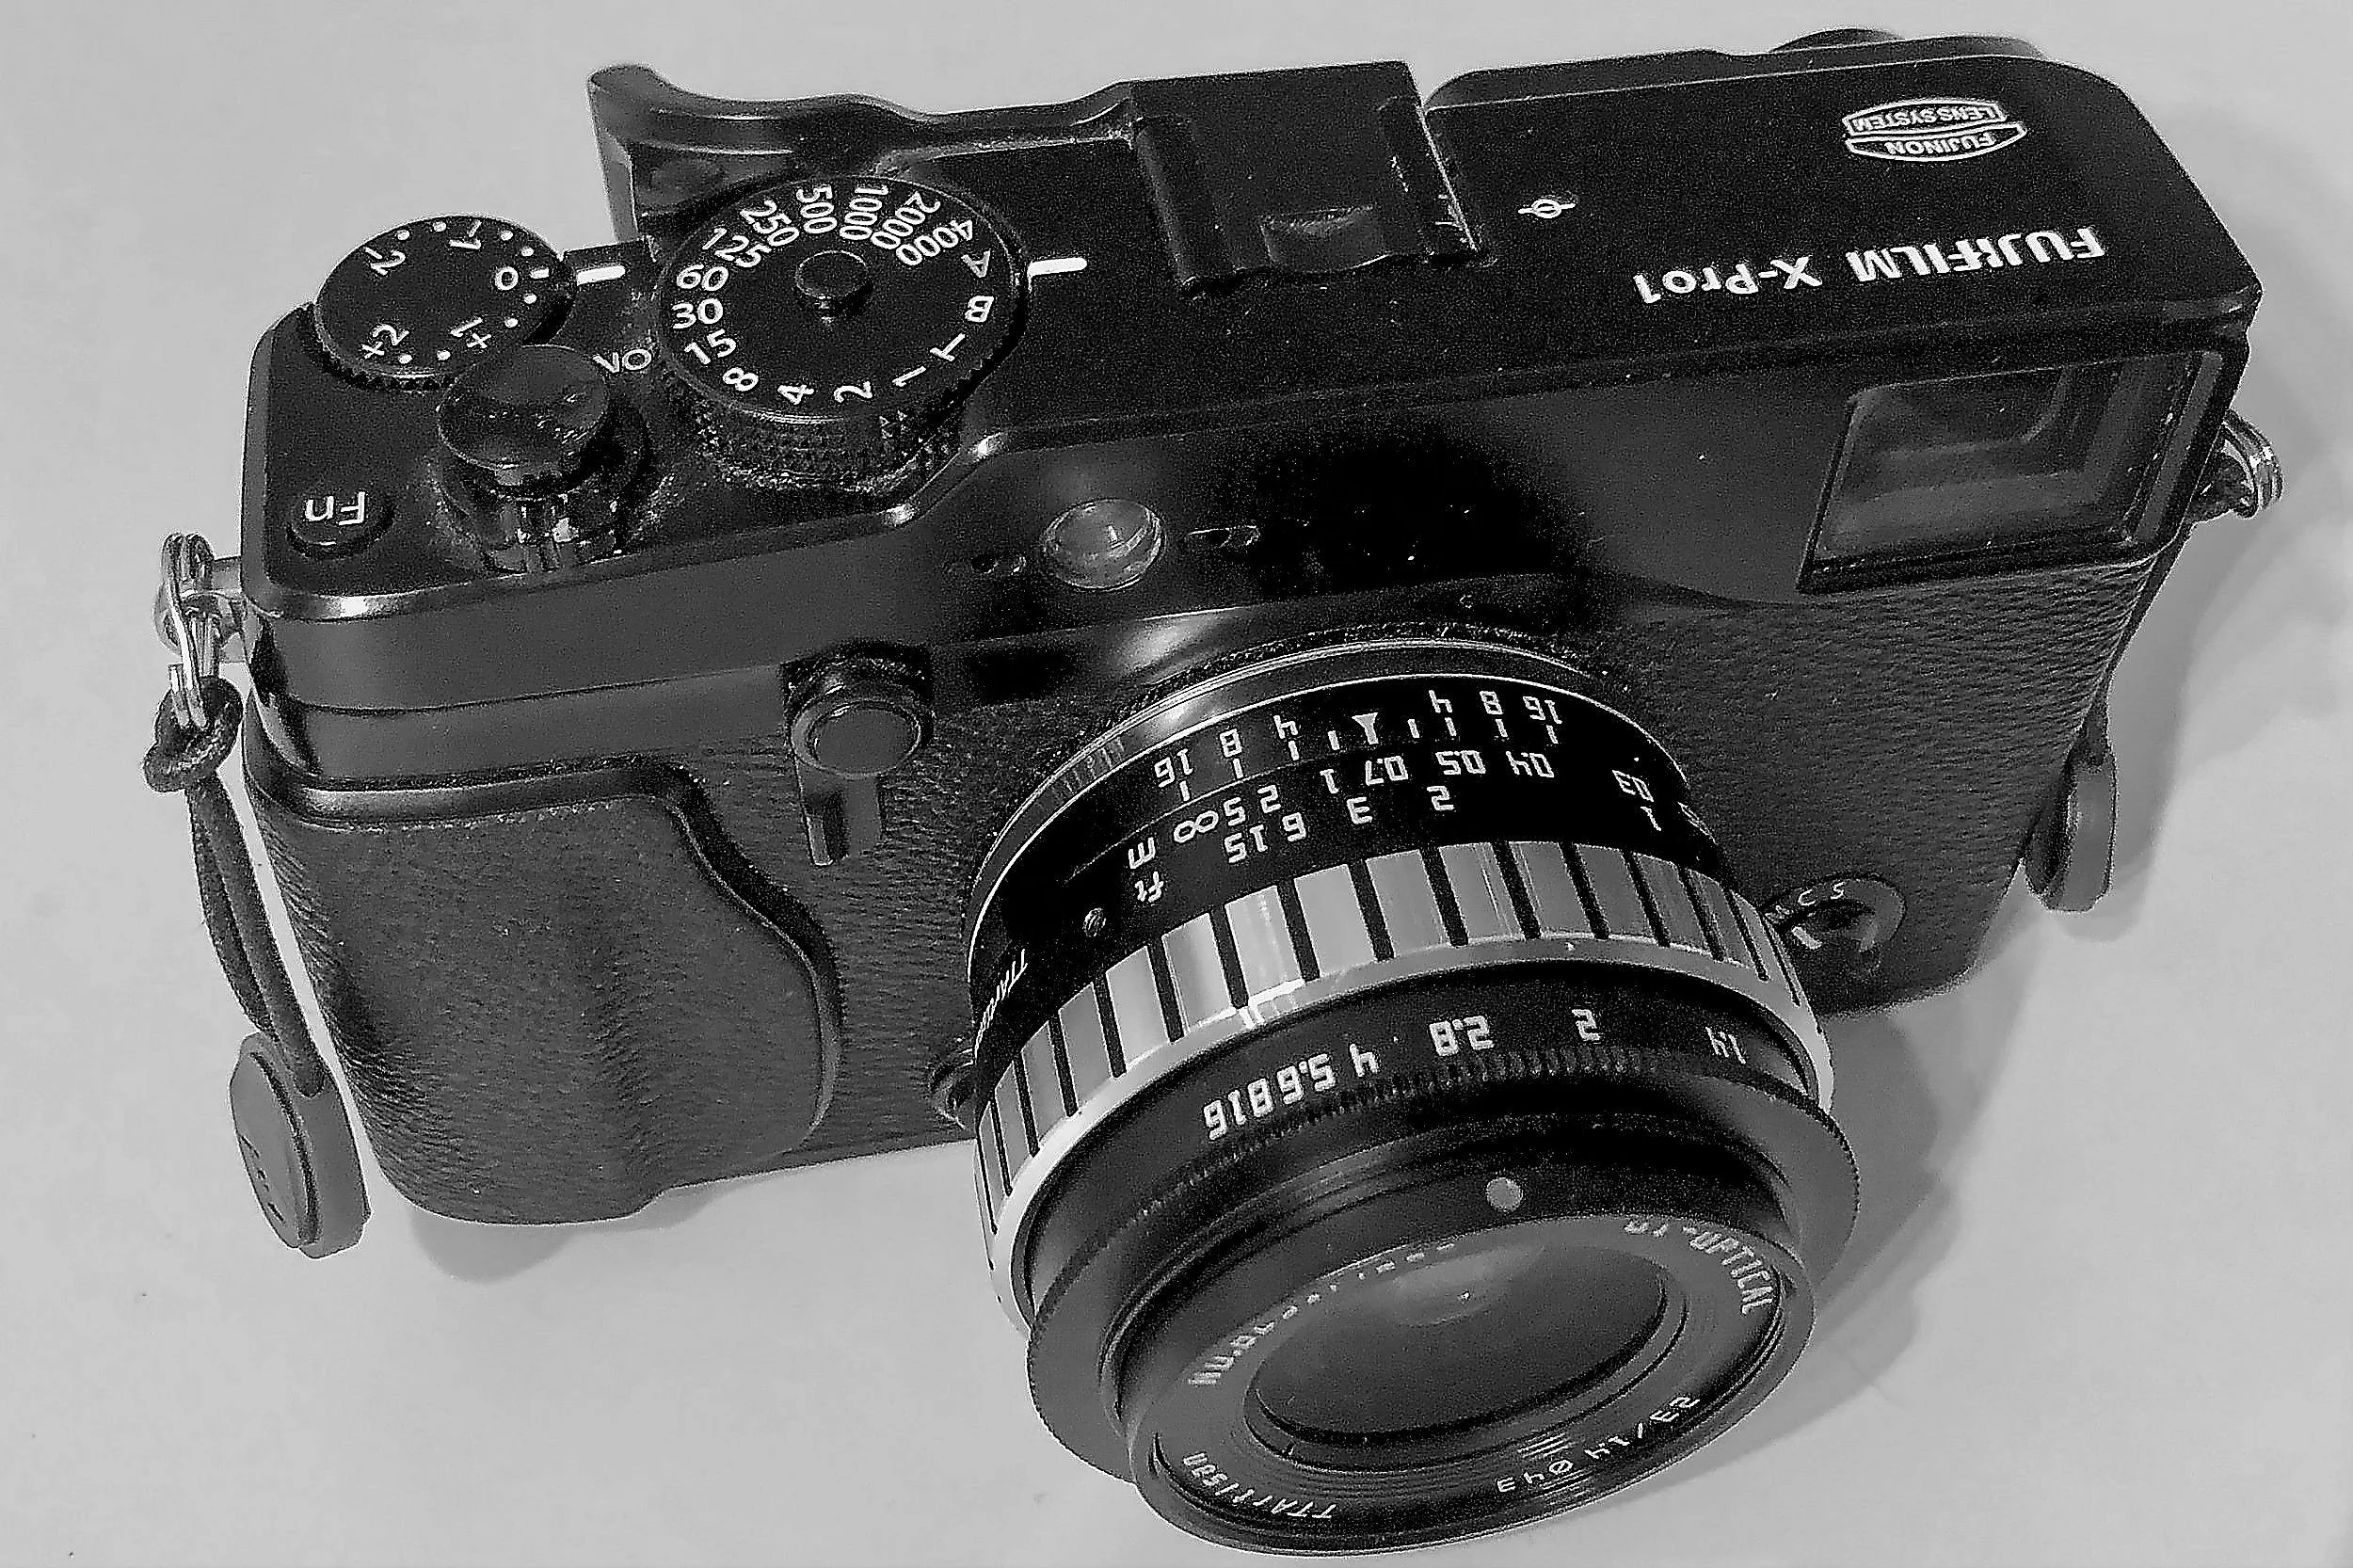
So now I am back to two daily cameras: the Leica M4 with the 35mm Summaron and the Fujifilm X-Pro 1 with the 23mm TTArtisan, which makes life also a bit easier because I don't have to choose between three cameras when going out on the street.
The images below are the first results of shooting with the TTArtisan 23mm (all are SOOC jpegs).
Admittedly, there is some learning curve since the lens is fully manual and does not communicate with the camera. I am finding, however, that the use of this lens is not much different from using the Summaron (all Leica devotees now probably are shaking their heads and un-friending me). And zone focusing even allows me to get great results using the X-Pro1's OVF.
Madrileñas
Madrid, Spain | Plaza Platería de Martinez | August 2019
Something that always strikes me in Spain is the strong and articulated women. Irrespective of social status or age, they are Present, with a capital P.

Madrid, Spain | Plaza Platería de Martinez | August 2019
Something that always strikes me in Spain is the strong and articulated women.
Irrespective of social status or age, they are Present, with a capital P.
After a stroll through Madrid's famous National Botanical Garden, my wife and I decided we earned some tapas and a refreshing drink. Since it was summer, most bars and restaurants had tables outside on the street, and we quickly found one near the botanical garden and the Prado museum.
While getting seated, I could not ignore these three ladies sitting at a table next to ours.
They were involved in deep conversation. One of the ladies passionately articulated her thoughts on a particular topic, while the other two listened with great attention.
I would have loved to eavesdrop to hear what they were so animated talking about, but that is not something one does. Also, my Spanish is not so good that I could fully understand what she said.
HOWEVER, what I could do was take my trustworthy Leica M4 and seize an image of this beautiful trio.
This photo might not capture a 'decisive moment', but, as I explained previously, street photography is not always about the decisive moment and is far more.
This image, for me, represents a typical situation that someone easily can encounter in Madrid. Or in any town and city of Spain.
Three ladies are having a great afternoon, enjoying some food and drinks and discussing current events, maybe talking about global wars and inflation, or gossiping about the new girlfriend of one of their sons.

In Focus: Bargain Found
The Joy of Finding a Bargain at a Madrid Market
This image was created during a stroll in sunny Madrid, Spain, in August 2019…

The Joy Of Finding A Bargain At A Madrid Market
Background Story
This image was created during a stroll in sunny Madrid, Spain, in August 2019.
I used my home leave from my assignment to South Africa to spend a week in Madrid with my wife, prior to traveling on to The Hague, the Netherlands, for some time with my youngest daughter.
Madrid has an abundance of squares (plazas), shopping streets, small back alleys, and parks to explore. The weather was great that week and we enjoyed a couple of days strolling through the beautiful capital of Spain.
That particular day we visited several open-air street markets, where a large diversity of goods was being sold. Fruit, vegetables, meat, fish, musical instruments, potter, leatherware, shoes, t-shirts, artisan bread, cheese, handheld fans, bags, tools; you name it, they sold it. And fabrics of course.
A fabrics stall at a market is always interesting to observe. Often the merchandise is just laying on a table or on the ground, and prospective buyers are picking it up, holding it to the light, and showing it to each other to determine if it is the right quality, size, and color for whatever they are creating at home.
And always there is this hope to find a real bargain.
As you can imagine, this creates numerous situations to make a photo. And this was just the right one for me.
How It Was Made
Only a couple of weeks earlier I was fortunate to purchase a just CLA’d Leica M4 and a Summaron 35mm f/2.8 lens for a very reasonable price. And since my wife brought my Voigtländer VCII lightmeter from home, I was experimenting with the camera, lens, lightmeter combination.
As you will know by now, I love black and white images and I had my favorite film, Ilford Delta 400, loaded.
Why It Works
The subject matter of this image is right up my alley: the busyness of the market, people interacting with each other, and the play of light and shadows.
The main subject is formed by the two hugging women in the center of the frame.
The pile of fabric and the piece held up by the lady to the left create a nice diagonal, leading the viewer’s eye through the composition.
The small tree and its support to the right and the larger tree to the left frame the main subjects of the image, while at the same time creating sub-frames for other points of interest: see the walking man perfectly framed by the small tree and the wooden support? This was a nice bonus that I only discovered after getting the film back from the lab.
As always, the light plays a major factor in making this image work for me. The harsh sunlight to the left and right of the group of women, with the shadows on the street in the foreground and the dark leaves of the trees, provides an additional frame for the main subject.
All parts work together to create several frames around the center of the image, focusing the view towards the two women in the center.
How Can This Image Be Used
There are several ways to use an image like this in a commercial setting.
There might be a hotel nearby that can use this image to show their guests the area they are located at, and how close they are to classical Madrid markets.
And the City of Madrid could use it to show prospective visitors its relaxed but lively street life and market culture, ideally for tourists who want to experience the real Spanish.
Although countries and cities are opening up after what hopefully was the worst of the Covid-19 / Coronavirus impact it might be a while until we can strolling the markets of Madrid again. Until then, images like this one will remind us of the better times to come.
How I Meter Light When Using The Leica M4
4 Ways To Meter Light When Using A Leica M4
Since it lacks a built-in light meter, I have four options to meter light when using the Leica M4: the Sunny 16 rule, an iPhone light meter app, my Voigtlander light meter, and an old Gossen light meter.

4 Ways To Meter Light When Using A Leica M4
About one year ago, when the world we live in was totally different, I acquired a pristine Leica M4 and a Summaron 35mm f/2.8.
It is a great camera, and after the first try-out, I have shot several rolls with it: both color and black and white film, especially my favorite: Ilford Delta 400.
I love shooting with this camera, not only because of the tool's built quality but also because of its relative simplicity. It is a fully manual camera, and I have only to set aperture and shutter speed for it to work. Of course, the film and the Exposure Index I decide for it to use at define ISO.
While the later Leica M5 and M6 boast a built-in light meter, the M4 lacks such frivolity, and I have to resort to other means of deciding on the 'right' aperture and shutter speed combination I want to use for each shot.
Since it lacks a built-in light meter, I have four options to meter light when using the Leica M4: the Sunny 16 rule, an iPhone light meter app, my Voigtlander light meter, and an old Gossen light meter.
Each of these methods or devices has its pros and cons, so let's look at each separately.
The Sunny 16 Rule
When I started using the camera, I started using the Sunny-16 rule to define my aperture, shutter speed combination, given the ISO of the film I was using. The Sunny 16 approach usually works very well when making images outside, especially when the light is very bright, and distinguishing between sunny, cloudy, and shadows is easy.
The Sunny 16 rule prescribes that in full sunlight, the shutter speed should be the reciprocal value of your film speed while using an aperture of f/16.
For example: when you are using a film of ISO 400, you set your aperture to f/16 and your shutter speed to 1/400 of a second (which will be 1/500 of a second for most cameras because of the available shutter speed).
Depending on the light conditions, you change either the shutter speed or the aperture to ensure you will get a correctly exposed image.
Assuming you want to keep your shutter speed at the reciprocal value of your film (in our example at 1/500 second), you would adjust the aperture as follows:

The Sunny 16 rule works remarkably well once you get used to it and learn how to read the light quality, and this is the way I currently shoot most of the time.
Pocket Light Meter App
Although the Sunny 16 rule works very well in most circumstances outside, I was not always 100% sure what my camera settings should be.
It also is my experience that the Sunny 16 rule doesn't work well when shooting inside. I eventually learned to guesstimate the right shutter speed and aperture combinations for inside situations but having a light meter still helps to get the best results.
For those times when I don't have any of my light meters with me, and I am not sure of the settings to use on the M4, I use the Pocket Light Meter app on my iPhone.
This app works very well: you select the ISO of the film in your camera and select the shutter time or the aperture. The app measures the light correctly and advises the aperture or the shutter time.
On your phone's touchscreen, you can select the point where the app measures the light.
You can adjust several settings: showing EV data, displaying white balance, setting exposure correction value, showing the focus point, and defining how to display shutter, aperture, and ISO stops (1/3, 1/2, or full).
You even can buy a Luxi Meter (the white dome to measure incident light) for your phone to use with the app.
This app works very well, and I recommend it.
Voigtlander VC II Light Meter
The best solution when I want to use a light meter is using the battery-operated Voigtlander VC II.
It is tiny and fits nicely in the cold shoe of the Leica M4.
Using this light meter is very easy. It has two dials on the top: one for ISO and aperture settings and one for shutter speed settings.
You set the ISO value depending on the film you are using.
To get a light reading, you push the orange button on the back, and three LEDs on top indicate overexposure, underexposure, or correct exposure.
You can then select an aperture/speed combination that provides a correct exposure (green light) by turning the dials.
The Voigtlander VC II has a couple of excellent features: the under and overexposure LEDs indicate what direction you need to turn the dials to get a correct exposure.
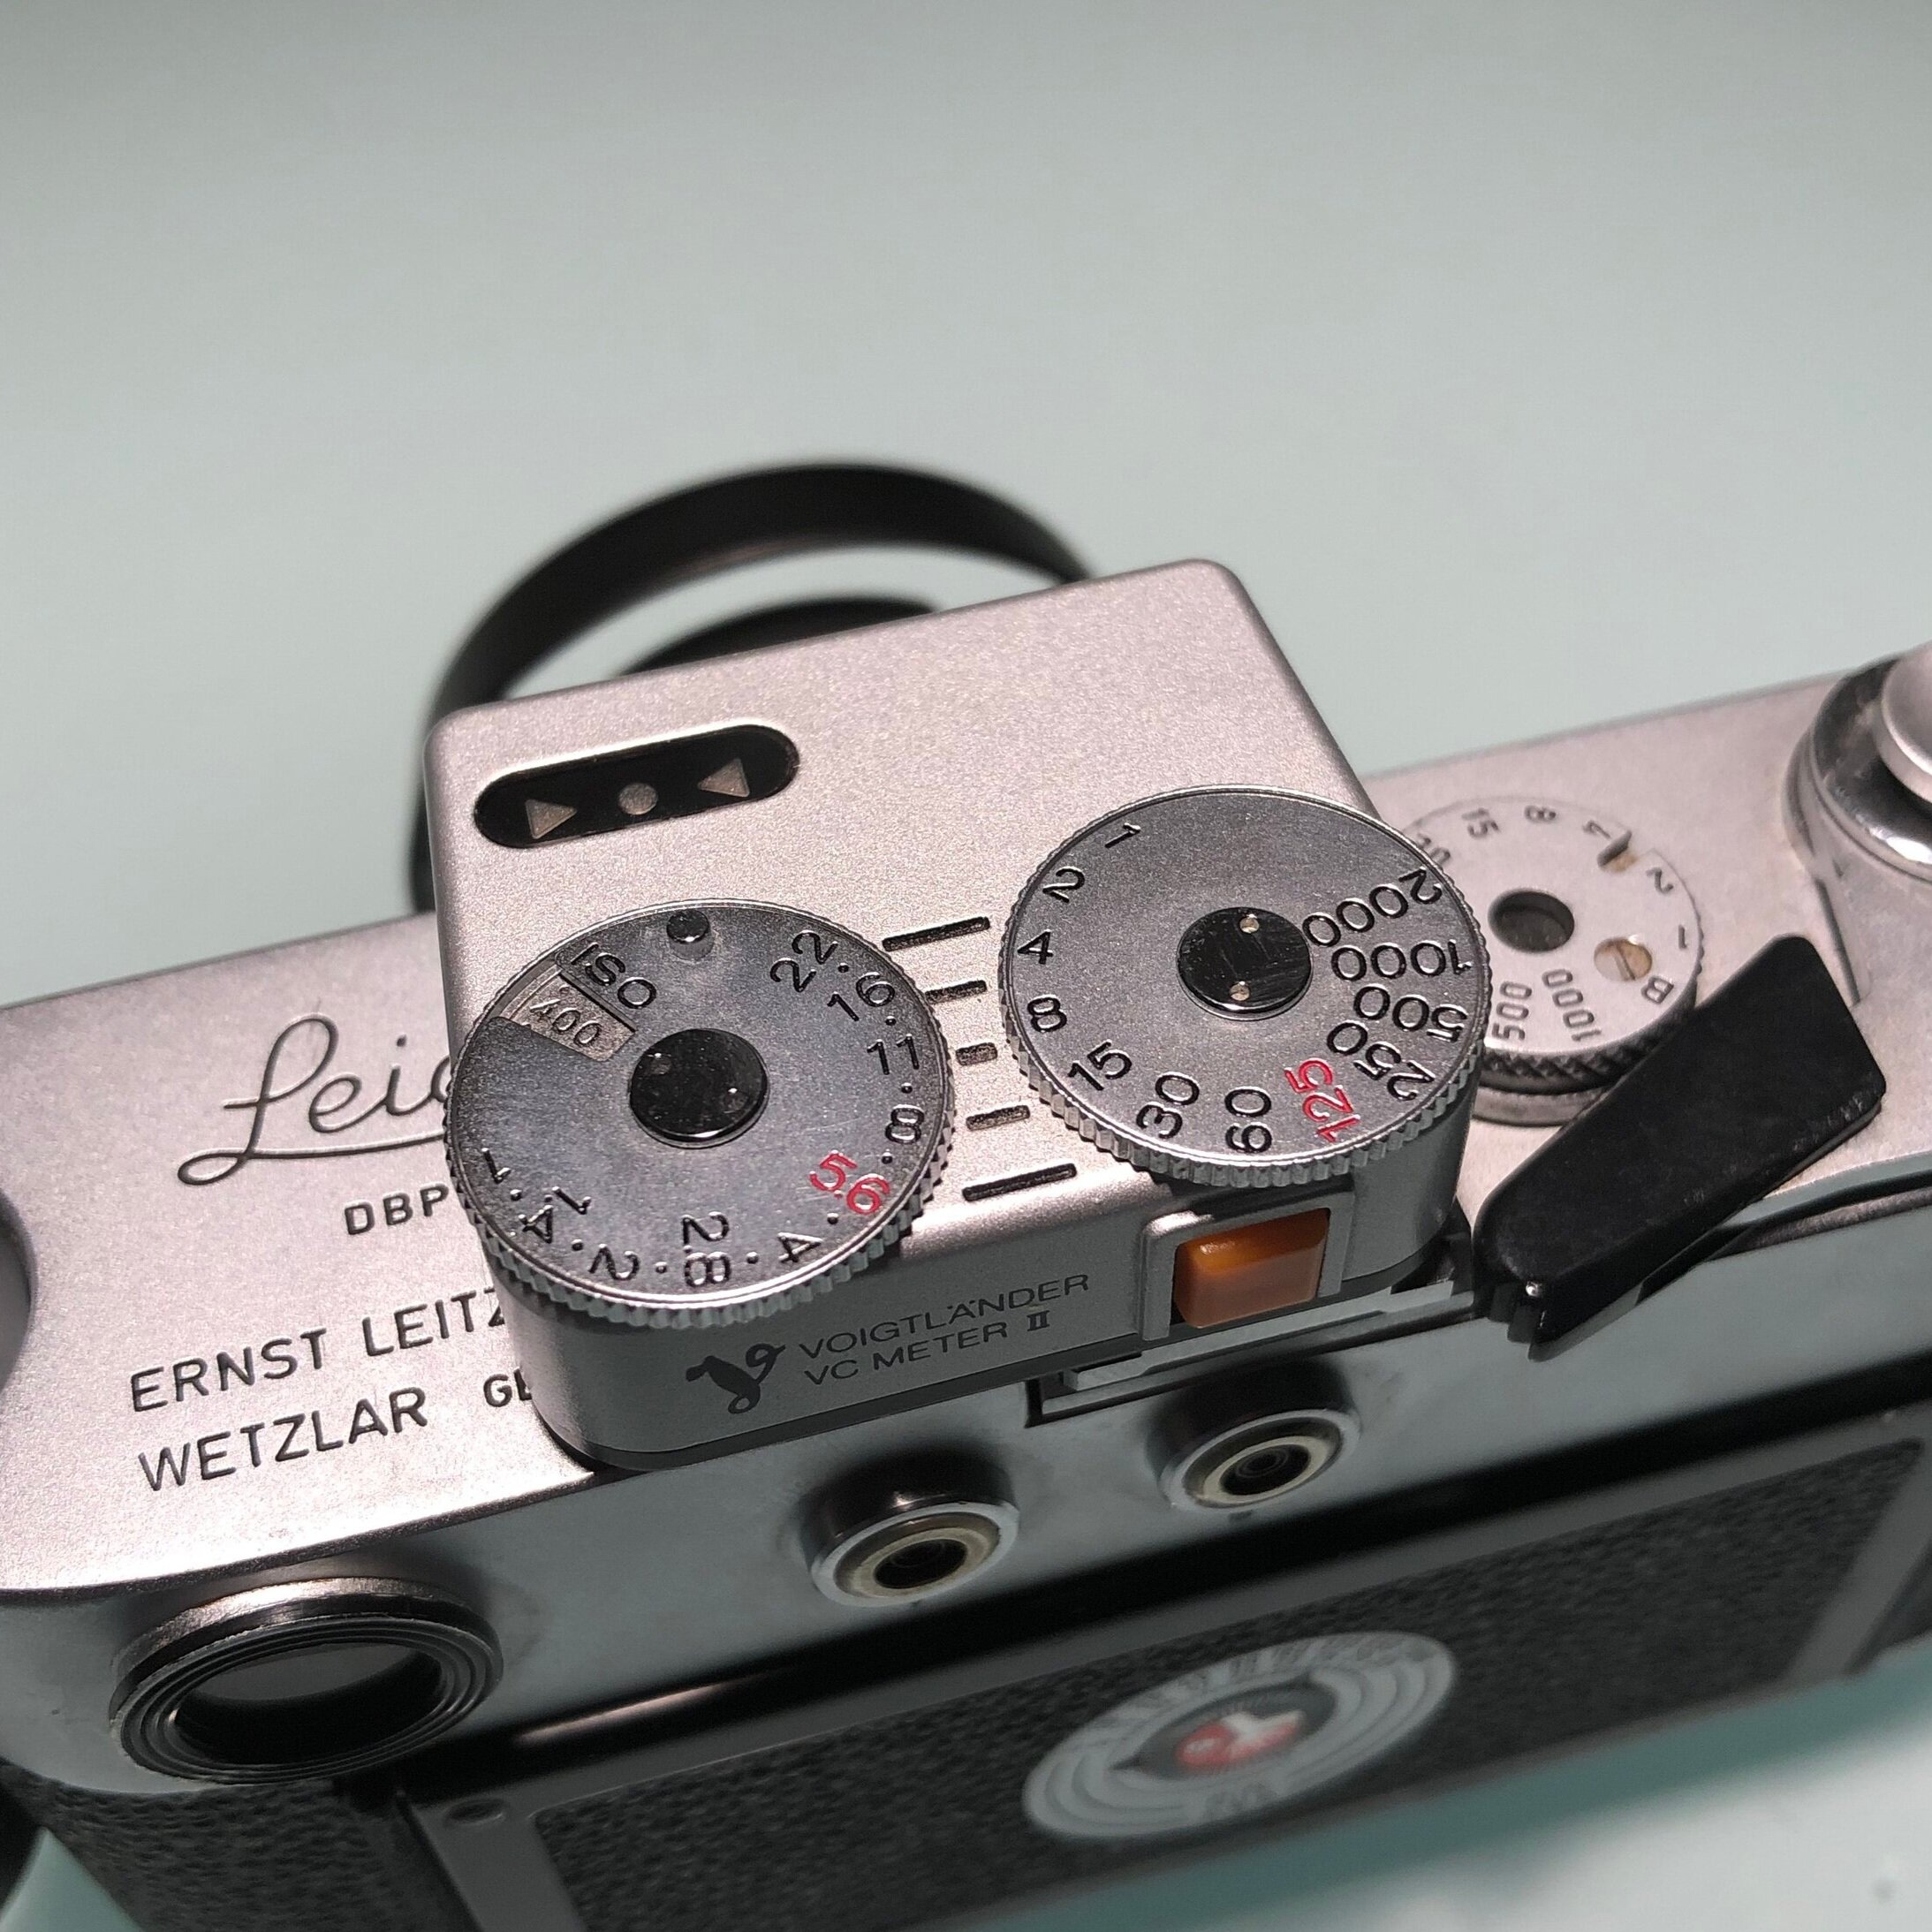
The black lines you see in the picture help to select alternative aperture/speed combinations that provide the same exposure. For example, the line in the middle shows f/11 and 1/8, but I immediately see that f/8 and 1/15 or f/16 and 1/4 will provide the same result.
A very well working and nice light meter that looks great on my M4
Gossen Pilot 2 Light Meter
One of the drawbacks (if you can call it that) of using a battery-powered light meter like the VCII is ...that it uses batteries. It is essential to regularly check the health of those to prevent taking under-exposed images or being on the streets with a not working light meter.
I , therefore, am still happy using old-fashioned selenium cell type light meters that do not need batteries, like my trusted Gossen Pilot 2.
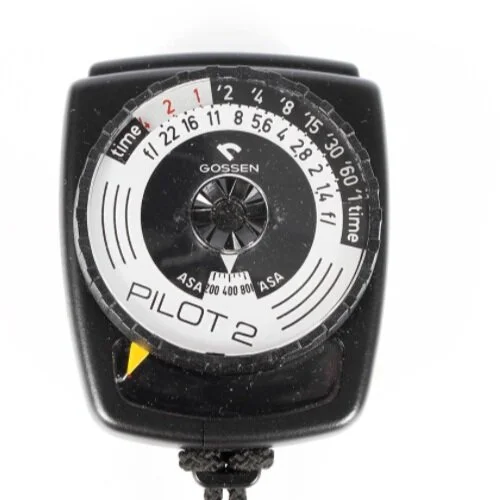
This 70ies era light meter still works excellent, and it is straightforward to use. I love this meter because it shows several exposure combinations (aperture and shutter speed) at the same time, without having to push any buttons or having to take other additional actions.
Since it is an old selenium cell lightmeter, I need to ensure that it still is working correctly. Therefore, I compare its readings regularly with the readings I get from the Voigtlander VC II and my digital cameras.
I have to admit that, when I purchased the Leica M4, I had some concerns regarding whether I would be able to get decently exposed images with a camera without a built-in light meter.
Since then, however, I have experienced great results by either using the Sunny 16 rule or using one of my lightmeters: the Lightmeter App, the Voigtlander VC II, and the Gossen Pilot 2.
How do you decide on your shutter speed and aperture when shooting with a camera without a built-in meter?